December 28, 2015 Lada.Online 113 478 4
None of the configurations of the Lada 4×4 SUV has front fog lights (FFL) in its list of options. AVTOVAZ did not provide them with the new model with the Urban prefix. Let's look at the features of self-installation of PTFs, as well as methods for connecting them.
Required
: PTF set
Where can I buy?
PTF for Lada 4×4 are presented in our online store.
Connection diagram
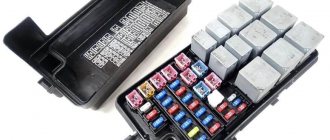
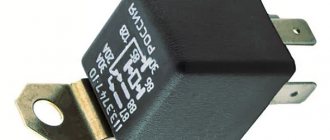
You will need: a 4-pin relay (type PC527 or 90.3747), a block with a 16A fuse, a three-position switch (for example, from a stove fan, 21070-3709608-01), wiring for power circuits (with a cross-section of at least 2.5 mm 2) and for control circuits (not less than 0.75 mm 2).
It is not recommended to connect the ground of the PTF through the headlight fastener, because During operation, corrosion may appear and contact may be lost. It is more convenient to place the relay in the engine compartment. We hide all the wiring in corrugations.
We connect the button illumination to pins 1 and 2 (take the white and black wire from any backlit button in the center console).
As a result, this connection allows the use of three modes of operation of the fog lights:
Using a similar scheme, you can install and connect headlights to the roof of a Lada 4×4 (chandelier).
Let us remind you that other improvements to the Russian SUV can be found in this category.
Source
Errors when connecting fog lights
When installing a PTF for the first time, it is easy to make a mistake. It is better to familiarize yourself with them in advance so as not to allow them to happen by your own example.
Also interesting: Chevrolet Niva fan does not turn on
The main problem is connecting the side lighting lamps to the wiring. The switch, like the wires used in this system, are not rated for the current drawn by the equipment. As a result, the wiring overheats and the protective insulation melts from the high temperature. Yes, the PTF will be activated when the side lighting is turned on at the same time. But the problem is that the equipment will not last long.
The second problem is the discrepancy between the installation parameters and those specified in the traffic rules. Traffic police officers have the right to check on site that the fog lights are working correctly. If the parameters are not met, the driver will have to pay a fine.
https://www.youtube.com/video/3fNE0lkwZVw
The third problem is the wrong choice of location for installing the button. The switch should be located no further than arm's length. Otherwise, you will have to reach for it, which risks getting into a traffic accident.
We hope our tips will help you connect and install fog lighting correctly!
Wiring diagram for fog lights VAZ 21214
Fog lights are designed to generate a flat and wide stream of light directed above the road surface. This direction of the light beam allows minimizing illumination of the volume of fog in thickness and improves visibility from the driver’s seat. Failure to follow the rules and wiring diagram for fog lights when installing them yourself can lead to accidents.
Installation rules
Requirements for PTF in GOST 8769-75:
- quantity – 2 pieces;
- no further than 40 cm from the plane of the side dimension (along the outer edge of the diffuser);
- not lower than 25 cm from the ground level (along the lower edge of the diffuser).
UNECE Regulation No. 48:
- not higher than low beam headlights (except for all-wheel drive vehicles);
- The visibility angles of the fog lights (within which the headlights are not blocked by any elements of the car) should be: vertical +15. -10 o, horizontal – +45. -10 o ;
- PTF should be turned on only together with the dimensions.
On Niva 4x4, the most popular location for fog lights is on the bumper. It will comfortably accommodate both universal, round fog lights and rectangular optics. If you place accessories under the bumper, they will reduce the overhang angle, which affects cross-country ability, and can also be damaged off-road.
Requirements for installing fog lights
It is permissible to locate fog lamps directly in the headlights.
The rules for installing headlights are regulated by two regulations:
Location of fog lights on a car
The general requirements are as follows:
The standards do not have special requirements for installing fog lights on a car, so the owner can install the kit himself.
PTF NIVA
The content of the article :
“Correct” connection of PTF to NIVU
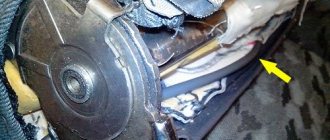
When I initially installed the PTFs, I quickly connected them “directly”, i.e. + from the battery to the switch, and the second wire from it to the PTF. Yesterday, having nothing else to do, I decided to do everything wisely. I used a regular relay from 2110. I decided to connect the control wire to the standard rear PTF switch so that the warning light on the panel would light up (without a relay, such a connection would cause the fuse to burn out or the wiring to melt). In principle, everything is visible in the diagram, the only thing is that there is still a fuse on the + from the battery.
I made one more modification (but this is a matter of everyone’s taste), replaced two wires from the PTF and side lights in the block on the rear lights, so that in normal mode the dimensions glow normally, and connected an additional rear light to the main PTF wire.
To pull the wires out of the block, you need to bend the holding tendril with something, for example I used a small hexagon.
Wires removed from the block. Before inserting into the block, the antenna must be bent again
In the end it turned out like this:
The indicator lamp lights up when the PTF is turned on
Works from near and far. The button is off, off and PTF 1 position if the low one is on and PTF 2 position if the far one is on and the PTF in this position when the near one is on the PTFs do not work when the far one blinks in this position the buttons blink and the PTF
PTF Hella Luminator Metal
It’s no secret that the standard light on the Niva, frankly speaking, is still junk. To improve the situation, I plugged into the headlights, in my opinion, very good KOITO Whitebeam lamps, but the situation remained sad. Due to the lack of light, I decided to radically combat this problem, and found a suitable solution. HERE IT IS!
The price of the issue was scary at first, but what can’t you do for your own comfort. In addition, Niva has not received gifts for a long time). I ordered PTF together with I-boost.
for some reason it says hromium on the box
if you enlarge the photo, you can see the note made with a black pen, after all, it’s Metal
We unpack the boxes and are impressed.
These are the kind of headlights the Germans make!
contents from the box
To connect the headlight “pot” and the mounting bracket, unscrew the 4 screws on the front side of the headlight with the included hexagon, remove the frame, take out the reflector and fasten it, immediately insert the H3 lamps, I installed MTF Light Platinum H3 and put everything back together. To facilitate the process of connecting the electrical wiring, I ordered a PTF connection kit on the 12v network, which came along with the windshield wiper switch and was waiting for its finest hour.
Fog light connection kit
Complete with wiring, relay and block, there is a button, it’s a pity that it is not backlit, and detailed installation instructions
READ How to connect a microphone to a TV via DVD
Here are the instructions, by the way, it is also available in electronic version on the 12v website
On the reverse side there is a diagram for connecting and adjusting the PTF
Next you need to drill holes in the bumper and secure the headlights. We measure 40 cm from the sides and drill:
bumper with holes
The headlights look solid
try on the protective caps from the kit
We are waiting for darkness to set in and go adjust the PTF. They shine decently, in principle you can drive with only fog lights, but with a head light there is more comfort) Now I don’t feel a lack of lighting. Perhaps I will replace the lamps with KOITO Whitebeam, perhaps I will leave MTF. Now I'm thinking about changing the head optics to Hella. I was looking at the bi-xenon lensed headlights from the Gelendvagen, but the price of 16 rubles apiece is stopping me.
Preparation for installing PTF for NIVA
In this post we will talk about PTF.
One PTF without a bracket, the second with a factory mount.
Here is the same PTF with the factory bracket.
And the second PTF without fastening, which could not be removed.
It was decided to independently make new mounts for both PTFs.
The original bracket with fasteners looks like this.
We remove the fastening from the PTF to make new brackets.
PTF fastener with bracket.
Factory PTF bracket.
We make new ones a little longer, to freely accommodate the bolt for the wrench.
The fasteners made from 1.5 mm steel were plated with nickel to prevent them from rusting.
New manufactured mount and factory mount.
At the Fastener store I purchased new bolts, nuts, washers, and grommets.
The bolts are attached to new brackets for fastening to the bumper.
Well, new brackets are installed on the PTF.
The distance for holding the bolt with a wrench is quite enough, so now there will be no problem with turning the bolt during installation or dismantling.
The finished PTF kit with fasteners is ready for installation on the Niva
Installation of PTF for NIVA
Installed PTF on the car. Haven't connected it yet, just installed it. I'll connect a little later.
This is how it was in stock, before my intervention.
I marked it, marked it, and drilled a hole on the right side.
I did the same on the left side (my faithful dog Druzhok walked nearby, I was under the reliable protection of a German shepherd.)
I installed the PTF on the right side and secured it (I put rubber between the PTF bracket and the bumper).
I did the same on the left side.
This is the general view after installing the PTF.
For me, it turned out not bad (I tied the wires from the PTF with plastic clamps to the fasteners).
In my opinion, the PTFs look more aesthetically pleasing from below, I understand that it’s not reliable, but I did it smartly, I didn’t tighten it too much, so that if an obstacle arose, they could fold under the bumper.
They don't rattle, they don't shake and they're good.
Connecting PTF for NIVA
Well, now my hands have reached the connection of the PTF.
Photo after installation.
Somehow, I think they look better from below.
This is what the center console looked like from the factory.
Remove the plastic plug from the installation location of the radio.
Remove the key cover to install the PTF activation key there.
I bought a PTF connection kit at a car store for 290 rubles.
Kit for VAZ-2106 (also suitable for Niva, power keys are the same)
Inside is a complete set: Relay, Key, Wiring connecting the key and the relay with the pads, and the wiring for the PTFs themselves - in our case it’s a little short.
Wiring with blocks for connecting the key and relay.
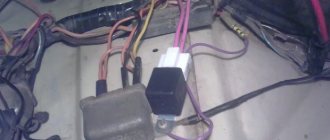
Under the dashboard on the driver's side there is a strip for installing all the relays, this is where we will mount our relay.
READ Furby boom how to connect to phone
We install the PTF relay on the bar and attach the ground wire.
We remove the center console to neatly route the wiring.
To keep the center out of the way, disconnect all the buttons and connect them to the connectors, so as not to confuse them with each other, connect the new connector to the key.
We drag one positive wire to the ignition switch and solder it to the positive output from the lock (activated when the key is turned), and the second output wire from the relay to the fuse block, and another positive wire from the PTF power key to the positive, which is supplied when the dimensions are turned on.
Those. if the ignition switch is turned off, and the dimensions and the PTF key are turned on, the fog lights will not light up even on the key and there will be a plus for controlling the relay because The main supply plus from the ignition switch is open. You turn off the headlights key while the PTF power key is on and the ignition switch is on, the power to control the switch also disappears and the fog lamps also don’t light up. In general, this dual-circuit system is made so as not to forget the fog lights are on and not drain the battery.
We clean the wire that goes to the fuses.
And solder the second end to it in order to separate 2 fuses for each PTF with its own fuse.
We insulate the soldering area with electrical tape (and insulate the connectors with heat shrink, I forgot to take a photo)
We make bulk output wires with PTF and solder them, and insulate the connectors with heat shrink.
Connectors with PTF are also insulated with heat shrink.
In the store I bought 4 meters of 2-core electrical wire (4 meters - 80 rubles) with a cross-section of 1.5 square, we drag it from the fuse block to the PTF (each core is one PTF, this is a plus, we solder the female connectors to the ends and insulate them with heat shrink)
The second positive output to the right PTF was routed along the power supply wiring for the electric fans (to route it, I had to remove the radiator grille).
The PTFs are secured with 10mm bolts, there is a rubber spacer between the bracket and the bumper (in the shape of a square)
We unscrew one nut, put the ring on the ground wire and screw it back with a pull.
We connect the mother/father terminals (we insulate the whole thing with electrical tape, we fasten the wires with plastic ties to the bumper pipe, to the mass bolt so that the long ends do not dangle, between the body we put a cambric on the wire so that the wire does not fray, and we fix it to the wire with electrical tape)
Next, unscrew the fuse blocks.
It turns out that we only have the 15th and 16th fuses free, so we will attach them to them.
We connect the power output from the relay and continue the circuit to power the PTF.
This is what it all looks like (later you will need to protect the remaining terminals with heat shrink)
We install the fuse blocks back and secure them.
We start the engine - power appears on the main (+) relay, turn on the size key - power is supplied to the PTF key, press the PTF key - power is supplied to control the relay (we go to check the functionality of the PTF) - the PTF key is the penultimate one on the right.
This is how the whole thing works - the PTF lights up.
It’s a good angle, but I like the way the PTFs look better from below.
It's beautiful, although not very practical.
We turn off the dimensions key; when the button is turned on, the PTF fog lights are also turned off.
All keys are disabled. Just as you noticed, I installed the radio at the same time so that I wouldn’t have to remove the center console again.
What will you need to install fog lights?
To install fog lights yourself, a minimum set of tools is required. The car owner must have knowledge and skills in working with electrical wiring, since the safe operation of the car as a whole depends on the correct installation.
Set of materials required for installation:
Set of fog lights for Ford Focus 3
How to install and connect with your own hands?
Installing fog lights on your own begins with developing a connection diagram. A properly designed circuit avoids unnecessary wires and ensures reliable operation of the electrical circuit. It is recommended to carry out installation work in the garage, although many owners install it outdoors.
Installing PTF in the front bumper and setting it up
There are three installation methods:
The setup is done using the homemade template presented below. The template is installed perpendicularly at a distance of 5 m from the car headlights. The adjustment is made until the top edge of the light spot coincides. The matching line is located 100 mm below the height of the center of the lamps.
Approximate view of the template for customization
Adjusting your fog lights increases driver visibility and reduces the risk of blinding oncoming drivers.
Installing PTF in a blind bumper
The most difficult and time-consuming option is to install fog lights in a solid bumper (i.e., one that does not have factory holes for this):
Installing PTF on the external bracket
Option for mounting foglights on a steel bracket:
Example of installing headlights on a bracket
Installation of PTF in standard openings
In order to install headlights in a bumper that has standard plugs, you must:
Wiring
When pulling and installing wiring, you must follow the following safety rules:
Neglecting the rules for safe installation of electrical wiring leads to overheating of the circuits and a fire, which can destroy the car.
Before starting installation, it is recommended to assemble the future electrical circuit and test the operation. This event allows you to find and eliminate errors made during development.
Wiring and headlight testing
Approximate wiring sequence:
Installation of PTF switch
The most common method of turning on the fog lights is a button installed in a regular place or at any other point within the driver’s reach. The regular places for the buttons are covered with removable plugs, and occasionally they are covered with instrument panel material. In this case, it is necessary to cut a hole corresponding to the dimensions of the button body.
A separate item worth considering is the installation of a steering column switch unit equipped with a rotary switch for fog lights. To perform the work, you may need a special tool - screwdrivers with Torx heads and a special wrench for the central bolt of the steering wheel.
To connect the steering column switch follow these steps:
An example of installing a new steering column switch on a Hyundai Solaris.
On some European cars, fog lights are switched using a rotary switch located on the instrument panel. When installing headlights on such a car, you need to connect the wires from the lamps to the plug and install a light switch with the function of controlling the fog lights.
What are PTFs?
On Shniva, this optics is a rectangular shape with 35W halogen lamps mounted inside. They are placed according to a standard layout below the main headlights, which is necessary to reduce the glare of oncoming drivers and the penetration of light through fog. If the main light is intended to illuminate the road surface, then the PTFs have the main purpose of highlighting a car on the highway with reduced visibility at a long distance and illuminating the road in fog.
Power comes from a 12V DC vehicle network. The power button is located in the Shnivy's interior and looks like a headlight with arrows pointing down. Even those models that are not equipped with PTF as standard have a connector for mounting a power button. Also, according to operational safety, the network supplying this optics consists of a relay and a fuse designed to protect the wiring from overheating. If these elements are not available, then they must be purchased if the installation of PTF is being calculated.
Inside, the design is based on lens optics, which allows it to cope 100% with the function of illuminating the road surface in fog. The lighting lamp has an H4 type base, which allows the installation of xenon lighting. The outside of the optics is covered with protective glass, which prevents fogging and does not reduce the quality of lighting.
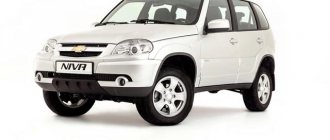
How to install fog lights on a Chevrolet Niva
To reduce fuel consumption on a Shnivy you just need...
So, if you need restyling or retrofitting of a Niva Chevrolet car, namely the installation of a PTF, then everything is very simple. Even if Shniva is not equipped with this type of optics, absolutely all models are equipped with training. The preparation includes ready-made wiring, places for installing relays, buttons and a place on the bumper. Therefore, you must first purchase all the listed material and get down to business:
- The car is de-energized. The instrument panel is removed to provide access to the button connection.
- Under the panel there is a free chip wrapped with electrical tape. This is exactly what we need.
- We install the button in the panel and connect the chip.
- Next we move to the control unit where the relays are located. We find a free block, which is located second on the left, and install a new relay into it.
- Now let's proceed directly to the connection. The wiring with a chip is brought out for connection through the underwing holes of the body to the front bumper.
- So, the connection diagram is laid out. Now the last thing left is to install the PTF in the front bumper.
- The Niva Chevrolet has already prepared holes for installing standard type PTFs. You just need to install them using fasteners and you're done.
- All that remains is to connect the fog lights and check that they are working properly.
Connection diagram
Most motorists have a question related to connecting PTF. Therefore, in this section we will consider the wiring connection sequence. The connection diagram is as follows, presented below.
PTF connection diagram
The diagram shows the location of the main elements for connecting the PTF. The numbers 1 indicate the fog lights themselves with the working elements inside (lamps). The black wire is ground, which is connected to the car body. The yellow and yellow-black wires are led out to the control unit through connecting chips. Position 2 shows the connection order on the mounting block via fuses F4 and F14. The relay responsible for turning on the PTF is powered from the control unit. The relay has two wires connected to the closing contacts of the power button. When pressed, power is supplied to the relay coil, which in turn closes contact 30 (on the relay), supplying power to the lamps. The entire circuit is powered by a 12V battery, which is shown by contact pairs A and B. The connection circuit is simple and primitive, which even a beginner can handle. But this same primitive circuit is the basis for the operation of an optical device. By numbering the contacts in the diagram, you can carry out repairs in case of malfunctions of the fog lights.
Scheme
Lamp for PTF
An important issue is the installation of lamps in fog lights for the Chevrolet Niva. The standard configuration of the fog lamp is equipped with a halogen incandescent lamp with a power of 35W. But such a lamp cannot produce a strong luminous flux due to the nature of low power, so many drivers seek to install other types of lamps, such as xenon or LED, in the PTF. Xenon ones are very popular, but they require the installation of an additional starting unit. The lamp produces luminous flux due to an inert gas and a special filament, which is many times superior to the good old halogens. The light from a xenon lamp pierces even thick fog due to the intensity of the flow.
Important! A high-power lamp overloads the electronics and battery, so it is not recommended to equip a car with more than four 55W lamps, especially installing cheap Chinese xenons.
The LED lamp does not have such a powerful flux, but it consumes little power compared to halogen and xenon lamps. The cost of xenon lamps remains maximum due to the additional ballast control unit and maximum performance.
Video
The wiring diagram for installing fog lights is shown in a video filmed for the “Car Lover” channel.
Scheme for switching on headlights and fog lights:
1 – headlights; 2 – main fuse block; 3 – relay for turning on low beam headlights; 4 – ignition switch; 5 – external lighting switch; 6 – control lamps for high beam headlights (left) and fog lights (right); 7 – fog lamps in the rear lights; 8 – fog light switch; 9 – additional fuse block; 10 – headlight switch; 11 – relay for turning on the high beam headlights.
The car has two round headlights. Headlight bulbs are double-filament (H4). The voltage to the lamp filaments is supplied through the low and high beam relay type 113.3747, located under the instrument panel on the left side. Relay characteristics: switching voltage at a temperature of (20±5)°C – no more than 8 V, winding resistance – (85±8.5) Ohm. Voltage is supplied to the relay windings if the exterior lighting switch key is fully pressed (then the choice between low and high beams depends on the position of the headlight stalk switch) or regardless of the switch position - if the driver pulls the left steering column switch towards himself (the high beam headlights turn on ).
Some cars can be equipped with a hydraulic headlight corrector, designed to change the angle of the headlights depending on the vehicle load.
What headlights to put on a car
Practice shows that, on average, the original condition of optics on Niva is maintained for 1.5-3 years. This is followed by damage to the lens, clouding of the glass, and when diving into cold bodies of water with the headlights on, their destruction. At the same time, the characteristics of the standard headlight cannot be called outstanding. Often, especially in the rain, the car becomes literally blind, and in the snow it becomes invisible. Optics for the field: which is better? It is recommended to replace lighting fixtures with similar ones from different manufacturers. Alternative tuning options are used solely at your own peril and risk, since traffic regulations directly prohibit the operation of a car with changes made to the design without registration with the traffic police. This is especially true for lensed xenon and diode LED optics.
For headlights on the Niva 21214, tuning may involve replacing bulbs, sidelights and other road lighting elements in the evening and at night. The design of the electrical network includes lighting fixtures for the VAZ-2121 interior and some other components. Headlights are important not only as a lighting device, they allow you to notify other road users about the driver’s planned maneuver. Simply put, the quality of lighting affects many areas of movement, without them it is impossible to drive normally at night.
The front and rear lights on the Niva are somewhat different in type; they need to be selected individually.
Key types of gas-discharge components are most often used:
- tungsten models are the cheapest, but they have a low luminous flux;
- halogen or incandescent lamps. They are cheap and much more common in cars. Such light indicators can be installed for distant and near illumination of a stout canvas;
- xenon – a modern and efficient type of device.
Nowadays, Niva headlights with LED elements, which are inlaid into a crystal structure, are becoming increasingly common. Similar models are used to transmit signals to drivers and to illuminate the route. According to the technical specifications, LEDs are characterized by increased brightness compared to other lamps, and an increase in efficiency is noted by 300%.
In general, tuning headlights on a Niva is a simple procedure that is carried out for most cars when the driver gets tired of insufficient lighting and falls into potholes. The situation is typical for all SUVs produced in Russia and the CIS. The increasing number of cases of optics modernization is associated with a significant improvement in the technical characteristics of modern flashlights.
Also interesting: Aerodynamic body kit for Niva: pros and cons
Based on practice, tuning of headlights on Niva-21213 is carried out more often using models from the manufacturer Wesem. Such optics can be easily installed in the grooves, instead of the base light bulb. It is optimally suited for domestic 4x4 vehicles, since the installation process takes only 10 minutes, and the lighting is significantly improved. Depending on the Niva car model, tuning should be carried out with 12 or 24 V light bulbs.
When it comes to replacing the Niva-2121 fog lamp, you can also prefer models from Wesem. They are distinguished by a clear boundary of the illuminated contour from below and above. Due to this useful property, it is much easier to adjust and adjust the headlight according to GOST. During the tests, it was found that the fog lights do not “hit” the eyes of oncoming drivers, and when turned on simultaneously with the low beam, the quality of lighting improves even more.
Practice shows that, on average, the original condition of optics on Niva is maintained for 1.5-3 years
Main characteristics
| Make: BMW | Gearbox: automatic / manual |
| Model: X1 | Body: sedan, coupe, station wagon |
| Year of issue: 2009 | Power: petrol/diesel |
| Engine capacity: 1985 cm³ | Drive: rear |
Installing fog lights on a field does not take much time, about one hour. First you need to purchase the necessary components, in addition to fog lights, you need to take 6 female terminals, one 6 mm loop, a 4-contact relay, a button for a VAZ and 6 meters of car wire.
To begin installation, you need to attach the fog lights to the bumper, as shown in Fig. 1.
Simultaneously with installation, connect the black negative wire to the fog lamp mount and bring the positive wires under the grille to the battery area as shown in Fig. 2 - 3.
Then you need to insert the cable into the button into the interior. Under the spare wheel, closer to the engine, there is a structural rubber plug in Fig. 4.
You need to pierce it with an awl and push the wire into the interior (Fig. 5.
Next, you need to connect a wire to the right headlight of the side lights - Fig. 6, to power the power relay, we find the blue wire, strip it, connect it and lead it to the battery compartment.
As a result, after dividing the wiring, as shown in the figures, the wires should converge in the area of the battery, Fig. 7.
Correct connection on relay fig. 8: contact No. 87 - battery, contact No. 80 - fog lights, contact No. 85 - button (minus control), contact No. 86 - positive from the blue wire of the side lights.
On each wire you need to put a terminal - a mother and on the main supply - an 8 mm loop, for connecting to the battery, Fig. 9.
Installing LED (ice) headlights video
Good evening everyone! I didn’t complain about the standard light, but I had a defect in the 1st headlight, they refused to replace me under the OD warranty, and besides, a set of LED headlights from AliExpress had been lying around for a long time, waiting in the wings.
As a result, I gathered my strength on the weekend and installed it, I’m probably a manual worker, but some write that the installation takes about 30 minutes... I spent 2-3.1 hours. First, you need to increase the seats for the Chinese headlights, you need to cut them with a grinder, in the absence of a small grinder, I started doing this with wire cutters and metal scissors, it turned out a little carelessly, but the goal was achieved.
2. I went to the store and bought a two-core wire, skinned it, and got 2 wires.3. I installed female-type terminal blocks on the wire for good contact.
4. I drilled 2 holes with a diameter of 3.5 mm in the headlight cup to pass the wires.5. I brought the wires out through the plug where the hydraulic correctors go, and secured them with clamps.6. There is a chip in the headlight, we attach it to the standard chip. There are 2 wires, yellow and red. We connect the yellow headlight wire to the yellow headlight wire. We connect the red headlight wire to the blue-orange headlight wire.
According to this connection scheme, the rings will light up constantly when both the DRL and the low and high beam are on.
I liked the headlights for their appearance and the quality of the light beam, the light is much better than the standard ones and do not dazzle at all! I checked it with my own eyes. I recommend it!
The price of headlights is 4800 rubles.
Price tag: 4,800 ₽ Mileage: 3200 km