The dashboard of a modern passenger car is an independent part of the car’s interior. Moreover, one of the most important components, which must meet two requirements and solve two important problems. Provide the highest functionality and create a feeling of aesthetic satisfaction, combined with an awareness of the comfort provided by a particular panel, through conveniently located storage drawers, cup holders, instruments and control buttons, as well as pleasant, non-straining lighting.
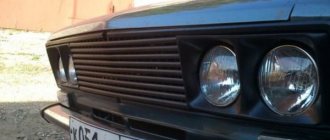
Dashboard VAZ 2114
Preparation
First of all, it is necessary to prepare the car interior for installing new sound insulation by dismantling all removable parts: seats, mats, panels. We carry out this procedure step by step:
- remove all seats:
— unscrew and remove the trim from the B pillar and door sills;
— carefully remove the carpet and coverings (we will need them later):
— remove the foam cushions to level the floor;
— remove the factory sound insulation:
After removing all removable parts from the interior, you must wash the floor thoroughly and thoroughly go over the metal with a degreaser.
It should be noted that in domestic cars, the drain holes at the bottom of the body are not sealed with plastic plugs, and water often enters the interior through them during bad weather. Therefore, before installing sound insulation, you should think about high-quality sealing of these holes.
Seat reupholstery
In order to reupholster the seat, you must:
- 1. Decide what materials will be used for this and purchase them. Experienced car enthusiasts recommend using leather and Alcantara (material similar to suede);
- 2. Remove the seat.
- 3. Carefully examine the fragments of the standard case and decide from what material each of them will be made.
- 4. Remove the standard cover by pressing out the metal clips on the back of the seat.
- 5. Rip the removed cover at the seams into separate elements.
- 6. Using the removed fragments, mark and cut out elements from the prepared materials with scissors. In this case, the Alcantara fibers should be oriented in one direction.
If desired, you can install a seat heating system under the fabric upholstery yourself. To do this, you need to purchase standard heaters, which, for reliability, are best sewn from the inside to the Alcantara of the “seat” fragment.
Glue the manufactured fragments of the cover onto foam rubber with a fabric base (the glue is applied from the side of the foam rubber). For gluing, it is best to use a special spray adhesive for reupholstery. Carefully sew the resulting fragments of the cover together. To do this, it is better to contact a sewing workshop that has the necessary equipment.
Front seat reupholstery
Glue the seam flaps on the wrong side of the cover and then sew them together. Turn the finished cover right side out and carefully straighten it out. Put the seat cover on. This operation begins from the back. To do this, you need to thread the straps, pull the cover to the back of the seat and carefully smooth it out.
Disassembling the front door
1) First, we need to remove the main handle with which the door closes. We press out the decorative trim with a screwdriver, but be careful not to damage it. Next, unscrew the bolts, there are two of them, and remove the handle.
2) Then we remove the decorative trim of the unlocking handle, you know that kind of black plastic, we also pick it up with a screwdriver and pull it out, there are two latches there, be careful.
Interior tuning
The main elements of the VAZ 2108 interior, which are relatively easy to tune, are:
- reupholstery of interior and seats;
- reupholstering the steering wheel and gear lever;
- installation of a seat heating system;
- improved cabin sound insulation;
- installation of a modern multimedia system;
- finishing of individual interior elements with carbon film.
In order to do all this work with your own hands, you need to spend a lot of time and, in addition, have certain skills and experience. Therefore, to achieve the best results, it is advisable to turn to professionals who will carry out tuning of the VAZ 2108 interior in a high-quality, comprehensive and fast manner. However, if the family budget does not allow this, then some of the work can be done with your own hands. Such work includes reupholstering seats and at the same time installing a heating system.
Important points regarding replacement
- When removing the right side of the console, be careful. Behind it are wires that can easily get caught on the side and be damaged. So before removing this cover, you should remove the negative terminal from the battery. You should also turn off the car radio by removing its connector from the common wiring harness located behind the upper instrument panel;
- Removing the plastic handles from the stove levers can cause serious difficulties. The fact is that there are protrusions on the stove levers (top and bottom), and holes on the handles. When you put the handle on, it snaps onto the lever. The only way to remove it is to pry it off with a flat screwdriver as shown in the picture. But when prying up the handle with a screwdriver, you should not bend it too much: the plastic breaks very easily;
The handles on the levers of the VAZ 2115 stove can be removed using a flat screwdriver
So, a novice car enthusiast is quite capable of removing the dashboard from a VAZ 2115 and other cars in this line. All that is required is patience and attentiveness. If, after unscrewing all the fasteners, the dashboard stubbornly refuses to come off, you should inspect everything again: it is quite possible that some tiny screw was missed.
Interior tuning
The main elements of the VAZ 2108 interior, which are relatively easy to tune, are:
- reupholstery of interior and seats;
- reupholstering the steering wheel and gear lever;
- installation of a seat heating system;
- improved cabin sound insulation;
- installation of a modern multimedia system;
- finishing of individual interior elements with carbon film.
In order to do all this work with your own hands, you need to spend a lot of time and, in addition, have certain skills and experience. Therefore, to achieve the best results, it is advisable to turn to professionals who will carry out tuning of the VAZ 2108 interior in a high-quality, comprehensive and fast manner. However, if the family budget does not allow this, then some of the work can be done with your own hands. Such work includes reupholstering seats and at the same time installing a heating system.
Replacement of floor covering and removal of soundproofing material on VAZ 2108-VAZ 21099
Removal
1) Remove the front seat together with the slides installed on it (instructions are described in the article: “Replacing front seats”)
2) Remove the floor tunnel lining. (explained point by point in the note: “Replacing the floor covering”)
3) Using a screwdriver on both sides, pry out the decorative plugs covering the seat belt bracket lower mounting bolts.
4) After removing the plugs, unscrew the two belt mounting bolts on each side.
5) Remove the brackets from both sides, taking them out together with the unscrewed mounting bolts.
Note! There is a metal sleeve on the bolts, be careful not to lose it!
6) Next, unscrew the 2 screws securing the middle pad to the stand and remove the pad.
7) Now move to the side front doors. On each side, unscrew the three screws securing the upper sill trims.
 Remove the screws from the car.
9) Using a screwdriver, remove the four screws securing the front lower sill panels.
10) Remove the covers from the machine.
11) Go to the rear doors of the car and use a screwdriver to remove three screws at the rear sills on each side.
10) Remove the pads and use your hand to pick up the carpet, lift it up and remove it.
Note! There is sound insulation below the carpets - if necessary, replace it with a new one.
Installation
This is done in the reverse order of removal, taking into account the following nuances:
1) Check the sound insulation for moisture, dry if necessary.
2) You must begin installing the sill overlays in the following order: lower – upper – middle overlays.
3) There is no need to tighten the cover screws too much to avoid damage.
Useful tips
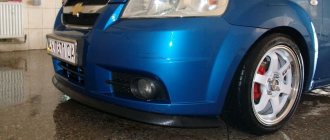
Today, many owners of the VAZ 2114 install new acoustics in the car, more powerful and productive. They buy an expensive subwoofer (see 1000-watt subwoofer and a review of the best models), a powerful amplifier (see The best amplifier for a subwoofer and how to choose it) and a lot of other useful things that significantly increase the level and quality of sound. But imagine their disappointment when all the money spent turns out to be thrown down the drain, since the sound still leaves much to be desired.
It turns out that the whole point is insufficient insulation of the car body panels, through which noise penetrates from the outside. It’s no longer possible to enjoy clear sound: rattles, vibrations, knocks - all this degrades the quality.
As mentioned above, car doors are very important in this regard.
Here's what you need to focus on:
- They must be insulated on both sides, although excessive zeal should not be shown either. Heavy doors mean they may sag over time;
Sound insulation for VAZ 2114
- In addition, we must take into account the fact that the doors of the VAZ 2114 are often covered with cellophane. The latter makes unpleasant sounds and creaks in the cold season in the frost;
- It is advisable to lay materials on the door in large pieces (as much as possible). The materials used should not be visible beyond the edges of the sheathing.
It’s not difficult to learn how to carry out “Shumka” with your own hands. Step-by-step instructions, photos, materials, and videos will help in this matter. The factory standard insulation must be completely stripped off so that new materials can be installed efficiently.
Product delivery options
Note! Below are the shipping methods available specifically for this product. Payment options may vary depending on the shipping method. Detailed information can be found on the “Delivery and Payment” page.
Parcel by Russian Post
Available payment methods:
- Cash on delivery (payment upon receipt)
- Using cards Sberbank, VTB, Post Bank, Tinkoff
- Yandex money
- QIWI
- ROBOKASSA
Shipping throughout Russia. Delivery time is from 5 to 12 days.
Parcel by Russian Post 1st class
Available payment methods:
- Cash on delivery (payment upon receipt)
- Using cards Sberbank, VTB, Post Bank, Tinkoff
- Yandex money
- QIWI
- ROBOKASSA
Shipping throughout Russia. Delivery time is from 2 to 5 days. More expensive than regular delivery by Russian Post, approximately 50%. Parcel weight up to 2.5 kg
Seat reupholstery
In order to reupholster the seat, you must:
- 1. Decide what materials will be used for this and purchase them. Experienced car enthusiasts recommend using leather and Alcantara (material similar to suede);
- 2. Remove the seat.
- 3. Carefully examine the fragments of the standard case and decide from what material each of them will be made.
- 4. Remove the standard cover by pressing out the metal clips on the back of the seat.
- 5. Rip the removed cover at the seams into separate elements.
- 6. Using the removed fragments, mark and cut out elements from the prepared materials with scissors. In this case, the Alcantara fibers should be oriented in one direction.
If desired, you can install a seat heating system under the fabric upholstery yourself. To do this, you need to purchase standard heaters, which, for reliability, are best sewn from the inside to the Alcantara of the “seat” fragment.
Glue the manufactured fragments of the cover onto foam rubber with a fabric base (the glue is applied from the side of the foam rubber). For gluing, it is best to use a special spray adhesive for reupholstery. Carefully sew the resulting fragments of the cover together. To do this, it is better to contact a sewing workshop that has the necessary equipment.
Front seat reupholstery
Glue the seam flaps on the wrong side of the cover and then sew them together. Turn the finished cover right side out and carefully straighten it out. Put the seat cover on. This operation begins from the back. To do this, you need to thread the straps, pull the cover to the back of the seat and carefully smooth it out.
Actions to take when the floor is very wet
The methods described above are unlikely to help if puddles have formed on the floor under the rugs. In this case, it makes sense to visit a car wash first: specialists can pump out the water with a powerful vacuum cleaner. After this, you can use adsorbents and dry the interior with warm air. At the car washes where interior dry cleaning is carried out, there is special equipment for subsequent drying, which can also be used.
If the car was seriously damaged, for example, it was in a pond, in order to completely dry the floor, you will have to disassemble the upholstery and remove the soundproofing material. So that the time and physical costs of such drying do not seem in vain, you can combine this event with updating the noise and heat insulation of the cabin.
If the interior is flooded, you will need to disassemble the upholstery
Do-it-yourself interior reupholstery
Over time, car upholstery loses its appearance.
It fades, scuffs and stains appear on it. Reupholstering the interior will help correct this problem. This operation can be done in a workshop, but it is much cheaper and more interesting to do it yourself. 1. Material selection
The market offers a huge range of different materials. However, when choosing, you must be guided not by personal preferences, but by the complexity of processing this fabric. For example, leather, which everyone adores, is not suitable for reupholstering with your own hands. This is not due to its cost, but to the complexity of working with it. Only a professional can do this.
It is best to choose Alcantara. The fabric is very similar to suede. It is quite durable, wear-resistant and elastic. And most importantly, despite its beautiful appearance, it is very easy to process. In addition, it has a very rich range of colors.
You should also take into account such characteristics of the selected material as protection of the car interior, strength, and wear resistance.
2.
Necessary tool
• To dismantle the old casing you will need a set of keys and a screwdriver;
• Scissors are required to cut out outlines;
• We will use a hair dryer to remove wrinkles;
• It is advisable to use soundproofing glue.
3. Upholstery of chairs
• First, you need to sign each individual part of the chair cover with a marker and indicate the required color.
• Secondly, by releasing the clamps located on the backs of the seats, remove the cover.
• Thirdly, we cut at the seams. We use the resulting elements as templates. We lay them out on new material and outline them along the contour.
• Fourthly, we cut out the blanks and cover them with a five-millimeter layer of foam rubber.
• Fifthly, using a sewing machine, we sew together all the components, aligning their edges. The first case is ready. You need to turn it out and put it on the chair. We perform the same steps for other chairs.
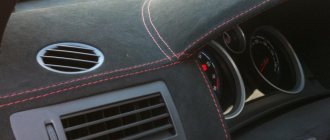
4. Torpedo reupholstery
This is done like this:
• Degrease the surface. Let it dry;
• Sand the surface on which the material will be placed. Sweep away the resulting dust with a brush;
• Mark the locations of the seams. Their number depends on the number of irregularities and bends on the dashboard, as well as on its shape;
• Using rubber glue, non-woven fabric is glued along the markings;
• We place the pattern from the interlining onto the material and cut it out. Leave a centimeter of margin for seams. We press it with an iron and weights;
• We lay out the cut out pieces on panels, check their shape and sizes, and then sew them together;
• From the inside we cut off all excess material. We glue the seams and wait until they dry. Pull the cover over the panel;
Source: club2108.ru
Torpedo
Tuning a VAZ 2109 torpedo can also be interesting and very useful. The simplest thing that comes to mind is replacing the original torpedo with a more stylish, sporty and functional one from a foreign car. Of course, not everyone will fit in, but by choosing the right model you can achieve very interesting results.
You can expand the functionality of the torpedo by slightly changing the front panel and adding a voltmeter, oil pressure sensor and a simple clock. Many people find this process quite painstaking, and therefore do not dare to do the tuning themselves. You can also tune the high panel of the VAZ 2109:
- You can install LED backlighting, which will improve the readability of devices at night.
- You can modify the scale by also adding LEDs, or simply change the arrow and stick on a new, brighter scale.
A fairly popular modification is the complete replacement of instruments with a set from one of the most modern cars. This will help improve their readability and also give the car a more modern look.
Source: autoshtorm.ru
Trunk
Tuning the trunk of a VAZ 2109 is not the most creative activity, and given the fact that no one will see it anyway, it’s worth thinking only about the practical side of the issue. Firstly, as already mentioned above, a subwoofer and an amplifier will coexist perfectly in the trunk. Secondly, you can reupholster it on leather, faux leather, material with an interesting color, or simply on something more resistant to external influences. And finally, you can organize LED lighting, which will be extremely useful at night.
Audio system
If you are looking at how you can tune the interior of a VAZ 2109 in the photo, you have probably noticed a powerful speaker system among them more than once. To make your sound as spacious as possible, you can make a 7.1 system. To do this, you need to install two speakers in the front door cards, two on the rear parcel shelf, and two on the A-pillars. You also need to think about high-quality bass; for this, the subwoofer is usually placed in the trunk, and an amplifier can also be placed there.
In order for your entire system to work efficiently, and not just reproduce a loud crash, the car radio must also be of high quality. It is worth paying attention to the maximum output power, however, if it is not enough, the situation can be corrected by an amplifier.
It is worth noting that it is quite difficult to carry out a high-quality installation of a sound system yourself and it is better to contact an auto electrician.
Tuning VAZ 2109
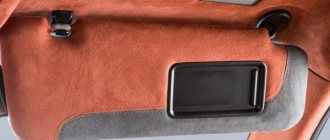
Over time, the ceiling lining in Lada Samara loses its original appearance, darkens, and sometimes turns yellow beyond recognition. You can, of course, try chemical detergents, but perhaps the best option would be to reupholster the ceiling, especially since it is not at all difficult and can be done with your own hands. At the same time, you can choose the color of the upholstery to your liking and fit it into the interior of the cabin, which is also an additional argument for reupholstering the roof upholstery of the VAZ 2109.
To reupholster, you must first remove the ceiling upholstery itself. To do this, you need to dismantle the sun visors and handrails.
Simply remove the plugs and unscrew the fittings.
Removing the sun visors
We do the same with the front pillar trims, where the screws are not covered with plugs and are in plain sight, 3 pieces per trim.
Removing the front strut covers
Next, remove the ceiling light and the lantern between the sun visors. It is advisable to mark the wires so that there are no problems when connecting them back.
Then you need to dismantle the ceiling mount in the rear of the cabin. It is made using three special pistons. We use a screwdriver to pick up the locks of these pistons, take them out and take out the pistons themselves.
Pry up the latch with a screwdriver
Removing the piston retainer
We remove the piston securing the casing
We do this carefully, since over time the pistons could become fragile and break during disassembly. It is better to purchase spare ones before removing the headliner, just in case.
When the upholstery is removed, it must be removed from the interior. In the case of VAZ-2108 and -2109, we simply remove it through the rear (fifth) door.
We glue the new upholstery (or carpet) over the entire area to the ceiling lining. To do this, you can use BF or Titan glue, sold at any building materials store. We apply glue to the surface of the upholstery, and very carefully, without haste, smooth the new upholstery onto it. The carpet is elastic and follows all the irregularities of the sheathing. We wrap the edges of the upholstery inward and fix it. Then use a sharp knife to cut holes for the interior lighting lamps. We are waiting for the glue to dry completely.
You can also refresh the appearance of the ceiling trim by simply painting it with a regular water-based fabric color. The paint must be diluted to a liquid state and the casing must be painted with a roller or spray gun. We paint carefully, without overfilling the paint, so that the covering does not soften or lose its shape from excess moisture.
In this article you can read about how to paint the ceiling and visors of a VAZ 2109.
When everything is dry, we attach the updated casing in place in the reverse order. Taking advantage of the situation, you can stick sound insulation on the ceiling with the trim removed. This way we will get rid of extraneous sounds in the car interior.
Source: tuning-lada-2109.ru
Interior noise insulation
If you are planning to carry out serious tuning of a VAZ 2109 car, first of all you should think about sound insulation, because it is not for nothing that the nine was called “rattle”. This is partly due to the not very good quality of the plastic parts, as well as the assembly itself. Before getting down to business, it’s worth deciding on the material, since the result, complexity of the work, as well as financial costs will depend on this.
First you need to disassemble the entire interior: remove the seats, trims, and instrument panel. Actually, as a result, bare metal should remain in the cabin. By the way, since you’ve already gotten to it, check all the plugs and possible problem or rusty areas. Make repairs where necessary.
We begin pasting the interior from the engine shield, and if necessary, apply sound insulation in two layers. At the end of the work, do not forget to restore the ventilation holes.
Important. Before gluing, clean the metal with a rag soaked in acetone, alcohol or another degreaser. There is no point in treating the entire interior at once, since during the work the surface will get dirty, so the surface is degreased immediately before pasting.