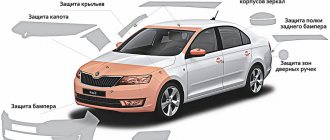
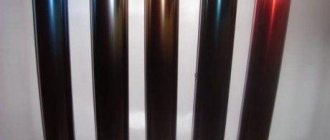
We give a definition
In simple, accessible language, tinting car windows is darkening them using a special film.
It is necessary to carry out such work independently only if you already have some knowledge in this area, and it is better if you also have experience.
The most common method of tinting is gluing glass with a special polymer film with a layer of paint of a certain intensity and shade applied.
In general, car enthusiasts are not too bothered by the choice of color, preferring the classic blackout.
Types of electronic windshield tinting
One of the main advantages of this type of tinting is that the electronic tinting of the windshield can be turned on, adjusted or turned off at any time while the car is moving.
Today there are several methods of electronic tinting:
- Chameleon . Tinting is based on special multilayer glasses that change the light transmission and shade depending on the light intensity.
- Three-layer glass . Tinting using a special three-layer glass, which allows you to change the light transmission coefficient of the glass by activating the internal electrochemical layer when the voltage is turned on.
- Electrochrome . Tinting using a special film, which is treated with a chemical composition that can change the optical properties when passing electrical impulses.
Operating principle
The operation of electronic tinting systems is based on a photochemical phenomenon that occurs when the structure of a special film changes under the influence of electrical impulses. When current passes, the crystal structure of the material changes. As a result, the light transmittance of the glass changes.
The most advanced technologies are SPD and PDLC tinting. The principle of their operation is based on the ability of a mixture of liquid crystals, enclosed in a thin electronic layer of a conductive transparent material, to change its structure when current is applied. Under the influence of voltage, liquid crystals are converted into a hardened polymer that can change the properties of glass and scatter direct sunlight. As a result, the glazing becomes matte. The shading first forms at the edges of the glass and then moves towards the center. This process occurs within a few minutes. Under the influence of electrical impulses, liquid crystals melt. As a result, the light rays are scattered and the glass becomes transparent.
Smart polymers
Electronic tinting using smart polymers is the result of the synthesis of chemical technology and transparent conventional film. These polymers change transparency and light transmittance when current passes. Glass made using smart technology is a combination of several layers based on transparent film and special chemical materials. Such a symbiosis, when the power is turned on, is capable of changing optical properties (heat absorption coefficient, haze, hue, light transmittance coefficient, etc.) with changes in illumination and temperature.
Electronic tinting allows you to reduce heat loss and save energy consumption for air conditioning and lighting. One of the important advantages of smart tinting is that it practically does not transmit ultraviolet rays.
The intensity of the darkening can vary from complete transparency to rich tinting. Power supply is necessary to adjust the degree of transparency. The rest of the time, the tint is maintained without additional power supply.
Difference between PDLC and SPD technologies
PDLC tinting allows you to change the transparency of the glazing without changing the light transmittance coefficient. Simply put, light will penetrate unhindered into the interior, but nothing will be visible from the outside due to the haze.
The degree of transparency of PDLC tint is regulated by the voltage value. In the absence of power, the film becomes matte and practically does not transmit light due to the fact that the liquid crystals are located randomly in relation to each other. Under the influence of electrical impulses when voltage is applied, the crystals begin to align. This increases light transmittance and the film becomes transparent.
SPD tinting is more advanced and functional. It provides a simultaneous change in the light transmittance and transparency of the glazing. In any position of the power supply regulator, the film is transparent. In this case, the degree of darkness is controlled and adjusted in any intermediate mode.
Light transmittance requirements
Until recently, the bulk of cars in Russia were tinted. Now strict requirements for light transmittance have been introduced, which have forced most car enthusiasts to get rid of the films that darken the front of their cars.
Let us remind you that by law it is allowed to tint the side front windows while maintaining the light transmittance of at least 70%, and the front window at least 75% (at least 70% from 01/01/2015).
Tinting the windows of the rear half of the car is not regulated in any way, except for one thing - it is prohibited to use mirror tinting.
There are two advantages to tinting:
- Prevents interior material from fading;
- Performs certain security functions.
The main disadvantage is reduced visibility, especially in the dark.
To tint your car, you don’t have to contact a professional car service. This activity is not difficult, although, admittedly, not everyone can cope with it.
It is important to know that electronic tinting of car windows still exists.
Important points
Before you start tinting your car windows, pay attention to a few important points:
- Don't forget, the film is attached to the inside of the glass. This will save it from environmental influences, as well as adverse weather conditions;
- Be sure to follow the norms established by law, otherwise you risk having your tint removed at the very first traffic police post. And you will be guaranteed a fine;
- To tint the glass you do not have to remove it. Of course, it is more convenient to carry out work with the glass removed, and the film will be fixed more smoothly, but with careful execution everything should work out just the same;
- Direct pasting must be carried out in a well-lit, clean room. You can do this outside, but then you will have to find a place where the appearance of dust is minimized, and also “catch” calm weather.
General procedure
Glass tinting occurs using a soap and water solution in the proportion of 3 to 5 drops of washing shampoo per liter of water.
It is necessary to mix this solution thoroughly; it is advisable to use an automatic sprayer.
Then the external glass cleaning is carried out. This must be done not only without fail, but also very efficiently, since the technology requires complete cleanliness of the tinted surface. Any grain of sand may end up being an air bubble.
In this way, you can tint any domestic and foreign cars.
General stages of work:
- FIRST STAGE. The glass is cleaned from dust and dirt, as well as degreased. If you are going to tint the windows without removing them, it is advisable, but not necessary, to remove the rubber seals.
- SECOND PHASE. It consists of making a solution of shampoos or non-aggressive detergents. It needs to be poured into a special spray bottle. Pay attention to the correct preparation of the solution. Add 5 drops of detergent to 1.5 liters of water and shake the entire mixture vigorously. It is better to pour the resulting solution into a container with a sprayer.
- THIRD STAGE. Making paper patterns. They will be needed to cut the tint film into the required shape. If you are unsure of your measurements, leave a slight tolerance. They are then easily removed using a cutter. If your hand is already full, then this point can be missed.
- FOURTH STAGE. The pattern and the tinting process itself.
Preparation and tools to tint your car
We've sorted out the laws, chosen the film, and now we can get to work. You immediately need to choose a suitable place for the upcoming manipulations. The street is not very suitable for this. Dust, insects, wind and direct sunlight are the main list of unacceptable conditions. A spacious garage or box is ideal.
This is interesting: Myths about the maximum speed of cars
To ensure that the execution process does not stop “at the most interesting place,” prepare all the tools and materials in advance. You will need:
- The tint film itself is in the required quantity. Decide how many glasses you will tint and calculate the area. Allow a margin of 10–20% for adjustment.
- Water spray in any form. Needed for spraying soap solution.
- Liquid soap or Fairy, clean water.
- Something sharp and cutting: an ordinary blade, a stationery knife, a scalpel.
- Lint-free wipes.
- Forcing is a special spatula with which you will remove the solution from under the film. Should be firm, but without sharp edges. They are usually plastic and some manufacturers include them with film. If you are unlucky, then look for them in construction or automotive stores; they are also definitely available in stores for outdoor advertising specialists.
- Special scraper for cleaning windows (optional, greatly facilitates the cleaning process).
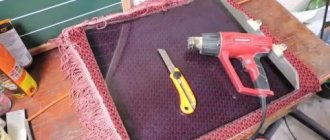
- Electric hair dryer with temperature controller (we need 550 degrees Celsius).
Everything you need to do it yourself (photo)
Spray gun Fairy Construction hairdryer Scraper for cleaning windows Film Stationery knife Forcing Lint-free napkins
Tool
Be sure to stock up on all the necessary materials and tools. For these purposes you will need:
- Direct tinting film. It is sold in any automotive stores, rolled up. As a rule, one roll is enough to tint all side windows;
- Rubber spatula. Basically, it comes complete with film, although it is often replaced with hard plastic. Its use is also possible, but with greater caution;
- A stationery cutter with special blades that do not scratch car windows. It will be needed to trim excess film along the contour;
- Sprayer for spraying soap solution;
- If you are going to tint curved glass, for example, the back one, you cannot do without a hair dryer. It is useful for uniformly applying tint to curves.
- And finally, you need to stock up on a few soft rags or rags.
Set of tools and materials
Before starting work, prepare the following tools and accessories:
- high-quality film for window tinting;
- sharp knife with replaceable blades (stationery);
- plastic or rubber scraper;
- marker with a thin tip;
- household sprayer;
- soap solution (can be from baby shampoo);
- construction hair dryer with the ability to adjust the air temperature;
- set of accessories for glass removal.
Before buying a tint film, it would be a good idea to study reviews from experienced users about a particular manufacturer. We should also not forget about the restrictions that are established by the PDR. Under no circumstances buy cheap Chinese film - with such material, even a professional cannot guarantee quality. Usually, self-respecting car stores will not sell you either cheap film or one that is prohibited by current legislation.
It is highly undesirable to use the forcing and knives that come with the film. Even the highest quality materials usually include a tool that is enough to tint only one glass, and the rest will be defective.
Professionals use only separately sold high quality tools. You can learn more about it on the relevant resources or in specialized online stores.
Choosing a film
Choosing a film for tinting your own windows is not so easy. The market is literally flooded with such products that come to us both from China and from European countries.
In short, do not look towards Chinese manufacturers who offer inexpensive “All in one” kits.
Pay attention only to rolled products from reputable manufacturers.
A good store won’t recommend a bad product; it’s enough just to say that you want to buy a high-quality film for window tinting, hinting that the price is not important to you and everything will be fine.
To delve deeper into the topic, we recommend reading the article about choosing a tint film.
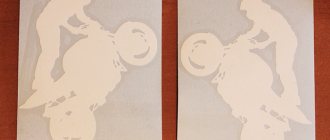
Pattern of film for side windows
Before starting the pattern, you need to decide where the protective layer of the tint film is; usually it is covered with a special liner.
For the pattern, you can use a special template, for example, for the Lada Priora for the front side windows it looks like this.
You can cut a template out of cardboard, watch the video to see how this is done.
But as a rule, such templates are used by masters in car services, so we will take a different route.
Cut the film onto the glass, with the adhesive layer facing outward. Try to cut parallel to the roll, making sure that the cut layer is 3-4 cm larger than the glass itself.
The bottom side of the tinted film should be located parallel to the outer lower window seal and overlap it by approximately 1 - 2 cm.
Pattern for the front right glass
Using a knife and a special clamp, carefully cut off the excess part of the film along the right edge of the glass, not the entire edge, but only its vertical part, which is located near the mirror.
Then we move the tint film 1 cm to the right, onto the glass seal, which is located near the mirror.
Next, we make a side cut along the seal on the opposite side.
The next step is to trim the tint film along the top edge of the glass, but to do this, lower it.
We carefully complete the pattern preparation stage using a special clamp and knife.
The roll-up window on the rear door is cut in the same way.
We moisten the glass from the outside, and place the cut piece of tint film with the inside facing toward you.
As in the first case with shifting the film, use a knife to make side vertical slits. Later, lowering the glass, we finally adjust the pattern as in the first case.
Always make sure that the blade of your knife is not dull, otherwise the film will tear.
The pattern for windows that do not roll down is cut out so that the film is 5 mm larger on all sides. As in the first two cases, it is impossible to do without shifting the tint film.
Try to remove excess pieces of tint film immediately after making the cut. Use the knife carefully to avoid damaging car parts.
If there is a non-transparent line of paint on a stationary part of the glass, then cut the tint film so that it extends to this non-transparent area.
Pattern of film for the rear window
The outer surface of the glass and the tint film must be completely dry and clean. Then write the letter “H” on the rear window with a wet sponge.
The film should be positioned with the adhesive side outward and rolled out along the roll. The pattern, as in previous cases, should be larger than the transparent part of the glass itself.
Place the resulting pattern on the outer part of the rear window, so that there are no folds on it, neither horizontal nor vertical. If this is not possible, try to have only vertical folds, they are easier to work with.
Since the car's rear window is a spherical surface, smooth out the tint film in an "H" shape.
Wrinkles should be removed using a hair dryer, but be careful not to overheat the film. Only vertical folds need to be heated. This operation will require special care and skill.
After removing all possible wrinkles, wet the surface of the glass and film with soapy water and carefully smooth the resulting pattern. The pattern should be the same as the shape of the glass without horizontal and vertical folds.
It is necessary to smooth the pattern from the center in different directions. This procedure must be carried out carefully using a combination squeegee.
Make sure that the film does not wrinkle, but is carefully smoothed over the surface of the glass. Use a soap solution during this operation.
Next, we carry out precise trimming of the film. You can use a special spotlight for this.
The cut line should align with the dark area of the glass by a few millimeters. We do the same as with the right side windows with the left ones, only in mirror image.
Applying film to side windows in preparation for tinting:
- We wet the inner surface of the side glass with the prepared soap solution and clean the lower part of it from dirt with a scraper.
- We lower the glass a few centimeters and thoroughly wash the rest of it. Be sure to ensure that there are no areas that have not been cleaned.
- Wipe the edges of the glass with a napkin.
How to properly glue film to the back
According to the principle of operation, the rear window adhesive does not differ from the curved side window. But the larger size and inaccessibility significantly complicate the process (if the station wagon is, of course, lighter).
- Let's briefly remember the procedure. You can’t go anywhere without a “magic” solution. Therefore, we start by spraying it onto clean glass.
The technology is similar to pasting front windows.
We apply a roll of film to the glass and cut it with a margin of 2-3 cm. Then we even out the tint exactly on the window and cut off the excess. Smooth out from the center and remove wrinkles using a hairdryer and pressing.
Convex rear windows require heating with a hairdryer - We achieve a perfectly clean inner surface of the glass and moisten it generously with soapy water.
Cleanliness is an important component of success - Let's move on to the last step. It is highly recommended to find a partner at this stage. It’s difficult to handle a large piece of film alone. Remember to constantly spray soapy liquid on the adhesive part and on the glass. All that remains is to get rid of air or water bubbles. The film should also adhere evenly.
Roll it onto the glass
Wet the film
Getting rid of excess solutionTo better visualize the process, watch the video.
How to make a film sticker on the rear windows of a car yourself: video guide
Work progress
Before applying the film, we once again make sure that it is clean. Wet the glass from the inside with soapy water. Next, remove 2/3 of the protective liner from the prepared pattern and also moisten the adhesive base with soapy water. We immediately cut off the excess liner.
Be sure to wet your fingers with soapy water and wash them well beforehand.
We take the pattern and place it on the already prepared outer side of the glass surface, while trying to ensure that its adhesive layer does not touch other parts of the car. Align the pattern with the top edge of the glass.
After making sure that there are no gaps or gaps anywhere, carefully begin to squeeze the solution out from under the tint film. Hold the pattern with your hand, as it may slip at the very beginning.
Gradually, slowly squeeze out the water from the center to the edges of the glass. Use a rubber squeegee or a combination squeegee first.
Then, take a hard distiller and continue to remove the soapy liquid in the same directions as the rubber one, from the middle to the edges.
After this, fix the tint film at the upper border of the glass using a forcing tool and a hair dryer. To do this, heat an area 2 cm below the upper border of the glass with a hairdryer while stroking it.
Using a knife, remove the remaining film protruding above the edge of the glass. Next, lift the glass and generously moisten its lower part with soapy water.
We remove the liner, while making sure that the adhesive base of the pattern does not touch anything except the glass itself.
Using forcing, carefully tuck the tint film under the seal, making sure that it does not break. This operation will require attentiveness and a certain skill.
We expel the solution from under the tint film, using a hard scraper. We do this in successive movements from top to bottom, from the middle to the edges.
We achieve complete removal of residual moisture using a moisture-absorbing cloth and a hair dryer.
Tinting the windows in the rear and other parts of the car occurs in the same sequence, but let’s take a closer look.
Applying film for tinting on car side windows
Wet the surface of the side glass and use a scraper to clean its lower part. Then lower the glass a few centimeters, wet it and also clean the rest of the surface using a scraper.
Clean the surface with the blade consistently and make sure that there are no uncleaned areas.
Next, wash the glass with a hard sponge and wipe dry using a rubber pad. Wipe the edges of the glass with a napkin. Moisten and wipe the glass again with a rubber pad.
- Before applying the tinting film, wet the glass generously.
- Then it is necessary to remove two-thirds of the liner protecting the adhesive layer from the workpiece and moisten the adhesive surface. It is convenient to carry out this operation on the rear window of the car by placing the pattern with the adhesive layer facing outwards.
- It is better to cut off the excess liner removed from the workpiece before applying the tint film.
Wet your fingers. Your fingertips must be clean, since in the process of tinting the glass you will need to touch the adhesive layer of the film.
Carefully take the workpiece and place it on the prepared glass surface.
Try to ensure that the adhesive layer only touches the surface of the glass and does not touch the seals or other surfaces.
Align the tint film along the top edge. Make sure that there are no gaps or gaps anywhere, and begin to carefully squeeze the solution out from under it.
Follow a few simple rules:
- Hold the pattern with your hand, since when you initially squeeze out the liquid, the workpiece will slide along the glass.
- Squeeze water from the center to the edges.
- Use rubber and then hard forcing. Using hard distillation, expel the liquid in the same directions - from the middle to the edges.
- Then, using a forcing tool and a hair dryer, fix the film at the top edge of the glass.
- After this, use a knife to remove the excess tinting film protruding onto the upper edge of the glass - this technology allows you to avoid leaving gaps along the upper edge.
Raise the glass. Bend down the bottom part of the pattern protected by the liner and generously moisten the glass with the solution. Remove the liner completely.
Do this extremely carefully and make sure that the film without a liner does not touch anything other than the glass with its adhesive layer!
Carefully tuck the tint film under the glass seal. Squeeze out the horizontal inner seal using a force and, when inserting the film for tinting, make sure that it does not break - this operation also requires certain skills, so be especially careful (pay attention to how the master will carry out this operation in the video tutorial below) .
- Squeeze the solution out from under the film using hard forcing: squeeze out the water in successive movements from top to bottom and from the middle to the edges.
- Finally remove any remaining moisture using a distiller wrapped in a napkin and a hairdryer.
- Make sure that no water bubbles remain under the film during the tinting process.
The technology for cleaning and sticking small fixed glasses will be identical.
Car rear window tinting
As a rule, in many cars, the rear window has heating filaments, so you need to clean it carefully. To do this, you can use blades made of soft materials, rubber, plastic, etc. It is better to do such work together.
Next we do this:
- Ideally wash the surface of the rear window;
- We completely cover the rear shelf so that the soap solution does not get on it;
- Wet the rear window heavily with soapy water;
- Take the pattern and partially detach the liner from the top side;
- Immediately wet the adhesive base with the solution;
- Place the top edge of the pattern against the top edge of the glass, making sure there are no gaps;
- Do not allow the film to curl or bend; for this, a partner must be nearby;
- Using soft and hard forcing, squeeze out the soap-and-water solution from under the film with downward movements, from the center to the sides;
- Having reached the middle of the glass, finally remove the liner and moisten the surface of the window and the adhesive base again with the solution;
- Continue squeezing out the soapy liquid;
- Next, you need to press the tint film to the edges of the glass. To do this, heat the edge of the glass from the outside with a hairdryer, and press the film inside using a hard force;
- IMPORTANT: do not overheat the glass.
Applying film for tinting on the rear window of a car
The process of cleaning the rear window of a car is slightly different as it has heating filaments and extreme care must be taken not to damage them. It is also recommended to use a plastic spatula instead of a scraper.
- After cleaning, the glass should be washed with a hard sponge, wiped dry using a hard scrub and wiped with a napkin around the perimeter.
- Before applying the film for tinting, moisten the glass generously with the solution, while covering the rear shelf with a rag or some other available material so as not to flood the car’s electrical equipment with water.
To apply the tint film to the rear window, it is better to use an assistant.
- When removing the liner, immediately wet the exposed adhesive layer with a soap and water solution.
- Carefully, without touching the adhesive layer to foreign objects, place the workpiece on the glass - this is a very important operation and requires a certain skill.
- Make sure that the film does not curl, wrinkle or bend.
The adhesive layer of the pattern should only touch the treated surface of the glass and, in no case, any parts of the car’s interior or the installer’s clothing.
Align the pattern with the glass so that there are no gaps, and begin to smooth it using a rubber pressing tool.
When tinting the rear window, smooth the film from the center to the edges so that no air or water bubbles remain under it. Use a plastic spatula in hard-to-reach places.
- Next, moisten the tint film and squeeze out the remaining solution from under it using hard forcing.
- Squeeze along the heating threads - from the center to the edges.
- Then perform this operation by hard forcing, but already wrapped in a napkin.
The final stage is pressing the tint film around the perimeter by forcing, while simultaneously heating the glass from the outside using a hairdryer.
Be careful not to overheat the glass with a hairdryer - it may burst!
Reflective strip
These works are carried out at will and are not mandatory, as they only partially relate to the topic of tinting car windows.
The same tool is used.
Pay attention to the presence of special blades in the knife that do not scratch car windows.
The procedure is largely identical to those described above:
- The pattern is being prepared. It should be 1.5 times wider and several centimeters longer than the dimensions we need. A pattern is made from tinting film along the roll;
- The upper part of the front glass is wetted with a soap solution;
- The workpiece is applied with the adhesive side out;
- Using pressing tools and a hairdryer, the pattern is leveled and cut at the top along the rubber seals (do not overheat the windshield, it may burst);
- We take a ruler and measure from above the dimensions we need (no more than 12 cm), while making notches with a knife. The more notches, the better (see video at 18 minutes). This is done because the upper side of the film no longer has a rectilinear, but an oval shape, since it has already been cut along the upper side of the glass;
- We tear off the excess film so that its lower side is in the video of the pointed wave;
- Next, using a ruler, we carefully cut off the pointed waves, making the bottom side of the film also oval;
- We wet the glass again, apply the film with the liner facing out and make an accurate adjustment of the film, cutting off its excess parts. To do this, use a good light source from inside the car;
- Wash the inside of the glass thoroughly;
- Next, glass tinting occurs in the same way as in the cases described above.
For more details on the entire work process, watch the video.
How to tint a windshield
There are several options for driving with tinted windows and not violating traffic regulations:
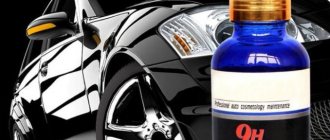
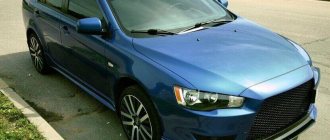
- Athermal film . It is believed that such tinting has sufficient light transmittance and has good heat dissipation properties. Plus, athermal tinting does not impair visibility during heavy precipitation and at night. It has a faint greenish tint and does not reflect.
- Strip at the top of the windshield . Bandwidth is calculated using a special formula. To protect yourself, make the width no more than 14 cm. However, here you need to take into account the design features of a particular car model. The strip must not interfere with the operation of the windshield wiper and provide a sufficient viewing angle for the driver.
- Electronic window tinting . This is the most expensive type of tinting. At the same time, the most effective and safe in terms of punishment. You can turn tint on or off at any time.
Removable tinting on the windshield with regular film is not legal and will not save you from punishment.
In any case, you will have to pay a fine. Its only advantage is the ability to avoid confiscation of license plates.