A knock on the stabilizer bar is a harbinger of the fact that this suspension part will soon need to be replaced, and, consequently, additional expenditure of money. However, few people know and are trying to restore the racks.
Restoring the struts is only possible with a prompt response from the car owner! If there is a knock, quickly remove them and revive them. This reaction will allow the stabilizer struts to serve for at least 100 thousand km. If you drive one or two thousand kilometers, they will have to be changed without any options. But if you “tamper” the rack in time, then it can easily cover another 50 thousand kilometers, about the same as a new one.
Purpose and reasons for wear of racks
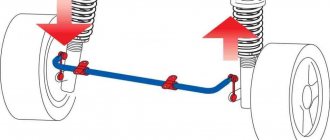
Such an element in itself is very important, as it performs a special function - it connects the body and suspension. It is this section of the mechanism that is very vulnerable when driving, so the spare part wears out and constantly needs to be replaced. Many believe that all this does not matter and the manufacturer invented it only to extract money. In fact, you can drive freely even with violations, but then the motorist risks a lot, because he may experience the following changes:
- The car doesn't listen as well to the steering wheel;
- other parts gradually fail;
- the car starts to make noise;
- bounces on rough roads.
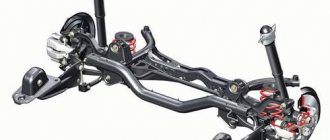
Suspension
As you can see, struts can cause all sorts of troubles if not given enough attention. An analogy can be drawn with a tooth that hurts more and more every day; ultimately, the person suffers from acute pain and the problem gradually spreads to neighboring teeth. If you do not change it regularly, but at will, the car will pull to the side when driving freely, it will constantly sway. This is often done negligently, which increases the risk of accidents.
Car suspension assembly
Do not forget that this element is directly related to the body and suspension. Therefore, if spare parts are unable to confidently perform their functions, they cease to stabilize the movement. However, in this way a person tries to cope with driving, thereby using the car more intensively than during normal driving.
Body and suspension
When under heavy workload, they often feel less comfortable and work at a higher intensity. If a person completely ignores potholes and other uneven surfaces, while racing at high speed or doing extreme driving, the element takes all this hard and therefore wears out quickly. As a result of all this, the car constantly rattles, especially when all these actions are repeated. The sound of the stabilizer bar can always only be rattling, which gives the driver a signal of a malfunction.
Faulty stabilizer link
It is worth noting that when a part wears out, a machine always becomes less maneuverable and more uncontrollable. Also, it does not drive as smoothly and the movement is not as stable. If the body bounces on any uneven surfaces, then the struts are no longer doing their job as effectively.
Convenient option for yourself
Important: You don’t have to buy the part all the time. In Russia, disassembling the stabilizer bar is practiced, which allows you to make the most durable and convenient option for both the front and rear of the car.
Methods for checking part wear
A car fan is always faced with a choice - buy parts, use them and buy them again, or make the most durable option for yourself and use it for a long time. Russian stabilizer struts are a very dubious concept, since the part is in any case imported by the manufacturer and sold on the market. In fact, making front stabilizer struts with your own hands is easy and simple; this requires only basic knowledge in auto mechanics.
DIY stabilizer struts
Once the driver already knows for what reasons a part can wear out quickly, it’s time to move on to the reasons. This information will be useful to all those who want to avoid bringing their car into a state of disrepair and at the same time save on a trip to the service station. Also, if a car enthusiast wants to learn how to make such parts himself, he first needs to learn methods for checking its functionality.
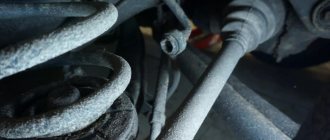
Worn rack
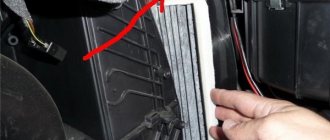
The wheel well can show the driver the level of strut wear. To do this, you will need to pull the rack while simultaneously turning the wheels left and right. If a part gives in or makes a sound, repair is definitely needed. You can easily determine by the sound how badly the part is damaged, but if it begins to twitch and give in, the outcome is clear.
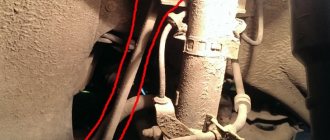
Determining stabilizer link wear
If you plan to check the car with a friend and it is possible to do this through a pit, this will make it even easier to accomplish your plan. A comrade goes down under the car and holds on to the hinge, the driver, in turn, swings the car horizontally. If vibration is felt, repair is needed. There are other testing methods, but they usually show dubious results.
Inspection of the rack through the pit
Repair work
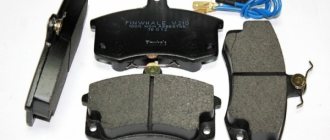
Ball elements
Restoring them, as already mentioned, is not easy. Typically, the restoration process involves replenishing the amount of lubricant in the boot. The following actions are envisaged:
- Removing the support. The stages depend on the specific make and model of the machine, as well as its technical features.
- Determination of wear. You need to move your finger and determine how easily its rotation is ensured. If there is a crunch, repair is impossible.
- Restoring the flare of the ring that secures the boot. To do this, take a tube and place it in a vertical position.
- With your finger down, the support is inserted into the tube. Next, the retaining ring is removed using pliers.
- Use a screwdriver to lift the boot, which is then folded up and filled with lithol using a brush.
- The boot that covers the hinge must be sealed using a thin wire wrapped around the boot.
- The retaining ring is placed in its original place, and the functionality of the hinge is checked. Movement and movement of the finger should be difficult.
Remaking the stabilizer struts
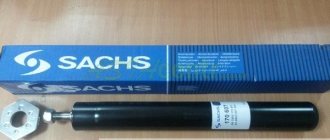
Important: For self-assembly of the finished part, you will need to first purchase on the automotive market such spare parts as: M10*70 bolts, M10 self-clamping nuts, M12*25 bolts, M12 nuts, one corner, a set of stabilizer struts, metal bushings 10*17*50 and drill. Assembly can be easily completed in three hours.
Bolts
M10 self-clamping nuts Metal bushings
The motorist has a choice between two options:
- purchase a finished part;
- do it yourself.
In the first case, you won’t have to waste time on self-assembly, since the finished kit can be freely installed and driven. The disadvantage of this option is that the manufacturer of this very element is interested in ensuring that it wears out as quickly as possible, so it works on the principle of batteries - it will work and stop.
Finished part
In the second case, you will need to take a little interest in the very structure of the final product, talk with colleagues and try to assemble everything with your own hands. Beginners often fail to unscrew the stabilizer bar, but this is only the slightest difficulty that you need to learn to overcome. As practice shows, you still have to buy a preliminary kit, but adding your skill and ingenuity to all this, the part will last many times longer.
Fabricated stabilizer link
Auto mechanics is an inexhaustible science and the most valuable knowledge appears in practice. If after reading you have any comments or want to complement your thoughts, write about it in the comments!