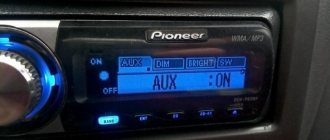
Car multimedia system (car radio)
is a universal radio-electronic digital device designed for listening to radio broadcasts, music, video surveillance, navigation and communication.
In modern cars, audio preparation is carried out during assembly - an antenna and speakers are installed in the doors, electrical wiring is laid, and there is a compartment in the beard with a connector for connecting the radio. To install the radio, if the connector standards meet, you just need to dock them and insert the radio into the compartment.
Car sound system
Rarely does a driver go without music in the cabin. Depending on the owner’s preferences, the system can be simple or sophisticated. Advanced acoustic systems are a separate topic, worthy of a multi-letter story with a continuation. The degree of sophistication of the acoustics is limited only by the wallet of the car music lover and his personal understanding of cool. In this article we will talk about what it is and how to install the simplest music in the interior of a VAZ.
Any acoustic system, including a car one, consists of a head acoustic unit (HA) and speakers. In the simplest case, these functions are performed by a radio tape recorder and a pair of loudspeakers. A modern default radio tape recorder combines a music player from digital media - disks or flash drives - and a radio receiver. It also has a built-in amplifier.
The standard location of the radio, as provided by the manufacturer, is in the panel above the interior heater fan switch. Before the first use, the hole intended for installation is closed with a plastic plug.
Features of connecting a car radio
The standard connection diagram is generally the same for all cars and radio models. But there are a number of nuances that need to be taken into account.
- The electrical wiring of domestic cars is designed to connect a device with a mechanical search for radio stations, this may cause some difficulties if you are planning to connect a modern model;
- In most VAZ models, a branch of the wiring for connecting the power supply comes from the ignition switch: when you turn the key, a short-term power failure occurs, which leads to a reset, if the model does not provide an uninterruptible power supply system;
- Before starting installation, the user needs to decide whether he is happy with the fact that he can only listen to music when the engine is on, or whether he wants to be able to use the radio while parked.
Connecting the radio
The connection work can be divided into three stages:
- installation of the device case;
- electrical connection;
- installation and connection of speakers.
Most likely, you will also need to connect an antenna.
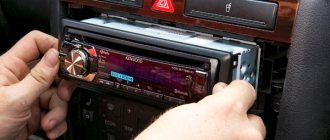
In order to install the radio casing, you first need to mount a metal frame. The frame is fixed in the socket using numerous tabs that need to be bent around the entire perimeter. The cassette player snaps into the frame. To remove it, special keys are installed.
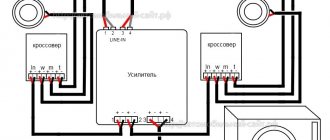
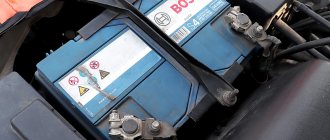
Before starting electrical connection work, you need to make sure that the battery is disconnected. When assembling an electrical circuit, the most important thing is not to mix up the wires and connect according to the markings. You can see the connection diagram in the photo. It is clear that it is not the royal business to read instructions. But, nevertheless, before you start installing the PG, carefully read the manufacturer’s recommendations on the top of the case or in the passport.
Typically, electrical wires are marked as follows:
- wire marked “+12V”, yellow – power supply, “plus”, comes from the battery;
A constant power supply to the radio is connected through this wire, thanks to which the settings memory is saved.
- wire marked “GND”, black – “minus”, connects to the car body;
- marked “ACC”, the red wire is also responsible for the power supply, but goes through the ignition switch.
If you connect the device in this way, you can listen to music only when the engine is on. This scheme was developed by manufacturers to save battery charge. The easiest way to achieve the ability to use the radio regardless of the running engine is to connect directly.
If you twist the yellow and red wires together and connect the radio directly to the battery, then if parked for a long time, the radio can completely discharge the old battery.
Inserting a button into the wire
A more correct way is to insert an on-off button into the wire, which allows you to turn off the power manually.
- “ANT”, the wire is usually white - serves to control the antenna built into the radio, can be used to connect an external antenna;
- wires marked “FL” and “FR” are used to connect the right and left front speakers;
- wires “RL” and “RR” respectively serve to connect the right and left rear speakers;
Modern machines are usually equipped with an ISO international standard connector. In older cars, it is worth installing an adapter on the ISO connector, then when changing the radio model, you will only need to switch the connector.
Having completed the electrical connections, you can proceed to installing the speakers and external antenna. If the machine is designed for only one pair of loudspeakers and there are no plans to install a second pair, then the wires can be twisted together in pairs, left and right.
Conclusion
If you are planning a standard acoustic design - two front and two rear speakers, then the best place for the front pair is the front doors. The rear ones are installed on a shelf, for which it is better to make a special podium. The wires for the front pair are stretched under the panel, and for the rear ones - near the handbrake, under the seat. The wiring must be laid so that during operation the cables are not accidentally touched or pinched.
The external antenna is usually placed on the windshield. The black wire of the antenna is connected to ground, the other wire is connected to the corresponding output on the radio.
These brief recommendations will allow you to connect a radio in a VAZ car. You can watch the assembly process in more detail in the video.
Structural and color scheme for connecting a car radio in a car
Before the initial installation or replacement of an obsolete car radio with your own hands, you need to study the principle of its operation and the connection diagram to the car's electrical wiring.
Radios of any manufacturer and standard size are connected according to the same electrical circuit, only it happens that the connecting connector in the car differs in design from the connector on the radio.
The color scheme of the wires in this block diagram corresponds to the European ISO standard. Please note that car manufacturers, especially in Asian countries, often use their own color coding for wires.
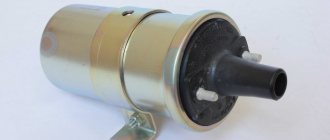
How is power supplied to the car radio?
For the car radio to operate, it must be supplied with a 12 V DC supply voltage from the battery. Usually it is supplied through three wires; in the diagram these are wires insulated in black (minus ground), yellow and red (+) colors.
The radio is connected with a yellow wire directly to the battery terminal through a fuse. This is necessary so that when the key is removed from the ignition switch, the set settings are saved in the radio; in this case, it is impossible to turn on the car radio. In standby mode, the current consumption of the radio is only a few milliamps, which is comparable to the self-discharge current of the battery and practically does not lead to its discharge.
The main supply voltage is supplied through the ignition switch via a red wire. If the ignition key is turned to the ACC position, even when the engine is not running, the car radio can be turned on.
The red wire can be connected to the yellow wire, and then the radio will work regardless of the ignition switch. But such a connection reduces operational safety and the battery will constantly discharge, especially if you forget to turn off the radio. Therefore, connecting the radio in this way is not recommended.
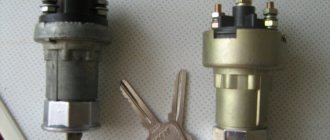
Antenna connection color scheme
A car antenna is a metal tube or rod of a given length. This antenna is connected using a coaxial cable using a connector directly to the antenna socket of the radio
The photo on the left shows the connector coming from the antenna, and on the right is the mating part of the socket, usually located on the back wall of the car radio.
To be able to receive radio transmissions at a greater distance from the radio signal source, active antennas are sometimes used, in which a high-frequency amplifier is additionally installed in the immediate vicinity of the antenna itself. For its operation, a supply voltage of 12 V is required, which is supplied via a blue wire with a white stripe.
In some car models, the antenna is hidden in the shaft and moves outward using an electric motor and mechanical gearbox only when the radio is turned on. The engine operates when a 12 V supply voltage is supplied through the blue wire.
Color scheme for connecting and checking car speakers
The vehicle's sound system, as shown in the color wiring diagram below, typically consists of four full-range speakers, one installed in each of the side doors.
Speakers have polarity and must be connected correctly. The speaker is not a battery, so if the polarity of the connection is reversed, this will not lead to irreparable consequences. The phasing will only be disrupted, as a result of which the speakers will work in antiphase and the sound waves emitted by one speaker will be absorbed by the opposite one. The sound volume will be low, even with high power input, not to mention the quality.
Usually there is a polarity marking next to the terminals on the speaker. On the loudspeaker shown in the photo, in addition to the markings, in addition, the terminals have different widths, the positive terminal is wider.
| Color coding for connecting car speaker wires according to the ISO standard | ||
| Installation location | Positive wire color | Negative wire color |
| Left front | white | white with black stripe |
| Right front | grey | gray with black stripe |
| Left rear | green | green with black stripe |
| Right rear | violet | purple with black stripe |
ISO speakers are connected to the car radio using two wires of the same color. The wire connected to the positive terminal is painted a solid color, and the insulation of the wire going to the negative terminal has a black stripe along its entire length.
Checking the correct phasing of car speakers by ear
Checking the phasing of the speakers may be necessary if the audio preparation was carried out independently, when replacing the radio connector with a connector of a different standard, or after replacing a failed speaker.
If the radio is installed in the car and is working, then you can check the correct phasing of the speakers without instruments, by ear. Any car radio has a function for adjusting the balance - adjusting the volume level of the right and left speakers. The driver of the car sits on the left, and is closer to the left speakers. In order for the sound from both sides to be perceived at the same volume, you can use balancing to increase the sound volume of the right speakers.
This function allows you not only to balance the sound, but also to check the correct phasing of the speakers. If you use balance to increase the volume of the left or right speakers, the overall playback volume, especially at low frequencies, should decrease. If it does not decrease, but increases, then the polarity of connecting one of the speakers is not correct.
If the polarity of the connection of one of the speakers is incorrect, then it is enough to swap the wires in the pair going to it. To determine an incorrectly connected speaker, you will have to sequentially swap the wires in a pair of each speaker and check the phasing using the method described above.
Installation and testing of car speakers with an ohmmeter
A car loudspeaker (speaker) is a conical diffuser fixed in a housing (basket) using a suspension and a centering washer with a coil of copper wire placed in the gap of a permanent magnet.
The photo shows a cross-section of a classic low-frequency electromagnetic loudspeaker. When electric current is applied to the coil, an electromagnetic field appears around the turns, which, interacting with the field of a permanent magnet, pulls in or pushes out the diffuser. The result is a sound wave, which we hear in the form of speech or music.
This photo shows a mid-tweeter consisting of three drivers. One of them, on the right in the photo, is a piezoelectric emitter, therefore it has a high resistance and cannot be read with an ohmmeter.
Mid- and high-frequency speakers are often connected through filters, which are a capacitor. Therefore, you need to check such a speaker by connecting the ohmmeter probes directly to its terminals.
The active resistance of electrodynamic speakers is in the range of 1-16 Ohms, so you can check the integrity of the coil by ringing it with a multimeter turned on in resistance measurement mode.
The multimeter showed a resistance of 5.1 ohms, therefore the speaker coil is working. But it happens that coils of wires from the supply of high power fly off the coil or begin to cling to the core. This can be easily checked by pressing the diffuser evenly and very lightly with your fingers. It should retract easily and silently and return to its original position without making any extraneous sounds.
If the speaker registers with an ohmmeter and does not make a rustling sound when you press the diffuser, then it is working.
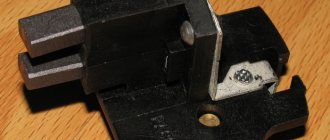
Checking and determining speaker polarity using a battery
If you don’t have a multimeter, you can check the speaker and at the same time determine the polarity of its terminals (if there is no marking) using any battery or accumulator. It is enough to connect the battery terminals to the speaker terminals for a second.
If the polarity of the battery connection matches, when the “+” is connected to the positive terminal of the speaker, its diffuser will rise upward, as shown in the photo.
Otherwise, the diffuser will be pulled into the speaker basket. When the battery is connected, the speaker will make a characteristic rustling sound.
Any battery or accumulator with a voltage of no more than 4.5 V is suitable for testing, even a dead one. With a higher voltage and a large battery capacity, you can burn the speaker coil. A Krona battery, although the voltage at its terminals is 9 V, can be used because it has a low capacity. If you don’t have a battery at hand, then any DC mains source, for example, a mobile phone charger, will do.
About choosing an speaker cable for speakers
When doing your own audio preparation, when installing a radio or replacing an obsolete radio with a more powerful amplifier, you need to select or check the cross-section of the wires going to the speakers. The procedure for selecting speaker cable differs from the selection rules for electrical wiring. There is a special article on the website dedicated to choosing an acoustic cable.
How to install a radio in a Zhiguli.
It is no secret that AvtoVAZ in Tolyatti still gives the future owner of the VAZ 2107 car complete freedom of action, covering the place for installing the radio in the “beard” or the center console with a plug. Connecting the radio yourself is a matter of honor for an amateur. Installation here is safer in terms of theft, since the radio is not conspicuous to anyone and is located low. In addition, it is easier to install the device - no re-arrangement of electrical and internal space is required. The only significant “minus”, even two, is the rather strong heating of the audio system when the heating is on. At high temperatures, the radio does not work for long. There is also the inconvenience of pulling out the audio disc due to the fact that the gear shift lever is in the way. But since disks are already becoming a thing of the past, giving way to “flash drives,” this is not a very significant drawback, unlike the first.
Some prefer an unusual place for it: to place it where the VAZ 2107 has upper air ducts. Like this:
Shown here is a homemade installation on a “seat” under the radio instead of elongated and removed air ducts. This homemade configuration has the following advantages: no heating (after all, the air ducts are removed), and ease of control of the device. Disadvantages are: changes in design, strong heating in direct sunlight, and the risk of theft. In addition, if you put it on top, the interior ventilation works worse, and this is an important argument against. Selling such a VAZ 2107 will most likely be more difficult. Therefore, before you connect a radio with such a serious modification, think carefully.
The picture shows the finished converted structure:
Either way, you need a radio. If you are just a fan of listening to “Autoradio”, then you can install “Aiwa”. If you want to get professional car audio, then think about purchasing a full-fledged audio system to connect a serious system, such as Pioneer. But at the same time, remember that you need to start working with proper complete soundproofing of the interior, purchasing a subwoofer, amplifier and other expensive things.
In addition, if your radio does not have a USB input, then know that you are purchasing and intend to install a very cheap and old model.
After this, you need to purchase speakers, at least four: a classic installation contains two front and two rear, with a power of about 200 Watts. It is not worth purchasing higher power speakers for the VAZ 2107.
The installation requires high-quality wiring, which you will have to buy yourself; in total you will need about 10 meters - 7 for the rear and 3 for the front speakers. When purchasing, it is better to take a wire with 4 cores so that the speakers can be connected “from one wire.”
By the way, the standard color of the wires on the power supply is as follows:
- Red color is always “+” in the on-board power supply, which operates at a voltage of 12 V, with the engine running or the ignition on;
- Black wire – “minus”, ground of the on-board circuit.
- Blue – antenna power;
- Yellow – constant voltage from the battery.
- Orange – connection of the console backlight.
When installing the radio in its original location, be sure to read the instructions. It should have a diagram of how to connect the speakers, indicating the “plus” and “minus”. Remember that the “minus” is the mass, that is, the car body, and in this capacity you can consider a well-cleaned bolt in contact with the body. It works as a contact.
Of course, before you begin, you need to remove the negative terminal from the battery.
Then we connect the speakers: we hide the wiring harnesses in the cabin and route them to the speakers.
Shown above is the wiring of four-wire wires to the acoustic shelf for the rear speakers.
Radio VAZ classic
Hiding the radio in the glove compartment of a VAZ 2101: preparation and purchase
It's time to tidy up the salon. I have long outlined a program to get rid of music. Or rather, not from the music, but from its detrimental effect on the original appearance of the interior. The main goal is to hide it out of sight; I don’t want to completely give up audio. Those who follow the BZ should remember that I have already redone the rear parcel shelf - the speakers are not visible. The next step is moving the head unit to the glove compartment (say “NO” to the 2107 beard!). To do this, I bought 4 mounting angles, which should directly secure the radio to the glove compartment tray.
Since the antenna cord would not reach the right place, I bought an extension cord. It is as much as 4 meters, I couldn’t find anything less. Let's go, no problem.
Well, for a long time I was haunted by the old JVC KD G-227 mafon. He does his job, no questions asked. But the obsession was to replace it with a new device, more functional. It will be the JVC KD-R531, I bought it today.
A miniature car flash drive for 8 hectares, purchased long ago, has been waiting in the wings for a long time.
I'll do the installation next weekend.
Hiding the radio in the glove compartment of a VAZ 2101: installation
We continue to get rid of the “07” beard and drag the radio into the glove compartment. First of all, I removed the old radio and pulled out the beard itself. She will be ritually burned.
Let's goodbye!
Then he took hold of the glove compartment. For some reason I used to think that its bottom was metal. It turned out to be plastic. It is very easy to remove - it is held on by several self-tapping screws (one was missing for some reason). For convenience, I also removed a small side wall.
What was disappointing was the insulation sticking out from above. I remember how my dad pulled it out so that the inspector could check the license plates during the re-registration of the car. We will fight this later, today there was a different goal.
We take out a fresh JVC KD-R531 from the box and see that its body has a bunch of mounting holes with threads of different diameters. Just what we need. We attach pre-purchased corners to the body on the sides and back. It turned out like this:
Actually, now you can screw it all to the bottom of the glove compartment. I advise you to take a small indent from the left edge, because... It will be easier to put the side wall back.
The next step is to extend the wiring harness. There's nothing complicated here. The main thing is to have the necessary supplies. I found a couple of 10-meter rolls of mounting wire of a suitable cross-section in my stash. We insulate everything thoroughly, install the antenna extension cord and enjoy the sound of the new radio, as well as its move to a new permanent place of residence.
Now the interior has been transformed, and another step has been taken towards the original appearance. Foreign plastic is not an eyesore. If anyone has any questions about the procedure, please write - I’m always happy to help. Although, there is nothing complicated here anyway. A Soviet receiver is now asking to be installed in the salon in the standard socket. If anyone has it, you can get it with arms and legs for a reasonable price. Not necessarily a worker, just for props.
Finally, I made a video of how it all looks and plays:
Pioneer DEH-3910MP car radio repair: solving the problem with VAZ 2107 disc ejection
Surely many people are familiar with this problem with car radios with, let’s say, disc output. Those. When you press “Ejekt” the disc comes out partially or not at all. And you have to press the removed disk with something, for example, another disk. My car radio is no exception. It’s clear that you can just go out and buy a better radio, with a USB port, a “blue tooth” and other bells and whistles. Personally, I somehow didn’t really want to change a completely working radio because of such a small thing, again, what to do with it later. And any “hardware” is closer to me than car audio. Get to the point. I bring to your attention a short report on how to fix the described problem using the example of a Pioneer DEH-3910MP car radio (or rather, a CD receiver). I even took everything apart again especially for this purpose. We remove the radio and take it home. It is better to remove the disk before doing this.
Remove the top cover and unscrew the screws.
To disconnect the cable you just need to press out the two latches (or whatever they are called).
Unscrew the screws and remove the springs. It's better not to lose springs.
Next you need to remove this bar (marked with an arrow):
To do this, you need to move this bar in the places marked with arrows...
...and remove the two springs on the sides of the housing.
This is the view of the drive roller that opens to our eyes. That's what interests us.
We remove the roller. To do this, you need to remove the gear or lock on the opposite side of the roller.
Then we remove (carefully pull together) the rubber tubes and wrap a thin layer of thin tape or a thin strip of electrical tape onto the shaft axis, as in my example. I will say right away that the blue electrical tape was too thick.
The electrical tape was installed a long time ago, I took it apart for clarity.
Then we put everything back together in reverse order and rejoice at the result. I almost forgot: the described procedure makes sense only if the remaining drive parts (gears, shafts) are intact.
Connecting a radio to a VAZ 2107
I decided to tell you in detail how I connected the radio. All radios have three power wires, two plus and minus, the option when two pluses are connected in parallel is not always good, since there are options with excessive discharge when turned off, but if you connect the red one to the ignition and the yellow one to the battery as it should You cannot listen to the radio without the ignition on; this scheme combines both methods together, eliminating all the disadvantages:
How to connect a VAZ 2110 car radio with your own hands
Installing a radio in a VAZ
Today you can find almost any speaker head unit on the market. Different prices, different needs and finally, a car radio is purchased. Almost every one of them today is equipped with a radio receiver and is capable of reading discs of any format. And if the choice of a head unit is not a problem for many, then installing a VAZ or other car radio becomes a real problem. In our article we will look at how car radios are connected. Installation on a VAZ 2107 or another model should be easy and quick if you study everything that is presented below.
Installation
Installing a car radio on a VAZ 2107
We will begin our story with the simplest way to install a car radio. This approach is completely justified, because it is impossible to learn complex installation options right away and you need to start from the simple. Before purchasing expensive equipment, you should decide on the choice of installer. If you intend to carry out such an operation on your own, then you need to know many secrets. On the contrary, an inexpensive device is very easy to connect and there is no need to spend money on the services of a specialist. So, what does a typical speaker system consist of? Of course, the main role here is occupied by the car radio, the installation of which we will do. But don’t forget about the four standard speakers that come included. You will need to connect wires from the head unit to them.
Note. All speaker components are installed only in places designated in advance by the automaker. This is done not only for the sake of simplicity, but also to avoid short circuits.
Starting the installation process
How to connect a car radio to a VAZ 2106
First of all, you should check the wires of the power supply, each of which should have its purpose written on it. The wire can simply be painted a certain color:
- The red color of the wire will indicate a cable implying power supply of plus 12 V when the ignition is on.
- Yellow will mean constant feeding.
- The blue wire is the power going to the antenna.
- The orange wire is for controlling the backlight.
- The black wire is always negative.
Let's consider installing a head unit, which, in addition to playing CDs, is also equipped with a radio receiver:
- We study the block for connecting speakers (see How to choose speakers for a car radio on your own). It consists of 8 plugs. Each speaker has two plugs. It turns out – 4 speakers x 2 = 8.
Note. The speakers can be installed as follows: two in the front doors, two in the rear parcel shelf.
- We study the player's power supply, which consists of 5 plugs.
Note. This does not mean that it should always be this way. There are different power strips, and they can have different numbers of plugs: 5, 8, etc.
How to install a car radio on a VAZ 2107
The connectors for connecting speakers and power are traditional. In other words, they (the plugs) have a specific purpose. In our case, it is assumed that these pads are included with the car radio and there is no need to buy them separately:
- We purchase special connectors, which are very important when connecting a car radio. Such components a priori eliminate the need to use soldering. These components are designed to connect an additional wire to the vehicle wiring. Typically, the connector has two channels: the main wire goes into the through hole, and the additional wire goes into the blind hole.
Note. In the contact part of the connector there are two slots for clamping the conductors through which current flows.
- As for the insertion point into the standard wiring, you can find it using the electrical connector diagram.
- After you have inserted the connector into the car wiring, you need to check the voltage plus 12 V and ground. This is done at the corresponding contacts of the block. We use the simplest probe - a 12 V car light bulb with two connected wires or a special one.
- We connect the wire blocks for the amplifier (which were not or will not be used during installation) with insulating tape.
Note. The wiring harness is a kind of block, it should be made in such a way that the wires for connecting the player are pulled out from there without excessive tension.
- Now you need to thread the wiring harness for the player and antenna through the special slides of the head unit.
- We insert the slide into the socket of the instrument panel console.
Advice. The slide must be installed without any distortion. Thus, the outer flanging of the slide must fit tightly to the edges of the player’s socket.
- Take a suitable screwdriver and bend the mounting brackets of the slide. We make sure that the sled sits securely in the nest and does not wobble.
How to connect a car radio to a VAZ 2101
- While we are not in a hurry to install the car radio, we once again check the voltage and ground on the required contacts of the power supply with a homemade probe.
- We connect the antenna cable to the radio.
- We also connect the remaining wires.
- We insert the radio into the socket of the instrument panel.
Connection diagram for car radio VAZ 2105
Note. To easily remove the radio from the slide, the installation kit contains two pullers. They are installed on both sides in the gaps that remain between the walls of the turntable and the slide. It is enough to simply pull these same pullers to remove the radio.
- We install the car radio panel trim.
- We install the panel itself.
- We check the functionality of the entire system.
Connection diagram for car radio on VAZ 2105
Advice. It is recommended to protect the connection points of the radio wires with insulation. You can use multi-colored ribbon.
At this point, the operation of installing the radio with your own hands can be considered complete. It won't hurt to use other step-by-step instructions. In addition, it is important to look at photos and video materials during the work process. A priori, the price of self-installation will please everyone, because in comparison it will be several times lower than what you will have to pay to specialists.
Installing a radio on a VAZ
Often, VAZ-2101 owners do not have the opportunity to purchase an expensive speaker system, much less install it in a service center.
That’s why they very often buy a budget radio and speaker system and install them on the car themselves. We will not consider the range of models of acoustics and radios, as it is constantly changing. Let's dwell on the technical part of this issue. Let us immediately note that with the correct installation of all elements, even budget car audio can sound acceptable. The VAZ-2101 car is a development of the distant 60s of the last century. Initially, there was no regular place for a radio. Therefore, you need to buy a center console from later models VAZ-2105 or VAZ-2107.
The first one can be installed in the interior of a “penny” car without difficulty and looks great. The power supply for the car radio should be connected directly from the battery. And don't forget to install a fuse. It is better to do this closer to the battery - in this case, if the wire is damaged, the battery will not close. “Minus” can be connected to the cigarette lighter mount so as not to pull the wire too far.
An alternative way to connect a car radio to VAZ cars where there is no “ACC” position in the ignition switch.
This method is also applicable to other cars without ACC mode.
To turn on the car radio, you will need to turn on the ignition for a couple of seconds. Then turn on the radio.
When the car is locked with an alarm, this circuit will turn off the power to the radio.
I recommend connecting the green wire directly to the negative terminal of the alarm release.
If power control of door locks is used (without an additional central locking unit), then the connection is made according to the diagram:
The next stage is the installation of car audio. The only possible place for it in the front of the car is at the bottom of the doors, opposite the cutout in their frame. If you want to install the speakers in a different location, you will need to convert the manual windows to electric ones. You need to make audio podiums for the speakers. To do this, you will need chipboard with a thickness of 25-35 mm. Cutting can be done on a lathe or with a jigsaw. Of course, the first method is more accurate, and therefore preferable. The resulting blanks are coated with drying oil and varnish. As a result, they will be protected from moisture. The last stage is covering the podiums with leather or a substitute and fixing them on the reverse side with shoe nails or a stapler. For a more impressive look, you can place a thin layer of foam rubber under the skin or substitute. The rear speakers are installed similarly on the panel in front of the rear window. Moreover, here you don’t have to make special podiums for speakers. High-frequency acoustics can be placed in several places: under the front panel, on its edges, on the side posts. The best option would be installation under the panel. In this case, they do not limit visibility and do not attract the attention of prying eyes. “Tweeters” are mounted on the sides of the lower part of the panel. Crossovers can also be installed here. Before connecting car speakers, you need to study the wire designations to avoid confusion of the left and right channels, as well as polarity. As a result of the work done correctly, you can get quite decent sound by spending money only on purchasing a car radio and speakers. Naturally, you don’t need to expect perfect quality from such car audio.
After all, the sound insulation of the VAZ-2101 car interior is far from ideal, and road noise will interfere with the sound. Of course, you can make a car soundproofing yourself, but that’s a completely different topic.
How to properly install and connect the radio in a VAZ-2107 (2106) car
The standard sound system in the VAZ-2107 car has long been outdated. In order to enjoy high-quality sound, you should consider installing new equipment. Installation of the VAZ-2107 radio can be carried out with a minimum set of tools.
How to install
When choosing a radio, it is recommended to pay attention to products manufactured under the Pioneer brand. It is characterized by high performance characteristics and can last for a long period. You can install the radio to improve the quality of music as follows:
- In the car, the radio is fixed using a standard ISO connector. This international standard has become widespread.
- When choosing a radio, you should consider its size. If they do not fit, installation will become more difficult. The seat can be changed in the machine.
- There are no problems with updating the radio if the seat has the required dimensions. All cables are fixed into a rectangular block.
- If the contacts do not fit, you can use a special adapter.
It is easy to install the radio correctly, since in most cases it has standard dimensions. For cars, it is recommended to purchase appropriate wires that are well insulated.
How to connect
You can connect the radio to the VAZ-2106 via the ignition switch, but this scheme is considered less attractive, since you won’t be able to listen to the radio with the engine turned off. The standard connection diagram involves the use of standard wiring. Among other features of connecting the VAZ-2107, we note the following points:
- It is forbidden to connect directly to the battery, as this can lead to rapid wear.
- To eliminate the possibility of battery discharge, a power button is embedded in the yellow wire.
- There is no standard fuse in the classic assembly. To install it, you need to change almost the entire electrical circuit. The easiest way is to purchase a power cable that already has a safety element built into it. A 20 A device is required for normal starting.
The service life of the speaker system largely depends on the correctness of the created power system. It is recommended to insulate the wire; the contacts are connected by soldering or using special adapters.
Speakers
In order to connect the radio to the VAZ-2106, you should connect it to the speakers. Among the main recommendations we note the following:
- The speakers are being installed and sealed tightly. Otherwise, vibration may occur.
- Most attention should be paid to correct cable routing. At the point of contact with metal, high-quality insulation should be carried out, since vibration can cause the insulation to rub through.
- The connection procedure involves the use of special adapters. In addition, connections can be made by soldering; all connections are insulated.
A modern radio has appropriate outputs for speakers. The power supply network should have a minimum number of connections, as they may cause increased resistance.
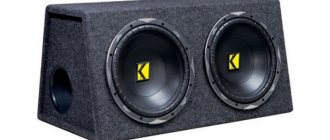
Subwoofer
When improving the sound system of the car in question, a subwoofer is often installed. This element is designed to output low frequency sound. Among the connection features, we note the following:
- A modern device has a corresponding output for connection.
- For a speaker like this, it is recommended to use a larger gauge wire.
It is recommended to lay the cable under the vehicle's skin. The radio tape recorder is connected to the VAZ-2107 using special chips.
Antenna
Before connecting a car radio to the VAZ-2107, you should consider the correct position of the antenna. Various artificial interference can cause signal quality to deteriorate, resulting in extraneous noise. Among the antenna connection features, we note the following:
- There is a corresponding connector for connecting an external device.
- If you do not have the required plug, you can purchase it and solder it to an outdoor antenna.
- A high-quality connection requires insulation using electrical tape or sealant. Too much humidity can cause corrosion, which will degrade the signal quality.
Installing and connecting the speaker system takes a relatively small amount of time. Most attention is paid to laying the cable to the power source, since it uses a battery.
How to connect a radio to a car
Modern hits, classical music and hard rock, metal and simple familiar “pop”, chanson and folk songs. This is not just a list of the most popular modern musical movements. Most of these works can be heard from the windows of millions of cars on the crowded streets of megacities, cozy streets of provincial towns and distant rural roads.
In order to experience this convenience and get a lot of pleasure, you need very little. Just buy and install a radio in your car. When purchasing a car for the first time, car enthusiasts are surprised that many brands are sold without certain accessories.
Most often, there is no radio tape recorder, which must be purchased separately, at your own discretion. Nowadays, various manufacturers offer a huge range of similar audio products.
How to connect the radio?
To choose a radio, it is best to consult with knowledgeable people. These could be consultants at a car dealership or a specialized audio equipment store.
Today it is possible to get advice and purchase the copy you like in online stores. An interesting and very useful video for those who don’t know how to connect a radio to a car.
This raises a problem of a different order. How to connect the purchased new thing? Of course, you can contact the same car dealership where you bought the car or find a specialist in a repair shop.
It's no secret that after such a serious investment as a car, you don't always have extra money. Therefore, in this situation, the skills to install the radio yourself will be very useful.
For this you will need very little, namely:
- A set of special tools that are found in almost every home.
- A few hours of free time.
- Careful study of the proposed instructions and the desire to follow them.
To begin installation and installation, you need to determine whether there is a special niche for musical equipment. Choosing equipment for listening to music. The most widely recommended radios are those offered on the market by the most popular companies. This is Pioneer; Alpine; Kenwood; JVC; Blaupunkt; Nakamichi.
Samples from these manufacturers are representatives of audio systems in a fairly expensive price category. At the same time, the relative high cost is compensated by high levels of sound and operational reliability.
The budget line is represented by Sony, Prology and Mystery. Checking the completeness will allow you to install it correctly. Are there all the connectors for speakers, power connections and slides for attaching the radio in the car?
An example of a radio connection diagram for a VAZ 2107
Having found all the wires and terminals according to the international marking system, all that remains is to accurately and carefully connect them.
Connection options
There are two popular basic options for installing radio tape recorders from any manufacturer. Considering the fact that starting from the most expensive category to all budget offers without exception, all models have a fundamentally similar structure, the connection features are almost the same.
Ideally, when all the indicators correspond, you just need to carefully read the instructions and electrical diagram. It is necessary to determine the compliance of the wiring and speakers with the calculated power.
If certain inconsistencies are detected, and this is most often a mismatch between the car wiring connector and the socket of the mounted radio. Here you need to resort to the second connection option.
It is a complete unified adapter, known as the ISO standard. If, however, this unique tool is missing, this problem can also be solved in several ways:
- The most proven and reliable . Buy an ISO standard adapter at your nearest specialty store.
- The method is less desirable, but popular among professionals , car enthusiasts and even in technical centers. I call it straight, that is, connecting the stripped edges of the corresponding wires by twisting. Strengthening is done by soldering or insulating with cambrics. You can check the connection by testing the wires.
- In this case, a complete replacement of the set of wires is required . Most require dismantling and connection from zero cycle. The length of the connections is calculated individually. This requires a copper stranded cable with silicone insulation.
Installation
Before starting installation, you need to know that all modern radios differ by 1 DIN and 2 DIN.
European manufacturers tend to produce cars with a niche for a single-block car radio. The automotive industry in Korea, America and Japan offers models with two-block niches. In this video, they will show you how to connect a Pioneer radio for a VAZ car.
Radio tape recorders are distinguished by a wide range of multimedia functions. The actual installation procedure occurs in several stages. First of all, you should pay attention to the correspondence of the polar terminals of the battery, radio, and speakers.
The wires for the positive connections must be stranded copper, with a cross-section of 4 mm² or more, fuses are installed here. You need to make sure that there is no twisting, the length is perfectly calculated.
After this, it’s time to clarify the installation diagram of the radio and connect the speakers as accurately as possible in accordance with the phases. Usually the manufacturer labels the terminals.
In most cases, the wide terminal is positive, and the narrow terminal is negative. Connectors A and B, which provide power to the speakers, usually do not differ from each other. “A” on restylings, pins 4 – 5 are connected to the navigator unit to output sounds.
Installation of radio VAZ 2107
Owners of VAZ 2107 begin acoustic tuning of their car by installing or replacing the main components - the head unit (car radio) and low-quality standard speakers. Replacing the head unit (head unit) is also practiced if the VAZ 2107 radio tape recorder stops working, which they refuse to repair as outdated.
Theft of a radio is also a common reason for installing a new PG. For professionals, installation operations are not difficult, but a novice amateur can damage the dashboard by connecting the wires incorrectly. Incorrect installation of the VAZ 2107 radio leads to short circuits and burnout of the receiver's electronic boards.
In this article we will describe how:
- replace front speakers;
- use the sound shelf correctly;
- move the radio to the place of the air ducts or to the glove compartment;
- install a 2DIN car radio;
- Connect the head unit to the speakers and power supply.
We hope that the tips will be useful to you.
Installing the front speakers
First of all, we install the front speakers. Then, when connecting the radio, you will not have to get confused in the wires installed by an illiterate radio technician. Most often, buyers of used cars encounter such cases. Identical black wires with careless twists and minimal insulation need to be ringed and labeled. It is much easier to replace unreliable electrical wiring with cables of the desired cross-section and color.
Speaker wires of different colors are used for the left and right speakers. The color of the wire is selected according to the pinout of the car radio manufacturer. In radio engineering, pinout is the color, letter, and digital designation of outputs and cables. When installing more powerful speakers (100 - 150 watts), take into account their mounting depth, which should not interfere with the movement of the glass. To extend the speaker, spacer rings are used.
To install the speakers, you need to disassemble the front door and remove the window lift mechanisms.
The bottom of the door is usually used to install speakers. Holes for the diffuser are cut in the door panel.
Spacer rings are attached to the door frame, into which the speakers are installed. The wires for connecting the speakers to the head unit are pulled into the technological holes in the door. After assembling the door, additional work can be done.
A grill (decorative and protective grille) is installed on the speaker, the door card is covered with vinyl or leatherette. Without additional door cavity soundproofing, the speakers may sound muffled or resonate. For sound insulation, the outer metal is glued with a vibration-insulating material that dampens metal vibrations (for example, “Bimast”). The internal surfaces of the frame and stiffeners are covered with noise-absorbing “Spleen”.
Expanding the sound system with speakers on the rear sound shelf
The extended connection diagram for the VAZ 2107 radio provides for the installation of front speakers and rear acoustics. The front speakers create frontal sound, the speakers from the passenger compartment are responsible for the lower frequencies and surround sound. At the rear, multi-way speaker systems use woofers or oval full-range speakers.
From an acoustics point of view, the best place to install ovals or compact subwoofers in the 7's cabin is the rear parcel shelf of the car. The standard rear shelf of the VAZ 2107 for mounting equipment is not strong enough. If you simply cut holes in it for speakers, the plastic will vibrate and distort sound waves.
To reconstruct the shelf, additional fasteners (corners) are used along the sides of the body. The shelf is reinforced with an additional frame, soundproofed, and covered with carpet (a special sound-absorbing and decorative material).
The acoustic wires are pulled under the interior flooring along the sides of the car.
Choosing the right connector
The head unit has several connectors. And this is not surprising. It is multifunctional and performs different tasks. Each hole serves a different purpose. Before you begin installing the equipment, it is important to determine which connector is needed for this.
They come in two types: simple and international standard or ISO. Each of these connectors can be used to connect a VAZ 2110 radio. But the process is different. If we talk about a simple option, then it is worth using the ISO hole. To replace a standard device with a new one using it, just change the plug.
Car and radio ISO pads
As for other connectors, they are individual. Therefore, working with them will be more difficult. In this case, you will need to additionally purchase an ISO adapter or cut the wiring. In this case, a special circuit is used, which is shown in the photo below.
As practice shows, specialists rarely practice the second option. And this is not surprising. After all, it requires the use of additional elements. For example, heat-shrinkable cambric. In addition, the entire procedure must be performed with extreme caution and in compliance with safety precautions.
Choosing a location for the car radio
The standard connection of the VAZ 2107 radio is provided by the factory in an inconvenient place. The factory niche, closed with a plastic plug, is located at the very bottom of the center console.
This place is inconvenient for three reasons:
- when the stove is operating, the radio tape recorder overheats, which reduces its operating time;
- the gearbox selector interferes with working with SD and DVD drives (this drawback is not critical when using flash drives and compact storage media);
- You cannot install radios of larger sizes or with retractable screens in the standard niche.
If you want to avoid these troubles, you have no other choice but to install the radio in the VAZ 2107 in place of the two central air ducts.
In principle, this method does not affect the operation of the heating system, since the mass of warm air will pass through the side and bottom air ducts.
Before moving the radio up to the VAZ 2107, you need to remove the air ducts and do a number of preparatory work.
When installing a car radio in place of the air ducts, difficult work for a novice amateur will include making sealed plugs for the air ducts, carefully cutting out plastic partitions and shaped protrusions on the dashboard. Under the installation frame of the car radio, you need to make and secure brackets (bars - inserts). To close the gaps between the dashboard and the car radio body, you need to buy and fit a factory adapter frame.
Even more difficult is the independent production of original decorative cladding made of wood or fiberglass. Installing the radio in the air duct slot makes it easier to control the receiver and view the display.
Installing a double din car radio
Modern 2DIN size standard radios are equipped with a larger display and touch controls. They are similar to 1DIN car radios in width and installation depth. Better functionality is achieved by increasing the height of the housing by 2 times (up to 100 mm).
The two-din radio tape recorder does not fit into the VAZ 2107 car in its regular place. The installation of a large housing under the center console is hampered by the gear lever. It is also impossible to install a 2DIN car radio in place of the air ducts. At the top, the edge of the “dashboard” does not allow expanding the niche of the air ducts. To expand the niche downwards, you need to remove the stove controls. Much easier than a complex reconstruction of the dashboard would be to install a double-din radio in the glove box of the car. There is enough space in the glove compartment to install a double-din radio, which can be supplemented with a separate amplifier. The main difficulties of this method are the design of fasteners for the installation section. Under them you need to install damping pads that absorb vibrations of the plastic.
Installing the head unit
All modern power units use a standard ISO connector (International Unified Electrical Engineering Standard) to connect power cables and speaker wires.
After installing the car radio housing in the selected location, all cables must be secured into a rectangular block suitable for this connector. The letter markings of the car radio outputs are different; you need to look for them in the equipment manufacturer’s instructions. If your existing wiring uses a different type of connector, purchase an ISO connector adapter.
Installation
Installation of the car radio is carried out in the following sequence of actions:
- It is necessary to remove the cover under the clock and route computer equipment.
- The metal body of the device is inserted into the rectangular window, which is fixed using triangular-shaped tabs.
- Then the antenna and power connectors are connected to the main device using adapters or directly.
- The housing must be installed in the mounting channel before the latches engage.
- Finally, the correct operation of the equipment is checked and decorative polymer plates are installed.
Connecting the radio to the VAZ 2107 power supply
The standard connection of the VAZ 2107 radio through the ignition switch is inconvenient because the radio and player can only be listened to when the engine is on. The designers chose this connection scheme for reasons of increasing battery life. To connect a new car radio in the same way, you can use the standard wiring. But keep in mind that with such a connection, advanced power units, such as Pioneer, KENWOOD, Alpine, Hertz, can reset new settings when the engine is started. Indeed, a more logical connection of the radio directly to the VAZ 2107 battery can drain a worn-out battery. Most often this happens when the driver forgets to turn off the quiet music at night. To avoid this drawback, a manual power switch button is embedded into the yellow power wire from the battery. The standard fuse for the VAZ 2107 radio is not provided in the block of protective devices. To install protection in a reserve location in the fuse box, you need to rebuild the electrical circuit. It's easier to buy a power cable that has a fuse built into it. For normal protection of the radio from strong inrush currents and short circuits, a 20-amp blade fuse is sufficient. To expand the acoustic system, move the installation location, and install complex power units, an acoustic tuning enthusiast must master the skills of an auto mechanic, radio technician, or electrician. If you do not have confidence in your abilities, it is better to turn to car acoustics professionals.
How to check the connection
To check that the cables are connected correctly, turn off the ignition and measure the leakage current, which should not exceed 30 mA. An additional test will be to turn on the equipment in high volume mode, and the components should not turn off spontaneously.
- How to connect Mystery radio
- Connecting the Ford Focus 2 radio
- Connecting a VAZ 2109 radio
- How to connect a radio to a battery
- What kind of oil to fill in VAZ 2107