Fiberglass has become widely known and popular both in everyday life and in many sectors of the national economy. This material is used to produce the simplest parts, such as buttons and speaker podiums, and the most complex products, such as aircraft skins. Fiberglass products can be found in automobile production, yacht building, light aircraft and helicopters, and other areas of industrial production.
Learning to make fiberglass parts with your own hands
Agree, not every fan of tuning has the opportunity to purchase original interior items in the appropriate stores.
But, to be honest, this is not at all necessary - you can turn an ordinary car into a piece of art yourself if you learn how to properly make fiberglass with your own hands. Actually, fiberglass is a polyester resin, which is manufactured approximately as follows: the material is given the required shape, reinforced with glass fiber and then polymerized.
It goes without saying that we do not intend to compete with branded garage tuning items. But if the necessary parts are small in size, then almost anyone can make them. But it is best to start such a practice with primitive details that have the simplest outlines.
Their installation should not require any supernatural accuracy from you. Gradually, day after day, we will gain the experience we need and one day we will be able to begin working on much more complex products.
We learn to be careful.
At the initial stage of manufacturing, we need to make a blank and for this, I tell you, we will have to work hard. It is worth noting that the shape of the blank must exactly imitate the future part. For this reason, the most important concern will be the correctness of all bends, symmetry and the cleanest possible surface.
Another equally important point is the material from which our punch will be made. For example, if the part has large dimensions (such as a bumper), then it is better to make a blank for it from foam plastic.
The base obtained in this way does not even need to be removed after the process is completed. For smaller parts, you should use clay or plasticine parts (but, frankly, the nuances of processing such materials can confuse you a little).
Wood is often used as a punch. Although its preliminary processing associated with giving shape seems complicated at first glance, subsequent processing with sandpaper will be a mere trifle for you.
In addition, at this stage we must decide exactly how the finished product will be removed from the blank. If there is an opportunity, we simply remove it. But in some cases you will have to cut the blank into two parts in order to remove the product.
Be that as it may, before removing the product, you will in any case need a special lubricant with which you will need to treat the walls of the matrix. Although, if you plan to use polystyrene foam, then such manipulations will not be required.
The resin used in making fiberglass turns into plastic only after a hardener is added to it. There are also special instructions in accordance with which the necessary components are mixed.
With minimal experience, you can control the curing procedure yourself. So, if you need to speed up the process, then the mass should be heated a little. Approximately the same effect is achieved if the amount of hardener is increased. But in both the first and second cases, the resulting mass will not be too strong.
Another important point is calcining the fabric, even over an open fire. When the smoke stops coming out, we stop the procedure: all the protective substances, including paraffin, have already evaporated, and the voids between the tissues are filled with our resin.
When we start impregnating the fiberglass, it is better to place it on the glass, so the resin will be distributed as evenly as possible. You can also use an iron ruler for this, pressing it firmly to the surface.
The fabric is placed on the blank either as a whole or in several separate flaps (in this case, everything will depend on the characteristics of the particular model and on your skills). Of course, the division of the fabric into flaps (if necessary) will occur even before the impregnation begins.
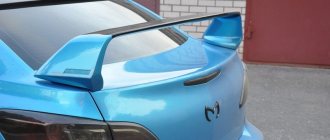
Methods for making a fiberglass hood
Let's look at how you can make a fiberglass hood. There are only two ways:
- Making a fiberglass and resin hood without using a die
- Making a fiberglass and resin hood using a die
Making a fiberglass and resin hood without using a die
Fiberglass and resin are applied to the outer (front) surface of the original hood. The reinforcements on the reverse side can also be made from fiberglass with resin according to the template of the original hood, and then glued to the first part. Another option for strengthening on the inside is to create their shape from any material (foam, polystyrene foam, cardboard) locally, and then apply glass mat with resin over them with an overlap, on the back side of the hood. This results in a uniform backside with fiberglass reinforcements.
On the hood, made without a matrix, reinforcements were added in the form of polyurethane foam covered with fiberglass and resin.
Flaws:
- The disadvantage is the rough front part, which requires additional leveling (putty and sanding), which will require additional time, make the hood heavier and thicker.
- If the panel is copied directly from the original, without a matrix, then its shape may be slightly distorted during hardening. This will also require additional leveling. Therefore, it is important that hardening occurs gradually, without temperature fluctuations.
- The form (in this case, the hood) made without a matrix turns out to be slightly larger than the original, since it is made on top of it. This may require additional adjustment of the hood to fit.
A mold (hood) without the use of a matrix can be produced when there is no need to make many copies of the original or the high quality of the front side is not required. As described above, high quality faceplates can be achieved by additional leveling after the fiberglass hood has fully cured. If you want to use this method, you can use the same principle as when creating a hood using a matrix. It will be described in detail below. The exception is that layers of fiberglass with resin are placed on the original hood (donor), and not inside the matrix, and a layer of gel coat (gelcoat) is not applied, since the meaning is lost.
Making a fiberglass and resin hood using a die
If you need to make several copies of the original (or a full-scale mock-up created), and also require high quality of the front side of the hood, then before making a fiberglass hood, you must first make a matrix.
A hood made from a matrix will be the most accurate copy of the hood from which this matrix was made. The method of making a fiberglass hood using a matrix can be considered the only correct way to obtain a high-quality product. If the matrix was made correctly, then you will receive a hood that will not require additional alignment and will be exactly the same size as the original (unlike a hood made without a matrix).
Flaws:
- Making a hood using a die requires additional costs for more materials (than making a hood without a die), and it will also take more time. Again, the excellent quality of the resulting copy using a matrix will not require additional labor and materials to align the hood (as is the case with a hood made without using a matrix).
- If you only need to make one copy of the hood, then the matrix will have to be thrown away, given away or sold to someone, or stored until the moment when it can be useful again.
The role of fiberglass
When the finished fiberglass fabric is placed on the blank, you need to take care of its maximum fit, eliminating various folds. But if you overlooked something there and they still formed, then we carefully remove them with the tip of a knife.
Air bubbles are removed in approximately the same way. It is also worth noting that often one layer of fabric is not enough, the minimum amount is three or four. We lay each layer in turn, but without long delays. Otherwise, the previous layer may dry out.
Removing the blank
When the resin hardens (this is about 3-4 days), we remove the blank. By the way, this is an extremely responsible process and damage to the “shell” in it is a common occurrence. If this happens, do not despair, because the damaged surface can be glued using the same resin.
As a result, I would like to add that almost every production of a tuning part is carried out according to this scheme. But if there are several copies, the procedure will become much more complicated. The “shell” must be strengthened with additional layers. Such matrices can be used repeatedly, but all parts that come out of it will require a good cleaning.
And if you need to make more durable fiberglass with your own hands, then the product at the hardening stage is placed in a vacuum (that is, in a plastic bag with evacuated air). Then all layers of fabric will be compacted and, accordingly, the entire surface of the finished material will be significantly compacted.
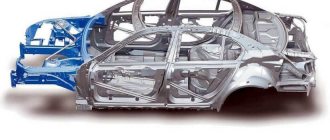
Fiberglass body made from a car frame.
Some designers have come to the conclusion that it is not practical to make a matrix .
There is a method of gluing body panels directly from the master model without making a matrix . It was noticed that fiberglass , impregnated with resin and well rolled to the surface of the master model , repeats its pattern, taking into account all the lines of the body. If the last (outer) layer is made decorative, then the shape of the car body is actually ready, and with appropriate putty it is possible to make a car body from this blank. of the master model from the inside of the shell , you can cut the resulting body into elements, glue the internal decorative and load-bearing elements to them with the same resin, and install everything on the car frame. When making a body this way, you need to carefully apply each layer of fabric and check the surfaces for glare. If these operations are performed incorrectly, the consumption of putty during finishing and preparation for painting increases unjustifiably.
This article was prepared based on materials from the book “ I am building a car ” by V. Zakharchenko and I. Turevsky, ed. "Mechanical Engineering" 1989
Making fiberglass products with your own hands
Fiberglass is one of the most common composite materials intended for the production of simple parts used for household needs and elements of complex machines and mechanisms. In particular, the durable and lightweight material is used for the manufacture of yacht hulls, car and motorcycle body kits, and aircraft skins.
Fiberglass consists of a reinforcing element, fiberglass, and a filler, polymer resin. Fiberglass is a collection of specially arranged fibers impregnated with epoxy resin . Depending on the thickness, the material can have a weight per square meter from 300 to 900 grams.
What is fiberglass?
Fiberglass is a dense material consisting of randomly arranged or ordered threads bound together by a thin layer of epoxy resin.
Fiberglass fabric has a thickness of up to 12 mm, but is usually measured in grams per square meter. The most common values: 300, 450, 600, 900 grams per 1 sq.m.
Fiberglass differs in type, manufacturing method, weight and nature of the fiberglass. The most common is “taffeta,” which has a cellular texture.
Glass felt has less resistance to mechanical loads than fiberglass, but despite this, it is more convenient to use for the manufacture of complex shapes.
For mass production, another type of fiber is used: it is cut fiber, which has the same or slightly shorter length as glass felt. It is used in making the base.
Hand molding method
In modern industrial production, various fiberglass manufacturing technologies are used.
For creating fiberglass parts with your own hands, the most suitable method is hand molding. The work technology does not involve the use of complex equipment and expensive materials.
In order to make fiberglass with your own hands by hand molding, you must sequentially perform the following stages of work:
- selection of materials;
- cutting fiberglass;
- creating a separating layer in the matrix;
- creation of a covering layer;
- laying fiberglass in the matrix;
- application of a polymer composition;
- repeating the two previous steps as many times as necessary (depending on the thickness of the product);
- drying of the product;
- removing the product from the mold;
- final processing (if necessary).
The main feature of the manual molding method is the high degree of dependence of the quality of the finished part on the level of skill of the performer. In order to get the most complete picture of making fiberglass with your own hands, it is necessary to consider each of the stages in detail.
Features of the fiberglass matrix
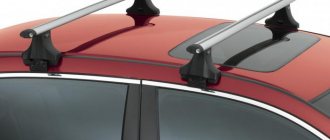
It is necessary to buy fiberglass for the car, since all parts are made of fiberglass.
For this, a special matrix is used, which can be made on the basis of a model from improvised things - plywood, polystyrene foam. A model of some car part is also suitable for restoration work with fiberglass. How to make a fiberglass matrix in the easiest way?
- The model of a car element must have a perfectly smooth surface, only then the product will turn out to be of high quality.
- To make a matrix, the model must be covered with wax. This is necessary so that the fiberglass does not stick to the layout.
- If a detachable matrix is required, then you can build low partitions that will divide the layout into several parts.
- To obtain fiberglass, epoxy resin should be mixed with a hardener. The ratio is indicated on the composition instructions. The main thing is not to overdo it and not to overdo it with the consistency.
- The resulting mixture must be impregnated with fiberglass.
- The next step is to apply the fiberglass to the model, layer by layer, until the desired thickness is achieved. It is important to ensure that the material fits very tightly in the mold.
- After the part has dried, it needs to be puttyed and all irregularities sanded. Then the surface must be polished.
- If the part does not turn out perfectly smooth, it should be waxed until the desired degree of evenness is formed.
- The last step is applying the gelcoat. This composition gives a mirror shine to the matrix and protects it from minor damage.
Selection of materials
The type of matrix material is adopted depending on the number of serially produced parts. For one-time molding, the matrix can be made of gypsum. If it is necessary to produce more than a thousand samples, a steel matrix is ordered. At home, the matrix is often a cast of the original model. It is most convenient to make a cast from fiberglass using the technology described above.
The choice of type of fiberglass depends on the requirements for the strength and aesthetic characteristics of the finished product. Fabric with fine fibers will give the surface a smooth, glossy appearance, and the use of coarse fiberglass will provide high strength.
The composition of the polymer resin is also determined based on the purpose and operating conditions of the part. The polymer filler is responsible for such technical characteristics of fiberglass as:
- product color;
- degree of waterproofness;
- Operating temperature range;
- exposure to chemical reagents and environments;
- sensitivity to ultraviolet radiation;
- level of fragility, softness, impact resistance of the product.
Creating a Matrix
- The matrix must be made using the original part as a template. The matrix for the hood is an exact copy of the desired shape, turned inside out. The glass fiber is laminated inside the matrix. Before creating the matrix, additional elements can be added to the original hood, or the shape can be radically changed (for this you can use modeling clay, polyurethane foam with putty, cardboard, etc.). Thus, you can get a hood with an individual design.
- The matrix should be thicker (usually 3–5 times) and stronger than the future mold poured over it. This will prevent matrix distortion and mold damage.
- When creating a matrix, you need to consider how you will extract the form poured into it. A factor to consider is the taper angle of the casting. This is the angle of the edges of the panel along which the matrix is made. The poured mold is easier to remove from the die with a positive angle. That is, the edges of the donor (or die) need to be slightly beveled so that the mold can be easily released.
- The original hood must be perfectly flat before creating the matrix. All the irregularities and imperfections of the original hood will be imprinted on the created matrix. Therefore, if there is a need for this, you need to make cosmetic repairs to the hood before moving on to creating the matrix.
- The hood must be thoroughly washed and dried.
- We will consider a method of creating a matrix, which involves pouring a matrix on the front side of the hood and hardening it, then turning the hood over and making a matrix on the other side of the hood (amplifier), hardening and separating these halves. This method involves pre-fabricating a barrier from a dense material, which is glued to the edge of the back side, before creating a matrix on the front of the hood. This barrier will serve as the basis for creating a tapered angle from modeling clay or special wax (a beveled angle around the perimeter of the hood edge to facilitate separation of the hardened matrix). Also, the barrier will not allow the resin to flow onto the back side of the hood and will serve as the basis for a supply of fiberglass with resin along the edge, that is, the fiberglass will be laminated both on the hood and on the glued barrier (you will get an edge). This edge will give additional rigidity to the die, and will also ensure a safer separation of the two halves of the die once they are ready. You can split the edges with any flat tool without fear of damaging the original hood (its edge will be far from the edge of the filled matrix halves).
- The barrier can be made of polycarbonate or thick plastic sheet. First you need to use masking tape to make a template around the edges of the hood. Then you can transfer the template shape onto thick plastic and cut a barrier out of it. Masking tape is pasted along the perimeter of the hood, 10 cm wide. It is necessary to mark the cut points in order to obtain separate segments that will be convenient to paste. The barrier segments need to be marked so that they can be easily glued in the right place. Before gluing the barrier to the hood, you need to apply masking tape so that the barrier can be easily peeled off. Masking tape is applied to the edge of the back of the hood. Hot glue is applied to this tape. Then the barrier is glued. Tape is placed between the joints of the barrier segments to seal the joints.
- Next you need to use modeling clay or special wax to make a taper angle around the edge of the hood between the hood and the barrier. This angle will prevent the resin from flowing under the hood, which would prevent the mold from releasing. This way, when the matrix is ready, it will easily separate and will not get caught on the edge of the hood.
You need to create a smooth transition between the edge of the hood and the plastic barrier using modeling clay or special wax. It will prevent the resin from flowing under the edge of the hood and will facilitate the separation of the matrix after curing.
- Next, a mold release / separating agent is applied to the surface of the hood (and to the glued barrier). This is necessary to prevent the resin from sticking to the surface of the original hood. Firstly, this will help not to spoil the original hood, and secondly, the separating agent is necessary so that the poured form can be separated from the surface without any problems. The most commonly used release agent is a combination of wax and PVA (Parting Wax and PVA Release Film). You must first apply wax to the matrix. To apply wax you need to use a clean cloth or a special applicator. Let the wax dry for an hour. Next, a layer of PVA is sprayed (or brushed on).
- After the release agent has dried, a gel coat is applied. To do this, you can use either a special spray gun or a brush. You can apply 2 thin layers or one thick (0.8 mm). For a medium-sized hood you will need approximately 700 grams of gel coat. Allow this layer to dry and harden, but still make sure it sticks when touched.
- Next, a connecting layer (coapling coat) is applied. The connecting layer is done in the same way as conventional fiberglass lamination. For this layer, a special resin can be used (available from the manufacturer), which serves as a connecting (transition layer) between the gel coat and the main resin. Resin is applied to the surface, then glass mat is placed and impregnated with resin. You need to use glass mat with a density of 225 gsm or less dense. Make cuts in the fiberglass mat, if necessary, so that it follows the shape of the hood. Due to the fact that the glass mat is less dense, this allows it to follow all the contours of the hood well and fit well. This ensures that there are no voids left between the gel coat layer and the first layer of resin-impregnated fiberglass. After soaking the glass mat, it needs to be rolled with a roller to completely remove air bubbles. This layer should dry within 3 hours. It should become firm but still sticky.
- Now you need to use glass mat with a density of 450 gsm. First, resin is applied, then glass mat is placed and again impregnated with resin. Next, a second layer of glass mat is placed and again impregnated with resin. Everything is rolled with a roller to even out the layers and remove air bubbles.
- Most matrices using chopped strand mat consist of 8–10 layers. Thicker fiberglass fabric (Woven Roving, Tooling Fabric) can be added after the third layer of glass mat to more quickly increase the thickness and strength of the matrix. Vary the position of the fibers of the layers to ensure uniform strength. Do not apply more than 3-4 coats at a time as heat build-up may distort the matrix.
- On large matrices (as in our case), reinforcement is added on the reverse side for additional rigidity. To do this, you can make spacers (from PVC pipes) and apply 2 layers of glass mat with resin on top of them. These reinforcements must run along both the center and the edges of the die, where a constant amount of stress will increase from the impact of the poured mold.
After curing, reinforcements can be added to the back of the matrix, in the form of plastic pipes coated with two layers of fiberglass and resin.
- After the matrix made on the front part has hardened, you need to turn the hood over without separating the hardened fiberglass part. Next, you can start making the mold for the inside of the hood (reinforcement). At this point, you can remove the plastic sheet barriers that are glued to the edge of the hood. Removing the plastic barrier will leave a fiberglass edge.
Reverse side of the hood
- To prepare the backside for the application of resin and fiberglass, all seams and holes need to be sealed. When the resin is applied, it should not seep into any cracks or holes as this will interfere with the release of the mold. Small seams can be sealed with modeling clay, and large holes can be sealed with tape or special adhesive tape (flash/release tape).
Before starting to create the matrix, all cracks and holes on the back of the hood must be sealed.
- You will also need to add clay to the edges of the reinforcements to prevent the resin from getting underneath them.
- Just like when making the face of the hood, a taper angle needs to be created along the edges of the hood (between the barrier, which is now made of fiberglass, and the edge). That is, make a beveled edge from modeling clay.
- Now you need to apply and spread the wax and spray or brush PVA mold release (release agent) onto the inside of the hood.
- Now the entire surface is generously coated with gel coat using a brush (or applied by spraying). The layer should be quite thick (0.8 mm). This layer should remain slightly tacky before applying the fiberglass and resin.
- Next, resin is spread and glass mat 225 gsm is placed. On the not completely dry layer of resin and glass mat, a second glass mat with a density of 450 gsm is applied and impregnated with resin. In total you should get at least 4 layers of 450 gsm. Everything is carefully rolled with a roller. The applied layers must dry within 24 hours.
Separating the matrix from the hood
After the matrix has completely hardened, it must be released. For this purpose, there are special wedges of different sizes and different hardnesses. These plastic wedges are convenient to use because they will not damage the edge, unlike screwdrivers, spatulas and other tools. In our case, it is not too important not to damage the edges, since we have an additional edge around the perimeter of the hood. It is necessary to cut off a few centimeters of this edge so that the junction of the two halves of the matrices is clearly visible. First you need to mark a cut line around the entire perimeter of the hood. A jigsaw is used for cutting. Use a tungsten carbide blade. Insert wedges or any other flat tool around the perimeter of the die and gently push inward. This needs to be done gradually, moving around the perimeter. Sometimes you may need to use a hammer to lightly tap the wedges or other tool.
Special wedges of different sizes for separating the fiberglass matrix or hood.
Large panels and matrices are sometimes difficult to separate, even after separating the edges. This is affected by slight adhesion of the cast mold and static. If disconnection is difficult, you can apply compressed air or pressurized water into the gap between the matrix and the breadboard to help disconnect the matrix.
In this form, the matrix can be used as is, but to give an additional smoothness to the surface, you need to sand the surface with P1200 sanding paper and water. This stage will remove minor imperfections on the surface and make the surface perfectly smooth. Thus, the form filled in this matrix will not imprint small irregularities in the surface of the matrix.
Preparation of fiberglass
The cutting of fiberglass is carried out according to a template made of thick cardboard according to the dimensions of the matrix. If the product has a complex shape, it is allowed, as an exception, to use fiberglass cutting consisting of several separate elements.
Depending on the thickness of the part, the required number of layers of material , which are stored in a convenient, easily accessible place, in the order of their formation in the matrix. If there is a break of several days between the processes of cutting fiberglass and molding products, it is necessary to strictly observe the storage conditions of the material.
Where to buy fiberglass for cars?
Many car owners are experimenting with various fiberglass parts and creating new identical items. It is almost impossible to form fiberglass with your own hands, but it is easy to make any objects using glass mat.
You can buy fiberglass for tuning at any hardware store.
The average market value of a product is 100 rubles. per square meter. When using fiberglass, you need to stock up on gelcoat, the price of which usually does not exceed 400 rubles per kilogram. The gelcoat is poured onto the product and straightened with a brush, but if the composition is liquid enough, you can use a spray gun.
Important! When mixing accelerator and hardener with gelcoat, do so gradually
. Under no circumstances should these two substances be combined separately, as the consistency will cause an explosion.
Fiberglass, or fiberglass as it is also called, has long been used only in the defense industry, shipbuilding, aircraft construction and other specific areas where strong, reliable and durable materials were needed. But not so long ago, fiberglass began to be used everywhere, and today its exceptional qualities are actively used in construction and households. What this material consists of and how to make fiberglass with your own hands - read in this article.
Fiberglass is distinguished by unique performance characteristics, thanks to which this material is able to withstand high pressure, be in an aggressive chemical environment and provide incredible strength to any structure. At first it was used to build boats, cars, and airplanes, then buttons, household appliances, snow removal devices, and other useful things began to be made from fiberglass. Even today, most of us still have old Soviet units, the body of which is made of the strongest and almost eternal fiberglass.
In the 90s in Russia it became fashionable to install fiberglass windows and doors, to which they still like to add the prefix “euro”. The impeccable characteristics of fiberglass allowed it to remain the most popular material for use in almost all industries, from rubble to construction and military.
Today it is used as a structural and thermal insulation material in the boat industry, strengthening the hulls of boats, rocket engines, ships, car bodies, etc. It is used to make helicopter blades, exhaust pipes, corrosion-resistant equipment, pipelines, swimming pools... The list of products for which fiberglass is used is simply colossal, and if it disappeared from the planet for even a day, the world would plunge into chaos.
Compound
Fiberglass is a composite material that consists of fiberglass filler and a binder. Fiberglass comes in thread-like fibers, fabric or mat. The binder is different types of polyester resin. The filler gives the material strength and performs a reinforcing function, while the resin makes it monolithic and distributes the load evenly between the fibers. It is also the resin that protects fiberglass from destruction by aggressive chemicals.
The strongest fiberglass plastics consist of oriented continuous fibers. They can be divided into unidirectional (the fibers are parallel to each other) and cross-directional (the fibers are located at a certain angle to each other). Changing the orientation of the fibers allows you to tune the strength and adjust the basic characteristics of the material.
Properties
The exceptional properties of fiberglass have already been mentioned above; now it is time to consider them in more detail. Why is this material so good, and why is it used in almost all areas of production?
Properties of fiberglass:
Classification
Fiberglass can be classified depending on the form of release, for example, sheet and roll fiberglass are distinguished. The material also comes in different colors, but the main classification is based on areas of application.
So, there are the following types of fiberglass:
- Structural - used in the form of power elements to strengthen the rod structures of pumping rods, rubber-fabric tracks, belts or electric motor housings.
- High-strength - reinforced fiberglass for the production of high-load multi-blade propellers that are installed in wide-body aircraft engines. It reduces the weight of the blade several times compared to aluminum blades. At the same time, such fiberglass increases engine efficiency, reduces fuel consumption, ensures high engine performance on takeoff and increases service life.
- Chemically resistant - the characteristics of this type of fiberglass depend on the type of resin used for its manufacture.
- Heat-resistant - non-flammable fiberglass with increased strength for radio engineering or structural needs. The operating temperature can reach up to 350C. This type of material is mainly used for the manufacture of motorcycle engines, protective covers and screens in aircraft, hoods, etc. Heat-resistant fiberglass retains high, stable strength characteristics even under prolonged exposure to high temperatures. It does not burn and provides high fire safety.
- Electrical – fiberglass used in electric dryers, heaters and other similar equipment. The main purpose is thermal insulation.
Cover layer
For laying the top and subsequent layers of fiberglass, epoxy or polyester two-component resin is used. The components are mixed and infused according to the technological regulations of the manufacturer. The prepared composition must be used within 15 minutes, and therefore the resin is prepared anew for each subsequent layer.
The covering layer is the first layer placed in the matrix and, at the same time, the top, protective layer of the product. Its thickness should be no more than 0.4 mm to avoid cracks during the drying process. The drying process of the coating layer lasts until it turns into a gelatinous sticky mass.
How to make a fiberglass hood using a matrix
- The process of making a replica hood is similar to creating a matrix. When creating the final hood replica, you don't need to use a lot of resin, unlike a die. It will be enough for the fiberglass to be saturated with resin, but not filled.
- Apply 3 layers of mold release paste wax to the surface of the matrix, then several layers of liquid PVA release agent.
- After the separating agent has dried, 3 thick layers of gel coat are applied. This layer will provide a smooth front surface of the future hood. If you immediately apply resin, and then apply glass mat and saturate it, then the front part will have irregularities in the form of protruding fiberglass fibers (especially if thick glass mat is used) and pores.
- After applying the gel coat, you need to wait 2–4 hours.
- Next, the resin is applied. To create a hood, the manufacturer can recommend Vinyl Ester Resin, which has better properties than cheaper polyester.
- A layer of glass mat is placed and impregnated with resin. The fiberglass should extend slightly beyond the edges of the matrix. Enough resin is applied to completely saturate the fiberglass. However, avoid applying excessive amounts of resin so as not to increase the weight of the hood. Excess resin does not increase strength either. The resin is applied to the surface from the center to the edges.
- It is necessary to apply 4 layers of glass mat. Lay layers of glass mat so that the fibers are located at different angles relative to different layers. This increases strength in all directions.
- After applying and leveling the first layer, you need to wait about 40 minutes, then lay down the 2nd layer of glass mat. You want the first coat to be firm but still tacky before applying the second coat.
- With 3-4 layers it will be approximately 2.5 - 3 mm thick, which matches the thickness of factory fiberglass hoods.
- Roll out the applied layer with a roller to remove air bubbles. If bubbles remain, then the top layer on the front side may crack in this place.
- In a cast mold, distortion (warping, curling) can be avoided by allowing each layer to cure (to a tacky surface) before applying the next layer.
- Dry the resin slowly. The faster a fiberglass panel dries and the higher the drying temperature, the more fragile the panel will be.
Trimming excess fiberglass and gluing fasteners
It is necessary to cut off the excess along the edges of the two parts of the new hood and cut openings between the amplifiers on the part of the hood that belongs to its reverse side. It is convenient to use a Dremel to trim off excess fiberglass. When cutting the edges, you need to follow the edge line imprinted from the original hood. It is necessary to cut with a slight indentation from the line of the edge of the hood, since the edges will need to be finalized by sanding. Before starting work, do not forget about protective equipment. Wear a respirator, safety glasses and gloves. After cutting the edges, use a file or sandpaper on a block to smooth out the edges (P120-P240).
Factory mounts for composite hoods.
Such fastenings are not difficult to make with your own hands. Next you need to drill holes for attaching the hinges. To do this, you need to mark the necessary places, in accordance with the places on the original hood. Use a drill and the correct size bit. The area at the front of the hood that connects to the lock needs to be cut out using a Dremel and the edges smoothed with a file. A two-component epoxy adhesive is used to glue the fasteners. This glue adheres well to both composite materials (in this case fiberglass) and metal. As long as the two halves of the hood (face and amps) are not glued together, the mounts can easily be glued to the back of the amps.
Connection of two parts of the hood
Before gluing the two halves together, you need to sand the joints so that they are flat.
To glue the two halves, you can use 3M fiberglass panel adhesive, which is specially designed for this, or polyurethane adhesive-sealant. Glue needs to be applied to the edge around the perimeter, then leveled so that it is approximately 3 mm thick and 4 mm wide. Next, the halves of the hood are connected and pressed with clamps for 24 hours. If you use clamps, try to avoid bending at the edges.
To glue the two halves of the hood (hood panel and reinforcement) together, you can use the matrix from which the front part of the hood was cast. This is necessary so that the front part is not distorted when gluing. We take the hood panel (front part) and put it back into the matrix, apply glue and press the second half (amp). You need to place weights on top of the amplifier in several places. With this gluing method, you can do without clamps.
Laying fiberglass and impregnating with resin
After reaching the required consistency of the covering layer, the cut glass fabric is laid into the matrix shape. The first layer of fiberglass is the thinnest (300 g/m2), which ensures the smoothest surface of the product.
The fiberglass fabric must exactly follow all the bends of the matrix shape without delamination and the formation of air pockets.
After laying, a layer of polymer resin is applied to the fiberglass, and the resulting shape is rolled with a special roller for better impregnation and squeezing out air bubbles. The next layer of fiberglass is laid without waiting for the resin to dry. Then the process of preparing and applying the polymer composition is repeated.
Depending on the thickness and required strength of the product, a different number of layers of fiberglass and impregnation are formed. Glass felt or thin finishing fiberglass fabric is used as the last layer.
Manufacturing process
The following is the cheapest method. To make a fiberglass hood you will need:
- Apply the diluted solution liberally to the surface of the hood. Let it dry a little;
- cover the hood with plastic film, try to expel all air bubbles;
- lay sheets of 50-gauge fiberglass with an overlap of 2-3 cm. Do not leave more than 2 cm of material along the edges of the hood. Impregnated with resin, it will bend;
- dilute the polyester resin. Please note that immediately after adding the hardener, the resin will begin to harden. Therefore, do not dilute more than 300 ml;
- saturate the laid fiberglass with a brush. This must be done so that there are no air bubbles left;
- cover the impregnated fiberglass with a second layer. Make sure that the overlaps are not always in one place. Next, it takes 1-2 hours (depending on the ambient temperature) for the resin to dry;
- Use 80-grit sandpaper to sand off any resin deposits. Treat the joints especially carefully, but do not wash the fiberglass in the overlap area;
- repeat the procedure, allowing for interlayer drying. Distribute the purchased fiberglass evenly. After the 50th, the 300th should be applied, and then the 600th;
- After complete drying, the hood can be adjusted to size. To do this, you can use a hand or jigsaw.
back side
It’s best to do the same manipulations, but on the back of the hood. Then you need to first remove the film, sand the mating surfaces and glue the two parts.
The hood needs reinforcements anyway. In the economical version, you can make them yourself at will. To do this, cut and position strips of foam plastic properly, after moistening the surface with resin. Then cover them with fiberglass. If your car does not have gas stops, you must make a place to fix the hood stop.
Fasteners and latch
To make the fasteners, cut two plates of metal approximately 3mm thick. Screw two bolts into them on each side so that the hood “ears” can be screwed to them. Tack them by welding and then trim the bolt heads to get a flat surface. To ensure that the hood fits evenly along the gaps, carefully measure the location of the plates.
The plates and latch need to be “walled up” in the manufactured hood. To do this, sit them on epoxy resin and then cover them with enough layers of fiberglass.
Matrix method
This method is more technologically advanced. Manufacturing will require additional materials:
- wax for composite materials;
- rags that do not leave lint. For example, microfiber used for manual polishing;
- gelcoat for application with a brush;
- glass veil;
- aerosil, which promotes adhesion and strength of connection between two parts of the matrix;
- special matrix polyester resin. If you don't have it, you can use the regular one;
- degreaser;
- some thick material, masking tape.
Demolding and finishing
Removing the product from the matrix must be done after the material has gained strength in order to avoid its deformation and delamination. Under normal conditions, the drying time for fiberglass is from 12 to 24 hours. This time can be reduced by heating the matrix with an infrared emitter, or by placing it in a drying chamber.
Finishing includes trimming and sanding the edges of the product.
If necessary, the product can be painted in the desired color with polyurethane-based paint. Finished materials can be glued together using polymer adhesives.
How to prepare a fiberglass hood for painting?
First of all, you need to know that the fiberglass panel must dry and harden properly. How long does it take for a newly made hood to dry? The longer the better. The minimum time is 48 hours, and the maximum is up to a week. Complete curing is especially important if the part will be painted black or another dark color. Since dark shades absorb heat, bubbles or even distortion of the shape may appear on a hood that is not dry in the sun.
After hardening, you need to put the hood on the car and check all the gaps. You may need to trim the panel somewhere and sand it down so that all the gaps are even. When sanding fiberglass panels, be sure to use a respirator and also work in protective clothing.
After fitting, you need to thoroughly wash the fiberglass panel. This is necessary to remove the release agent, which is used to facilitate the removal of the hood from the matrix. If this substance is not completely removed, fish-eye defects may occur during painting.
In many ways, preparing a fiberglass and resin hood is similar to preparing a metal panel (see the article “Preparing for Paint”). It is important to remove all unevenness by puttying, sanding and priming, if any remain.
What primer should I use to coat a fiberglass hood? There may be several options here. You can use epoxy primer (see article on the properties and uses of epoxy primer). Next, you can apply acrylic primer, prepare it and paint it.
Another big difference between a fiberglass hood and a steel hood is that a regular hood has the same surface on both sides, while the face of a fiberglass hood is smooth and the back is rough and uneven. You can apply raptor polyurethane paint or an analogue to the back of the hood, having previously prepared the surface. This will add durability to the hood and also improve its appearance.
Rules for performing work
To obtain high-quality fiberglass products , the following must be taken into account during work:
- the surfaces of the matrix and containers for preparing polymer resin must be clean;
- air bubbles that could not be squeezed out with a roller must be removed by cutting with a blade;
- the tools used (rollers, brushes), as well as containers for mixing components, must be washed with acetone immediately after use to remove residual resin;
- the temperature in the working room should not be lower than 20 degrees to comply with the correct technology for the resin polymerization process;
- polymer components may have toxic fumes, so work must be done in a well-ventilated area;
- Gloves should be used to protect hands;
- Smoking and using open flame sources is prohibited in the premises.
The video below explains well how to make fiberglass with your own hands. As an example, the author of the video makes “eyelashes” for car headlights.
Advantages of a fiberglass hood
- To make a fiberglass hood, you do not need any special skills. The main thing is to follow the sequence of manufacturing stages and dry the layers for the required amount of time.
- You can make a hood that has an individual design that no one else has.
- A fiberglass hood is lightweight (usually 3 times lighter than a steel hood) without compromising its structural stability. This lightens the overall weight of the vehicle.
- Fiberglass, resin and other related materials (discussed below) are reasonably priced. Thus, a hood made by yourself will not cost much.
- Fiberglass panels have good resistance to temperature changes.
- The fiberglass and resin hood will not wrinkle or rust.