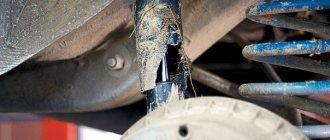
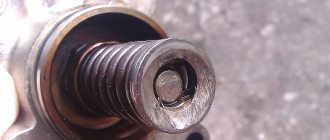
The information in this article will be as useful and informative as possible for car enthusiasts who are just beginning to study the design features of a car. The question of what front shock absorber struts are, what is the importance of these elements, and how to replace them when they wear out or break down will be covered in detail.
The device of the front shock absorber struts
Many drivers mistakenly draw a parallel between concepts such as a shock absorber strut and the shock absorber itself. Some of them believe that this is an ordinary spring, or call all the elements of this system assembled together a strut. To understand that this is an erroneous opinion, it is worth studying in more detail the question of what racks are and what features of their design are present.
A shock absorber strut is a component that is required to connect components such as the body and wheels of a vehicle. This support is connected to a spring and a damper, which, by the way, is the main component of the shock absorber.
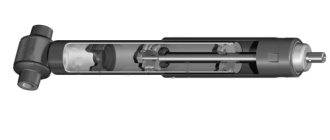
This design contains the following elements:
- Cylinders containing a piston and special hydraulic fluid.
- Hydraulic fluid, which can be presented in the form of a mixture of liquid and gas, as well as a certain mixture of gases. The composition is necessary to transfer forces between two types of shock absorbers.
- Stock. Designed to hold the piston on itself and is required to transmit serious pushing forces.
- A piston with a special bypass valve. It moves in the inside of the cylinder. Used for smooth transmission of vibrations.
- Seals, seal and high-quality sealant.
- An enclosure designed to house the various components of a rack inside.
- Fasteners necessary to connect the main parts of the shock absorber to the car body.
If you study the design of the elements, you can understand that the front shock absorber struts (AS) may or may not be equipped with springs. The choice of one or another option must be made based on the design features of the suspension and an acceptable budget.
Like all car parts, front shock absorber struts wear out over time, break and become completely unusable. If this phenomenon is detected, the front strut shock absorber should be replaced as soon as possible.
Necessary equipment for work
- Jack, wheel chocks, supports under the car (it is unsafe to carry out work using only a jack).
- Open-end and ring wrenches according to the size of the fastener.
- Spanners with ratchet handle.
- Special key for disassembling the cylinder.
- Flathead screwdrivers of different sizes made of high quality steel.
- Retaining ring removers.
- Oil for replacing the shock absorber (with reserve for pumping).
- An air compressor or a cylinder of nitrogen (carbon dioxide).
The principle of operation of the front struts
To understand how the front shock absorber struts of a vehicle function, the MX should be divided into two main structural elements - a spring and a shock absorber. They are the ones who put the whole mechanism into action.
Spring
The main element of this part is designed to level out a variety of defects in modern road surfaces. It is also necessary to reduce vibration activity, which is reflected on the body during movement. When moving along a heavily broken road, it is thanks to the spring that the driver only feels the smooth rocking of the car. the spring absorbs the most powerful shocks, that is, completely dampens them.
The metal from which the spring is made must have optimal elasticity. Typically, the steel used is one that is optimally suited for a specific vehicle brand, its weight and general specialization.
The spring is installed with one side in a special cup of the rack, and the other part passes through a rubber spacer, which, in turn, rests against the body.
Shock absorber
This is the stand itself, which, when compared with the same spring, is a more complex part in its design. Here are the most basic design features:
- A two-chamber cylinder along which a piston moves, pre-attached to a rod. It is this that is filled with gas or liquid.
- The working composition circulates in the inside of both chambers, on the basis of which all struts, like standard shock absorbers, are divided into several types.
The main task of a shock absorber is to dampen vibrations that come from the spring. The depreciation procedure implies a serious increase in the level of pressure generated by the internal part of the part. Its reduction is carried out due to special valves, which are located directly on the piston. Depending on the general position, the elements automatically close and open so as to effectively regulate the applied loads.
This is interesting: Internal CV joints on Opel: Astra, Kadett, Zafira
Bleeding the shock absorber
Before assembling the strut, it is advisable to bleed the shock absorber. It is DESIRABLE, not mandatory. If you forgot to do this, then it is not a sin and you can survive it.
The shock absorber will self-pump during operation. And it is necessary to pump it for two reasons:
- To check its serviceability
- To avoid damaging the shock absorber when lowering the car from a jack or lift. If you lower it smoothly, nothing will happen. And if for some reason the car suddenly stands on its wheels, the unpumped shock absorber may deteriorate.
To bleed the shock absorber, it must be turned over and placed on the rod. It is better to tighten the nut first so as not to spoil the thread.
We press the shock absorber and smoothly retract the rod. Keep the rod pushed in and turn the shock absorber over. We release the rod and wait for it to come out completely.
Then gently press the rod and press it in all the way. In this case, the rod may move jerkily. At this stage there is nothing wrong with this.
Now let go of the rod and wait until it comes out completely.
We recess the rod again. Now he should walk without jerking. If there are jerks and dips, then the shock absorber is faulty.
If there are no dips, jerks or extraneous noises, then we retract/release the rod again.
The fourth time we recess the rod with jerks. There should be no failures or extraneous sounds. If this is the case, then let go of the rod and no longer turn the stand over! She should now always be in an upright position!
And let's start assembling the rack.
Installing the rubber gasket
And then the spring. We make sure that the beginning of the spring coil is in its place on the rack. (there is a characteristic protrusion there and it is very difficult to make a mistake)
Installing a bump stop
Anther
Spring cup
We test ourselves with a rod or electrode. There are holes in the spring cup and in the shock absorber itself. We thread an electrode through them and take a look. They must be strictly opposite each other
We coat with anticorrosive
And we put on the support:
- It must fit clearly into the groove on the rod!
- The support has the shape of a triangle. The sawed part should be installed to the hole where we inserted the electrode!
Now another important point. On Kayaba struts, there are no edges on the rod for a 9 mm head, like on the original struts. There's just a groove there
Therefore, for this rod it is convenient to use a special wrench for racks
Put the wrench on the nut
And insert the middle part of the key
Now it's not a tricky thing. We hold the middle part of the key (it is convenient to insert the knob into the cut and hold it), and rotate the outer part of the key with a pipe wrench, tightening the nut.
After this, our rack is ready to be installed on the car.
It is quite possible to install it yourself without any problems. It may seem difficult and inconvenient, but in fact the procedure goes without problems.
Note. It is better to tighten the three nuts securing the support in the trunk when the car is already on its wheels. It is therefore advisable to cover all rubber-metal components.
Here is the new rack installed. The thread is protected using Movili and autoplasticine. This is written and shown in detail on the page Thread protection from corrosion
On the opposite side, all procedures are similar
Dismantled rack from the opposite side
The finished result
Purpose of the front pillars
Any type of elastic metal from which the spring is made, when exposed to one or another mechanical factor, forms automatic residual vibrations, which cause serious discomfort to passengers and the driver. It is to dampen such shaking and vibrations that the shock absorber was developed and is widely used. It can completely transform sharp shocks into almost imperceptible soft vibrations.
Shock absorber struts play a major role in the structure of the entire vehicle suspension. Due to the relatively small size and ease of maintenance, the manufacturer produces structures at minimal cost.
Due to their small dimensions, the racks take up minimal free space. Due to this, you can easily place additional levers and other structural elements that can make the trip as comfortable as possible.
At the same time as increasing the level of comfort, the front shock absorber strut is designed to perform the following functions:
- maintaining vehicle weight;
- transfer of adhesion force with asphalt pavement to the body;
- maintaining the optimal position of the body in relation to the car wheels;
- eliminating excess roll;
- taking on serious lateral loads.
The price of the struts is an order of magnitude higher compared to the shock absorbers themselves. The reason is a more complex design, as well as the fact that high quality materials are used in production.
Shock absorber repair or replacement?
There are several important factors to consider before deciding on a solution to your shock absorber problems. One of the main factors is the cost of new parts. If restoring shock absorbers with your own hands will cost the same as buying a new unit, you should choose the second option. The reason for this choice is that after restoration of shock absorbers they will not last long, and they will still have to be replaced.
Up to 90% of modern cars are equipped with non-separable struts, which makes repairing shock absorbers on your own almost impossible. Their main difference from collapsible racks is their five-year warranty period. In the case of restoring collapsible structures, you will need special equipment - a spring puller.
It is impossible to repair gas shock absorbers. The only exception may be models with swapping. But the components are very expensive and are extremely rare on modern vehicles. Models with pumping work perfectly until they break down, and it is highly not recommended to carry out repairs without the help of specialized specialists and special equipment.
Regardless of which option the car owner chooses to restore the functionality of the unit, car manufacturers recommend not buying cheap fakes and choosing exclusively original components.
DIY shock absorber repair
Having determined the type of breakdown, you can proceed directly to troubleshooting. If you choose the option of replacing racks, it is important to remember that it is carried out on a pair basis. If you decide to restore the functionality of a failed unit, you can use the services of a car service or repair the shock absorbers yourself.
Before carrying out repair work, it is necessary to study in detail the features of the part and safety regulations. Opening with an angle grinder and welding the monolithic body is strictly prohibited.
The first stage of repair work is disassembling the shock absorber. Before dismantling the rack, you must prepare all the required tools and equipment. The repair kit does not provide any special equipment; all the tools can be found in almost any garage:
- support trestles for lifting the car (the use of a jack is prohibited by safety regulations);
- standard kit for automotive repair;
- rack key;
- screeds.
Over the past few years, the process of repairing rear and front shock absorbers has become much easier. Previously, individual components of the unit were replaced, such as working fluid, seals, valves. Now, to repair the shock absorber, it is enough to dismantle and replace its internal cartridge.
Features of dismantling
To repair a shock absorber with your own hands, you will first need to dismantle the part. You should not immediately take up the grinder if you have difficulty removing fasteners. To begin with, you can try to clean them of accumulated dirt, treat them with a special WD-40 liquid, and after half an hour, try again to remove the nuts and bolts.
Dismantling the shock absorber struts must be carried out in compliance with several rules:
- The vehicle must be placed on jackstands, since the use of a jack does not provide the necessary stability and can be dangerous. If sawhorses are not available, be sure to use supports for belaying.
- To gain access to the fastening elements of the assembly, you will need to remove the wheels.
- Using a rack wrench, unscrew the bolts from the lever and the rod nut. After removing these fasteners, the shock absorber will come down, after which you will also need to remove the internal thread.
A more complex process for dismantling collapsible shock absorbers. This type of design is secured with a hub nut, and in order to remove the strut, you will also need to remove the wheel hub. In the case of non-separable structures, you only need to unscrew a couple of bolts and remove the part.
The difficulty of dismantling in front-wheel drive cars lies in the fact that in their design the strut is connected to a spring. To dismantle them, you will need screw ties.
Types of front struts
All car struts operate using a special working fluid. Based on the substance used in the cylinder device, front shock absorber struts can be divided into three main types:
- Oil or hydraulic. They are effective when traveling within the city, as well as on country roads.
- Gas. They are distinguished by higher rigidity rates. This is the best option for modern sports cars. It is believed that gas structures belong to the category of more modern devices. But if the car often moves on dirt roads, this category of shock absorbers is not very suitable.
- Gas-oil. As numerous reviews say, this is the optimal solution for any vehicle. All the positive characteristics of the categories of shock absorbers listed above are present here.
The front and rear pillars are different from each other, so you need to be careful during the purchasing process.
The front ones are slightly higher in length and have a smaller diameter. There are no steering knuckles in the rear shock absorber designs. Additionally, rear struts are much more difficult to replace than front struts.
Method for determining the need to replace racks
Experienced car enthusiasts identify problems with shock absorbers by how the car behaves on the road.
If, when the vehicle picks up a speed of 70 km/h and above, it begins to “float”, and when driving on uneven terrain, dull noises are heard, this means that there is a need to replace the shock absorber struts.
To more accurately determine the location of the problem, rock the front and rear of the car alternately.
If there are no problems with the shock absorbers, then raising the edge of the body from the lower to the upper position will occur smoothly, without rocking. Otherwise, there is a malfunction and the part on that side needs to be replaced.
Life time
The total operating time of front shock absorbers, as well as the frequency of their replacement, directly depends on three main factors:
- part quality;
- level of compliance with vehicle weight;
- manner of traveling by car.
For this reason, on some machines parts have to be changed every 6 months, while on others the designs last for 7 years.
Such a difference in service life is based on improper operation of vehicles, as well as poorly selected main structures and springs. Neglect of these rules can lead to the fact that the load will not be distributed evenly, which will automatically negatively affect the service life of the entire shock-absorbing system of the car.
Signs of problems
If the right or left rack fails, this can lead to an emergency situation. It is for this reason that it is so important to carefully monitor your vehicle. Timely repair work will avoid a large number of problems.
The following signs and characteristic symptoms indicate a breakdown of the front struts:
- during the movement there is a constant creaking, knocking and clicking sound;
- the car constantly rocks and oscillates from side to side;
- the car skids seriously when turning;
- To perform braking, a much longer braking distance is required than with working shock absorbers;
- the vehicle squats heavily as soon as the driver accelerates or brakes. Unpleasant sensations are present both behind and in front;
- the machine clings to the surface very poorly;
- rubber wears out very quickly and unevenly;
- Brake fluid leaks from the shock-absorbing system;
- the supports, spring and rod become covered with destructive corrosion;
- a significant increase in noise level during acceleration. This indicates that the fasteners of the built-in bushings have been damaged;
- the housing is deformed, which is why the piston cannot move normally in the inside of the cylinder;
- The springs are not positioned very correctly, as a result of which the car body begins to sway while driving.
This is interesting: How does a clutch release bearing work? Malfunctions in operation and its independent replacement in 11 stages
Such phenomena usually occur due to the poor quality of the main elements of the racks, due to improper installation, as well as due to the natural process of wear and aging of the built-in elements.
It is impossible to say which racks you need to buy. It all depends on material wealth and the vehicle itself. In any case, there is no need to save on these elements. It is worth buying designs that have a large number of positive reviews and are produced by trusted manufacturers.
Front strut replacement process
If the bearing, upper support and the entire strut as a complete assembly have already served their useful life, there is only one way out - replacing the front shock absorbers. This operation on the front of the car can be done with your own hands.
If the left or right strut is worn out, both will need to be replaced at the same time.
When making a replacement, you must rely on a special repair manual. Despite the fact that there are certain differences in the design of different car brands, the algorithm of action is similar in all cases. The sequence of manipulations here is as follows:
- Access to the upper support of the rack is freed. Here you will have to remove the engine compartment seal.
- The plug is removed and the fastening nut of the AC rod is unscrewed. You will need a head, as well as an extension with a knob. It is advisable to carry out this operation when the rack itself has not yet been dismantled.
- It is worth loosening the wheel fasteners, and then jacking up the car to such a position that the tires do not touch the ground. Here you definitely need to ensure that the jack does not fall off.
- The wheel is being removed. Using a metal brush, you need to clean all the structural elements located there. It is advisable to treat them with WD40 and wait for the composition to take effect.
- The fastening nut is unscrewed from the installed stabilizer joint. This must be done simultaneously with the brake hose screw. If the car has ABS, you will need to remove the tube with wiring from the sensor, which is located on the rack.
- After this, the fist fastener is unscrewed. Many experts knock out bolts with a simple hammer. It is worth knowing that some cars have separate bushings. After this manipulation, nothing holds the stand anymore.
- Now it's time to unscrew the nut holding the upper support to the body. The front shock absorber strut is removed simultaneously with the support and spring.
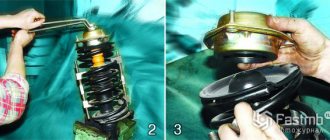
- You will need ties that are designed to remove the spring. Here you will need to get a gap between the cup and the outermost turn.
- Previously, the nut on the rod was already loosened, now it can be completely unscrewed. Only then will it be possible to remove the support and spring at the same time as the cup.
- If the bump stop along with the anthers are worn out, they must also be replaced.
- It is advisable to seriously pump new front struts beforehand. This process is carried out strictly in accordance with the manufacturer's instructions.
- It is necessary to replace the gaskets and seals, since the old seals will no longer fit.
- Reassembly is in progress.
If you follow these instructions, you can quickly replace the front struts with new ones, ensuring comfortable movement of the car and ensuring a high level of safety. The support will become strong, the suspension will stop swaying and negatively affect the overall operation of the vehicle.
What you need to know when reinstalling
Follow the same procedure in reverse order from the removal method you used, keeping in mind the following guidelines.
- Reinstall the strut assembly or shock absorber and tighten the mounting bolts by hand.
- Tighten all mounting bolts.
- When installing the tie rod to the steering knuckle, tighten the fasteners.
- Reinstall the wheels
- Lower the vehicle and gradually tighten the wheel lock nuts in a crisscross pattern. Check your repair manual or vehicle owner's manual for torque specifications.
- Tighten the upper strut mounting nuts.
- Finally, if you replaced the front elements, do a wheel alignment.
