How to Adjust Headlights on a Chevrolet Lacetti Sedan - mallsspb.ru
We adjust the headlights on a Chevrolet Aveo T250 with our own hands
Try the Lacetti Sedan and everything will work out. Scheme for adjusting the headlight beam.
So, to complete the process you will need a garage or just a flat wall, chalk and a little time. Essentially, the process can be completed in half an hour if you are not in a rush. For those who don't want to go through the hassle of drawing lines, special canvas screens with lines already drawn are sold.
Having settled in with the necessary items, you can begin to carry out the process.
First, you need to draw stripes on the wall according to the diagram below: Screen marking diagram for adjusting headlights. The next step is to find the light trigger regulators. These tools are located behind the headlight unit, unfamiliar to the engine department. Car and station wagon For cars with a car and station wagon body: How to tighten the control rack of a VAZ? Most believe that this can be done without the help of others; no Chevrolet Aveo how to adjust the headlights.
Adjusting the headlights of a Chevrolet Lacetti To properly adjust the headlights, you need to select a flat area and park the car ten meters from a smooth wall.
Fill the fuel tank full and check the tire pressure 2. Headlight adjustment bolts.
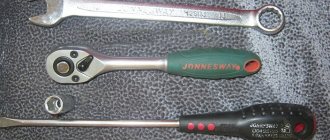
Placing a Chevrolet Aveo how to adjust the headlights adjusting the headlights for a hatchback car Adjusting the vertical plane of the light beam Adjusting the horizontal plane of the light beam If you set a goal to create manipulations, you will need a Phillips screwdriver.
So, by moving the regulators, the light beams of the headlights are adjusted. The distance of the car from the wall on the other screen should be 5 meters. Adjusting the headlight beams on a Chevrolet Lacetti is quite easy, and any motorist can cope with this easy task without the help of others in half an hour. Advice for raccoon breeders Gluttonous glass washer in the Note Every raccoon breeder will agree with me that the process of washing windows in the Note is not very economical.
Adjusting Chevrolet Lacetti headlights
All this is due to the fact that when washing the windshield, the headlights are also washed. This function turns on when the headlights are on, but because in our country it is necessary to drive with low beams everywhere and always, What does this concept mean?
It characterizes the freedom of movement of the clutch pedal until it is activated. You can feel it when you press on its surface.
In the beginning, when you start pressing the pedal, it will move quite freely. In other words, you don't feel much resistance. After operation, you will note the occurrence of b Replacement of the Lacetti Valve Cover Gasket 1.
How to Adjust Headlights on a Chevrolet Lacetti Sedan
In August last year, when replacing the spark plugs, I saw a lot of oily deposits on their upper surface, and when I contacted him, I found out that the Lacetti has a disease such as the valve cover gasket, which becomes tanned over time, breaks and begins to leak oil onto the spark plugs, Chevrolet Aveo how to adjust the headlights out.
Then I changed this gasket on a Chevrolet Aveo, how to adjust the headlights How to Adjust the Headlights on a VAZ If at one point you saw that the headlights of your car began to shine less brightly, and the visibility of the road became somewhat worse, you need a simple wash, or If this does not help, then adjustment helps. Video with adjusting the headlights on a VAZ car: Thanks to our article, you can find out how to do it in the shortest possible time Release date: Low fuel consumption.
The intersection points of the horizontal and inclined sections of the light spots should be 12 and 22 cm below the points corresponding to the centers of the headlights. We adjust the headlights so that they coincide with these values and the work can be considered complete. Adjusting the headlights is especially important if you have unusual bulbs installed, such as xenon.
Xenon has a brighter beam of light, so it must be adjusted. In this case, the car must be equipped with automatic leveling and headlight washers.
Otherwise, the car simply will not be able to pass inspection and then the lighting will be of no use. In any case, this is done for our own safety.
Adjustment
Preparation
It will be problematic to do the work yourself; it is best to call an assistant.
In addition, you need:
- create a flat horizontal platform located next to the wall of the house, gate or fence;
- take a tape measure 5 m or more long;
- a small piece of cardboard with which you will cover the second headlight during adjustment work.
It is necessary to adjust the beam of light in the dark, while the car should be fully refueled and no excess cargo should be placed in it, except for the driver. It is better to use a plywood board with sides 1 by 2 m as a kind of screen, on which the appropriate markings should be applied.
Tip: prepare a stop that will allow you to install the shield strictly vertically.
Process
Everything can be done, of course, at a car service center, but the price of such work is not worth it.
So do this:
- Place the vehicle on a horizontal and as level area as possible so that it is perpendicular to the marked screen. The distance to it should be 5 m.
Tip: you can replace the special screen with a plywood sheet, observing the same conditions.
- Mark the screen according to the manufacturer's instructions. To do this, you can use a tape measure.
- Check the tire pressure and adjust it to normal.
- Turn the gearbox of the electric headlight range control to the “zero” position, which will correspond to the minimum vehicle load.
- Place an assistant in the driver's seat and actively rock the car from side to side to self-install the suspension so that it takes its normal position.
- Turn on the low beam and cover the right headlight unit tightly with cardboard.
- Turn screw No. 1 of the adjustable headlight (or fog lamp) of the Chevrolet Lacetti and bring the light beam to line “G”.
- By rotating screw No. 2, align the border of the light beam with the line under the letter “A”.
- Adjust the second headlight in the same way.
How to adjust headlights on a Chevrolet Lacetti sedan
Review from the owner of a Chevrolet Lacetti Sedan - self-repair. After driving in the fog, I noticed that the headlights were shining in the wrong direction. Apparently I messed up the adjustment earlier. I decided to fix this issue immediately. The headlights now shine directly on the road, but during the adjustment process I realized that my knowledge in this matter is not great. After driving in the fog, I noticed that the headlights were shining in the wrong direction. Apparently I messed up the adjustment earlier. I decided to fix this issue immediately. The headlights now shine directly on the road, but during the adjustment process I realized that my knowledge in this matter is not great. I found information about this on the Internet.
Adjusting the direction of the Chevrolet Lacetti headlight beams. Chevrolet Lacetti Adjusting the direction of headlight beams. We adjust the direction of the headlight beams on a fully fueled and equipped car, with normal air pressure in the tires. The location of the light beam direction regulators on the headlight housing of cars with sedan and station wagon bodies: 1 - light beam regulator in the horizontal plane 2 - light beam regulator in the vertical plane. We adjust the direction of the headlight beam by rotating the regulators with a Phillips screwdriver.
Correct adjustment of the car's headlights plays an important role in ensuring safety on the road. It is important that the headlights shine at a certain angle and do not blind other road users. In this material we will talk about how the headlights of a Chevrolet Lacetti are adjusted. The information presented will be useful to motorists who are repairing their Chevrolet on their own. Adjusting the headlights of a Chevrolet Lacetti. To properly adjust the headlights, you need to select a flat area and park the car ten meters from a smooth wall. Bay
I’m almost sure that servicemen do this at 0. Maintenance schedule for Chevrolet Lacetti Repair and diagnostics of the Chevrolet climate system. For example, Mercedes used headlight designs using this technology, but did not make them smaller. News Engine Fuel system Cooling system Control system.
Adjusting Chevrolet Lacetti headlights
Lighting on a car is one of the conditions for the safety of the driver and passengers, both in conditions of poor visibility and at night. In order for the headlights to illuminate the road surface efficiently and not blind oncoming drivers, they need to be adjusted. The article talks about optics, the criteria for its selection, and how the Chevrolet Lacetti headlights are adjusted.
The car's optics consists of head lights, tail lights, daytime and side lights, turn signals, fog lights, interior lighting, trunk lights, and instrument panel lighting. Optics can be divided into two types: The first type is installed at the factory. The second, called alternative, is installed at the driver’s request to give the car a stylish appearance. Author of the video: Fara70, auto body parts.
Halogen lamps are more often used in standard optics. They are losing their popularity because they poorly illuminate the side of the road due to the weak luminous flux. Xenon is used mainly in alternative optics, but many drivers install xenon lamps instead of standard ones, or change the headlights completely.
Drivers are attracted by the brightness of xenon and the ability to choose the color of the light beam. LEDs are no less popular among car enthusiasts. They are less susceptible to mechanical damage and consume a small amount of electricity. After upgrading the headlight, replacing optics or lamps, it is advisable to adjust the headlights so that they correctly illuminate the road. Even a novice driver can perform this procedure.
Adjusting lensed headlights
Before adjusting lensed headlights, you need to know that there are two types of them - adjustable and non-adjustable. The latter are quite cheap, and we do not recommend using such lighting devices. One example of such a headlight is produced under the Depo brand. Some headlights are equipped with automatic control. However, it often fails, so this is also not the best option.
To adjust lensed headlights, there are also special regulators, as on conventional lighting fixtures. In this case, it is impossible to give unambiguous recommendations, since in different cars and even in different headlights, adjustment occurs using different means. As a rule, adjusting bolts or handles are used for this. But after reading the general instructions for adjusting headlights, you will be able to cope with the task.
How to choose and adjust the optics on a Chevrolet Lacetti?
Lighting on a car is one of the conditions for the safety of the driver and passengers, both in conditions of poor visibility and at night. In order for the headlights to illuminate the road surface efficiently and not blind oncoming drivers, they need to be adjusted. The article talks about optics, the criteria for its selection, and how the Chevrolet Lacetti headlights are adjusted.
What should you know about car optics?
The car's optics consists of head lights, tail lights, daytime and side lights, turn signals, fog lights, interior lighting, trunk lights, and instrument panel lighting. Optics can be divided into two types: standard and tuning. The first type is installed at the factory. The second, called alternative, is installed at the driver’s request to give the car a stylish appearance (video author - Fara70, auto body parts).
Selection options
The following types of lamps can be installed in alternative and standard optics:
- halogen;
- xenon;
- LED
Halogen lamps are more often used in standard optics. They are losing their popularity because they poorly illuminate the side of the road due to the weak luminous flux.
Xenon is used mainly in alternative optics, but many drivers install xenon lamps instead of standard ones, or change the headlights completely. Drivers are attracted by the brightness of xenon and the ability to choose the color of the light beam.
LEDs are no less popular among car enthusiasts. They are less susceptible to mechanical damage and consume a small amount of electricity.
LED angel eyes
When choosing lamps to replace standard ones, you should consider the following points:
- You cannot install xenon in halogen headlights;
- you should choose products from well-known manufacturers; when purchasing Chinese and Korean goods, you need to require certificates allowing sale in European countries and Russia;
- If you have no experience in electrical installation work, it is better to entrust lighting modernization to specialists.
Instructions for adjusting headlights
After upgrading the headlight, replacing optics or lamps, it is advisable to adjust the headlights so that they correctly illuminate the road. Even a novice driver can perform this procedure.
Before making adjustments, the car should be fully fueled, equipped with a spare tire, an assistant should be placed in the front seat or a load of about 75 kg should be placed. In this way, the conditions in which the machine is usually operated will be created. Tire pressure must be normal. Before adjusting the headlights, the vehicle should be rocked under load to allow the suspension to settle.
Adjustments should be made in the dark. The machine must be installed on a flat horizontal plane at a distance of 5 meters from the wall. You need to put markings on the wall according to which the headlights will be adjusted.
Light adjustment circuit
On the stand, a vertical center line is drawn and two parallel lines at the same distance from it, corresponding to the left and right headlights. The horizontal line is drawn at the same height as the centers of the headlights from the floor. A second horizontal one is applied under it at a distance of 65 cm.
First, you should adjust the light from one low beam lamp by covering the second with cardboard or an opaque cloth. We set the headlight adjustment switch to the position corresponding to the minimum vehicle load, that is, “0” and turn on the low beam. The upper boundary of the light beam should coincide with the lower horizontal line. We align the bend in the border of the light beam with line A. The light beam of the second headlight is adjusted in the same way.
Correctly adjusted optics provide high-quality illumination of the road and the side of the road and do not blind oncoming drivers.
Tuning ideas
One of the common tuning options is replacing standard lamps with xenon or LEDs. A great way to improve the appearance is to modify the headlights - with angel eyes or eyelashes. For tuning, LEDs and headlight covers are used. You can darken the optics. For this it is better to use a special film.
Installing alternative equipment makes it possible to choose different color schemes. The headlights inside can be painted white, red or black. The light bulb can be blue, yellow, red or another light. Projector headlights and FF reflectors are in demand. Despite their small size, they provide greater efficiency.
Photo gallery “Tuning options for the Chevrolet Lacetti”
Video “Universal optical correction”
This video clearly shows how to correct car optics with your own hands (the author of the video is an inquisitive person).
Chevrolet Lacetti manual
Chevrolet Lacetti Adjusting the direction of headlight beams
We adjust the direction of the headlight beams on a fully fueled and equipped car, with normal air pressure in the tires. We install the car on a flat horizontal area at a distance of 5 m from the screen (you can use a garage wall, a sheet of plywood or hardboard measuring 1x2 m). We draw a horizontal line 1 on the screen at a height equal to the distance from the center of the headlights to the floor. Below it, 65 mm, we draw a parallel line 2. We draw on the screen a vertical center line 0 (the distance from it to the center of the left and right headlights should be equal) and lines corresponding to the centers of the headlights (AE and BE). Set the headlight range control switch to position “0” (single driver or driver with a passenger in the front seat) and turn on the low beam headlights. Cover one of the headlights with opaque material. When adjusting, the upper boundary of the light beam should coincide with the lower horizontal line (see figure), and the point where the beam breaks (the point of intersection of the horizontal and inclined sections of the light flux) should coincide with the vertical line corresponding to the center of this headlight. Similarly, we adjust the direction of the light beam of the other headlight.
Scheme for adjusting the direction of headlight beams
The location of the light beam direction regulators on the headlight housing of a car with a hatchback body: 1 - light beam regulator in the vertical plane; 2 - regulator of the light beam in the horizontal plane
Location of light beam direction regulators on the headlight housing of cars with sedan and station wagon bodies: 1 - light beam regulator in the horizontal plane 2 - light beam regulator in the vertical plane
We adjust the direction of the headlight beam by rotating the regulators with a Phillips screwdriver. Similarly, we adjust the direction of the light beam of the other headlight. We adjust the light beams of the fog lights under the same conditions as when adjusting the headlights (see above). We measure the distance between the centers of the fog lights and the distance from the surface of the site to the center of the fog lights. We draw lines on the screen and draw another horizontal line below the height line of the center of the fog lights by 50 mm. The adjustment is made from under the car's bumper. By rotating the headlight adjustment screw with a Phillips screwdriver, we bring the upper horizontal border of the headlight beam to the height line of the center of the fog lights.
Screen marking diagram for adjusting fog lights: A - distance between the centers of fog lights; H - the height of the center of the fog lights on the car
We change the direction of the light beam of the fog lamp by rotating the adjusting screw with a Phillips screwdriver (for clarity, shown on the removed headlight).
How to adjust headlights on a Chevrolet Lacetti station wagon
Removing and adjusting Chevrolet Lacetti headlights
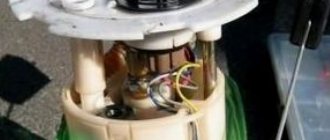
Removal of the front headlight units on the Lacetti sedan is carried out from the engine compartment. You need to unscrew the 2 bolts that are located at the top of the headlight (as in the photo). And also 1 nut at the bottom of the headlight on its rear side. It is more convenient to unscrew this nut with a 10 mm . If you get in the way of the washer filler pipe, you can remove it; there shouldn’t be any difficulties.
To remove the headlights on the Lacetti hatchback, you will need to remove the decorative radiator trim, since one of the fasteners is hidden under it.
After all the fasteners have been unscrewed, carefully remove the headlight and disconnect all the pads. Of course, the pads can be disconnected in advance, but as practice shows, this is somewhat more inconvenient.
Article number of the original headlight unit for the Lacetti hatchback - left GM 96458811 , right GM 96458812
Article number of the original headlight unit for the Lacetti sedan/station wagon - left GM 96499865 , right GM 96499866
Adjusting headlights on Lacetti
In order to adjust the headlights on the Lacetti, you need to point the car at a wall (for example, a garage) and so that the surface on which the car stands is level. The car should be at a distance of 5 meters from the wall. Set the headlight electric corrector to “0”, open the hood, turn on the low beam headlights, cover one of the headlights with something, or simply turn it off and start adjusting.
The headlights are adjusted through special holes or on the back of the headlights (see image below).
Left headlight Lacetti hatchback
Right headlight Lacetti hatchback
Also on the headlight itself it is indicated where to turn the adjusting screw so that the headlight goes up (UP) or down (DOWN)
This feint can also be rotated in several ways. .
Location of adjustments on a sedan and station wagon.
Also below is a diagram by which you can adjust the headlights. But from experience, most owners limit themselves to adjustments by eye.
So, height h is equal to 1065 mm, distance l is 1275 mm
The main difficulty lies in positioning the car strictly perpendicular to the wall and determining the central (center) line “O”.
Adjusting Niva fog lights
The Niva's fog headlights are also adjusted manually. To do this, we rotate each headlight vertically and horizontally until it meets our standard. Of course, you should first unscrew the mounting bolts a little for practicality and ease of setup.
After completing the procedure, do not forget to tighten the bolts again. Remember that it is strictly forbidden to adjust the light beams so that they blind oncoming drivers. For such an act, you can safely receive an administrative fine for obstructing the driving of oncoming traffic. The fine starts from 500 rubles. The amount is not large, but the human factor plays a greater role here.
Remember the main thing is that if the body of the Chevrolet Niva is not damaged, the optics are intact, then there is no special need to adjust the headlights. Sometimes they resort to tuning when the owner intends to tune the car with non-standard equipment.
In such cases, a new mounting socket can be cut out, optics with a completely new shape can be installed, and new electrical power cables can be pulled. But that's a completely different story.
The video below shows how to adjust the headlights of a Chevrolet Niva with your own hands, taking into account the angle of incidence of the headlights.
Removing and adjusting Chevrolet Lacetti headlights
Removal of the front headlight units on the Lacetti sedan is carried out from the engine compartment. You need to unscrew the 2 bolts that are located at the top of the headlight (as in the photo). And also 1 nut at the bottom of the headlight on its rear side. It is more convenient to unscrew this nut with a 10 mm . If you get in the way of the washer filler pipe, you can remove it; there shouldn’t be any difficulties.
To remove the headlights on the Lacetti hatchback, you will need to remove the decorative radiator trim, since one of the fasteners is hidden under it.
After all the fasteners have been unscrewed, carefully remove the headlight and disconnect all the pads. Of course, the pads can be disconnected in advance, but as practice shows, this is somewhat more inconvenient.
Article number of the original headlight unit for the Lacetti hatchback – left GM 96458811 , right GM 96458812
Article number of the original headlight unit for the Lacetti sedan/station wagon – left GM 96499865 , right GM 96499866
Adjusting headlights on Lacetti
In order to adjust the headlights on the Lacetti, you need to point the car at a wall (for example, a garage) and so that the surface on which the car stands is level. The car should be at a distance of 5 meters from the wall. Set the headlight electric corrector to “0”, open the hood, turn on the low beam headlights, cover one of the headlights with something, or simply turn it off and start adjusting.
The headlights are adjusted through special holes or on the back of the headlights (see image below).
Left headlight Lacetti hatchback
Right headlight Lacetti hatchback
Also on the headlight itself it is indicated where to turn the adjusting screw so that the headlight goes up (UP) or down (DOWN)
This feint can also be rotated in several ways..
Location of adjustments on a sedan and station wagon.
Also below is a diagram by which you can adjust the headlights. But from experience, most owners limit themselves to adjustments “by eye”.
So, height h is 1065 mm, distance l is 1275 mm
The main difficulty is to position the car strictly perpendicular to the wall and determine the central (center) line “O”.
Comments and reviews
The necessary measurements can be taken using a tape measure. We monitor the tire pressure and, if necessary, bring it to normal.
We place the assistant in the driver's seat. Then we actively rock the vehicle from the side to self-install the suspension. Having turned on the close beam of the headlights, we cover one of the headlights, for example, the right one, with a sheet of cardboard.
By turning the handle of the adjustment screw 1 of the left headlight, we bring the horizontal boundary of the light beam to line D, and then, by turning the adjusting screw 2, we align the kink of the boundary of the light beam with line A. We adjust the right headlight in the same way.
This problem of glare from oncoming traffic is a specific and difficult problem in automobile lighting and, despite major improvements in modern automobile headlights, has remained acute to this day. Gradually, the awareness of the need to change the light intensity and the distribution of the luminous flux of the headlights when passing oncoming cars was formed, i.e. In this case, the reflector of the outer right headlight was mostly deflected, so that its light beam, in addition to tilting down, shifted slightly to the right, illuminating the side of the road; the inner left headlight turned off and only the side lights remained, indicating the width of the car; on high-end cars, two sets of headlights were used: Such auxiliary headlights were installed either on the fenders or under the main headlights and were also used for parking lot lighting, so that the parked car and its dimensions were clearly visible at night to other road users.
This principle has become widely used in the automotive industry, undergoing only some modifications. Work on creating headlights with asymmetrical low beam began in the United States first.
In this case, the headlights were installed so that their light beams intersected, i.e. A similar system is suitable for changing the order of switching headlights for both right-hand and left-hand traffic; However, the design of the special headlights described is significantly more complex, requires very tight manufacturing tolerances and is expensive.
Sedan and station wagon For cars with a sedan and station wagon body: Location of headlight adjustment screws for a sedan class car Regulator of the horizontal plane of the light beam.
Regulator of the vertical plane of the light beam. Headlight adjustment bolts. For vehicles with a hatchback body: Location of the headlight adjustment screws for a hatchback car Adjuster for the vertical plane of the light beam Adjuster for the horizontal plane of the light beam In order to perform manipulations, you will need a Phillips screwdriver.
Drivers are attracted by the brightness of xenon and the ability to choose the color of the light beam.
Site navigation
LEDs are no less popular among car enthusiasts. They are less susceptible to mechanical damage and consume a small amount of electricity.
Diode angel eyes When choosing lamps to replace standard ones, you should consider the following points: Instructions for adjusting headlights After upgrading the headlights, replacing optics or lamps, it is advisable to adjust the headlights so that they correctly illuminate the road.
Even a novice driver can perform this procedure.
Before making adjustments, the car should be fully fueled, equipped with a spare tire, an assistant should be placed in the front seat or a load of about 75 kg should be placed. In this way, the conditions in which the machine is usually operated will be created. Tire pressure must be normal. Before adjusting the headlights, the vehicle should be rocked under load to allow the suspension to settle.
Replacing the headlight lens on a Chevrolet lacetti hatchback
How to adjust headlights on a 2013 Chevrolet Cobalt
CAR WORKSHOP - do-it-yourself car repairs
DIY headlight adjustment
If this does not happen, then you should adjust the headlights using the horizontal and vertical adjustment screws. adjusting headlights with your own hands - .
Adjusting Lacetti headlights with your own hands.
In order to avoid problems such as a reduced visibility range at night, as well as increased danger for drivers driving in the oncoming lane, you need to correctly adjust the car's headlights. Try the Lacetti Sedan and everything will work out.
Installation of fog lights Chevrolet Cobalt h 1
Adjusting the headlights of a Chevrolet Cobalt is a mandatory operation that is carried out in order to improve visibility on the road for the car owner and oncoming cars. Some motorists try to adjust their headlights only before the actual inspection, neglecting the safety of other road users. In fact, this operation should be carried out regularly and exclusively in specialized centers. — all about installing fog lights on Cobalt 2013.
Fog lights for Chevrolet Cobalt 2013 price
Damn, I can’t tell you the length of the tape, because I applied the tape to the headlight and immediately cut it off. Try a rope from the beginning of the headlight to the bottom, attach it and measure. It seems to me that 1 meter is enough, but this is not accurate information. UNIVERSAL LASER FOG STOP LIGHT WITH DELIVERY ACROSS RUSSIA Arrived...
Adjustment of the headlights without the device
To correctly adjust the headlights, it is necessary to combine the light spot formed by the optics with the reference adjustment diagram, which is usually provided by the car manufacturer (in our case, the headlight adjustment diagram for Tavria and Slavuta cars). The second part of the video is here “Adjusting headlights using the device, or how to check Uncle Vasya the traffic controller”...
Light on the road and safety
The location of the headlight adjustment knobs is marked with arrows.
Headlights are, first and foremost, a safety factor when driving.
Thus, it is necessary to create visibility on the road, to identify the car for pedestrians, but at the same time, the light rays should not blind an oncoming car. To do this, every car enthusiast must adjust the light beams.
Adjustment process
Device for adjusting headlights.
Many car enthusiasts do not know how to adjust the headlights on a Chevrolet Lacetti, and turn to a car service center, where it is not so cheap. But, this process can be carried out at home, with a minimum amount of necessary materials and tools.
Scheme for adjusting the headlight beam.
Chevrolet Lacetti Adjusting the direction of the Chevrolet Lacetti headlight beams
Replacing the headlight lens on a Chevrolet lacetti hatchback
Thus, the optical system of the headlight, including the light source - the filament, is one inseparable whole. Thus, k. The adjustment must be performed in the dark.
After all, I don’t have xenon, but ordinary light bulbs, and I myself switch the high beam on time...
We seat the assistant in the driver's seat. The four-headlight system, based on the principles described above, is widely used in the USA, and somewhat later in Europe. The other two headlights, located closer to the planes of the side marker of the car, have double-filament lamps, in which the main filament with a power of 50 W is used for low beam when passing oncoming traffic; the second thread with a power of 37.5 W turns on only simultaneously with the high beam headlights and serves to additionally illuminate nearby sections of the road with high beam.
The headlights now shine directly on the road, but during the adjustment process I realized that my knowledge in this matter is not great. However, acetylene headlights continued to be used for a long time, gradually being replaced by electric ones. Such a system is suitable for changing the order of switching headlights for both right-hand and left-hand traffic; However, the design of the special headlights described is significantly more complex, requires very tight manufacturing tolerances and is expensive.
Site navigation
Apparently I messed up the adjustment earlier... I decided to fix this issue immediately. The headlights now shine directly on the road, but during the adjustment process I realized that my knowledge in this matter is not great.
DIY headlight adjustment
I found information about this on the Internet. To be honest, everything is somehow complicated.
I think it would be better to go to a service station, where a specialist at a stand will adjust the headlights. Adjusting the headlights of a Chevrolet Lacetti To carry out the work, you will need an assistant, and also: The adjustment must be performed in the dark.
The vehicle must be fully fueled and without additional cargo. This is how Chevrolet Lacetti adjusts the headlights. Screen layout for adjusting the headlights: In this case, you need to prepare a stop or stand to place the protection vertically.
The sequence of adjusting the light of the headlights 1 We mount the vehicle on a flat horizontal platform perpendicular to the surface selected as the screen and at a distance of 5 m from it.
You can place a sheet of plywood in front of the car under the same conditions.
We mark the screen according to the picture. The necessary measurements can be taken using a tape measure.
Land Russia Moscow Belyaevo Age: The need for regular automobile traffic not only during the day, but also at night, at high speed, has brought to the fore the problem of lighting the path in front of the car over a fairly large distance, 60 m or more. This problem was solved by installing two headlights on the car - spotlights, in which the luminous flux of the light source was reflected by a paraboloid reflector and concentrated in a narrow solid angle, creating a light beam with high luminous intensity.
In addition to headlights, cars were also required to use a light to illuminate the rear license plate, which was often equipped with a rear-facing red eye, and could also use an acetylene torch as a light source.
However, the unreliability and danger of supplying acetylene to it with a rubber tube often forced the use of independent taillights with an oil or kerosene burner. Invention in the city From this moment, in essence, begins the history of the development of electric lighting devices on cars, which quickly reached a high degree of perfection, both in design and in the quality of production.
However, acetylene headlights continued to be used for a long time, gradually being replaced by electric ones. This is explained by the fact that standard cars of that time usually had the working mixture ignited in the engine cylinders from a high-voltage magneto, which was an autonomous source of electricity, and the engine was started manually by rotating the starting handle.
So the use of electric lighting has become technically and economically feasible. As automobile generator sets improved, electric lighting was used more and more widely.
MEET THE ALL-NEW CHEVROLET TRAVERSE
However, the electrical equipment of the car is only from
Thus, in the very first years of the use of electric headlights on cars with gas-filled lamps of high overall brightness, a serious danger of accidents and collisions arose when oncoming cars were moving on the highway due to the blinding of their drivers by the bright light of the headlights. Designers of automobile headlights were faced with the need to satisfy two incompatible requirements: This problem of glare from oncoming traffic is a specific and difficult problem in automobile lighting and, despite major improvements in modern automobile headlights, has remained acute to this day.
Chevrolet Lacetti manual
Chevrolet Lacetti Adjusting the direction of headlight beams
We adjust the direction of the headlight beams on a fully fueled and equipped car, with normal air pressure in the tires. We install the car on a flat horizontal area at a distance of 5 m from the screen (you can use a garage wall, a sheet of plywood or hardboard measuring 1x2 m). We draw a horizontal line 1 on the screen at a height equal to the distance from the center of the headlights to the floor. Below it, 65 mm, we draw a parallel line 2. We draw on the screen a vertical center line 0 (the distance from it to the center of the left and right headlights should be equal) and lines corresponding to the centers of the headlights (AE and BE). Set the headlight range control switch to position “0” (single driver or driver with a passenger in the front seat) and turn on the low beam headlights. Cover one of the headlights with opaque material. When adjusting, the upper boundary of the light beam should coincide with the lower horizontal line (see figure), and the point where the beam breaks (the point of intersection of the horizontal and inclined sections of the light flux) should coincide with the vertical line corresponding to the center of this headlight. Similarly, we adjust the direction of the light beam of the other headlight.
Scheme for adjusting the direction of headlight beams
The location of the light beam direction regulators on the headlight housing of a car with a hatchback body: 1 - light beam regulator in the vertical plane; 2 - regulator of the light beam in the horizontal plane
Location of light beam direction regulators on the headlight housing of cars with sedan and station wagon bodies: 1 - light beam regulator in the horizontal plane 2 - light beam regulator in the vertical plane
We adjust the direction of the headlight beam by rotating the regulators with a Phillips screwdriver. Similarly, we adjust the direction of the light beam of the other headlight. We adjust the light beams of the fog lights under the same conditions as when adjusting the headlights (see above). We measure the distance between the centers of the fog lights and the distance from the surface of the site to the center of the fog lights. We draw lines on the screen and draw another horizontal line below the height line of the center of the fog lights by 50 mm. The adjustment is made from under the car's bumper. By rotating the headlight adjustment screw with a Phillips screwdriver, we bring the upper horizontal border of the headlight beam to the height line of the center of the fog lights.
Screen marking diagram for adjusting fog lights: A - distance between the centers of fog lights; H - the height of the center of the fog lights on the car
We change the direction of the light beam of the fog lamp by rotating the adjusting screw with a Phillips screwdriver (for clarity, shown on the removed headlight).
Source
Tuning ideas
One of the common tuning options is replacing standard lamps with xenon or LEDs. A great way to improve the appearance is to modify the headlights - with angel eyes or eyelashes. For tuning, LEDs and headlight covers are used. You can darken the optics. For this it is better to use a special film.
Installing alternative equipment makes it possible to choose different color schemes. The headlights inside can be painted white, red or black. The light bulb can be blue, yellow, red or another light. Projector headlights and FF reflectors are in demand. Despite their small size, they provide greater efficiency.
Photo gallery “Tuning options for the Chevrolet Lacetti”
Headlight polishing + adjustment according to GOST — Chevrolet Lacetti 5D, 1.6 l., 2008 on DRIVE2
So, let's begin. I've been wanting to polish my headlights for a long time, but I still can't. Moreover, I installed lenses. But it still happened. Thank you - zolotojs. I was at a meeting on Saturday, and before it started I went and polished the headlights. There is an effect compared to what happened, although it was not particularly deplorable. Unfortunately there are no photos before polishing.
smeared
They did the polishing with a machine. But first we removed the layer with fine sandpaper and water. It took about 25 minutes.
beauty
Shiny
There is an effect, and the view is much nicer. I still plan to tighten up the armor this weekend.
Next, it was necessary to adjust the headlights since I had adjusted them myself at one time. Having gone through all the services in the city of Gagarin, they told me there is no device, we can only do it by eye. I did it by eye, but that’s not it. And yesterday I remembered that at work we have a motor transport workshop and there is a device there, I called the boss and made an agreement. I went in the morning.
Master at work
I’ll say right away - the horizon was set up perfectly, the height was raised up. Therefore, I drove with the corrector position - 1.
Like this
Unfortunately, the focus is on the glass, but you can see that the horizon is above the line.
That's how it was
The picture shows how I drove. The left headlight was shining to the right, not properly illuminating the left side, the right one was more or less level.
And this is what happened after adjustment
We made the horizon along the line and also adjusted the jackdaws along the lines on the device. I know the master, so we also chatted about lenses. Now everything is correct and in accordance with the rules. I didn’t blind it, and now I won’t do it anyway. Closer to spring it is necessary to install the washer.
Near
Further
Smooth roads everyone.
www.drive2.ru
Adjusting the direction of the light beam on the VAZ-2114
The sequence for self-adjusting headlights is identical for many cars. But the overall dimensions of the vehicle models themselves affect the markings applied to the plywood sheet.
So, on the VAZ-2114 model the sequence of work is the same - the car is placed on a flat platform in front of a wall with a plywood sheet leaning against it.
Drawing the first horizontal line and the central vertical line is done in exactly the same way as on the VAZ-2107. But the lower horizontal line for this car is applied at a distance of 65 mm.
Also, the distance between the centers of the headlights of the VAZ-2114 is 964 mm, so the two side vertical lines are drawn at a distance of 481 mm from the central one.
These are all the nuances that should be taken into account when adjusting the headlights on a VAZ-2114.
All adjustment work on this model is also carried out using adjusting screws located on the back of the headlight.
Headlight adjustment — Chevrolet Lacetti SW, 1.8 l., 2005 on DRIVE2
After installing the bilens, the next step was adjusting the headlights. After I adjusted the headlights, I skated for about a month and no one blinked at me yet. Accordingly, we can conclude that I am not blinding anyone, and you can safely share information about how I adjusted the headlights. I adjusted the headlights horizontally immediately on the disassembled headlight, since it is much easier to do it on it.
Next, in the dark, place the car on a flat horizontal platform at a distance of 5 m from the screen - a light wall of a building, garage, etc. (this is the most difficult part, in my case the garage wall). You can use a sheet of plywood or hardboard measuring 1x2 m. It is also recommended that when adjusting the headlights, refuel the car, put the tool and spare wheel in their original places, and check the pressure in the tires of all wheels. It is also recommended to have an assistant sit in the driver's seat or place a 75 kg load and slightly rock the car from the side to install the suspensions. Next you need to measure the distance from the centers of the headlights to the floor (in my case 70cm), at this height draw a line on the screen (in the figure - line 1), and 60 mm below it - a second one (line 2) (This value varies for different cars since all cars have a different incidence coefficient of headlights. In Lachika it is 1.2%. For example, in a car the incidence coefficient of light is 1%, then at a distance of 5m the light should fall down 5 cm, at 6m - 6cm, etc. Next you need to draw on the screen a vertical center line O (the distances from it to the centers of the left and right headlights should be equal) and lines A and B corresponding to the centers of the headlights.After the marking is ready, you need to set the headlight electric corrector knob to the minimum load position, that is, 0 .
Cover one of the headlights (with a piece of cardboard, plywood, etc.). Turn on low beam headlights. Using the screws located on the back wall of the headlight, adjust the direction of the light beams of the uncovered headlight (which in the case of a cover is not very convenient, since for this you need to remove the headlight)
sorry for the quality
To begin with, I removed the headlight since I needed to twist a lot, and then I adjusted the light with a screwdriver, like this.
. The upper boundary of the spot (horizontal) should coincide with the bottom line, and the break point of the beam (point E of the intersection of the horizontal and inclined sections) should coincide with the vertical line of the center of the headlight. After this, open and adjust the second headlight, closing the first one. Here is the drawing I made on the garage wall:
When setting up, I specially turned the left headlight slightly horizontally and aimed it a little lower so as not to blind oncoming drivers.
The photo was taken after the headlights were adjusted. Unfortunately, the photo directly from the light adjustment was not preserved
I also want to share photos of low and high beams in the dark:
low beam
2 distant ones =)
I hope someone finds this post useful. Thanks everyone for your attention.
www.drive2.ru