In order to tighten the front parking brake cable of the VAZ 2101-2107, you need to drive the car onto an overpass or inspection hole. Then you need to lift the rear of the car with jacks so that the wheels sag.
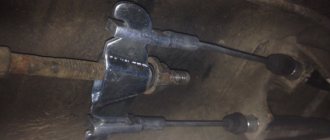
The parking brake cable adjusting nut is located between the roller it goes around and the junction with the rear cables. Hold the end of the cable so that it does not turn, and tighten the nut three to four turns clockwise.
After this, you need to check the effectiveness of the parking brake again. If it does not hold the car well enough, we tighten the cable again in the same way, but we must take into account the fact that the cable will have to be replaced in the near future.
↑ Inspection and repair
- After loosening the locknut 26 and the adjusting nut 27, remove the tension spring 11, then completely unscrew the locknut and nut.
- Disconnect the cable brackets 15 from the body floor and the rear cable end from the brake shield; remove the brackets and rear cable.
- Remove roller 8 with sleeve 7.
- Remove the lever protective cover, and then the lever assembly and front cable.
- After removing the cotter pin and thrust washer, disconnect the front cable from the handbrake lever.
- Install the parking brake in the reverse order of removal, followed by its adjustment.
↑ Diagram of the brake system of the VAZ-2107 car
1 — brake disc; 2 — brake pedal; 3 - vacuum booster; 4 — master cylinder for hydraulic brakes; 5 — pipeline of the front brake drive circuit; 6 — front brake protective cover; 7 — front brake caliper; 8 - vacuum pipeline; 9 — master cylinder reservoir; 10 — parking brake lever button; 11 — parking brake drive lever; 12 — lever latch rod; 13 — lever latch; 14 — bracket for the parking brake drive lever; 15 — return lever; 16 — pipeline of the rear brake drive circuit; 17 — flange of the cable sheath tip; 18 — rear brake wheel cylinder; 19 — rear brake pressure regulator; 20 — pressure regulator drive lever; 21 — brake pads; 22 — lever for manual drive of the pads; 23 — rod of the pressure regulator drive lever; 24 — bracket for fastening the tip of the cable sheath; 25 — rear cable; 26 - lock nut; 27 — adjusting nut; 28 — bushing; 29 — rear cable guide; 30 — guide roller; 31 — front cable; 32 — parking brake warning lamp switch stop; 33 - brake light switch.
Replacing the handbrake and front cable on a VAZ 2101-VAZ 2107
Removal
Remove the guide from the tip of our cable, for more details see the article: “Replacing the rear cable”, points 3-4.
Take a wrench and remove the bolt securing the roller to the bracket (the bracket is indicated by the blue arrow). Carefully remove the roller by rolling the roller towards the tip of the front cable, as shown in the figure, and remove it from the car.
Note! Be careful: inside the roller there is a bushing (number 3 in the photo below) and a fastening bolt (number 1). Don't let the parts fall and get lost.
We recommend using Litol-24 or LSC-15 lubricant, lubricating the contacting surfaces of the bushing itself (the surface is indicated by the letter B) and the surface of the roller (the letter A). To do this, remove the bushing from the socket.
Now pull the cable to the bottom and remove the cable from the bracket and the intermediate support of the cardan drive (indicated by the blue arrow).
Get out from under the bottom of the car and move into the interior. While inside the car, remove the two screws securing the handbrake trim, remove it and set it aside.
You will see four handbrake mounting bolts. By unscrewing them, you will remove the handbrake from the car along with the attached cable (front).
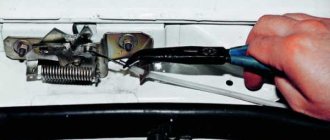
Note! If necessary, disconnect the cable from the handbrake: using pliers, remove the small cotter pin (looks like a small twisted wire inserted into the hole; a washer is placed under it, holding the parts in place) that goes into the hole indicated by the red arrow. Unfortunately, the hole is hard to see in the photo, but it is present in the so-called finger, where the cable tip is installed. Remove the cotter pin securing the end of the cable and remove the washer with the cable as shown in the figure below.
Installation
New parts are installed in the reverse order of removal. ,After installation, adjust the cable; the process is described in detail in the article: “Adjusting the cable.”
Note! Is the handbrake button stuck? Most likely the spring is to blame. It can be easily removed and replaced with a new one:
- Unscrew the handbrake button completely;
- pull out the hole button together with the spring;
- replace the spring with a new one;
- Reinstall the parts in reverse order.
The operation of replacing the cable is carried out on a lift or inspection pit.
To replace the handbrake cable, it is necessary to remove the brake drums of the rear wheels. When removing them, it is possible to check the condition of the brake pads and parts of the brake mechanism, especially the working cylinders. The latter should not have any traces of brake fluid leakage, and the rubber boots should not have cracks or damage.
How to tighten the handbrake of a VAZ 2107. Adjusting the handbrake
The parking or handbrake (handbrake) is designed to lock the wheels while the car is parked, and is most often used on uneven sections of the road (downhill slopes).
A properly adjusted handbrake should hold the car in place when tightened by 4-6 teeth, on an area with a slope level of 25%. If the handbrake does not hold, it needs adjustment or repair of the parking brake.
In order to disable the handbrake, you don’t need much, just drive once and forget to take the car off the handbrake. While driving, the pads will quickly wear out and simply will not reach the brake drum when you tighten it.
Why the handbrake does not work on the VAZ 2107
Like any other part or mechanism, the handbrake cable tends to wear out and become unusable. The parking brake on the VAZ 2107 is activated using a lever located in the middle part of the car between the driver and passenger seats.
Periodically, the handbrake cable should be tightened, as it becomes weakened, which leads to a decrease in the efficiency of the device. The reasons why the handbrake on the “seven” may not function are due to the following factors:
- Excessive cable stretch.
- Damage to the cable.
- Malfunction of the brake mechanism in the rear wheel drums.
During prolonged use of the car, when the handbrake is constantly used, owners are faced with the need to periodically restore the cable tension. Over time, the device in question stretches, and there is nowhere to tighten it. The only way out of the situation is to exchange the product for a new one. It is recommended to carry out work on replacing the handbrake cable in an inspection hole, but you can do without it.
Changing the handbrake cable
Replacing the handbrake cable on a VAZ 2107 car begins with the fact that it is first necessary to dismantle the brake drums of the rear wheels. After dismantling the brake drums, you should pay attention to the condition of the rear brake pads and working cylinders. The presence of traces of fluid leakage will indicate that the mechanisms also need repair.
Each owner of his car decides individually when it is necessary to change the handbrake cable. It all depends on the degree of wear of the cable. The procedure for replacing the parking brake cable is divided into 2 stages: dismantling and installation, as well as adjusting the tension.
The replacement algorithm is as follows:
- After the rear wheels and brake drums are removed, you need to go down into the inspection hole and find the tension adjusting rod. This rod is equipped with a spring, which must be removed using a screwdriver.
- Both nuts are unscrewed, after which the adjustment bar is removed. Next, the rear and front handbrake cables are dismantled.
- Using a wrench, you need to unscrew the two nuts securing the two brackets. These brackets prevent the cable from falling. There are screws under the nuts that prevent them from unscrewing on their own.
- After this, you should remove the rear brake drums and remove the springs that secure the brake pads. The pads can also be replaced if they show excessive wear.
- Next, you need to pull the cable to disengage it from the bracket against which it rests.
- The brake pads are removed. There is no need to remove both pads on the wheel. To replace the rear cable, you only need to remove one rear brake pad.
- Now you should unscrew two fixing bolts from the back of the brake shield of both wheels. With their help, the cable tip is fixed. After unscrewing these two bolts, you should pull the cable, as shown in the photo below.
- Using a 10mm wrench, you need to unscrew the front cable mounting brackets. After unscrewing the bolt, carefully remove the roller. To remove the roller, you need to roll it forward in the direction of the tip.
- To remove the front part of the device, you need to pull on the product to remove it from the bracket and intermediate support structure.
- After this, you need to get out of the hole and go into the car interior. When performing work, the handbrake must be in its lowest position. Inside, unscrew the two screws securing the handle trim.
- There are 4 bolts under the cladding that need to be unscrewed. After unscrewing them, you will need to remove the handle along with the front cable.
- To disconnect the cable mount from the handle, you will need to use pliers to remove the small cotter pin that secures the device to the handbrake handle.
- After this, the device can be completely removed from the car and a new cable installed in its place. The installation process of both products is carried out in the reverse order of removal. After this, you should secure them and begin the tension adjustment procedure.
It is important to know! When installing the rear cable, it is important to know the following: this element has right and left sides. On the right side there is a rubber tube, which acts as additional insulation of the braid from the nearby hot resonator pipe.
Adjusting the hand brake VAZ 2107
Adjustment of the handbrake should be performed not only periodically when the parking brake is lost, but also after replacing the cable. In order to adjust the cable tension, you will need to take the following tools:
- pliers;
- two keys for 13;
- a can of WD-40 lubricant.
Why does the VAZ 2107 handbrake fail?
The most common cause is jamming of the cable, this is facilitated by moisture, rust, as well as various dirt that gets on the cable while moving. This can be treated by cleaning or washing the cable, as well as its subsequent lubrication. If the problem recurs over time, the VAZ 2107 hand brake cable needs to be replaced.
Often the cause of the malfunction is jamming of the handbrake lever or the ratchet mechanism of the ratchet.
In order to repair the handbrake, you should make sure that it is adjusted correctly and that the problem is not in the cable.
Note! First of all, you need to understand that adjusting the parking brake and its cable makes sense provided that the rear brakes, as well as the cable itself and the handbrake drive are in normal technical condition.
To work you will need:
- Two “13” wrenches and pliers.
- Jack.
Replacing the handbrake cable
The VAZ cable must also be replaced on an overpass or inspection pit. First of all, you need to screw the adjusting nut and locknut onto the tip so that the place where the spring hooks to the tip is visible.
Then use pliers to unhook the spring. Next, holding the tip from turning, unscrew and remove both nuts and the cone bushing from it. The cable end is now free.
We completely unscrew the bolt securing the roller through which the handbrake cable passes, remove the roller from the holder and pull out the cable. The work under the bottom is completed, you can move into the interior.
Adjusting the handbrake yourself
If you promptly ask yourself the question of how to tighten the handbrake on a VAZ-2107, and do all the work correctly, you will be able to avoid a number of unpleasant situations. Securely locked wheels will prevent the car from rolling away while parked. In addition, a properly functioning hand brake system makes it much easier to move the car away if you are on a steep road. Therefore, if the handbrake on a VAZ does not work effectively enough, read the instructions for adjusting it.
Timely tightening of the handbrake on the VAZ-2107 will allow you to avoid unpleasant situations
Before pulling the handbrake on the VAZ-2107, make sure that the brake pads of the rear wheels are in good technical condition. And also check the condition of the cable itself - perhaps it is too stretched or worn out and a regular tightening will not solve the problem. And also check the operation of the handbrake drive. If all parts are in good condition, prepare two “13” wrenches and pliers and begin adjustment, guided by the sequence of actions described below:
- The VAZ-2107 hand brake is adjusted under the bottom of the car, so it must be installed above the inspection hole or the rear of the car must be raised using a jack.
- Set the parking brake lever to the applied position by tightening it 5–6 clicks.
- After this, while under the car, remove all dirt from the adjusting rod and nuts. After cleaning, hold the adjusting nut with one wrench and loosen the lock nut.
- Next, by tightening the adjusting nut, you need to tighten the handbrake cable until the rear wheels lock. During the process, the adjusting rod should be held with pliers so that it does not rotate.
- After the required degree of cable tension has been set, tighten the nut a few more turns - this is necessary to reduce the free play of the lever.
- Now check if the wheels actually brake, and if everything is fine, you can tighten the lock nut.
How to change a handbrake cable
Not all car enthusiasts know that the parking brake system includes not one, but two cables - front and rear. It is the second one that often has to be changed. There may be several reasons for this, including critical wear and damage. And also in case of frequent jamming, the cable has to be replaced. In addition, if, after adjusting its tension, you find that the handbrake can no longer block the rear wheels, while the brake pads are fully operational, replacing the VAZ-2107 handbrake cable will be the only correct solution. We will tell you how to do this further.
If you do not intend to contact a car service, you can change the unusable cable yourself. To do this, you need to buy a new part and prepare the same simple set of tools that are used in the adjustment process. You will also need a jack.
Important! Buy a handbrake cable only from a supplier that has proven itself and is trustworthy, since a low-quality product made in violation of technology will not last very long. If everything you need is ready, you can start replacing, starting with dismantling
The following guide describes in detail how to change the handbrake cable on a VAZ-2107 in a garage - you just need to follow its instructions:
If everything you need is ready, you can start replacing, starting with dismantling. The following guide describes in detail how to change the handbrake cable on a VAZ-2107 in a garage - you just need to follow its instructions:
- First, you need to raise the rear of the car so that the rear wheels can rotate freely. This is necessary to dismantle the brake drums, without which removing the old cable and installing a new one is simply impossible.
- Now you need to remove the brake pads, and there is no need to remove both, but only the rear one on each wheel.
- Next, similar to the adjustment process, hold the adjusting nut on the rod with one wrench, and loosen the locknut with the second. But in this case, both nuts should be unscrewed. First, disconnect the tension spring from the rod using pliers.
- After removing the nuts, you can easily remove the rear cable guide, and then remove the cable itself from it.
- On the left and right sides of the car, two fixing brackets are attached to the bottom, in which the protective shell is placed - they must be removed by unscrewing two nuts on each.
- Further towards the wheels, the protective shell rests with two tips on two more brackets. There is no need to unscrew anything here - just disengage the tips by pulling the shell back.
- Having reached the brake flap on each wheel, remove the two bolts that hold the tips of the protective shell. Then pull the rope to bring them out.
Further, replacing the handbrake cable on a VAZ-2107 car involves installing a new product. To do this, follow the same pattern as when removing, but in reverse order. At the same time, make sure that the protective sheath passes over the longitudinal rod, and the right and left branches are located each on their own side, since they are not the same. So, on the shell of the right branch there is a rubber tube, but on the left it is missing. Before replacing the cable, it is advisable to install new brake pads, and after completing all installation work, be sure to adjust the hand brake system.
https://ladaprofi.ru/vaz-2107/kak-sdelat-zamenu-trosa-ruchnika-na-vaz-2107.htmlhttps://provaz07.ru/tormoza/zamena-trosa-ruchnika-vaz-2107.htmlhttps: //vaz-russia.com/remont/zamena-ruchnika-i-perednego-trosa-ruchnika-na-vaz-2101-2107.htmlhttps://www.vazzz.ru/zamena-ruchnogo-tormoza-na-vaz- 2107/https://car-exotic.com/vaz-cars/vaz-2107-car-brake-17.htmlhttps://carextra.ru/remont/zamenit-ruchnik-na-vaz-2107.html
