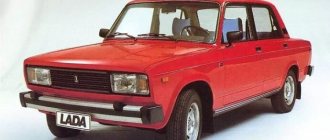
Instrument panel VAZ 2107
The instrument panel is designed for ease of driving, so it should be easy to use and quickly provide the driver with all the necessary information. This is first of all:
- the condition of systems responsible for safe driving (brakes, airbags, etc.);
- driving characteristics (speed, fuel consumption);
- additional information (time, temperature, remaining gasoline, etc.).
VAZ 2107 dashboard: description and photo
The standard dashboard of the VAZ 2107 is quite laconic and gives the driver only the most basic information about the car and its driving characteristics.
The standard dashboard of the VAZ 2107 has a limited number of instruments and indicators and is characterized by rather dim backlighting
The instrument panel of the VAZ 2107 includes:
- 7 indicator lights;
- 6 pointer indicators;
- 2 digital indicators.
The following devices are located on the panel:
- A voltmeter is an indicator of voltage in the vehicle’s on-board network.
- Speedometer is an indicator of driving speed.
- Odometer is a counter for the total mileage of a vehicle.
- Tachometer. Indicates the engine speed (engine speed).
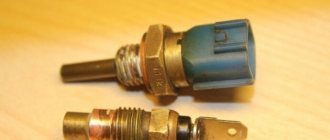
- Coolant temperature gauge.
- Econometer. Helps to select the most fuel-efficient operating mode.
- Warning lamp block:
- turning on the direction indicators;
- malfunction of the engine control system;
- low battery charge;
- turning on the side light;
- turning on the high beam headlights;
- insufficient oil pressure;
- engaging the parking brake;
- Daily distance counter.
- Fuel reserve warning lamp.
- Fuel level indicator.
Installing a dashboard on a VAZ 2107 from another car
If there is a desire or need to replace the G7 dashboard, there are several ways:
- purchase a new, more modern dashboard. This is quite an expensive pleasure; for example, a Ferrum panel with an on-board computer costs about 23 thousand rubles;
- update the “tidy” by replacing stickers and arrows;
- install an instrument panel from another car.
Having decided to select and install a torpedo from another model on a VAZ 2107, you need to take into account that the dashboard of each car has its own configuration. To install it, you will have to additionally carry out work to adjust the size and shape.
Dashboard from another VAZ model
The simplest replacement would be a panel from a VAZ 2110. There are no problems with the job, and the resulting result looks much more interesting. There will be no complications with electrical wiring: the wires are almost identical and connected in the same way.
The dashboard from the VAZ 2110 looks much more modern and representative
Dashboard from Gazelle
On the “seven” you can install the dashboard from the “Gazelle”. This is a more complex option; it differs greatly in size and shape. In addition, adapters will be needed to connect the wires, since the electrical circuits are also very different.
To install the dashboard from the Gazelle on the “seven”, a serious alteration will be required
Dashboard from a foreign car
The most difficult but effective option is to install tidy from other foreign car models. Here it is necessary to take into account the correspondence of the “Seven” devices and the selected foreign car. Most likely, a similar set of dashboard indicators will be found in models produced in the late 1980s and early 1990s.
For the VAZ 2107 it is necessary to select a torpedo with the same instruments and indicators as on the standard panel
What to do if the instrument panel on a VAZ 2109 does not light up
Home › Cars › VAZ ›
When the instrument panel on a VAZ 2109 does not light up, this is one of the common malfunctions of this unit. To fix a problem, you first have to find the cause of its occurrence.
Types of panels
Instrument panels on the VAZ 2109 are of at least three types:
- Low panel;
- High panel;
- Electronic panel on nines with Europanel.
On versions with a low panel, failure of the entire panel is extremely rare. This is due to the fact that here the speedometer and econometer are equipped with mechanical drives. Therefore, it is unlikely that they will fail along with the electrical component.
Why doesn't it light up?
- First, remove the cover of the mounting block and make sure that the fuse is intact. The fuse markings are located on the inner surface of the cover. You should look for fuse F16 or F5, depending on the year of manufacture of your VAZ 2109.
- If the fuse is intact, be sure to check whether the contacts of the fuse you are looking for have not oxidized. It is not uncommon for shields to fail due to broken contact.
- Check if there is power to the dashboard. To do this, you will need a warning light and the ignition on. Disconnect connector X4 in the mounting block and check for voltage at pin 3. The disadvantage of the VAZ 2109 design is that when it rains, the mounting block immediately becomes wet. This causes oxidation of the contacts in the pads, which causes the electrics to stop working. Sometimes not only the contact is oxidized, but also the board of the Nine mounting block.
If none of the above actions yielded results, you will have to be disappointed. After all, now you need to remove the dashboard and check the condition of the wiring, contacts, and negative connections. Here it is better to trust a professional electrician or set aside a whole day to troubleshoot problems yourself. There is no need to rush here.
Popular faults
If we talk about the dashboard of VAZ 2109 cars, then they are characterized by certain problems. We will tell you about them, and also tell you how to act correctly in a given situation.
| Fault type | Your actions |
| Gasoline level and temperature indicator does not work | In most percent of cases, this situation occurs due to breakdown of devices, sensors of these devices, or an open circuit of the power supply. Therefore, first check the circuit for continuity, make sure that the fuses have not blown. If this is not the case, check whether the gas level and temperature sensors are working. Only if none of the actions allowed you to get rid of the breakdown, you can begin to replace the devices themselves. No options, the problem lies in them |
| When the fuel tank is full, the arrow points to zero | If you have worked on the fuel level sensor, the fault most likely lies with you. When manipulating this device, the float limiter is often knocked down. Either the limiter is installed incorrectly or adjusted, causing the resistor winding to end. To resolve the problem, remove the sensor and then adjust the limiter again |
| The fuel gauge needle regularly jumps and ends up at zero | Here, most likely, the resistor has weak contact with the current collector. Another possible option is that there is a break in the resistor. To resolve this situation, we recommend replacing the hot level sensor with a new measuring device |
| The fuel level lamp is constantly on | If this lamp is constantly on, there is probably a short circuit in the fuel level sensor supply wiring to ground. Another option is that the sensor’s flexible bus is shorted to the fuel intake pipe. You will have to disassemble the device to align the bus and get rid of the resulting short circuit |
| Indicator lamps do not work on the dashboard | There is a high probability that the light bulbs have simply burned out, or they are poorly held in their seats due to loose contact. Replace the bulbs, but first try tightening the contacts. Traces of oxidation may be detected. When cleaned, the light bulbs can work normally again. Also, do not exclude the possibility of wiring breakage or oxidation of the tips of the supply wiring. Try going over the wires with a tester, cleaning the contacts if necessary. |
| The speedometer does not work, the flexible shaft is noisy | In such a situation, you will have to change the speedometer drive cable or replace the entire speedometer assembly. But before you bother so much, check that the fastening nuts of the tips are tightened correctly and properly. The flexible shaft may make noise during operation due to deformation or violation of the permissible bending of the shell of less than 10 centimeters during installation |
The instrument panel of the VAZ 2109 is not so complicated that you cannot figure it out on your own. But in the absence of experience, it is better to entrust the repair to specialists, or to enlist the support of a partner who understands this matter.
Source: https://www.vazzz.ru/pochemu-ne-gorit-podsvetka-na-paneli-priborov-vaz-2109/
Torpedo tuning
Replacing the dashboard bulbs of the VAZ 2114
“Seven” is known for its interior, which is very modest by modern standards. Therefore, VAZ 2107 owners change the internal structure of the car in various ways, trying to make it stylish and ergonomic.
The dashboard (colloquially referred to as a dashboard or dashboard) is the part of the car that both the driver and passengers see most often, so it is the part that receives the most attention when tuning the car’s interior. The dashboard of a car is a set of arrows and light indicators that allow the driver to monitor the technical condition of the car, control the performance of devices and systems, as well as the speed of movement.
The dashboard of a car is a set of arrows and light indicators that allow the driver to monitor the technical condition of the car, control the performance of devices and systems, as well as the speed of movement.
The standard “seven” torpedo looks quite simple and mean. In addition, it has a serious drawback - very weak backlighting, which is why at night the driver has to be distracted from the road, looking closely at the numbers. This is extremely unsafe when driving on the highway at high speed.
The standard VAZ 2107 torpedo has an outdated design and a small number of functions
Directions for improving the “Seven” torpedo could be as follows:
- purchasing tuned elements and installing them instead of standard ones;
- introduction of additional mechanisms and systems (thermometer, parking sensors, on-board computer, etc.);
- independent installation of instrument scales, lighting, etc. - both “native” and from other car models.
Any tuning option begins with dismantling the car’s dashboard.
Before any work related to the electrical circuits of the car, including removing the dashboard, it is necessary to de-energize the car, that is, remove the negative terminal from the car battery.
After removing the torpedo, you can begin to remake it. For this you will need:
- multi-colored LEDs (purchased at electrical stores);
- instrument scales (sold in a large assortment at car markets);
- arrows (you can choose from other cars at auto repair shops or in stores);
- hand tool.
Tuning of the instrument panel is carried out according to the following algorithm:
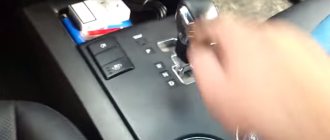
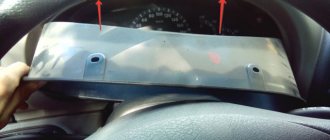
Remove the instrument panel from the dashboard.
Remove the arrows very carefully without damaging the pins on which they are attached.
Remove old stickers.
Degrease the surface with an alcohol-containing liquid, cut out and install new stickers.
Install new arrows and install the panel in place.
When replacing the hands, you need to take into account the main point: it is very important to install the hands correctly. In the zero position, the speedometer needle is between the 0 and 20 km/h marks
The new indicator must be in the same position after installation is complete, otherwise the speedometer readings will be distorted. To do this, at the beginning of work, you need to mark the location of the arrow on the dial, and during the installation of a new one, align it with the mark.
When replacing pointers, it is important to note the place where they are in the zero position to avoid distortion of instrument readings
You can improve the backlight by installing additional LEDs.
The dashboard of the VAZ 2107 after installing LED backlighting becomes much brighter than the standard one
Which ones to choose
To install new light bulbs instead of failed ones, you will have to remove the instrument panel, which is rather not so difficult as it is troublesome
For this reason, it is important to choose a high-quality replacement, which will allow VAZ owners to encounter this problem less often
In most cases, car enthusiasts install classic lamps with incandescent filaments, but they do not last long. In fact, their only advantage remains their relative cheapness. Moreover, the dashboard is illuminated by them much worse than by LEDs. The latter consume about 9 times less electricity and work for many years.
Whatever type of lamp you decide to buy, in both cases those that are marked AMN 12-3-1 are selected for illumination. When it comes to indicators, we need A 12-1,2. All of them are chambered for T3W.
Please note that if you took an LED, then when installing it on a battery charge signal, you will have to add a resistor in series to the circuit, which equalizes its energy consumption with a regular incandescent lamp. Otherwise, difficulties may arise with the correct operation of the indicator.
Next, we'll talk about the replacement process itself.
Dismantling instructions
Instructions for selecting and replacing light bulbs in the dashboard of the Lada Kalina
In order to remove the tidy, you need to study the operating instructions and follow the sequence of actions:
- Disconnect the car from power by disconnecting the negative terminal from the battery.
- Use to remove the caps from the stove control levers.
- The next step is to unscrew the fastening nut of the daily mileage reset handle.
- After removing the nut and washer, push the handle behind the dashboard.
- Using a thin screwdriver, you need to remove the plug, under which there is a self-tapping screw holding the instrument panel. Unscrew it with a Phillips screwdriver.
- Removal of the shield should be done carefully
- After unscrewing the speedometer cable nut, disconnect the cable.
- Next, remove the vacuum discharge hose from the ECON indicator fitting.
- By disconnecting the three wire connectors, you can remove the instrument panel from the car.
- After completing the necessary repair or tuning steps, reassemble the panel in the reverse order. If the devices do not work, then you need to repeat the assembly and disassembly operation.
Block lights
Here are the turn signal bulbs, dimensions, low and high beams. To get to the side lights and low and high beam lamps, you need to:
Remove the protective cap. We turn it counterclockwise, the indicators are marked on it. It has no thread, but can be removed by turning it 180 degrees. In its inner part there are “antennae” with which it is fixed in the body of the headlight unit.
Remove the wire retainer. It secures the low beam lamps in the reflector housing. This clamp is made of elastic metal, so you need to remove it carefully. We take its upper ends out of the grooves and lower them down, freeing the socket of the high and low beam bulbs.
We take the lamp out of the reflector, holding it by the base, and remove the plug.
Important! If it is working properly, but you want to install a halogen or LED one, it is not recommended to touch it with your hands. Otherwise it may burn out
Changing the headlight bulb
We take it out of the reflector housing along with the socket. If you haven't done this for a long time, then getting it out will be problematic. To do this, remove the low and high beam unit. We insert a finger into the reflector hole, feel for the size bulb and push it out with a little force.
To replace, you need to lightly press the light bulb and turn it half a turn. It will come out of the plinth retainers and can be easily removed. We insert the new one in reverse order.
Important! When installing into the headlight housing, do not use great force - the reflector may crack. To ensure easy installation, it is recommended to sand the seat with fine-grained sandpaper.
This will remove oxides, dust, and dirt that interfere with smooth installation.
Video, instructions for replacing light bulbs in the headlights and dimensions of the VAZ “Seven”:
Direction indicators
We turn the turn signal socket counterclockwise half a turn in the headlight unit housing.
Let's take it out. The lamp, similar to its dimensions, is fixed in the socket with two “antennae”. Therefore, they pressed lightly on it, turned it and took it out. The cartridge is made in the form of a single plate with a slot on one side. Therefore, the light bulb must be pulled out of it with little effort, because its contacts will cling to the socket.
Video about modifying the direction indicator in the headlight unit of a VAZ 2105-07, removing and replacing the lamp in it:
Why LED lighting is preferable
Tuning the dashboard of the VAZ 2107
At the moment, there are a variety of products on the lighting market that can be used to illuminate any brand of car.
Industrial dashboard lighting
But in most vehicles such additional lighting is absent or incomplete. This situation is especially relevant for older models that were manufactured at a time when LED backlighting had not yet been heard of. When choosing an LED type of lighting, car owners are guided by the following positive aspects of such lighting:
- diodes of this type have small dimensions, which allows them to be installed anywhere on the dashboard. At the same time, they are easily massaged;
- simple soldering of LEDs for different connections between them. Moreover, if the LED strip is re-soldered, then this procedure is carried out according to certain rules, which are also typical for working with individual diodes;
- even a small number of diodes installed on the panel can create a full-fledged type of lighting, sufficient for comfortable driving;
This type of lighting consumes a minimal amount of electricity, which is very important for a battery-powered car and its alarm system. At the same time, installing diodes is not very difficult
Here you only need to correctly connect the elements of the lighting system to each other. Almost anyone can do this kind of work with their own hands.
At the same time, installing diodes is not very difficult. Here you only need to correctly connect the elements of the lighting system to each other. Almost anyone can do this kind of work with their own hands.
Combined instrument lighting
To implement this type of lighting, you need to stock up on the following materials:
- double sided tape;
- LED in a socket (three pieces);
- foil.
In order to remove the dashboard, it is necessary to clarify the removal steps with the instructions that came with the vehicle. The algorithm of actions here is as follows:
- removing the instrument cluster;
- carefully unscrew the speedometer cable and disconnect all existing plugs;
- illumination sources should be located in the upper part of the instrument panel - three light bulbs. There will also be a green filter here. It can be removed or left;
- The light bulb is being replaced with LEDs and a foil diffuser is being installed. We secure it with double-sided tape.
- How to remove the dashboard of a VAZ 2112
Ready-made dashboard lighting
After this, all that remains is to assemble all the panel parts and install them in their original places.
General information about tuning the VAZ-2107 instrument panel
The VAZ 2107 is a model that has proven itself well on domestic roads. According to experts, tuning a VAZ 2107 with your own hands can completely change the appearance of the car and somewhat improve its operational capabilities. Today, there are all the necessary accessories and elements for tuning. Thanks to them, your simple factory panel can be turned into an attractive and practical “gadget” inside the cabin.
Tuning the VAZ 2021 panel can begin with installing good lighting. This will allow you to avoid straining your vision at night. But more on that a little later. In addition, you can improve this part of the car in another way.
The main thing here is to turn on your imagination and decorate the car in such a way that it turns into an original and unrecognizable everyday practical “element” of your life. You can install, for example, white instrument scales. They look very unconventional and modern stylish. You choose their design yourself.
Also, for stylish and very relevant today tuning of this brand, installation of a modern, reliable and powerful audio system is perfect. The choice today is huge and choosing the option you need is very easy.
Without a doubt, it is better, if you have the money, to entrust the tuning to specialists; they are able to competently and quickly complete their work, but you should remember that you will have to pay much more for this than if you carried out the improvements and modifications yourself. Therefore, stock up on desire, patience and faith in yourself and go ahead to work.
Why do you need additional lighting?
Today, car tuning is carried out not only outside, but also inside its interior, and there is no better place than the dashboard. Diodes built into the panel will allow you to achieve the following positive aspects:
- give the dashboard a new unusual look;
- High-quality illumination of important elements of the dashboard;
- make additional lighting for the vehicle interior;
- make your car ride more comfortable;
- improve road safety. When the instrument panel is well lit, all the indicators are clearly visible on it, which allows you to correctly assess the position of the car on the road and not violate the rules of the road with your driving.
The easiest way to illuminate such an element of a car as the dashboard is to install diodes in it. The following types of LED products can be used here:
separate diodes. Using them as backlight, you can create full or decorative lighting for the dashboard. It is worth noting that LEDs can glow in different colors. Therefore, such LED lighting can beautifully complement external tuning, glowing with it in the same color scheme;
LED Strip Light. This tape is very often used as decorative lighting not only for a car, but also for home premises or street elements. It can be easily replaced with another, which will allow you to change the boring color scheme to a new one. The LED strip has a self-adhesive base, with the help of which its installation by hand is quite easy and quite quick.
Removing the instrument panel and preparing for replacement
To change the lamps in the instrument panel, the latter will have to be removed. It cannot be said that the PP can be removed with one movement of the hand: the designers of the VAZ 2107 made dismantling a little more difficult than on other cars of the VAZ family. Nevertheless, dismantling the PP is quite feasible in a garage or even a parking lot. In this case, the operation does not require any special knowledge. The tools we will need are:
I think all this will be found in the trunk of any VAZ 2107, and we can get started. First of all, we remove the plastic handles from the heating control knobs by prying them off with a flat screwdriver.
Removing handles from the seven's interior heating system
We unscrew the nut securing the daily counter reset button (marked with a red arrow), and push the button itself inside the shield.
Removing the daily counter reset button
Now you need to unscrew the screw that is located under the plug and secures the decorative trim. Remove the plug using a flat-head screwdriver and unscrew the Phillips screw.
Removing the fixing screw of the PP decorative trim
After this operation, the right side of the panel will move away so that you can get to the flexible speedometer control shaft.
Releasing the right side of the control panel on a VAZ 2107
The shaft is removed with bare hands: simply unscrew the nut securing it.
Removing the speedometer drive
Now remove the instrument panel from the clamp that secures its left side and pull it out slightly to get to the vacuum hose connected to the econometer. It can also be removed with bare hands, but be careful not to tear it.
Removing the vacuum hose from the econometer to the PP
It remains to disconnect the three power connectors of the instrument panel and the three wires on the VAZ 2107 heater switch. Before disconnecting, it is advisable to mark them so as not to confuse them when assembling the panel.
Disconnecting the power wires from the heater switch
We remove the decorative trim along with the PP and unscrew the four self-tapping screws securing the shelves (two on each, I marked them with red arrows) to the decorative trim, and the instrument panel can be removed.
Expansion of functionality
The VAZ-2107 is equipped with a minimum of instruments, and therefore installing new ones will significantly increase the information content of the panel. Most often they add:
- light and temperature sensors;
- fuel consumption indicator per kilometer;
- ECU;
- TV, etc.
Additional holes are cut for them. It is also necessary to install wiring and make changes to the design of the machine (in particular, to provide it with missing sensors).
Instrument panel diagrams
Electrical diagram of the operation of devices in combination with working elements
So, the operating diagram of the instruments located on the main panel in the cabin includes the following elements and combinations:
- indicator of the presence of engine oil in the engine;
- coolant temperature sensor;
- mounting switching block;
- fuel sensor;
- combinations of turns;
- indicator of the amount of fuel in the tank;
- tachometer;
- coolant temperature indicator;
- turning off the ignition;
- ignition relay;
The diagram shows the relationship of the sensors on the instrument panel with the main elements that directly perform the main work. Pointers only read information from operating devices and display it in an understandable form for human perception.
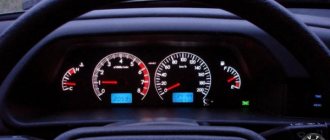
Diagram of the instrument panel of a VAZ-2107 car
The above diagram makes it clear about the exact location of the instruments on the dashboard, which are important elements in driving the VAZ 2107.
| 1 | Lever designed to switch wiper and washer modes |
| 2 | Buzzer button |
| 3 | Turn signal control lever |
| 4 | Headlight switch (high, low) |
| 5 | Elements for supplying fresh or warm air to the cabin |
| 6 | Hydraulic adjustment of headlights |
| 7 | Lever designed to open the hood |
| 8 | 12V power socket |
| 9 | Turning off the ignition |
| 10 | Turning on the hazard warning lights |
| 11 | Clutch |
| 12 | Brake |
| 13 | Heater switch |
| 14 | Instrument panel lighting switch button |
| 15 | Gas/accelerator |
| 16 | Head unit |
| 17 | Switch panel (outside light, heater fan, heated rear window) |
| 18 | Hand or parking brake |
| 19 | Lamp indicating that seat belts are not fastened |
| 20 | Reserve |
| 21 | Transfer speed switch |
| 22 | Built-in mechanical clock |
| 23 | Cigarette lighter with additional 12V socket |
| 24 | Lamp indicating the operation of the rear window heating |
| 25 | Warning light indicating the presence of brake fluid |
| 26 | Built-in ashtray |
| 27 | Storage box |
| 28 | Shelf for tools and things |
| 30 | Choke or manual gas |
| 35 | Instrument clusters |
Based on the above information, we can say that the VAZ 2107 car has in its set almost all the elements necessary to control the movement of the vehicle
It is important to monitor the operation of each device; if any of them does not function, then operation of the car is prohibited until the problem is corrected
- https://avtoyoutubb.ru/kak-snyat-panel-priborov-na-vaz-2107.php
- https://7vaz.ru/tjuning/tjuning-paneli-priborov-vaz-2107.html
- https://vagflash.ru/lada/kak-snyat-torpedu-na-vaz-2107-inzhektor-karbyurator-svoimi-rukami.html
- https://ladafakt.ru/kakuyu-torpedu-mozhno-postavit-na-vaz-2107.html
- https://expertVAZ.ru/2107/kakuyu-panel-postavit.html
- https://AutoFlit.ru/1673-kakaya-torpeda-podoydet-na-vaz-2107-kogda-hochetsya-komforta.html
- https://avto-idea.ru/remont/kakaya-torpeda-podoydet-na-vaz-2107-kogda-hochetsya-komforta/
- https://tnvd-auto.ru/zapchasti/kakaya-torpeda-podhodit-na-vaz-2107.html
- https://bumper.guru/klassicheskie-modeli-vaz/tyuning/tyuning-salona-vaz-2107.html
- https://semerkavaz.ru/tyunig/tyuning-pribornojj-paneli-vaz-2107/
- https://remam.ru/tune/tyuning-torpedo-paneli-priborov-vaz-2107.html
- https://ladaautos.ru/vaz-2107/kak-sdelat-tyuning-paneli-priborov-vaz-2107-svoimi-rukami.html
- https://scart-avto.ru/avtogarazh/tyuning-torpedo-i-paneli-priborov-vaz-2107-svoimi/
How to modernize a VAZ 2105, give it some zest and functionality using the instrument panel?
In order to fully use the information that the dashboard provides, you need to know the location and purpose of its instruments and indicators, and their characteristics. The instruction manual provides a description of the device. A standard panel consists of a set of measuring and control instruments, as well as signaling devices. Instrument panel VAZ 2105 The dashboard usually contains the following components:
- speedometer – speed indicator with trip meter;
- coolant temperature and fuel level indicators;
- indicator lights for battery charge, oil level, fuel reserve;
- control lamps, turning on side lights, high beams, direction indicators;
- voltmeter;
- signaling unit;
- switches for heated rear window, rear fog lights;
- switches for exterior lighting and electric heater fan.
When installing an on-board computer, it becomes possible to monitor more than 20 parameters that allow you to control the operation of components and systems of the machine. The information is reflected on the display (the author of the video is RusLan 404).
Possible faults
Dismantling and repair of the device may be required for the following malfunctions:
The control panel backlight does not light up. You should check the condition of the wiring, contacts, and the serviceability of fuses. Not a single sensor or indicator works, and the warning lights do not light up. First of all, you should check the fuse in the mounting block and replace it if it is burned out. If the indicator arrows jerk in different directions, the cause is most often poor ground contact. Malfunctions may be related to the operation of the dashboard itself. It is necessary to dismantle the shield and carry out diagnostics. Sometimes the functionality of the device is caused by a malfunction of the cigarette lighter. The instrument panel does not work or does not function correctly. The functionality of the control panel sometimes disappears after tuning.
Tuning with LED lighting
Installation and repair instructions
Dismantling the control panel may be required for repairs, tuning the panel, replacing sensors, etc. The procedure is simple and can be performed at home.
Tools and materials
Tools for disassembly To disassemble and repair the dashboard, you must prepare the following tools and materials:
- a set of keys;
- Screwdriver Set;
- diagnostic tester;
- new sensors and parts needed for replacement;
- elements for tuning.
Algorithm of actions
To dismantle the tidy, you need to perform the following steps:
Turn off the power supply to the machine by disconnecting the negative terminal from the battery. After unscrewing the mounting bolts, you need to remove the casing from the steering column. By removing the plugs and unscrewing two screws, the instrument panel is removed. Next, the wire plugs are disconnected. After opening the glove compartment, you need to unscrew the mounting bolts. The bolts securing the shelf for things are unscrewed in the same way. By pulling the handle of the hydraulic light corrector, you need to remove it. Then, using a socket wrench, unscrew the mounting nut and push it in. In the glove compartment, disconnect the power cord for the backlight lamp. After unscrewing the two bolts, you need to move the heater control unit. Next, you should dismantle the air duct. The next step is to unscrew all the console fasteners. When the last two fastening nuts in the center are unscrewed, you need to carefully remove the panel from the studs and remove it from the interior.
Next, the necessary repairs, tuning, replacement of sensors are performed, and backlighting is installed. After completing all the manipulations, the assembly of the device is carried out in the reverse order of disassembly.
replacing lamps on panels of VAZ 2105 - 2104
Disconnecting connectors with wires
Tuning ideas
The VAZ 2105 was little modernized, mainly in the engine. Owners of “fives”, as well as UAZ cars, often resort to tuning the instrument panel to give it a modern look and increase functionality. On the VAZ 2105, tuning is possible in the following options:
- purchase a ready-made kit, which includes dials for sensors, instrument panels, parts for lighting, wiring and terminals for connections;
- A budget option is to illuminate devices with LEDs of different colors;
- More technically difficult is the texture and color change of the console.
With the help of LED lighting, you can change the design of the control panel, make it stylish and give it a personal look.
Photo gallery
The photo gallery shows the VAZ 2105 - photos of various options for tuning the control panel.1. Dashboard illumination VAZ 21052. Red console trim3. Five panel with tachometer Loading...
How to remove a VAZ-2107 panel
Removing the “tidy” of the presented car is carried out in the following sequence:
1. First, you need to prepare the car for operations (to do this, you should review the corresponding material called “Preparing the VAZ 2107 car for repair and maintenance”).
2. Then you need to disconnect the wire on the car from the negative terminal of the battery.
3. After this, use a screwdriver and carefully remove the handles from the stove control levers.
4. The next step is to unscrew the nut that secures the meter reset handle. We remove the nut together with the washer and push the handle into the space that is located behind the instrument panel.
5. Using a thin screwdriver, carefully pry and then remove the screw plug that secures the instrument panel.
6. Using a Phillips screwdriver, unscrew the fastening screw.
7. Carefully remove the “tidy” of the VAZ 2107.
8. Disconnect the cable after the union knurled nut of the car speedometer drive cable has been unscrewed.
9. After this, remove the vacuum supply hose from the econometric fitting.
10. Carefully disconnect the blocks (three colors) of the wiring harnesses.
11. Now you can remove the panel from the car. After this, you can safely perform the following operations:
Replace backlight bulbs;
If necessary, replace the control lamps.
Installation of the “tidy” should be carried out in the opposite order of its removal.
How to replace dashboard lamps?
Well, firstly, before carrying out any electrical work in the car, it is necessary to turn off the power to the vehicle’s on-board network. To do this, open the hood and remove the negative terminal of the battery.
Replacing a light bulb in a VAZ dashboard. Comparison of LED and conventional light bulbs in the tidy
How to change light bulbs on a VAZ 2107
Inside the car, use a flat-head screwdriver to pry and pull out the plastic handles on the heater air damper control drive. After this, unscrew the nut located on the small handle designed to reset the daily mileage. Then remove the washer from it and push the handle deep into the instrument panel.
- Using the same screwdriver, pry off the plastic plug, which is located on the far right side of the panel in the lower corner. Under this plug there is a panel fastening bolt, which also needs to be unscrewed using a Phillips screwdriver.
- Pull the heater drive control button towards you and remove it from the plug. After this, push the connector deep into the dashboard. The panel must be pulled out starting from the right side. During the dismantling process, unscrew the nut securing the speedometer drive cable, then pull it out and leave it hanging. Remove the vacuum supply hose from the fitting located on the econometer. Finally, pull out all the wire connectors and remove the instrument panel from the dashboard.
- In total, there are about 9 backlight lamps on the instrument panel. Each of them is removed by pressing and turning the cartridge 90 degrees. After this, the old lamp is pulled out, and a new one is installed in its place directly into the socket.
VAZ 2110 (new model) - changing the backlight with your own hands
- First of all, you need to unscrew the two screws that secure the decorative trim at the top. This trim is installed directly on the dashboard.
- Pull out the knob for adjusting the backlight and use pliers to unscrew the large nut located under it. After the nut is removed, make sure that the regulator does not go under the panel, since it will be difficult to get it out later.
- In the left corner, near the button for turning on the fog lights, pull out another plug. There is a screw under it that also needs to be unscrewed. After this, pull the decorative trim towards you. As soon as the button connectors appear, disconnect them and pull the cover even further.
- Inside the panel, find two screws that secure the instrument panel from the inside. Unscrew them and pull the instrument panel out. During the removal process, pull out the plug connector from the rear of the instrument panel.
- The lamp sockets are unscrewed by turning them 45-90 degrees. Then the burnt out lamps are unscrewed from the socket. After this, new lamps are installed in place of the old ones, and the dashboard is assembled in the reverse order.
How to remove lamps on Lada Priora
Replacing lamps in the dashboard
- To make it easier, take a Phillips screwdriver. Unscrew the two screws located in the upper inner part of the instrument panel.
- There is a small plastic panel (or trim) located under the steering column. At the top of the panel, unfasten the latches, and at the bottom, turn three fasteners made of plastic. After the trim is removed, you will see two more screws securing the instrument panel. They also need to be unscrewed.
- Now lower the steering wheel down, but do not remove it. Pull the decorative trim towards you. If it does not give in, you can carefully pry it off with a flat screwdriver without damaging the plastic coating. Inside the torpedo you can find two more screws. The instrument panel itself rests on them. Unscrew them, holding them with your hand, so as not to lose washers and screws, which can easily fall inside the torpedo.
- Pull the instrument panel towards you so that the wiring block is visible. Unplug the plug from the connector and place it outside so that it does not go inside. Expand the instrument panel and find the lamp sockets.
- As in other cars, the cartridge is pulled out by turning. You can change the lamps as a whole with a socket or separately. Currently, prices allow replacing lamps along with sockets. This will be much more rational than sitting and waiting for the cartridge to fail.
- After replacing the lamps, reassemble the panel in the reverse order.
At the end, forget to connect the battery terminal. This completes the replacement of the dashboard lamps.
What kind of light bulbs are in the dashboard of VAZ 2107
How to fix dashboard backlight panel
on a VAZ 2107?
One of the malfunctions that does not directly affect the operation of the car, but causes a lot of problems for the driver. backlight instrument Panel VAZ 2107 does not work. During the day, the problem is invisible, but in the dark, the lack of lighting makes it difficult to control your VAZ 2107. Because of this malfunction, it is impossible to see the readings of the main instruments: tachometer, speedometer, economy indicator, fuel level indicators, charge level, coolant temperature.
The reason for lighting the dashboard of the VAZ 2107 is turned off, most likely the output of the incandescent lamp. Therefore, to fix this, you will need to replace the damaged lights with new ones. The task is simple and requires a minimum of tools and skills. However, to access the bulbs, you will need to remove the entire dashboard. Armed with a flathead Phillips screwdriver, you can get started by removing the positive charge from the battery.
First, remove the plastic handles from the heater control levers and damper damper and unscrew the nut of the day counter return regulator so that they do not interfere with the instrument panel of the VAZ 2107.
Next, you need to use a Phillips screwdriver to remove the screw hidden behind the plug next to the above levers. The toolbar is freed, there are a few simple steps left to completely remove and continue the repair:
- Remove the speedometer cable nut;
- Disconnect the hose from the power meter;
- Disconnect the three electrical connectors.
In this video I will show you how to change light bulbs
into the panel
LED technology! Classic disease.
replacing a light bulb vase dashboard 2107
Description
Then remove the VAZ dashboard. 2107 and start replacing incandescent lamps. Everything is simple here, we remove the burnt ones and install new ones.
Thus, the VAZ 2107 replaces the lighting and warning lamps. Their location is shown in the following figure.
Here the number 2 indicates the backlight of the instrument panel. Other lamps controlled:
- Fuel level;
- Direction indicators;
- Engine control systems;
- Turn on parking lights;
- Engine oil pressure;
- Handbrake activation;
- Long drive;
- Battery charge.
It is worth noting that many motorists, having reached the dashboard of the VAZ 2107, do not worry about banal repairs and adjusting the lighting. To do this, install the correct size LEDs instead of regular light bulbs. Thanks to this update, the lighting works more efficiently. All you need to do is select the correct resistor (resistor) that goes in series with the LEDs. You can also attach a stylish scale to your device instead of the boring standard one. Another implementation of LED lighting is to install lighting elements not in usual places, but along the perimeter of the panel. This method requires significant material costs, but the result is more effective.
Reassembling the instrument panel is carried out in the reverse order:
- Connect the electrical connectors, economizer hoses, speedometer cable;
- Place the panel in its original position;
- Secure it with a screwdriver and push the plug into place.
- Replace the handle and secure the handle to reset the daily consumption counter.
As a result of the operation of the lamps, the work can be considered completed.
Post Views: 3
Turn signal
The housing of the side turn signals is fixed in the car fenders with plastic clips. They work on the principle of inserting and clicking. There are two options for replacing the lamp in repeaters: through the wing arch or by removing the plastic housing. In the latter case, there is a chance that this body will no longer be securely fixed in the wing due to breakage of the plastic clips.
Let's consider the second option
We pry up the repeater housing with a plastic flat object, you can use a screwdriver, but use a rag or other lining so as not to damage the paintwork of the wing. The body is surrounded by a rubber “skirt”, so you can lightly press on it with a hard tool and pry it, it should pop out of the metal of the car body.
We remove the rubberized cartridge from the turn signal housing. It uses, depending on the modification, T4W or W1.2W lamps. The last type is removed from the cartridge by turning 90 degrees so that the contacts come out of the latches, the second type is removed from the socket by hand, since it does not have a base.
The first option is through the arch
We do the same thing, just don’t pull the repeater housing out of the wing. It remains in place, which ensures the integrity of its latches. In this case, there are also nuances:
To get to it, you need to remove the fender liner. In some cases, when no one has climbed there for many years, unscrewing the screws will be problematic.
If there is no protection, then there is so much dirt that it will be even more difficult to get there.
We climb under the wing, find the cartridge and pull it out along with the lamp. And we do everything as in the second case. Assembly is carried out in reverse order.
Important! When you “push” the cartridge into the repeater body, you need to hold it from the outside, rest your finger against it so as not to squeeze it out. If this happens, the plastic clips may break and you will have to buy a new one.
What kind of light bulbs are in the dashboard of VAZ 2107
How to fix dashboard backlight panel
on a VAZ 2107?
One of the malfunctions that does not directly affect the operation of the car, but causes a lot of problems for the driver. backlight instrument Panel VAZ 2107 does not work. During the day, the problem is invisible, but in the dark, the lack of lighting makes it difficult to control your VAZ 2107. Because of this malfunction, it is impossible to see the readings of the main instruments: tachometer, speedometer, economy indicator, fuel level indicators, charge level, coolant temperature.
The reason for lighting the dashboard of the VAZ 2107 is turned off, most likely the output of the incandescent lamp. Therefore, to fix this, you will need to replace the damaged lights with new ones. The task is simple and requires a minimum of tools and skills. However, to access the bulbs, you will need to remove the entire dashboard. Armed with a flathead Phillips screwdriver, you can get started by removing the positive charge from the battery.
First, remove the plastic handles from the heater control levers and damper damper and unscrew the nut of the day counter return regulator so that they do not interfere with the instrument panel of the VAZ 2107.
Next, you need to use a Phillips screwdriver to remove the screw hidden behind the plug next to the above levers. The toolbar is freed, there are a few simple steps left to completely remove and continue the repair:
- Remove the speedometer cable nut;
- Disconnect the hose from the power meter;
- Disconnect the three electrical connectors.
In this video I will show you how to change light bulbs
into the panel
LED technology! Classic disease.
replacing a light bulb vase dashboard 2107
Description
Then remove the VAZ dashboard. 2107 and start replacing incandescent lamps. Everything is simple here, we remove the burnt ones and install new ones.
Thus, the VAZ 2107 replaces the lighting and warning lamps. Their location is shown in the following figure.
Here the number 2 indicates the backlight of the instrument panel. Other lamps controlled:
- Fuel level;
- Direction indicators;
- Engine control systems;
- Turn on parking lights;
- Engine oil pressure;
- Handbrake activation;
- Long drive;
- Battery charge.
It is worth noting that many motorists, having reached the dashboard of the VAZ 2107, do not worry about banal repairs and adjusting the lighting. To do this, install the correct size LEDs instead of regular light bulbs. Thanks to this update, the lighting works more efficiently. All you need to do is select the correct resistor (resistor) that goes in series with the LEDs. You can also attach a stylish scale to your device instead of the boring standard one. Another implementation of LED lighting is to install lighting elements not in usual places, but along the perimeter of the panel. This method requires significant material costs, but the result is more effective.
Reassembling the instrument panel is carried out in the reverse order:
- Connect the electrical connectors, economizer hoses, speedometer cable;
- Place the panel in its original position;
- Secure it with a screwdriver and push the plug into place.
- Replace the handle and secure the handle to reset the daily consumption counter.
As a result of the operation of the lamps, the work can be considered completed.
Post Views: 3
First aid if the tachometer does not work on a VAZ 2107 with an injection and carburetor engine
The driver can learn about the main operating parameters of the vehicle thanks to the dashboard. This device is equipped with basic sensors and indicators that indicate the operation of certain devices. One such device is the tachometer. For what reasons does the tachometer on a VAZ 2107 carburetor not work and how to replace the device - detailed instructions are described below.
The purpose of the VAZ tachometer is to visualize the readings of the crankshaft. The device shows how fast the crankshaft rotates per minute, these readings are also called engine speed. Structurally, the VAZ 2107 tachometer is a milliammeter connected in one housing to an electronic part; these elements are installed on a printed circuit board.
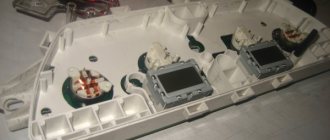
Repair of the VAZ-2107 dashboard
As for the principle of operation, it consists in measuring the frequency of pulse transmission in the primary circuit of the engine ignition system.
With the power unit operating, during one revolution of the distributor shaft, the contacts on the breaker should close and open 4 times. Accordingly, with one revolution, 4 voltage and current pulses are formed in the electrical circuit.
As the crankshaft speed increases, the pulse transmission frequency also increases, which, in turn, affects the deflection of the instrument needle.
"Seven" tidy with tachometer
Possible malfunctions and ways to eliminate them
Often the cause of device malfunction is the use of inappropriate high-voltage wires. In particular, this problem usually occurs as a result of replacing them with silicone ones. Due to the use of silicone high-voltage wires, the instrument needle may begin to twitch.
As for malfunctions in which the tachometer does not work at all, the procedure for identifying them may differ depending on the type of engine:
- On carburetor engines, three wires are connected to the device. Two of them are power, and the third is connected to the coil. To determine the cause of the device failure, you need to gain access to the back of the control panel and disconnect the terminals connected to the device. Then, using the other three wires, which must be operational, the device should be connected directly to the battery, as well as the coil. When the power unit is started, the device should start working (then the reason lies in the circuit); if this does not happen, then it is necessary to look for the cause in the ignition system or the device itself.
- As for injection engines, in this case the tachometer connection diagram is somewhat different; 4 wires are used here. Two of them are power, one goes to the ECU, and one goes directly to the crankshaft sensor. The best option would be to conduct computer diagnostics. You can also try checking the condition of the contacts on the connectors or replacing the DPKV with a working one (the author of the video is minishumaher).
DIY replacement instructions
Car owners, as a rule, think about the need to service and repair the tachometer if it fails.
More information about replacing the device:
- Disconnect the battery and use a flat-head screwdriver to pry and remove the three handles installed on the heater control selector.
- Unscrew the nut securing the odometer reset lever, and also remove the washer installed behind it.
- Next, using the same flat-tip screwdriver, pry off the cap of the bolt that secures the tidy. After removing it, unscrew the screw securing the shield to the center console bracket.
- Having done this, move the right part of the tidy to the maximum, then remove the left part. After this you will have access to the back of the shield, now you need to unscrew the speedometer cable nut and completely disconnect it. Next, disconnect all hoses and connectors connected to the shield.
- Remove the dashboard. Remove the tachometer from it and install a new one. If you have connected everything correctly, the installed device will work.
Photo gallery “Dismantling the tidy”
1. Unscrew the instrument mounting bolts. 2. Unscrew the nut securing the speedometer cable. 3. Disconnect the connectors from the device and remove it. Loading …
Video “Overview of the dashboard on a microcontroller”
The video below provides an overview of the updated shield running on a microcontroller (author – Vadim Kornelyuk).
Was this article helpful?This article was helpfulPlease share the information with your friends
VAZ-2107 instrument panel diagram
The instrument panel is an important part of every car, and the 2107 is no exception. For visual perception, it is better to look at what the VAZ 2107 “tidy” diagram looks like.
1 — automobile voltmeter;
2 - speed indicator or, more simply put, speedometer;
3 - machine trip meter - odometer;
4 - tachometer. It shows the frequency at which the crankshaft rotates. The yellow zone on the scale indicates that the engine is running at high speeds; the red zone indicates unacceptable modes. 6000 rpm is the maximum permissible speed.
5 - coolant temperature indicator. The green zone is the normal coolant temperature. The red zone indicates engine overheating. The vehicle must not be operated at a coolant temperature exceeding 118 °C;
6—econometer. This indicator helps you select the most economical mode for engine operation from all modes (the instrument needle should be in the green zone of its scale).
7 - block (CL) of warning lamps of the VAZ 2107 car:
Turning on the turn indicators (when a left or right turn is turned on, it lights up with a flashing green light);
Malfunction of the engine control mechanism (used on a car with an injection power unit. The lamp glows orange if the ignition is on. When the engine starts, it goes out). If there is a malfunction in the system, the lamp flashes or is constantly on. In such a situation, using the car is not prohibited, the system will simply switch to backup mode;
Battery charge lamp. When the ignition is turned on, the lamp on the instrument panel turns red and goes out when the engine starts. If the lamp continues to light, the battery is not charged. There may be several reasons: the generator drive belt is insufficiently tensioned, the control lamp or generator circuit is faulty. If you continue to use the car, this may lead to the battery being completely discharged and the engine stopping. A fire may also occur;
Side light indicator (lights up green if the side lights are on);
Indicator for turning on the high beam of the car's lighting fixtures (the lamp lights up blue if you turn on the high beam of the headlights);
Insufficient oil pressure. When the ignition is turned on, the oil pressure lamp begins to glow red and immediately goes out when the engine starts. If the light remains on, there is low oil pressure. To avoid failure of the power unit, you need to turn it off and try to eliminate the cause of the malfunction;
The parking brake is engaged (the lamp lights up bright red when the ignition is turned on and the parking brake lever is raised).
8 - indicator of the path traveled per day;
9 - (CL) fuel reserve. The yellow light comes on if there is less than 6-4 liters of fuel left in the fuel tank;
10 — fuel level indicator;
Dashboard lamps
The dashboard provides the driver with a lot of useful information that allows him to monitor the condition of the car, the driving process, diagnose breakdowns in a timely manner and correct them. So, the panel light comes on for the following reasons:
- The battery is not charging.
- For one reason or another, the handbrake is stuck.
- Not enough fuel in the tank.
- The oil pressure has decreased (which indicates the need to urgently stop the engine to avoid more serious consequences).
- Excess water in the filter. To prevent water from entering the pump, which could lead to damage, you need to drain excess water from the filter.
- The fuel system is malfunctioning.
- There was a failure in the propulsion system and much more.
As you can see, the panel lamps allow you to determine what is wrong in the car; if the lamps themselves fail, then you can miss a very important breakdown, which can even lead to an accident
This is why it is so important not to delay replacement (lamps cannot be repaired)
Today, the car market offers a wide range of lamps for the control panel, ranging from the standard version, which is cheaper but also has average characteristics, to modernized versions that give the panel, and therefore the entire atmosphere of the car, a different, more expressive atmosphere.
https://youtube.com/watch?v=A_rLbDOjSaM
Description.
Replacing light bulbs on the VAZ instrument panel
Professionals also advise replacing standard lamps with LEDs, which largely decorate the panel.
So, we list several of the currently most popular options suitable for the VAZ 2114.
- LED lamps Sho-Me SM-T5 (blue, white and red). Country of origin: Korea, price: 80 rubles. for a couple.
- High-brightness SMD LED module – 20 rubles.
- LED Sho-me SM-T5-cap-super (white) – 50 rub.
- Halogen lamps from Osram and Philips cost about 40-80 rubles apiece.
As you can see, prices for lamps are not high. It is worth noting that replacement takes very little time, which we will talk about later.
Elements of the VAZ 2107 panel and their purpose
Experienced drivers take full advantage of the information displayed on the dashboard indicators. You should know which lights indicate an emergency.
- If the battery warning light comes on, you should first check the terminals on the battery, and then the generator.
- When the oil pressure light comes on, it is advisable to stop driving and check the oil level. If it is insufficient, add the required amount.
- When the brake fluid light comes on, stop and check the brake fluid level. If necessary, you need to add liquid.
- The fuel level sensor signals when there is less than 5 liters of gasoline left in the gas tank.
- The coolant temperature sensor is located in the red zone. If the engine starts to boil, you need to stop and check the coolant level.
Why is it necessary to change the backlight bulbs?
When driving in conditions when it is night outside, the headlight light reflected from the ground has a small blinding effect on the driver, who does not see the readings taken from many of the car’s instruments. These may be: speedometer, tachometer, fuel or coolant level indicators, etc. In addition, various buttons on the instrument panel and levers designed to control the heater air damper become invisible.
Trying to find all these devices and use them in the dark can be quite a dangerous undertaking. This is due to the fact that the driver is distracted for a very long time in order to find this or that button, or to determine, for example, a parameter such as speed.
Malfunction of lamps, as well as their absence, disrupts the overall illumination of the dashboard and complicates the process of driving a car at night
That is why it is important to promptly change burnt-out lamps and monitor their condition. Let's try to figure out how to replace backlight bulbs on various VAZ cars
Replacing scales
The standard dials on the instrument panel are black, and the numbers on them are faded. This design, in principle, looked good twenty years ago. But the instrument panel clearly does not correspond to modern trends. There are quite a lot of photographs on the Internet of options that car enthusiasts made with their own hands. In most cases, owners prefer white circles with black numbers. This option looks more “sporty”. In addition, it is easier to highlight.
The only thing to remember is that when working with dashboard parts, you must be extremely careful. All spare parts are quite fragile and very easy to break. Recovery will take a lot of time.