Yak nalashtuvati fari Daewoo nexia (De scho twist)
How to adjust Daewoo nexia headlights (What to turn) Instructions for dummies.
Don’t criticize too much)1) To adjust the light The headlights on the Nexia don’t shine well
.How to fix? — Project assistance: .
It is better to adjust headlights at night. We install the car on a flat horizontal area at a distance of 5 m from the screen - a light wall of a building, garage, etc. (you can use a sheet of plywood measuring 12m). As it turned out, I had to take out the headlights and adjust the light on the Nexia itself. Tire pressure should be as recommended. We seat assistants in the front seats or place a 75 kg load. How to remove the headlight of a Daewoo without removing the bumper, although this can be done on a Nexia n150. By pressing the front and rear wings in turn, we slightly rock the car to install the suspensions. We measure the distance from the centers of the headlights to the floor and draw horizontal line 1 at this height (see figure) on the screen, and 65 mm below it - horizontal line 2. How to properly install fog lights on a VAZ 2109. Materials and requirements for installation, process carrying out the work, decide on. We draw vertical lines A and B, corresponding to the centers of the headlights, and line 0 at an equal distance from lines A and B. Replacing the headlight on a Renault How to insulate the engine of a Renault Logan car. We set the headlight beam direction control to the “O” position, corresponding to the minimum vehicle load. Cover one of the headlights with a piece of cardboard and turn on the low beam. We adjust the direction of the light beams of the open headlight by alternately rotating the gears of the two adjusting screws with a Phillips screwdriver (at least 125 mm long) through the holes in the upper cross member of the radiator frame.
Headlight adjustment diagram
I spent about 2.5 hours making adjustments and drew chalk on the fence, but it was really worth it! We make the headlights one by one, cover one with a cloth, turn off the PTF.
As it turned out, not only did I drive like a blind kitten, but I also blinded oncoming traffic for six months!
was: neighbor
— shines diffusely forward for a period of 50-120 meters (5-10 meters in front of the car were saved by PTF)
further
— illuminates the tops of trees 30-70 meters above the road
now: neighbor
“illuminates” 10-50 meters in front of the car with a good beam (everything is visible) PTFs capture the sides of the road and the area directly in front of the muzzle of my ship =)
further
— illuminates 40 - 150 meters ahead, again, with a good beam of light!
I drive and smile
I used this scheme
There were no problems with horizontal adjustment
but here I had to suffer!
I had to pull out the headlights, adjust them, insert them, see the result, pull them out again, etc... PS: photos for clarity were taken from Yandex =)
Judging by VW Group vehicles, there's no end in sight for owners
The Kangarooing problem with manual 1.5 TSI Evo cars has been going on for seven months; VW admits the problem but has no solution
Ferrari Portofino 2019 review
Ferrari Portofino. this is a super stallion that you will ride every day Maximums Spectacular gearbox with excellent shift mechanics
«>
Required Tool
Both Daewoo Nexia bumpers have a similar configuration and fasteners. To dismantle these structures you will need the same tools:
- long Phillips screwdriver;
- spanners;
- small hammer;
- key to 13;
- ratchet with extension;
- sliding pliers;
- socket wrenches;
- pliers.
This is interesting: How to paint a car bumper with your own hands?
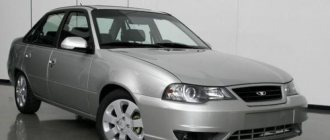
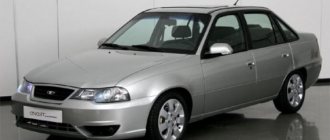
Review of Daewoo Nexia 1.5 (2013)
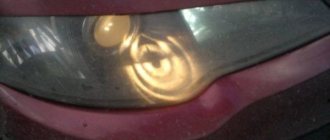
The low beam disappeared while the high beam was working.
Good day everyone!
Over the past 4 months, I have “run” another 7 thousand km on my Nexia. And this review is just a continuation of the previous (main) one, in which I will talk about those points that were not covered in the first review, plus interesting nuances that occurred during the “reporting period.”
So, let's go.
Firstly, the front panel “cracked” at 27,000 km and the level of comfort dropped to the level of domestic Samaras.
Secondly, the winter this year in St. Petersburg was harsher and the weak windshield airflow was a little annoying. Anticipating this, I installed an additional Chinese windshield heater on the bracket on the dashboard - in fact, it’s just a mini-hair dryer (150W - a larger fuse won’t “allow”), stylized and adapted for a car. But it is of little use (since the heating area is small) - it really only helps when there is heavy frost on the glass. The hot air, unlike the stove, is pumped in immediately. The asking price is only 800 rubles.
Another winter problem in Nexia is frozen castles. If you wash your car in winter, and the next morning the temperature is below zero, both the lock cylinder and the opening handle will freeze (in many cases, if you pull it upward to open the door, you can break the locking mechanism, which threatens repairs that involve removing the door trim). Therefore, feel free to take 2 liters of hot water (4 liters if severe frost hits) and water the area of the door above the handle and lock cylinder - then you will get into the car. The problem will go away if the car sits in the sun for half a day.
Now the headlights are on. All my life, in all cars, I basically didn’t care about the low and high beam of my car’s headlights. But in October-December I had to work in the Leningrad region, where in the dark it is only possible to get there along long roads without lighting. On the Nexia, the low-beam light bulbs and headlights come on frequently, and after waiting until only the “left low-beam” one remained alive, I went to resolve the issue. By the way, I don’t recommend changing the right headlight bulb (any one) on the Nexia yourself - there’s not enough space, you can’t put your hand in, you can get scratched, you need to remove the air duct. Nexia is equipped with 55-watt low beam bulbs, and I decided to try one well-known Japanese manufacturer. The advertising on the packaging promised the lighting effect of a 100-watt light bulb with a consumption of 55. They cost about 5-7 times more than regular ones. I was NOT happy with the effect. Of course, they shine better than “ordinary” ones, but not by much. Maybe the problem is not in the light bulbs, but in the design of the Nexia headlight? It’s like looking at them - so beautiful... stylish... lensed! Maybe it was necessary to put xenon in the lenses and install additional windshield washer nozzles on the bumper? But this is already more expensive...
In the last review I didn’t mention the sometimes “jumping” rpm. engine - innate, apparently, the generator often occurs when the turn signal and heated rear window are turned on at the same time. I didn’t bother to fix it - it doesn’t bother me.
I also forgot to mention the driver’s seat - the seam came apart by about 8-10 cm - I can’t sew it up - I don’t have enough skill. But for a year now this seam has not come apart any further. Scored. It doesn't interfere.
Having replaced the windshield wipers with new ones, I took a closer look at the panel and found a roller on it with regulating the speed of the windshield wipers. And this is in the most flawed configuration! Pleased!
The paintwork is still perfect - no questions asked. Just like a car's suspension. Brake pads, having covered 30,000 km, still have a resource.
Contrary to the recommendations of the service book, which were developed (modified) by the Uzbeks in the 90s, I change the oil every 15 thousand km, and not 10, because I think that over 20 years the oils have become much better and of higher quality. But I use synthetic. A 4-liter canister is enough for replacement and topping up for 15,000 km. The engine has no complaints.
Well, in the end, at 27500 the right rear door stopped opening - when you get around to it, you will need to remove the door trim and figure it out.
How to adjust headlights on a Daewoo Nexia with your own hands
How many meters should low beam headlights illuminate?
Most often, when setting up, standard schemes are used, although if desired, you can use unique adjustment methods. A diagram of the process should be included in the set of documents for the car. The universal procedure involves creating markings on vertically located, flat working surfaces - usually a wall (for example, a building) plays the role of a stand.
How to set low beam headlights on Nexia
After marking is completed, the luminous flux is turned on in a manner that is optimally convenient for adjustment. First, adjust the angle - the parameter ideally coincides with a horizontal line made on the surface of the wall. To obtain an optimal light beam, rotate the adjustment type screws from the back of the headlight inside the engine compartment.
Adjustments are made one at a time, one device is adjusted, the second is covered at this time - for example, with a piece of cardboard. After installing the light beam below the areas marking the center of the optics, we can say that everything was done correctly.
In difficult cases, you can solder circuits
How to set high beam headlights on Daewoo Nexia
The high beam type is adjusted separately from the low beam, and the markings on the wall are changed. Vertically located, pre-prepared surfaces must be smooth, distances must be maintained from 10 m. Sequence of actions:
- The car, fueled and ready for work, is placed on a vertical platform, where the location of the central elements of the headlights is marked.
- To fix real center points, you need to find them on the machine. The points are connected to each other, between them a horizontal ruler is placed 10 cm below the main one.
- After completing the marking process, the car is driven 10 m away, and the light control is immediately set to zero.
As a result, the light beam received from the head optics acts as the upper boundary of the bottom line along the main horizontal line.
How to adjust the fog lights on Nexia
The basic principle of regulating fog lighting is to rotate the optical devices in the horizontal and vertical directions to obtain the optimal angle of inclination. First make the fastening bolts on the fog lamps for the bumper weaker and perform the following actions:
- Place the machine on a flat working surface at a distance of 5-7 m from the vertical axis (the most common example is the wall of a house). The machine should be installed so that its axis is perpendicular to the marking site.
- They test the current pressure inside the tires - it must meet the norm for the springs to stay in place; it is recommended to rock the car from the side.
- Measure the distances from the base of the site and the central section of the anti-fog optical devices.
- Mark a horizontal line taking into account the level of previously made measurements.
- Connect the low beam type, place marks on vertical surfaces, and mark the center of a pair of beams.
- Turn on the low-beam headlights and turn off the fog lights.
The upper limiter of the light beam should be 10 cm less than the height of the horizontal platform. The optics are fixed in a parallel position relative to the longitudinal axis.
Lines are drawn on the walls dividing the car into halves. Additionally, a strip is provided below the first by 10 cm. The distance from the ground to the fog lamp, from the central axis of the car to the main lamp is measured. The intersection of these lines is the center for orientation.
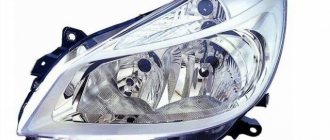
Which low beam lamp is suitable for the restyled first generation Nexia?
Suitable vehicle years: 2008, 2009, 2010, 2011, 2012, 2013, 2014, 2021, 2021.
The H7 55W low beam bulb is installed at the factory:
- 55 is the power in watts,
- H7 - base type,
- original articles - 96914491, E3100131, 13503427.
Read about high beam lamps below.
Quick comparison: the best low beam lamps for Daewoo Nexia I
| Model | Peculiarities | Rating | Link |
| Philips X-treme Vision | very bright | ★★★★★ | Buy |
| Philips LongLife EcoVision | inexpensive and durable | ★★★★✩ | Buy |
| Bosch Pure light | inexpensive, universal replacement for standard lamps | ★★★★✩ | Buy |
Philips X-treme Vision - the brightest low beam bulbs
Features declared by the manufacturer:
- up to 130% brighter white light,
- increase the lighting area in front of the car by 45 m,
- high quality quartz glass,
- Patented technology provides more powerful light output.
Designed for perfect visibility and unsurpassed quality.
Country of origin: Poland.
What we like best: White and very bright light.
Test results
Good ADAC score, results:
- very good road lighting,
- short service life,
- relatively expensive (but each lamp is tested at the factory).
Auto Express test winner. According to the measurement results, the border of the bright light spot is 75 meters from the car.
Philips LongLife EcoVision - durable lamps for Nexia
Features declared by the manufacturer:
- high strength quartz glass,
- resistant to temperature changes and vibration,
- high internal pressure provides more powerful light,
- protect headlights from harmful ultraviolet radiation.
Country of origin: Poland, Germany.
What we like most: They should last much longer than regular lamps.
Bosch Pure light
Features declared by the manufacturer:
- a universal series of high-quality products for passenger cars,
- indicators as close as possible to standard lamps,
- certified by ECE (Economic Commission for Europe),
- do not transmit the ultraviolet spectrum to protect the headlights.
The package contains one lamp.
Country of origin: Poland, Germany.
What we like best: well-known manufacturer, characteristics - the same as standard lamps.
Bosch lamp test results
ADAC satisfactory rating, results:
The Pure Light Bosch is a typical standard lamp. All ratings are average.
Wiring
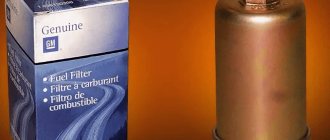
How to correctly replace the cabin filter on a Daewoo Nexia. how to make and install a cabin filter in a Daewoo Matiz cabin filter Daewoo Nexia 1.6
Perhaps this is a step of any complexity, as it involves:
- or searching for an existing technological hole in the bulkhead between the passenger compartment and the engine;
- or creating it individually using a drill.
Most car enthusiasts will not agree to the 2nd option, so they will have to use existing holes in the bulkhead. (See also the article Installing fog lights on a Granta: technical difficulties and solutions)
External lighting control Daewoo Nexia N150
Notes:
For ease of use, the handles, buttons and control devices located on the instrument panel and other additional control panels are marked with symbols of their functional purpose.
The steering column switches of the Daewoo Nexia N150 are installed on the steering column. The left steering column switch combines switches for the direction indicators, exterior lighting, low and high beam headlights.
Central light switch
To turn on or off the external lighting devices, turn the handle at the end of the lever of the left steering column switch.
The handle has three positions:
1. External lighting of Daewoo Nexia N150 is turned off;
2. Side lights, license plate lights and instrument panel lights are on;
3. The side lights, license plate lights, instrument panel lights, and low beam headlights of the Daewoo Nexia N150 are turned on.
Note:
If the ignition key is in position “B” - “steering shaft locked” or “I” - “ignition off”, when the driver’s door is opened, a warning sound is heard, reminding you to turn off the lights.
Headlight switch
To turn on the high beam headlights, turn the handle of the central light switch counterclockwise (turn on the low beam) and press the left switch lever away from you. When the high beam headlights are turned on, the corresponding lamp on the instrument panel lights up blue.
To briefly turn on the high beam headlights, regardless of the position of the central lighting switch, move the lever of the left steering column switch towards you. When released, the lever will return to its original position.
Turn signal switch
The turn indicators of the Daewoo Nexia N150 are turned on when the left steering column switch lever is moved up or down until it stops. In the upper position of the switch lever the right turn signal is on, in the lower position the left one is on.
When the steering wheel is returned to the neutral position, the left steering column switch lever is automatically returned to its original position and the turn signal is turned off.
Switch block
Front fog light switch
The front fog lamp switch is located on the instrument panel above the headlight beam direction control.
To turn on the front fog lights, press the button with the exterior lights on. At the same time, the indicator in the switch lights up. By pressing the button again, we turn off the front fog lights of the Daewoo Nexia N150.
Which low beam lamp is suitable for the pre-restyling first generation Nexia?
Suitable vehicle years: 1994, 1995, 1996, 1997, 1998, 1999, 2000, 2001, 2002, 2003, 2004, 2005, 2006, 2007, 2008.
Low beam lamps 60/55 H4 are installed at the factory:
- 60/55 is the power of low beam (55) and high beam (60) in watts,
- H4 - base type,
- original articles - 11071361, 05104-60553, 94535545.
Please note that the same bulb is used for low and high beam.
Quick comparison
| Model | Peculiarities | Rating | Link |
| Philips X-treme Vision | the brightest, give white light | ★★★★★ | Buy |
| Philips LongLife EcoVision | inexpensive, extended service life | ★★★★✩ | Buy |
| Bosch Pure Light | extended service life | ★★★★✩ | Buy |
| Osram Original Line | good lighting area | ★★★★✩ | Buy |
Philips X-treme Vision
Features declared by the manufacturer:
- bright white light,
- increase the lighting area in front of the car by 45 m,
- high quality quartz glass.
One of the highest brightness levels and incredible comfort in the dark.
The package contains two lamps.
Country of origin: Poland.
What we like most: White bright light, increased illumination area.
Test results
Good ADAC score, results:
- very good road lighting,
- short service life,
- relatively expensive (but each lamp is tested at the factory).
Auto Express test winner. According to the measurement results, the border of the bright light spot is 75 meters from the car.
Philips LongLife EcoVision
- high strength quartz glass,
- resistant to temperature changes and vibration,
- high internal pressure - powerful light.
There are two pieces in the package.
Country of origin: Poland, Germany.
What we like most: they are close in color to standard lamps, they should last longer than regular lamps.
Bosch Pure Light
Features declared by the manufacturer:
- a universal series of high-quality products for passenger cars,
- indicators as close as possible to standard lamps,
- certified by ECE (Economic Commission for Europe),
- do not transmit the ultraviolet spectrum to protect the headlights.
Other causes and solutions
One of the factors that the headlights on the model in question do not light well is weak wiring. To solve this problem, it is reasonable to power the lighting system through a separate relay.
The sequence of work in a specific example consists of the following operations:
- Check the voltage at the battery terminals after stopping the engine (12.6 V);
- A similar indicator is read at the headlight connector (10.4 V);
- There is an obvious difference of 2 volts (if you change it back to halogen headlights, the lighting will improve significantly).
To install separate wiring, you will need two copies of a 4-pin relay (30 A), 2 blocks, about 5 meters of wire with a diameter of 2.5 sq. mm. The power contact of the relay should be secured to the safety element using the soldering method. The remaining ends are soldered to the positive of the battery. The relay wires are connected to each other, the remaining parts are extended and attached to the low and high beam lighting system.
A bundle of 600 mm for the left headlight and 1800 mm for the right element is attached to the contacts of both relays by soldering. All connections are carefully insulated. Power comes directly from the battery. The ground is connected to any bolt, and the wiring is connected specifically to the lamp connectors. Installation is carried out using plastic ties to securely secure the wiring. For convenience of work, it is recommended to disconnect and remove the battery before starting work.
Also, car headlights may shine poorly if the contacts oxidize.
. In this case, cleaning the last elements with fine sandpaper and treating with a special compound will help. If the reason for the weak light of the lanterns lies in an incorrectly selected lamp, an alternative option should be installed according to the characteristics specified in the operating instructions.
Foundation and reason
An inexperienced driver of a standard Nexia may not realize that the car’s lighting has objective shortcomings. The same cannot be said about experienced motorists. Those who have driven different cars often complain about the lack of power of standard Daewoo Nexia lighting devices. The brightness of the n150 head optics is really insufficient even for new cars that have recently rolled off the assembly line. What can we say about used equipment and tarnished lenses.
The root of the indicated situation lies in the electrical settings. For an unknown reason, Daewoo designers made the logic of the system a little strange and incomprehensible. If you have 12.5V available on your battery, only 11V reaches the optical bulbs, that is, noticeably less. Almost 10 percent is lost somewhere unknown.
The process of correcting the defect will take a few hours. It is, of course, advisable to have a basic understanding of the structure of electricity and electrical appliances. Additionally, you will need the ability to solder and measure circuit voltage. The effort and time spent will result in safety and more comfortable night driving.
Preparation for manipulations
To quickly understand whether it is necessary to modify the electrical wiring of the Daewoo Nexia 150, you will need an ordinary sensitive multimeter. We measure the battery voltage and remember (record) the data. With the low beam on, we take measurements at the connections of the lamp base chip. If, as a result of comparing the two obtained figures, you find a difference of 1.5 volts, then there is unspent potential that is easy to use. In this case, the operation described below will have a positive effect on the efficiency of the optics.
The working process
If everything is organized correctly, the replacement will be done quickly and without any problems; it is important to be careful and not rush
Preparation
To carry out the work you will need the following:
Low beam lamp for Matiz in the amount of 2 pieces, this model uses H7 type halogen elements with a power of 55 Watts, you should not purchase more powerful options, as this will lead to overheating of the car wiring and other problems in the form of burnt contacts and failed controls. You can opt for LED solutions; they are more expensive, but they also have a resource three times longer.
Read more: Day of Mourning and Remembrance for the Dead
- When carrying out work in the garage, or even on the street, we advise you to stock up on a flashlight; with its help you will clearly examine everything down to the smallest detail, which will help carry out the work faster and easier.
- We also recommend taking a small mirror and having someone to hold it, this will help you see the inside of the body without having to stick your head under the hood. You yourself will appreciate how convenient it is to work while controlling the process through the mirror.
Replacement
The instructions for carrying out the work are quite simple, and you can easily do them yourself; this will not only get a high-quality result, but will also save significant money.
A step-by-step description of the process is as follows:
First of all, you need to disconnect the connecting block of the wires, which is located outside. Everything here is very simple and easy: grab the chip and pull it away from the body, under no circumstances pull the wires, as you will damage them and have to deal with them later, and this is much more difficult than simply replacing a light bulb.
Now nothing prevents you from removing the rubber plug, this is done simply: there is a tab on top that you need to grab and pull, the cover can be removed very easily.
Next, you will need a mirror, with which you can view the location of all internal elements. You need to release the spring clamp, which holds the light bulb and does not allow it to move when vibrating, to do this, press the two antennae, either together or separately, and disengage from the protrusions of the body, do not pull too hard, as you can pull the clamp out of its place of attachment , and putting it in place is not an easy task.
- Then nothing holds the lamp, and it can be easily removed, after which a new one is installed in its place. There is nothing complicated here, the only thing you should remember is that you should not touch the glass, take the product by the base, but if you do touch the flask, then wipe it with a cloth soaked in an alcohol solution.
- Assembly is done in reverse order and takes just a few minutes. (See also the article Fog lights on Gazelle Business: features.)
Low beam lamps in brands and prices
, OSRAM NIGHT BREAKER lamps with an H4 base have proven themselves well . Quite decent light output, but service life leaves much to be desired. But the power is 90/100 W. The following lamps received good reviews:
- Valeo 032006 , about 300 rubles each;
- Philips Vision H4 , 700 rubles, gives a 25% increase in brightness
- Osram Original Line H4 , 900 rubles, excellent quality;
- Philips Long Life H4 , lamp with extended life, 900 rubles;
- Osram Offroad Super Bright , high-power lamp, but you should think about the quality of the wiring, power 90/100 W, 980 rubles.
A test carried out by the Center of Expertise shows that not all H4 lamps produce the same luminous flux.
150 body
For the 150th Nexia, the public prefers Philips Vision H7 low beam lamps. At a price of about 800 rubles, the lamp produces an increase in brightness of about 20%, has proven to be trouble-free, but the light boundary is somewhat blurred. The following lamps are also in demand:
- Mtf-Light Longlife Standart+30% , South Korean lamp with an improved filament, price about 600 rubles, quite reliable;
- Osram Original Line , an expensive but good quality German lamp, priced at just over a thousand;
- KOITO H7 White Beam III , 1200 rubles, 100 W, Japanese quality, quartz glass, high resource;
- Mtf-Light Palladium , a lamp with the xenon effect with all the ensuing consequences, costs about a thousand, produces a bluish color characteristic of xenon;
- Bosch+ 90 , one of the most worthy representatives of H7 lamps;
- Narva Range Power White , a German lamp with an average price, but practically not used in Europe due to non-compliance with European standards, durable, with virtually no drawbacks.
Why do the headlights on Nexia shine poorly?
Adjusting the Nexia n150 headlights improves the quality of lighting in the dark (in the evening, late at night). Incorrect settings, on the contrary, reduce visibility on the roads. If the optics are not positioned correctly and the angle of inclination does not meet the optimal requirements, drivers of other vehicles will be blinded by the scattered light flux. This situation increases the risk of accidents during oncoming traffic. Insufficient operating efficiency of light sources reduces the field of view, and this is also a cause of accidents.
Poor visibility at night greatly increases the risk of accidents on the roads
Driving takes place on roads with poor quality and smooth surfaces. As a result, the installation angle of the light sources changes, and the need arises to adjust the direction of the light. Other reasons why adjustment is needed:
- a new headlight, lamp or reflective element has been installed;
- fog lights were installed;
- there was an accident during which the front end of the body was damaged;
- recent repairs, replacement of suspension elements;
- installation of new tires and rims.
Adjusting the Nexia n100 headlights is easy to do on your own; you don’t need a complicated tool for this.
Preparation for adjusting headlights on Daewoo Nexia
Adjusting the Nexia headlight range control must be done with an understanding of the work procedure. If you do not have knowledge or skills, you should first study the theoretical basis or immediately contact specialists.
- Align the body level, check the pressure inside the tires - the parameter must meet the optimal criteria.
- To remove dirt from optics - the easiest way to do this is with plain water; oil stains will be removed by any organic solvent.
- Moisten the adjusting screws with a penetrating liquid, then loosen the fasteners and again check that the headlights are securely seated inside the niche.
The final stage of setup is testing the tire pressure. Before starting the adjustment, it is advisable to select a flat area and make vertical markings on the wall.
Sometimes the cause of problems lies in the proofreader (its operation should be checked)
Olga Nikolaeva | Topic started by: Daewoo
Daewoo Nexia optics..pros and cons
— (Tudor) WHILE RIDING A DAUGHTER NEXIA CAR, I CAME TO THE CONCLUSION THAT THE LIGHT COMPLETELY SUCKS. THERE IS SIMPLY NO POSSIBILITY TO DRIVE SAFELY AT NIGHT. THIS IS RELATIVE TO STANDARD HALOGEN LIGHTS. I WANT TO SHARE EXPERIENCE. I PURCHASED HALOGENS FROM THE GERMAN COMPANY OSRAM. I DON'T WANT TO ADVERTISE ANYTHING. BUT THE LIGHT BECAME BETTER FROM REPLACING THE STANDARD BULB. NOT MUCH BETTER BULBS WITH 4200 KELVIN LIGHT FLUX BUT THERE ARE ALSO 5000 KELVIN. YOU SHOULD NOT INSTALL ANY BULB MORE POWERFUL THAN A STANDARD GALAGEN. THE WIRING WILL NOT STAND UP OR THE REFLECTORS WILL FLOAT. IF THERE IS AN OPTION TRY 5000 KELVIN COOL BLUE. I'M OF COURSE NOT VERY SATISFIED WITH THE LIGHT BUT IT'S STILL BETTER THAN THE STOCK LIGHTS. THEIR FILAMENT IS THINner AND THE LIGHT IS BRIGHTER AND THE OPERATION LIFE IS LESS. I WOULD LIKE TO TRY TO INSTALL XENON..BUT INSTALLING IT INTO HALOGEN OPTICS IS NOT AN OPTION. LACK OF LENSES AND PRESENCE OF TRAFFIC RULES THAT YOU CAN’T INSTALL GAS DISCHARGE XENON WHERE IT WAS NOT SUPPLIED BY THE FACTORY. I THINK THERE IS A WAY OUT. THE LAW ALLOWS THE INSTALLATION OF SPARE PARTS AND ELEMENTS FROM OTHER CARS ON THOSE VEHICLES THAT ARE OUT OF PRODUCTION. IF YOU CHOOSE HEADLIGHTS FOR XENON WITH A SIMILAR SIZE AND DESIGN AS NEXIA, THEN YOU CAN INSTALL THEM
— (Tudor) THESE FOGS RIGHT?
— (Tudor) THE LAW PROHIBITS THE INSTALLATION OF XENON IN THE MAIN HEADLIGHTS DESIGNED FOR HALOGEN. BUT. THE LAW ALLOWS THE INSTALLATION OF DISCONTINUED STRUCTURE ELEMENTS ON A CAR, INCLUDING HEADLIGHTS FROM OTHER VEHICLES. THE EXIT IS TO INSTALL HEADLIGHTS SUITABLE IN SIZE AND DESIGN, DESIGNED FOR XENON FROM ANOTHER CAR.
Daewoo Nexia has poor low beam
If you are reading this article, then you are tormented by the question of how to solve the problem of bad light on the Nexia. Yes, the Daewoo Nexia car has a drawback - poor or dim low beam and there are several reasons for this. If your low beam headlights don't shine well, then this article will help you deal with this issue once and for all and you can improve the light on your Nexia yourself.
Why is there bad light on the Nexia? Causes
The first reason is poor quality headlights . The low quality of Uzbek headlights is one of the main sources of this problem; at first the low beam on the Nexia lights up normally, but as it is used it begins to dim. Because the reflector burns out or becomes cloudy.
The second reason is low voltage . The wires that go to the headlights are very thin, and the low beam also goes directly through the contact group because of this there is a strong loss on the light bulbs.
The third reason is lenses . Nexia lenses in combination with halogen bulbs are not the best pairing. Most cars have lenses if they use xenon bulbs instead of halogen bulbs.
The fourth reason is natural wear and tear . As the car is used, the headlights begin to become cloudy; wiping the headlights dry with a rag will scratch the surface severely, so the headlights will shine worse.
So, we have figured out the reasons, now we need to solve the problem with poor light on the Nexia once and for all. In order to improve the light on Nexia, you can perform a number of manipulations.
Improve headlights on Nexia
Install new headlights. Installing new headlights is a good option if your headlights are completely damaged, for example, with a crack or the reflector has turned black. If everything is fine with them, then try unloading the headlights, that is, installing a relay on the Nexia headlights to improve the voltage on the bulbs, the result will be brighter.
Also, to make the light better, installing xenon in the Nexia will help, then the combination of a lens and xenon lamps will allow you to forget about poor road lighting. If you don’t want to break the law (installing xenon yourself is prohibited in the Russian Federation), then another option will help - install other light bulbs. Yes, there are light bulbs from osram or philips that really improve the light, usually they have special markings on them.
No matter how trivial it may sound, installing additional lighting will help improve lighting. Try installing fog lights if you don't have them or adding external lamps.
If your car is not that old, you can try polishing the headlights. At first, the light will improve and the road will become better visible.
If you know another way to improve the headlights on the Daewoo Nexia, then write in the comments below
Controls
The fog lights are activated using the power button.
And since headlights are quite powerful current consumers, the operation of the entire circuit is based on a relay:
- pressing the button activates the primary winding of the relay;
- the magnetic field closes the second circuit of contacts;
- current is supplied to PTF incandescent lamps from a battery or generator;
- Pressing the button again interrupts the current supply to the winding and the contacts open.
Note! Thanks to the relay, the button contacts do not burn out, since they work separately from the PTFs themselves. And at the same time, the cost of the solution is quite low
Operating principle of the fog lamp relay
For safety and protection, PTF control components (relay and button) are installed inside the car:
- power relay under the instrument panel;
- control button - on the instrument panel.
We take the other ends of the wiring that we extended into the cabin and connect the relay to it. The photo below shows that it is most convenient to carry out this operation through the standard place of the air duct in the front panel.
- connect the red wire to pin “30”;
- blue - to pin “86”;
- the wire from the fuse goes to pin “87”.
The process of connecting relays and control buttons inside the car
All that remains is to install the button in place and hide the wiring harness under the dashboard. That's it, the work on installing the PTF is completed.
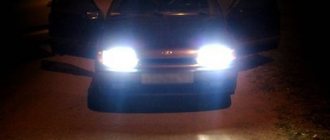
The headlights on the Nexia don't shine well. How to fix it
The headlights on the Nexia don't shine well
.How to fix? — Project assistance: .
It is better to adjust headlights at night. We install the car on a flat horizontal area at a distance of 5 m from the screen - a light wall of a building, garage, etc. (you can use a sheet of plywood measuring 12m). As it turned out, I had to take out the headlights and adjust the light on the Nexia itself. Tire pressure should be as recommended. We seat assistants in the front seats or place a 75 kg load. How to remove the headlight of a Daewoo without removing the bumper, although this can be done on a Nexia n150. By pressing the front and rear wings in turn, we slightly rock the car to install the suspensions. We measure the distance from the centers of the headlights to the floor and draw horizontal line 1 at this height (see figure) on the screen, and 65 mm below it - horizontal line 2. How to properly install fog lights on a VAZ 2109. Materials and requirements for installation, process carrying out the work, decide on. We draw vertical lines A and B, corresponding to the centers of the headlights, and line 0 at an equal distance from lines A and B. Replacing the headlight on a Renault How to insulate the engine of a Renault Logan car. We set the headlight beam direction control to the “O” position, corresponding to the minimum vehicle load. Cover one of the headlights with a piece of cardboard and turn on the low beam. We adjust the direction of the light beams of the open headlight by alternately rotating the gears of the two adjusting screws with a Phillips screwdriver (at least 125 mm long) through the holes in the upper cross member of the radiator frame.
Headlight adjustment diagram
I spent about 2.5 hours making adjustments and drew chalk on the fence, but it was really worth it! We make the headlights one by one, cover one with a cloth, turn off the PTF.
As it turned out, not only did I drive like a blind kitten, but I also blinded oncoming traffic for six months!
was: neighbor
— shines diffusely forward for a period of 50-120 meters (5-10 meters in front of the car were saved by PTF)
further
— illuminates the tops of trees 30-70 meters above the road
now: neighbor
“illuminates” 10-50 meters in front of the car with a good beam (everything is visible) PTFs capture the sides of the road and the area directly in front of the muzzle of my ship =)
further
— illuminates 40 - 150 meters ahead, again, with a good beam of light!
I drive and smile
I used this scheme
There were no problems with horizontal adjustment
but here I had to suffer!
I had to pull out the headlights, adjust them, insert them, see the result, pull them out again, etc... PS: photos for clarity were taken from Yandex =)
Judging by VW Group vehicles, there's no end in sight for owners
The Kangarooing problem with manual 1.5 TSI Evo cars has been going on for seven months; VW admits the problem but has no solution
Ferrari Portofino 2019 review
Ferrari Portofino. this is a super stallion that you will ride every day Maximums Spectacular gearbox with excellent shift mechanics
I spent about 2.5 hours making adjustments and drew chalk on the fence, but it was really worth it! We make the headlights one by one, cover one with a cloth, turn off the PTF.
As it turned out, not only did I drive like a blind kitten, but I also blinded oncoming traffic for six months!
was: neighbor
— shines diffusely forward for a period of 50-120 meters (5-10 meters in front of the car were saved by PTF)
further
— illuminates the tops of trees 30-70 meters above the road
now: neighbor
“illuminates” 10-50 meters in front of the car with a good beam (everything is visible) + PTFs capture the sides of the road and the area directly in front of the muzzle of my ship =)
further
— illuminates 40 - 150 meters ahead, again, with a good beam of light!