The hood is one of the most visible body parts on a car. Over time, the paint on the edge begins to peel off and chips form. The reason for this is the stones that fly from under the wheels of oncoming cars. Also, painting the hood is necessary in case of corrosion. This happens after installing plastic deflectors. A deformed or sun-bleached hood significantly spoils the appearance of the car.
In addition, this greatly reduces its market value. How is the hood painted? Read about this in our article today.
How much does it cost to paint a hood?
Some car owners do not dare to carry out this procedure themselves. Therefore, this service is common in many workshops. Usually repainting is done completely. Making local repairs is difficult. The slightest transition along the paintwork will be noticeable even on a gloomy day.
On average, painting a hood in Moscow costs from three to five thousand rubles. The exception is premium cars. In this case, the cost of painting the hood can reach up to ten thousand rubles. But you can do this work yourself.
The procedure for painting engine compartment elements of a car body
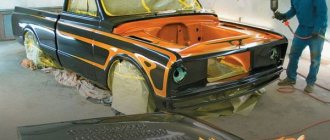
Painting a car under the hood is a rather difficult task, but you can do it yourself without contacting a service center. To do this, you need to purchase special tools and tools, prepare the garage and adhere to all the rules and recommendations. The procedure can take a long time, especially if it is the first time, but there is no need to rush. You need to try to do the painting well so that the result lasts a long time.
DIY hood painting: preparing the garage
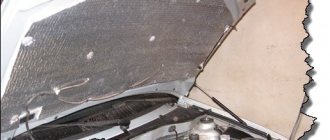
If you want to perform this operation yourself, you should prepare a work area. Painting the hood on the street is strictly prohibited. To do this you need a clean and bright room. An ordinary garage can serve as such. First of all, you need to remove all dust and dirt from the floor, ceiling and walls. The slightest pollen will be clearly visible on the new paintwork. Therefore, we get rid of dirt in the garage as much as possible. It is also recommended to prepare hangers - it is better to hook the hood onto the hooks and apply paint while hanging.
Preparatory work
Before you start painting a car or part of it, you need to thoroughly prepare the room in which the work is planned. The main requirements are that it must be clean and dry. You should clean the room (garage) and take out everything unnecessary. It is also worth vacuuming the room, and not only the floor, but also the walls, ceiling, and all hard-to-reach places. Wet cleaning won't hurt.
Now you need to prepare the part before painting.
For more convenient work, it is recommended to dismantle the hood and place it on a stand or table. This will subsequently protect your car from accidental damage during polishing, puttying and painting. If it is not possible to dismantle it, then it is worth covering the car with film; only the hood itself remains uncovered.
Before painting, it is advisable to remove the hood from the car.
Preparing tools and materials
What does it take to successfully paint a car hood? First of all, consumables are needed. This is numbered paint, primer and varnish. You will also need a degreaser, several pieces of clean rags, and rubber gloves. To achieve a high-quality result, materials should be applied using a spray gun. In addition to it, we need a compressor that will produce the required pressure (preferably with a receiver).
If local painting of chips on the hood is carried out, it is not necessary to dismantle the element from the car. You can limit yourself to masking tape and film, covering all unnecessary parts.
Please note: you need to cover the entire body with film, since pollen can accidentally get on any body element.
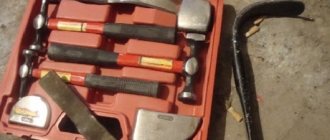
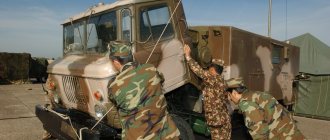
In case of complete painting, a set of tools (sockets and ratchet) and an assistant are required. It will hold the second part of the hood when removed. It is difficult to dismantle this structure alone.
If there are dents or other deep damage, putty should be prepared. It usually already comes with a hardener (while for paint you need to buy it separately). Additionally, you will need a spatula and a set of sandpaper of different grits. For grinding, it is better to use a wheel attachment.
How to paint the hood yourself?
It is difficult to do such work yourself - special skills and training are required. The room itself must be clean (dry and wet cleaning of the floor, ceiling, walls). For the dismantled part, you will need a stand or table to reduce the risk of damage to wet layers of putty, paint and polish. If the part is repaired without removal, the car should be covered with film (except for the area of interest). To properly paint a part, before starting, we recommend finding a video instruction with a step-by-step description of the process.
Surface preparation
For best results, it is necessary to clean the surface from old paintwork. To do this, use sandpaper of different grain sizes. Dust from grinding can be removed with white spirit.
They pre-dip the rags. Next, the surface is puttied. This allows you to achieve the most even surface after sanding. Putty is a kind of paste that is applied using a spatula. But first it must be mixed with a hardener. Otherwise, the drying time will be about a day. And we need at least three such layers. Please note that the applied layer should be as thin as possible. After drying (usually this takes up to ten minutes), all excess is ground off the surface. As a result, the layer thickness is about one to two millimeters.
An important point: do not overheat the putty and do not forcefully dry it with a hair dryer. At temperatures above 70 degrees Celsius, the layer will become covered with cracks.
Sanding, puttying and applying primer
The sanding procedure is necessary to remove old enamel and varnish. If you apply enamel to old paintwork, the result will be very short-lived.
We perform sanding with water using waterproof sandpaper, gradually reducing the grain size. There is no need to be afraid if bare metal appears in some places - this is normal. The result should be a perfectly smooth surface. You can only check this by touch.
Grinding with a machine will allow you to carry out the procedure much faster and with better quality, but you must keep in mind that inept handling of a mechanical tool may not lead to the desired result, or even ruin everything.
Before applying the primer, the surface should be puttied to remove all unevenness and defects. Different compositions are used for different defects. For example, scratches and pores are eliminated with liquid; deep dents require the use of more serious preparations, including the addition of fiberglass. Universal soft putties are suitable for small defects.
Liquid putties are applied with a spray gun, soft putties are applied with a spatula. After drying, the surface is sanded again. The main rule when using putty is to remember that it sets quickly.
The primer is applied using a sprayer using uniform linear movements from the edge of the surface. The spray pattern should be inclined at an angle to the surface. The primer is applied in 2-3 layers with intermediate drying. The first layer is designed to protect against corrosion. The second one levels the surface. And the last layer is applied as a finishing layer. Once dry, the hood is ready for painting.
Padding
To ensure good adhesion of the paint to the metal, you need to apply a layer of primer. This can be done using a spray gun or an ordinary spray can. The last option is good because it has a fast drying time and does not require dilution with a hardener.
First, a developing layer is applied. He is the thinnest. You need to keep the gun or cylinder at a distance of at least forty centimeters. Further, this distance is reduced by a third - the second layer is applied. It will hide all imperfections invisible to the eye. If using a spray gun, the pressure should be set to three atmospheres. Typically, about 300 grams of diluted primer is used on the hood.
Removing shagreen
Too noticeable shagreen on the hood is a clear drawback. But even in this case, you shouldn’t get upset and get ready to repaint. You can smooth out shagreen by polishing.
To polish the hood and soften the shagreen, you need to treat it with a polishing machine and paste, which ensures delicate removal of the layer. If the shagreen grain does not disappear, then you should switch to a larger grain.
On a note
Removing shagreen is a very labor-intensive and costly process. Therefore, it is better to try not to create it. To do this, you need to use only high-quality materials, control their consistency and use good spray bottles.
Shagreen should be removed only after the paintwork has completely dried. It is better if three days pass from the time of painting. This, of course, takes a long time, but wet paint is difficult to sand and polish. Sanding removes too much material, and polishing makes it difficult to achieve a glossy finish.
It is also useful to read: Review of materials for painting and body repair of a car
When polishing the hood, the machine should not be kept in one place for a long time. This can heat up the paint too much, which can cause it to peel off. Touch the hood with your hand periodically, and if it becomes hot, you need to either wait or move to another area.
Helpful advice
If already during the painting process it is clear that the material is shagreen, then it is better to take action right away. First of all, you need to check the correct consistency, as well as the operation of the spray gun.
To clearly see the shagreen, you need to find the reflection of a light source or some light object on the hood. If the boundaries of the reflections are clear and not wavy, then the paintwork turned out perfect.
Applying paint
The next step is to directly paint the hood. The cost of a mistake is a complete repaint of the element. Therefore, you need to take this work as responsibly as possible. Just as in the case of primer, a developing layer is first made. The paint is applied from a distance of about forty centimeters. At what speed should you move the can or spray gun? It should not be moved quickly, but also without stagnation - approximately 50 centimeters per second. If you move it slower, there will be a risk of drips.
Don't focus on the same point. When using a spray gun, the enamel and solvent are mixed in a one to one ratio. The pigment is applied in three stages. But to achieve the best possible result, the first layer should be slightly dry (that is, with less hardener). After developing, give the enamel time to dry. Usually this is 10-15 minutes. Then the missing portion of solvent is added to the paint. The second layer is made thicker. After half an hour, the final layer of enamel is applied to the coating. However, you need to move the sprayer very intensively - the paint can drip at the slightest stagnation.
How to choose engine compartment paint
I need to paint the hood on one side, the accident was not big and there is nothing to even remove from the car to take to color selection, can anyone tell me the paint number or how to choose it, 2006 Forester is golden, the hood is matte gold
thanks cap) the hatch is glossy on both sides
Well, it’s glossy because it’s under varnish. So the tone is probably the same?
paint code on the wine sign
Select by hatch or paint code
yeah not a big accident - paint the engine compartment))))))))
I think the paint code is the main color of the car, but under the hood is some other color, matte in a different shade, who exactly painted the hood?
I have the main radiator, wings, hood and even the TV is fine) there is no crime, and I’m not going to sell the car
It was a joke))) I’m not talking about the subsequent sale, but why do you need a hood then?
I can’t understand, are you going to paint it yourself? If not, then don't bother. look for a good painter, they will do everything themselves, and they will select the paint and repair it.
Under the hood the paint is the same as the main one!
a friend of mine does it, he says I’ve been repairing cars for 20 years (he’s not done the first one for me) I’ve never seen that under the hood from an impact there’s nothing to saw off and take to color selection, that is, you can take the hatch and go with it to selection, order paint and paint the engine compartment only without varnish and everything will be the same, right?
usually it’s not the same thing, outside and inside (under the hood, in the trunk, etc.). And the difference is in the shade, and not just in matte
In general, it’s like that on all Japanese cars, there’s a base under the hood. So what’s damaged there?
For those who don’t know: under the hood there is usually no paint at all, there is primer everywhere (usually very close in color to the paint that is used on the entire car, to save expensive metallic), and the paint and varnish itself partially ends up under the hood when painting the wings and hood Those. It’s unlikely to be done unnoticed, unless of course you repeat the entire sequence of applying layers of primer paint and varnish.
You write something very interesting))) no offense, but why say “for those who don’t know” if you don’t know yourself? ) The engine compartment should be painted with the same paint as the entire car, only without varnish and in a thinner layer. An economical type of spray.
Applying varnish
No professional hood painting is complete without this step. Using varnish you can add shine to the part. This material is diluted with a solvent in the same proportion - one to one.
After applying the first layer, you need to wait about 20 minutes until it hardens. Next, another 15 percent solvent is added to the composition. The finishing coat of varnish is applied from a long distance.
How to prepare a garage
There should not be many unnecessary objects and small parts in the place where the car will be painted. You should also try to get rid of dust, otherwise it will create additional difficulties during the work process. The best solution is general cleaning of the room using a vacuum cleaner. If possible, you should remove items from the garage that can be accidentally stained with paint.
Important! There should be no objects that can easily ignite spontaneously in the room where the hood will be painted. Before you open a can of paint and start painting with your own hands, you need to shake off the dust from the can.
If possible, it is recommended to varnish the floor so that the dust remaining in the garage no longer bothers you. This is especially important in situations where the hood is to be completely painted. This is not a cheap business and you should not take unnecessary risks trying to save money.
Materials and tools for painting the hood.
What's next?
After applying the last layer, you need to wait about a day until the paint coating is completely dry. The recommended room temperature is from 20 degrees Celsius. This will significantly speed up the pace of work. In winter, you can use an infrared heater.
Next, the hood is removed from the hanging mounts and installed on the car. Installation is carried out in reverse order. When installing, it is important to check the gaps between the wings. If necessary, they are adjusted. Next, the rod and lock, as well as the washer elements, are assembled.
If you paint the hood on site, all you have to do is remove the masking tape and film from the body. You will immediately notice the contrast of the transition - a shiny hood and fairly dusty fenders. However, you should not rush to go to the car wash. It needs to be done only on the third day after repair (but not earlier).
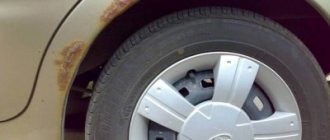
How to remove chips before painting
Special attention should be paid to removing chips, because... They appear most often on the hood. Ignoring scratches and chips on the car body leads to corrosion, and these defects also spoil the appearance of the car. If you are not going to completely remove the paintwork down to the metal, but just want to refresh the paint layer, then you need to get rid of the chips first. Removing chips is not a complicated process, but it brings the best results in the warm season, although if you have a heated garage or box, then the temperature and humidity outside the window does not matter.
To remove chips we will need:
- polishing materials (fine sandpaper, felt, polish);
- masking tape to protect chips;
- match and brush.
First, the chipped areas must be thoroughly washed and then degreased. Rust is removed with zero sandpaper. The edges of the chips are sealed with extra masking tape. Next, we need to thoroughly clean the chipped areas from exfoliated parts of the paintwork - this is done with coarser sandpaper. After all defects have been removed, you need to degrease the newly formed groove with a match and a brush to remove small particles. The final step will be rinsing and repeating degreasing.
Preparing to paint plastic parts
You will need the same set of equipment. But other putties are needed:
- Otrix - Polish high-quality and affordable material for plastic;
- SolidFlex - polishes surfaces in one go and adheres well;
- APP Flex Poly-Plast is flexible and durable due to the polyester added to the composition. Perfectly protects vehicles from aggressive influences.
- MasticPlast is a finishing material based on polyester resin and hardener.
Please note: Thickness gauge: description of the device, rules and procedure for use
Preparing plastic parts of a car for painting is similar to the steps used when working with metal elements.
Attention! When handling putties based on epoxy resin, use special rubber gloves or goggles and a protective mask.
Painting a plastic bumper