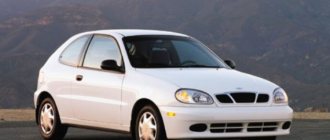
Replacing the torpedo (part 1) — Daewoo Nexia, l., year on DRIVE2
Slide the tines of the old fork under the head of the stud and lift it out of the panel.
Carefully lower the panels away from the front panel and remove them from the metal mounting tabs on the bulkhead. If the vehicle is equipped with a passenger airbag, a detailed description of the removal procedure is given in the Section Removing and reinstalling components of the auxiliary safety system SRS.
On vehicles equipped with an airbag on the driver's side, the procedure for removing the airbag module is described in the Section Removing and installing auxiliary components for replacing a torpedo on the Daewoo Nexia SRS.
Remove the steering wheel, see Chapter Suspension and steering. On vehicles equipped with a driver's side airbag, remove the airbag rotating contact assembly.
how to remove a Daewoo Nexia torpedo ~ inter-foto-press.ru | Car repair - ordering spare parts
disassembly will help Rear bumper removal and installation The rear bumper of the Lada Largus is removed in case of body work, or when replacing it.
The peculiarity of removing the rear bumper is that along with the bumper you also need to remove the rear marker from the car. Tools needed to remove the rear bumper of a Lada Largus You will need: A car heater helps maintain a temperature in the cabin that is better not only for passengers, but also for car components.
Removing the instrument panel on a Daewoo Nexia car
How to remove the radio quickly and easily from Deewo Nexia Deewo Nexia)
Now we can see such a detail. We bend the airflow grille down and lightly press the lower part of the grille with one hand and push it inward, while with the other hand we press the upper part as if towards the bottom.
Remove the center console trim (see “How to remove the heater control unit”). Tags: squeaks, crickets, eliminating squeaks...
Use a Phillips screwdriver to remove the self-tapping screw securing the instrument panel to the steering column.
How to remove the Daewoo nexia instrument panel and change the light bulbs Detailed instructions How to remove the Daewoo nexia instrument panel and change the Daewoo Nexia how to remove the console Detailed instructions How to remove the Daewoo nexia instrument panel and change the light bulbs Detailed instructions How to remove the Daewoo nexia instrument panel and change the light bulbs Detailed instructions In one It’s a beautiful day and my instrument panel light bulb in Ksyukha burned out. Then it is removed completely. After this, you need to carefully pull the block towards you, so that the cable that we removed under the dashboard does not get caught inside the torpedo and break.
Disconnect the wiring harness from the glove compartment light switch under the instrument panel.
Using pliers, squeeze the petals of the wiring harness holder under the instrument panel and remove it from the hole in the instrument panel. Using a Phillips screwdriver, unscrew the screws for the side mounting of the instrument panel on the right and left sides.
Using a screwdriver, we remove the upper and lower locking clips of the protective cover... ...and remove it. Using a Phillips screwdriver, unscrew the two screws for the lower fastening of the instrument panel on the right and left sides.
Use a Phillips screwdriver to remove the self-tapping screw securing the instrument panel to the steering column. Instrument panel front view.
We unscrew the two screws securing the instrument panel to the center console frame. We take out the air duct of the right deflector through the hole for the housing of the central deflectors.
We swap the radio and control unit for the Daewoo Nexia stove / Daewoo Nexia
In the engine compartment, remove the windshield trim, see. Remove the trim of the instrument cluster 5, disconnect all connectors on the right and left sides, while signing what is connected where. Everything in the photo is already signed.
Sequence of operations
Below we will look at disassembling the Daewoo Nexia torpedo in detail and step by step. Perform operations carefully - the fastenings may be invisible and flimsy.
- Removing the plastic around the handbrake. There are three self-tapping screws here, unscrew them by lifting the leatherette and leaving it on the lever.
- Move towards yourself to separate the edging of the radio.
- We release the gearshift knob from the frame by unscrewing 2 screws near the radio. We unscrew the edging leatherette, leaving it on the handle.
- The ashtray and the music device with the glove compartment underneath are attached with 4 screws each.
- To separate the climate control unit, you need to remove the damper drive washer and immediately unscrew the cable itself. The unit is pulled out onto itself, after which the cables of the switches and backlight are disconnected.
- The claw holding the vacuum drive tubes is unhooked by turning and moving towards the hood.
- We remove the solid lower plastic block near the stove and radio by unscrewing 4 screws, cutting off 4 lock washers with a knife and releasing 2 screws on the sides and on the screed with the air duct.
- The plastic block above the glove compartment is held in 6 places with self-tapping screws and is removed from below.
- We rotate the cables that prevent the glove compartment lid from falling off around the axis until they coincide with the slots. The glove compartment itself is secured with two screws in the depth.
- The central part of the steering wheel is pulled towards itself, we disconnect and isolate the horn connectors. Using a screwdriver, loosen the washer of the steering wheel fastening nut. Loosen the nut gradually, pushing the steering wheel towards you a little bit at a time and remove it.
- The plastic blocks near the steering wheel are on self-tapping screws, we remove them. Don't lose their external plugs - there is a shortage.
- We free the switches under the steering wheel from their claws and contacts. We remove it by unscrewing the plastic of the dashboard in 2 places. We disconnect the contacts from the buttons and sign them.
- To remove the dashboard, release the screw, lift it up and towards you, disconnect the connectors and the speedometer cable.
- We remove the speakers by lifting the plastic and unscrewing it, marking the connectors. Separate the gas tank button and the clock.
- To release the air ducts, turn the grilles down and pull, unscrew the screws, and pull out the deflector without separating both parts.
- We separate the connectors of the glove compartment button and the backlight, disconnecting the wire clamps. We take out the damper hoses and fuses inside.
- From the outside, remove the wipers and dust grill.
- We remove the processor part by removing the casing and prying off the plastic mounting pins.
- We remove the torpedo body by unscrewing numerous fasteners outside and inside, disconnecting the windshield air ducts and wiring.
Nexia new: Removing the instrument panel (dashboard) to replace the heater air duct. (part 2) "
Remove the Daewoo Nexia panel.
After this, remove the housing of the central deflectors from the instrument panel. Remove the front part of the floor tunnel lining, see. And then I had an embarrassment - a piece of plastic fell off along with the upper mount of the central left center deflector.
Instructions for removing the instrument panel (speedometer) on the Daewoo Nexia. First you need to remove the steering column pads...
When installing the instrument panel, first connect the right air duct to the right deflector, and then to the central ones.
Instrument panel front view.
Now let's unscrew the remaining screws and nuts that still interfere with removing the torpedo. Now you need to get under the hood - there is one nut that holds the dashboard on the passenger side.
What kind of light bulbs needed for the instrument panel Nexia (Detailed review)
Remove the dashboard instrument panel. We remove the instrument panel of dashboard 1, pull the entire dashboard towards ourselves, straightening the wires. We remove the instrument panel of dashboard 2, put it on the seat and disconnect the remaining wires.
We remove the instrument panel of the dashboard 3, this is how we now look in the cabin. The instrument panel of the dashboard and here is the dashboard from different sides.
Next, remove the plugs in the top picture, marked in red, and unscrew the screws - there are 2 of them in each deflector, one below under the plug, the other open on top. If you wish, you can use a wet cloth to wipe off all the dust that has formed during operation of the fan.
After this, remove the housing of the central deflectors from the instrument panel. Removing the housing of the central deflectors. Inspecting this housing, I was very struck by how smooth the lower edge is, if you look at the photo - a miracle of Uzbek engineering!
They did it right on the level! After removing the case we have the following picture.
I also wiped the air duct itself with a rag - there was a ton of dust! Next, remove 2 screws of the steering column casing, marked in red. Right screw. After that, very gently and carefully, and most importantly, without nerves! Pulled it out painlessly. I’ll answer the question why you need to pull it out carefully... the whole problem is that the plastic used in the decoration is incredibly easy to scratch.
Below is an example of what I'm talking about; these are not my crafts - they were inherited from the previous owner. Removing the instrument cluster, see
Overcoming the resistance of the clamps, remove the switch block from the bottom trim and disconnect the wiring harness block.
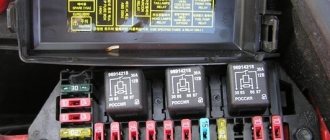
Lifting the bottom part of the fuse box cover... ...remove it. Using a Phillips screwdriver, unscrew the two screws of the upper... ...three screws of the lower fastening of the lower decorative trim of the instrument panel... ...and remove it.
Possible faults
If everything is clear with the description, then let’s move on to the main faults.
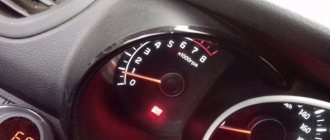
The dashboard of any car, including Daewoo, can have two types of breakdowns:
- Mechanical, associated with mechanical impact on the device. These include breakdowns of fasteners, clamps, fractures or chafing of wires, plugs, pads, and connectors.
- Electrical. There are much more options here. One of the most common electrical breakdowns is the dashboard lights not working, which is usually caused by burned out light bulbs. This type also includes failure of the tachometer, speedometer, board malfunction, etc.
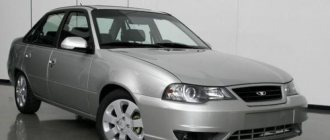
Daewoo Nexia 2010, 109 l. With. — self-repair
Remove the casing with the heating, ventilation and air conditioning control unit, see. Unscrew the four nuts securing the steering column to the body... 8.
Remove the front part of the floor tunnel lining, see Remove the heating and air conditioning control unit, see.
If you are not removing the instrument panel for disassembly, the cup holder and niche need not be removed. Remove the two screws securing the niche for small items... Remove the two screws securing the glove box to the instrument panel... Open the left front door and, using a screwdriver, pry... Disconnect the hood lock drive handle from the panel, see.
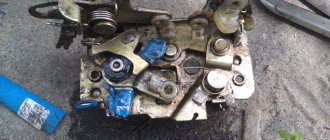
DISASSEMBLY OF TORPEDO N150
share information. like what. photo reports. Today I decided to glue the torpedo with anti-squeak and ran into the first problem: I can’t remove the deflectors. guys, we are helping, this is not an easy task, dismantling the torpedo and in the entire forum there is no manual on how to remove it, I think everyone will find it interesting and useful! we write who has already done this on the restaling Nexia
and also, maybe someone knows the link, feel free to post it
Dr.Akula said: 03/05/2013 11:06
alex218 said: 03/05/2013 11:15
guys - there is a book on our website - download it - everything is clear there and with pictures on the deflectors, if you are too lazy to read - lower the grille all the way down and, with a little effort, remove the grille, then look in the tunnel for 2 self-tapping screws at the top and bottom (can be sealed with black tape) in the deflector itself we bend 4 plastic fasteners towards ourselves (you need a couple of screwdrivers and there is a risk of breaking a couple of fasteners - but it’s not scary - I only broke 1 on all the deflectors) the deflector is in your hands - and your hands will immediately be dirty
I asked the moderator to move the link to the book to topic N150 - no, we will continue to produce complex answers to simple questions
Nexia new: Removing the instrument panel (dashboard) to replace the heater air duct. (part 2) "
Remove the Daewoo Nexia panel.
After this, remove the housing of the central deflectors from the instrument panel. Remove the front part of the floor tunnel lining, see. And then I had an embarrassment - a piece of plastic fell off along with the upper mount of the central left center deflector.
Instructions for removing the instrument panel (speedometer) on the Daewoo Nexia. First you need to remove the steering column pads...
When installing the instrument panel, first connect the right air duct to the right deflector, and then to the central ones.
Instrument panel front view.
Now let's unscrew the remaining screws and nuts that still interfere with removing the torpedo. Now you need to get under the hood - there is one nut that holds the dashboard on the passenger side.
What kind of light bulbs needed for the instrument panel Nexia (Detailed review)
Remove the dashboard instrument panel. We remove the instrument panel of dashboard 1, pull the entire dashboard towards ourselves, straightening the wires. We remove the instrument panel of dashboard 2, put it on the seat and disconnect the remaining wires.
We remove the instrument panel of the dashboard 3, this is how we now look in the cabin. The instrument panel of the dashboard and here is the dashboard from different sides.
Next, remove the plugs in the top picture, marked in red, and unscrew the screws - there are 2 of them in each deflector, one below under the plug, the other open on top. If you wish, you can use a wet cloth to wipe off all the dust that has formed during operation of the fan.
After this, remove the housing of the central deflectors from the instrument panel. Removing the housing of the central deflectors. Inspecting this housing, I was very struck by how smooth the lower edge is, if you look at the photo - a miracle of Uzbek engineering!
They did it right on the level! After removing the case we have the following picture.
I also wiped the air duct itself with a rag - there was a ton of dust! Next, remove 2 screws of the steering column casing, marked in red. Right screw. After that, very gently and carefully, and most importantly, without nerves! Pulled it out painlessly. I’ll answer the question why you need to pull it out carefully... the whole problem is that the plastic used in the decoration is incredibly easy to scratch.
Below is an example of what I'm talking about; these are not my crafts - they were inherited from the previous owner. Removing the instrument cluster, see
Overcoming the resistance of the clamps, remove the switch block from the bottom trim and disconnect the wiring harness block.
Lifting the bottom part of the fuse box cover... ...remove it. Using a Phillips screwdriver, unscrew the two screws of the upper... ...three screws of the lower fastening of the lower decorative trim of the instrument panel... ...and remove it.
Instructions for replacing light bulbs in the dashboard with your own hands
To replace the lamps you will need to do the following:
- First, dismantle the driver's and central deflector, then remove the clamps and unscrew two bolts for each of them. Having done this, you can remove the housing of the central deflectors from the tidy.
- On the steering column, or rather its casing, find two bolts and unscrew them, the casing can be removed. After this, unscrew the two bolts that secure the control panel trim. Remove the cladding and move it towards you.
- Having done this, you can disconnect all plugs and connectors from the device to make it easier to dismantle it. We are talking about the plugs of all elements that are connected to the dashboard - the rear window heating system, hazard warning lights, fog lights, light direction sensor, clock, etc. When dismantling, you may encounter the problem of removing the left part, in order to do this without problems, you need to move the left deflector housing slightly to the left. In other words, the deflector body must be moved to the left, and the facing part of the device is pulled to the right until a click is heard. At this stage, you can tighten all the screws located on the inside of the cladding - if the parts are not tightened tightly, squeaks may appear during movement.
- The final stage of dismantling will be unscrewing the bolt that secures the control panel, but to do this, you must first move the wiring harness away.
- Having completed all the steps, tilt the control panel towards you, press on the fasteners and disconnect the remaining blocks with wires. On the back side of the dashboard, the burnt-out light bulbs are removed and replaced with new ones, after which the device is put back in place.
Daewoo Nexia 2010, 109 l. With. — self-repair
Remove the casing with the heating, ventilation and air conditioning control unit, see. Unscrew the four nuts securing the steering column to the body... 8.
Remove the front part of the floor tunnel lining, see Remove the heating and air conditioning control unit, see.
If you are not removing the instrument panel for disassembly, the cup holder and niche need not be removed. Remove the two screws securing the niche for small items... Remove the two screws securing the glove box to the instrument panel... Open the left front door and, using a screwdriver, pry... Disconnect the hood lock drive handle from the panel, see.
Remove the left side body trim, see
Removing the door trim
The door card is removed not only for tuning. After 2 years of operation, drivers are recommended to check the sedan body and carry out anti-corrosion treatment on the sills, bottom, wheel arches, and clean the door drains.
Nexia owners note poor standard sound insulation of the interior, so the lining is removed to install an additional sheet of noise-absorbing material, if it is necessary to repair the door lock, handle, check the window regulator, or install an additional audio column.
Before removing the front door trim on a Daewoo Nexia, you need to prepare tools and consumables:
- flat screwdrivers with wide and narrow blades;
- T24 key, Phillips screwdriver;
- a thick plastic or wooden ruler;
- set of clips for trim.
The price of an original set of caps for a car starts from 100 rubles. for 50 pcs. For the sedan, simple caps with a square base and a simple one-sided skirt are used.
Additional Information
It is interesting that the official service center for repair and maintenance of Daewoo Nexia does not consider a loose distributor to be a factory defect . Moreover, the climate system control unit of this car is officially maintenance-free . That is, if any problems occur, official servicemen will simply remove the problematic unit and put a new one in its place. Everything would be fine, but the customer will have to pay around $ 50 .
If the climate control unit begins to direct air flow anywhere, it is easier and cheaper to use the above repair scheme. Yes, if you independently service the control unit, there is a risk of breaking the latches . Therefore, experienced craftsmen always try with extreme delicacy to dismantle both the console facing panel and the climate system unit itself. Knowing about the problem with the latches, a competent technician will not allow them to break.
Otherwise, servicing the climate system unit should not cause any difficulties.
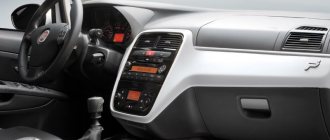
Head unit
This article will talk about the standard radios of the Daewoo Nexia. With the advent of the updated Nexia N150, changes occurred in the exterior and interior of the car. Inside, the instrument panel, door trim, and steering wheel have changed. An airbag for the driver is installed. Nexia also began to be equipped with a new Clarion 2din radio. The radio harmonizes well with the dashboard and the interior as a whole.
You can verify this by looking at the photo. Modern design and sound quality allow you to get great pleasure from your trip. The switch keys are located vertically on both sides. The volume control is in the middle. Above it is a display. All buttons respond to a light finger touch. No effort is required when pressing. Standard Clarion radios in combination with a factory speaker system are capable of reproducing musical compositions in good quality.
Clarion head unit
Operating the radio will not be difficult after reading the instructions. The instructions describe in detail the settings of all functions that even a child can understand.
Let's move on to practice: replacing the ignition switch cylinder
To change the cylinder, you need to purchase the corresponding mechanism of a certain article. Please note that you only need to buy original parts produced by the car manufacturer. If you buy a Chinese larva, there is a chance that it will not fit into the seat, since its size will be larger. In this case, you will have to grind the device, and this will take additional time.
The replacement procedure is performed as follows:
- First of all, turn off the ignition and open the hood. Disconnect the terminals from the battery.
- After this, using a Phillips screwdriver, you will need to remove the screws that secure the plastic steering wheel cover. By unscrewing the bolts, this cladding element can be dismantled.
- Next, you will need to disconnect the connectors connected to the contact group of the device; they are secured with bolts. In this case, you will need two screwdrivers, one longer and one shorter. The screw itself that you need to unscrew is located inside the device.
- Now you will need a wire, with its help you need to press on the cylinder mount through the existing hole, at the same time the ZZ must be moved to position 2. After this, you will be able to remove the larva by about 0.5 cm. Having done this, it can be completely dismantled.
- When installing a new cylinder, make sure that the 3Z is in position 2. Using the pin, press the fastener and install the new structural element.
If you change the cylinder in the ignition switch, then you should also change the cylinders in the trunk lock and in the doors, otherwise you will not be able to open the door and trunk with the key to start the engine.