Brake fluid is a very hygroscopic and chemically active fluid. During vehicle operation, the physical and chemical properties of brake fluid change. Therefore, after some time, the brake fluid no longer meets the high performance requirements placed on it, and operating a car with such fluid becomes dangerous.
According to the manufacturer's recommendation, the brake fluid is changed after 20,000 km of vehicle mileage or after 12 months of operation.
To perform the operations you will need: – an assistant, – a flexible transparent tube, – a container for draining the brake fluid.
Difficulty level: 2. Completion time: 1 hour. Sequence of operations:
1. We securely install the car on an inspection hole or overpass (see “Standard operations”).
If there is no inspection hole, this operation can be performed on level ground. But in this case, you will have to sequentially remove all the wheels from the car and place the car on reliable stands.
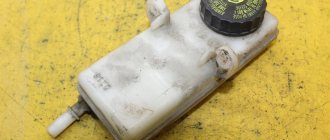
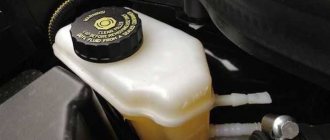
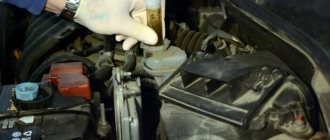
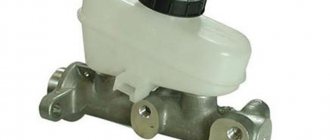
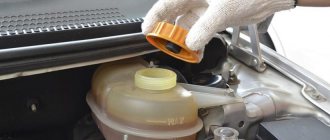
2. Open the brake fluid reservoir cap on the master brake cylinder.
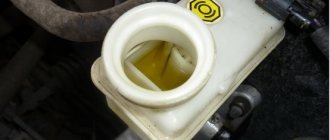
3. Using a rubber bulb, completely remove the old brake fluid from the reservoir and fill in new brake fluid to the very top.
To prevent air from entering the hydraulic system, during all work on bleeding the system, we constantly ensure that the fluid level in the reservoir does not fall below o.
4. Remove the protective rubber cap from the bleeder fitting of the rear right wheel. Thoroughly clean the fitting and the surface around the fitting from dirt.
5. Place a size 9 spanner on the bleeder fitting of the working brake cylinder of the rear right wheel.
6. Place one end of a flexible transparent tube onto the fitting. We lower the other end of the tube into a transparent brake fluid drain container, partially filled with brake fluid.
7. Open the car windows so that the assistant can clearly hear your commands.
8. An assistant presses the brake pedal several times and holds the pedal down.
9. You loosen the bleeder fitting and then unscrew it 3/4 of a turn. The brake fluid from the cylinder begins to flow through a flexible transparent tube into the drain container. After the brake fluid stops coming out of the tube, tighten the thread of the fitting.
10. At your command, the assistant slowly releases the brake pedal, and then again presses the pedal several times and holds it pressed. You repeat the steps described in the previous paragraph.
11. Repeat the steps described above until new, lighter brake fluid begins to come out of the tube.
Read more: Replacing the Lancer 9 stove
12. To flush the hydraulic brake drive, repeat the bleeding steps two or three more times.
13. Finally tighten the fitting with a tightening torque of 9 Nm. Remove the flexible transparent tube and spanner from the fitting. We wipe the surface around the fitting and put a protective rubber cap on the fitting.
14. Add brake fluid to the master cylinder reservoir and constantly monitor the fluid level during subsequent operations.
15. We repeat the operations for bleeding the cylinders on the remaining wheels of the car, strictly following the bleeding sequence indicated below.
1 – Rear right wheel.
2 – Front left wheel
3 – Rear left wheel.
4 – Front right wheel.
16. After completing all operations, we check and, if necessary, bring the level of brake fluid in the reservoir of the main brake cylinder to normal.
17. By pressing the brake pedal, check its position and “hardness”. If the pedal is “soft” or it has gone far down, then re-bleed the brake system in the sequence indicated above.
Good day!
The time has come to replace the brake fluid in the clutch and brake system. The brake fluid itself is very hygroscopic (absorbs moisture), which reduces its boiling point and, as a result, braking efficiency. Plus, over time, a lot of dirt accumulates in the brake fluid and the color of the brake fluid changes, at best, to dirty yellow. Accordingly, the brake fluid must be replaced either when it becomes unsightly in appearance, or once every two years, at least. Well, this is according to theory, which, by the way, is often supported by practice.
Once again looking into the expansion tanks of the clutch and brakes, an immediate decision was made to replace the operating fluid with fresh and not yet sour)
Along the way, it turned out that the rubber seal under the clutch reservoir cover was bubbled, decomposed and became unusable. The middle was cut out and discarded. I couldn’t find a separate order number in the catalog for this same rubber sealing gasket.
For bleeding, I used a silicone tube, which is placed one by one on the fittings of each brake cylinder. The bleeding procedure itself is standard: with an assistant, the circuits of the brake system are pumped. To speed things up, an experimental pumping method was tested with an open fitting and pumping 7-8 times directly into a vertically raised tube. However, in this case, the escaping liquid was aerated with small air bubbles, which could indicate a strongly unscrewed brake fitting (considering that there was not that much air in the system). But in general, the brake fluid is pumped quite quickly. Towards the end - I pumped it classically a couple of times - after a few pumps, I opened the fitting and drained a fresh portion of light brake fluid, at the same time making sure that it was free of air bubbles. It took about 900 ml to replace the fluid in the entire brake system.
Read more: The locks in the garage are frozen
D2 has already talked many times about simple modifications and methods for pumping brakes alone 1; 2; 3; 4; 5; 6; 7 well enough...
There is a desire to make an additional cap for the expansion tank, but for now I am enthusiastically looking for a cap for the brake reservoir of a suitable diameter. I think that I will soon purchase a fuel return valve 2108 (VAZ/UAZ) and a vacuum hose as described here, here and here.
The procedure for completely replacing the brake fluid can be carried out once every six months or once a year, for example in the fall, before the start of winter operation - this is everyone’s business - like changing the oil - some more often, some less often. But in any case, with regular replacement, the pumping fittings do not become sour and the cylinders benefit from all the accumulated dirt and old liquid being expelled from them. Well, I’m not even talking about the fresh “balm” in the brake system.
Peace, kindness, smooth roads and strong brakes to everyone!
The braking system of the Daewoo Nexia is not much different from similar systems in small class cars. However, there are some nuances that should be taken into account when servicing and repairing Nexia brakes. Today we will figure out how to bleed the brakes on a Nexia and find out all the intricacies of this issue.
When the brakes are pumped on a Daewoo Nexia
Naturally, the first signal of a malfunction in the brake system will be an inadequate response of the car to pressing the brake pedal.
Before bleeding the brakes, it is worth remembering the last time the brake fluid was changed.
The pedal may feel weak or sink almost to the floor, but there will be no effective deceleration. It is also worth looking at the brake fluid level warning lamp in the reservoir. A burning lamp will indicate that air has most likely already entered the system.
After any repair of the brake cylinders, main or wheel, it will also be necessary to bleed the brakes . The ultimate goal of the operation is to completely remove air from the system or completely replace the brake fluid. When fluid leaks, air can also enter through leaks in the brake lines and worn brake cylinder seals. In short, pumping technology will come in handy more than once.
Necessary tool
Pumping scheme
When bleeding the system, we will remove air from each circuit and from each working cylinder in strict order:
- Right rear wheel.
- Left rear wheel.
- Right front wheel.
- Left front caliper.
In the event that we repaired only one caliper or one working cylinder, most likely there is no need to bleed the entire system.
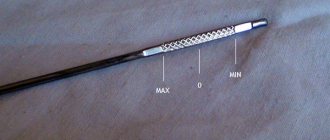
It will be enough to remove air only from the cylinder being repaired. Before starting work, do not forget to unscrew the reservoir cap and add fluid to the maximum mark. In addition, during the pumping process, we will monitor the liquid level in the tank and will not allow it to be more than half empty.
Read more: How to assemble a balancer on a KamAZ
Before pumping, add brake fluid to the expansion tank using a syringe or bulb.
Pumping technology
If the car is equipped with an ABS system, then bleeding begins by turning on the ignition and pressing the brake pedal five times. After this, fresh liquid is added to the tank if necessary. When bleeding air from the rear cylinders, the ignition must be turned on. This is necessary so that the ABS hydraulic pump is activated and creates pressure in the circuit.
Otherwise, the pumping technology is no different:
- We ask the assistant to slowly press and release the pedal until it becomes elastic with maximum pressure resistance, the pedal is held in this position.
- Remove the protective cap from the fitting of the rear right cylinder, put a tube on it and lower it into a container half filled with liquid.
We clean the rear fitting from dirt and put the tube on it.
Bleed the brake cylinder until all the air is released.
We pump the remaining cylinders according to the order.
After pumping
After bleeding, add new brake fluid to the maximum level and close the reservoir with a lid.
We control the level of brake fluid in the expansion tank.
There are several nuances - when pumping, you need to press the pedal slowly and smoothly. Smoothly pressing the pedal eliminates the formation of emulsions (small air bubbles). The emulsion in the form of foam is almost impossible to dislodge from the system in the usual way. This is why pressing the pedal smoothly and slowly is of great importance.
Replacing brake fluid
If we talk about brake fluid and its replacement, then almost every car owner will once again remind himself that it was high time to replace it. Often, owners of iron horses only monitor the level of brake fluid in the expansion tank. However, any car operating instructions clearly state the time for changing the oil (after a certain number of kilometers). Many did not open this instruction at all.
And it seems like why? Everything, therefore, is clear: the color of the liquid and its thickness can be easily seen with the naked eye, while it regularly performs its functions, and it moves in a vicious circle without unnecessary external influences. However, everything is by no means as simple as it might seem at first glance. Brake fluid is characterized by good hygroscopicity.
How much brake fluid is needed for partial and complete replacement?
Maintaining the required level of brake fluid is necessary for the proper operation of the vehicle's braking system. How much is needed can always be found in the service book, but often car owners are not used to looking into it, but act empirically or look for the answer on the Internet. It is these users that we will try to help figure out the question of how much brake fluid is needed for replacement and which one should be poured.
Brake fluid is the working fluid of the brake system, with its help the force created in the master cylinder is transmitted to the wheel pairs.
If the brake fluid level is below the minimum mark (by the way, this will be indicated by the corresponding icon on the instrument panel - a red circle with waves inside), then you need to top it up.
It also doesn’t hurt to check the brake system, since a decrease in the brake fluid level may indicate a malfunction or wear of the master cylinder gaskets. As a rule, the brake system of a passenger car contains from 0.55 to 1.0 liters of brake fluid.
And its specification can very often be indicated on the body of the expansion barrel or its cover.
When checking, do not forget to pay attention to the color of the liquid . The new TJ is transparent with a yellowish tint. During operation, it changes its color and becomes dark, this is mainly due to the accumulation of various impurities. If the fluid has darkened, this may mean that a complete replacement is necessary and simple topping up is not enough.
Experts recommend replacing brake fluid approximately every 2-3 years , this is the optimal interval in accordance with hygroscopicity and exposure to temperature loads. For the brake mechanisms to function properly, the fluid must have a number of properties and also meet a certain standard.
Old and new brake fluid
Types and properties of fuel fluid
Any brake fluid has 93-98% of the main composition and from 2 to 7% of additives, which, in fact, are the key component for imparting the declared characteristics. In general, if you look at it this way, the properties of brake fluid depend on the combination of its components. Depending on the composition of the base, TJ is divided into 3 groups.
Types of brake fluids:
- Mineral (mineral oil LHM) . They consist of alcohol and castor oil.
- Glycolic . Developed on the basis of polyglycols and their esters.
- Silicone . Manufactured from silicon-organic polymer products.
Regardless of the type and composition, all brake fluids are divided into two classifications.
Classification of TJ:
- By viscosity.
- By boiling point:
- for “dry” liquid (without water);
- “wet”, which contains 3.5% water.
If the boiling point exceeds the permissible norm, then there is a risk of a vapor lock forming in the system (as a result of moisture evaporation), which can lead to breakdown and failure of the brake pedal.
Brake fluid standards
In practice, and in most cases, it is customary to use the American quality standard FMVSS No. 116 (Federal Motor Vehicle Safety Standard), which was developed by the US Department of Transportation (DOT for short). So, often, in modern cars, either DOT 4 is used on a glycol basis, or DOT 5.1 (including glycol and silicone compounds). But in cars manufactured more than 20 years ago, BSK or DOT 3 fluid can be used.
It is important to understand that DOT 5 fluid is chemically different from others, so it should never be mixed with DOT 3 or DOT 4, or used in systems designed for DOT 3 or DOT 4 fluids to avoid damaging the brakes.
The DOT standard clearly describes such characteristics as:
DOT 4 brake fluid (meets SAE J1703&J1704, FMVSS 116, JIS K2233, ISO 4925)
- degree of viscosity;
- boiling temperature;
- chemical inertness to materials (for example, rubber);
- corrosion resistance;
- constancy of properties within operating temperatures;
- possibility of lubrication of elements working in contact;
- level of moisture absorption from the surrounding atmosphere.
In accordance with FMVSS No. 116, brake fluid options are divided into five classes, each of which is designed for a specific type of operation and even the type of brake mechanisms - disc or drum.
But you shouldn’t think that these are uniform existing standards, because in Europe there will be SAE (Society of Automotive Engineers) J1703/1704 , ISO(DIN) 4925 - International Organization for Standardization, in the Middle Kingdom, Japanese - JIS (Japanese Industrial Standard) K2233 . But in Russia and other CIS countries there is no single standard regulating the quality indicators of brake fluids, so manufacturers work according to their own technical conditions.
Use of DOT brake fluids
Since in many cases everyone is guided specifically by the American DOT standard, let’s take a closer look at all five of its classes:
- DOT 3 – designed for low-speed vehicles with drum and disc front brakes. Boiling point 220° C.
- DOT 4 – is poured into the brake system of high-speed vehicles that have disc brakes on both axles. Boiling occurs at temperatures of 240° and 160° C.
- DOT 4+, DOT 4 SUPER – modifications of DOT 4, their boiling point is 260° C and 180° C.
- DOT 5 is a silicone fluid that cannot be poured into a car with an ABS system, because it does not absorb moisture, but allows it to collect in one place. Due to the fact that the boiling point is 280°C and 180°C (for “dry” and “wet” liquids) while having low viscosity, it is usually used only in racing cars.
- DOT 5.1 – for fast cars whose brakes are often overloaded. It is more high-tech and fluid than DOT 4, but still absorbs moisture. Often recommended for use in systems with ABS and ESP. Operating temperature 270°C and 180°C.
