Disassembling, replacing, changing the color of the dashboard backlight (board) Renault Logan, (phase 1), Duster.
I couldn’t find such LEDs separately in radio parts stores, so I unsoldered them from the LED strip. We turn the base of the burnt out lamp and remove the base with the lamp from the grooves, change the lamp and reassemble in the reverse order
Replacing the heater light bulb with your own hands on Renault Logan and Renault Sandero. The backlight is located...
Tomorrow I will try again. I had nothing on hand to check whether the newly made LED was lit or not, so every time I ran into the car to insert the board itself into the connector and check.
Undocking the connectors of buttons 5.
After you have soldered all your LEDs in their places, you need to put it all back in place, otherwise driving like this is not an option. Then the question arises about calibrating the arrows on the scales.
After all, you removed them when you took the board out of the device, see. In that video in Spanish or Italian, the calibration process is also indicated, despite the language, I understood everything. I'll tell you what difficulty I encountered when calibrating the scales.
I pressed the arrows too hard against the dashboard and they moved with difficulty, that is, they touched the dashboard. I must say I was crazy then. In general, when you turn the arrows and put them in place, you don’t need to press them too hard against the dashboard, it’s difficult for them to move like that, have pity on them! In general, everything seems to have been written about all the pitfalls.
In warm weather, you don’t have to remove it, but carefully remove the latches of the decorative panel of the center console. Remove the decorative trim of the center console without dismantling the trim according to step 2. Gently press it from the middle and remove it. Undocking the connectors of the buttons 5.
Unscrew the screws securing the climate control unit 6.
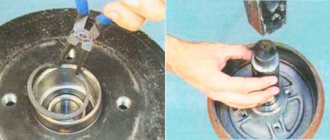
We remove the climate control unit from the upper clamps by moving the block inside the center console and remove the lower clamps upwards from the grooves. Then we turn the block a little to remove the connector or disconnect the damper control cables 7.
For easy replacement, you need to disconnect the connector from the air conditioning unit and 1 damper control cable from the blue lever - temperature control, in this case the unit can be expanded further and replacing the lamp will be much more convenient. Rotate the base of the burnt out lamp and remove the base with the lamp from the grooves, change the lamp and reassemble in the reverse order. Be careful not to pull it with all your might, to avoid damaging the wires, which also need to be disconnected.
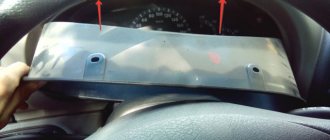
After you have removed the dashboard from the car, you can safely go home with it, because there is nothing further to do with it without a soldering iron and additional lighting devices. Next, you need to disconnect the front transparent cover from the instrument panel; again, you need to do this carefully and carefully so as not to break the latches. After you remove it, put it away; if you accidentally break it, it will be very difficult to find a new one.
To do this, you need to pull them towards you, while rotating them counterclockwise. Thus, it will be possible to estimate by eye by what degree the arrows deviated at the moment of separation.
Replacing light bulbs in the heater block for Renault Logan after 2010, Sandero, Duster, Largus
As for their subsequent installation, everything is done differently here than on conventional cars: Next, you will need to calibrate the arrows. To do this, hold down the mileage reset button and turn on the ignition, the instrument panel will switch to diagnostic mode, in which the arrows move with a strictly set step for the speedometer: 20, 40, 60, 80, etc.
Replacing the front light bulb on a Renault Logan
Many Renault Logan owners, when the light bulbs fail, go to a service station to replace them. But the problem can be solved on your own. Changing a parking light bulb is as easy as changing any other bulb. Moreover, if you have an alarm connected to these lights, the bulbs may burn out more often than usual.
Tools
- Rags.
- Gloves.
- Screwdrivers.
- Lamp.
- Head at "10".
- Extension.
Front headlight
Block headlight (auto edition)
In Logan, block headlights are installed, and therefore in one design there are low beam and high beam lamps and direction indicators. When replacing any of the lamps, it is not necessary to disconnect the battery. The fog lights are located separately from the headlight unit at the bottom of the bumper; more information about replacing the lamp in them is here.
The process of replacing marker lamps in detail
Some owners remove the block lamp completely, but this is a lot of unnecessary steps. My hand can easily fit into the gap, even where the battery is!
- Use the head to remove the headlight unit.
- Then you need to disconnect the negative wire from the headlight.
- Remove the entire front bumper.
- Disconnect the headlight range control cable.
- To move the headlight to the side you need to unscrew three screws.
To replace a side lighting element, no additional equipment is required; the process will not take more than 5 minutes.
- In order to replace the lamp, you need to open the hood and feel on the headlight unit for the side lamp socket, which is located just below the headlight lamp.
- Finding the lamp body by touch is not difficult.
We took out the socket and tried to remove the burnt out lamp.
Next, turn the cartridge to the left and remove it from the headlight housing.
The lamp has been removed and we are preparing to install a new parking light lamp.
To replace the lamp, just pull it.
It is only necessary to remove the light bulb from the housing while wearing cotton gloves.
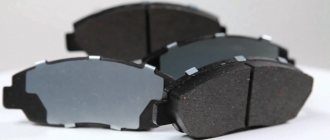
Articles and parameters of the marker lamp
W5W standard lamp back, similar to the removal process.
LED lamps
Some Loganovods recommend using diode lamps when replacing. They reduce current consumption and improve visibility on the road. We recommend that you pay attention to lamps with at least 13 diodes.
Installing diode lamps will not replace your requirement to drive with daytime running lights or fog lights on.
Conventional and LED lamps for side lights
Installing LED lights is no different from conventional ones. And the light from diodes is better, the current consumption is also less. The most important thing is to make the right choice.
13-LED marker lamp
It became much brighter
If you want to change the low beam lamp on a Renault Logan, then this article will tell you everything about it in detail.
Installation instructions
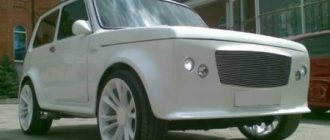
New standard trim
To dismantle the old part and install a new one, you need to perform the following procedure:
- first disconnect the wires from the battery, negative first;
- partially remove the door seal;
- remove the decorative panel from the left front pillar;
- Unscrew the bolts on both sides of the panel;
- then remove the small covers located at the bottom edges of the instrument panel;
- there are bolts under them, unscrew them, then remove the headlight range control knob;
- Unscrew the bolts that are located under the corrector handle;
- remove the upper steering column cover;
- unscrew the bolt, disconnect the wiring connectors, and then remove the steering column switches;
- now unscrew the bolts above the column;
- remove the visor of the shield;
- Unscrew the shield bolts, disconnect the wiring connectors and remove it;
- remove the radio;
- now unhook from below and completely remove the central decorative wiring, disconnect the wires;
- remove heating and air conditioning system regulators;
- now dismantle the heating and air conditioning regulator, unscrew one bolt at the top and two at the bottom;
- then disconnect the diagnostic connector;
- completely remove the instrument panel, disconnect the wiring block;
- unscrew the bolts securing the front passenger airbag, remove the wiring connector to it;
- then remove the rivets from the glove box and the cover;
- Installing a new panel is done in the reverse order.
Required Tools
Replacing side lamps on a Renault Logan will require the use of the following tools and materials:
- clean fabric or rubber gloves;
- 4 pieces of halogen bulbs with W5W base;
- alcohol for cleaning flasks;
- a screwdriver with a cross blade;
- keys for 8 and 10;
- to remove the battery you will need a 13mm socket;
- extension;
- rags.
The presence of gloves allows you to keep the bulbs of halogen devices clean. Oily hand stains cause rapid formation of dark spots and lead to failure of the light bulb. The light becomes dim and uneven, quickly losing brightness. In this case, the service life is reduced by 5-10 times from that declared by the manufacturers.
Articles and parameters of suitable lamps
The side lights of Renault Logan are implemented with halogen lamps with a W5W socket for the front headlights and P21/5W for the rear ones. This is the factory configuration, which is prohibited from changing according to current rules. However, many users prefer to install brighter and more economical LED bulbs. Designs with 13 crystals are commonly used.
Important! They consume less energy and have an increased service life. This option is not suitable for replacing front headlights, since they are installed in the headlights together with the headlights, which become very hot. LED devices cannot work in such conditions and quickly fail. This feature should be taken into account when choosing suitable lamps.
Instrument panel Logan 2 icon description
Next, the locations of absolutely all indicators on the Renault Logan 2 dashboard will be indicated. As well as detailed explanations for them . An image of the instrument panel itself with markings is attached.
Click to enlarge
- Electronic tachometer (1) - shows at what specific frequency the engine crankshaft rotates. The scale is marked from 0 to 7, and the price of one division between the main marks is 0.25. To clarify at what frequency the crankshaft rotates per minute, the tachometer readings must be multiplied by 1 thousand.
- ABS brake warning light (2) – if the ignition is active, lights up yellow for a few seconds. If the starter is active, the indicator lights up continuously. After starting the engine, the light should go out. If the system is malfunctioning, the instrument panel beeps continuously.
- Airbag malfunction warning lamp (3) – if the airbags are damaged, it will turn yellow after the engine starts.
- Sudden braking indicator (4) – when the engine is activated, it lights up red for a few seconds. If the starter is active, the indicator lights up continuously. After starting the engine, the light should go out. If the indicator on the instrument panel begins to signal while Renault Logan 2 is moving, even together with other warning lights, it will be safer to slow down and turn off the engine.
- Upshift Alert (5) – When the Logan is moving, may illuminate yellow, indicating that the crankshaft is close to maximum speed.
- Speedometer (6) – shows the level of speed at which the car is moving along the road at the moment. The scale is marked from 0 to 210, and the price of one division between the main marks is 5 km.
- A lamp indicating that the battery is discharged (7) - the dashboard lights up scarlet if you turn the ignition key to position M. Immediately after activating the Logan engine, the lamp should go out. If the lamp is still on when the engine is active, this indicates a breakdown of the generator or motion controller. It could also be a loose or broken alternator drive belt.
- The left turn signal activation indicator (8) is represented by an arrow that lights up and flashes green, simultaneously with the activation of the left turn signal. If it flashes more often or stays on steadily, it means the turn signal bulb has burned out.
- Signal indicator for starting the parking brake and the state of the brake system (9) – the scarlet lamp lights up after the ignition is started if the level of brake fluid in the reservoir is too low beyond the permissible limits. Or the parking brake lever is in the raised position.
- The right turn signal activation indicator (10) is represented on the instrument panel by an arrow that lights up and flashes green, simultaneously with the activation of the right turn signal. If it flashes more often or stays on, it means the turn signal bulb has burned out.
- ECO mode activation controller (11) - activated only if this mode is preinstalled in Logan.
- ESP shutdown signal (12) - the instrument panel glows yellow, warning of a malfunction. Flashes if the system is triggered.
- Control of ESP and ASR systems (13) – lights up if the systems are activated.
- The on-board computer display (14) - in addition to the functionality already listed, displays a scale of the gas tank fullness level.
- Fuel reserve indicator (15) – lights up orange if Logan has enough fuel for approximately 80 km of road.
- Cruise control signal (16) – if installed.
- Starting cruise control (17) – if equipped.
- Speed limiter indicator (18) – lights up red if the maximum set speed has been reached.
- Indication of a critical drop in oil level (19) - the light on the instrument panel lights up scarlet if you turn the ignition key to position M. Warns that the lubricant level has dropped below normal. Immediately after activating the motor, the light should go out.
- Engine preheating (20) - not used on Renault Logan 2 for the Russian car market.
- High beam activation (21) – activated with high beam headlights.
- Low beam activation (22) – activated with low beam headlights.
- Starting the fog lights (23) – lights up together with the fog lights.
- Starting the rear fog lights (24) – lights up along with the rear PTFs.
- Indication of antifreeze overheating (25) – if it lights up (red), it will be safer to stop Logan for a while and let the engine cool.
- Alert about the need to switch to a lower gear (26) – the light is yellow, indicating that the crankshaft is close to the minimum speed.
- Engine system failure signal (27) – activated on the instrument panel during engine start-up. It should go out immediately afterwards. If it shines while the car is driving, this indicates corresponding malfunctions. It can light up simultaneously with No. 4, No. 7, No. 19 and No. 25, specifying the cause of the breakdown. The correct thing to do is to stop driving and evacuate the vehicle to the nearest service station.
- Tire pressure drop indicator (28) – active if the pressure in any of the wheels is critically low.
- The side door (29) is not locked – when trying to start the Logan engine, it signals that one of the doors is not closed or not closed tightly.
This completes the decoding of the Renault Logan 2 instrument panel.
Replacing the tail light bulb
View of the rear marker lights on Renault Logan 2 (auto edition)
View of the rear marker lights on Renault Sandero (auto edition)
When replacing a lamp at the rear of a car, there are also some features that must be taken into account when carrying out the work.
- Here, before starting work, you will need to disconnect the negative from the battery.
- Unfold the trunk lining.
- Disconnect the wiring harness from the rear markers.
Disconnect the power harness
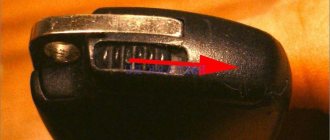
We unscrew the two screws, for this you will need a screwdriver with an asterisk (two plastic nuts, if it is a Logan 2 phase).
Two lambs are marked with arrows
Pull the headlight towards you and remove it.
Removing the rear parking light unit
The panel with light bulbs is attached to 3 latches, remove it and change the burnt out lamp.
This is what the location of the signals on the Logan taillight circuit board looks like.
- Find the burnt out lamp by lightly pressing it, turn it and remove it from the socket. Insert the new lamp and turn it until it stops.
- After this, the lantern can be assembled in the reverse order of removal.
When carrying out this work, you must be careful, as you will have to come into contact with other elements of the system.
It is not recommended to touch the lamps with your fingers. The work must be done with clean gloves.
Step by step procedure
There is no need to remove the entire front panel!
In order to remove the instrument panel, you must act carefully and strictly adhere to the following procedure:
- First of all, we remove the casing on the steering column; to do this, we unscrew several long bolts from its body.
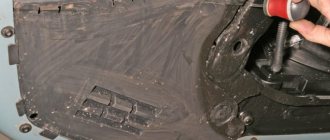
- After this, you need to remove the decorative panel of the air duct deflector on the driver's side. It is attached with clamps and latches; you just need to gently pull the panel towards you.
In order to rip it out of place, you will have to make an effort.
- View of the decorative overlay from the reverse side.
All marked latches must be removed.
- Next, we snap off the panel on the right in the same way, but only so that you can get close to the instrument panel.
You need to move it away exactly as much as necessary so that it does not interfere.
- This clamp needs to be removed.
The fastener marked with a marker must be precisely removed.
- Next, unscrew the screws that are located at the bottom of the instrument panel and secure the casing.
Unscrew the screws using a hexagon.
- We dismantle this casing by pressing out the fastening latches, just be careful when removing the latches on the right side, since the decorative trim may get in the way a little.
- When the decorative panel was dismantled, we went directly to the instrument panel.
- We remove it by unscrewing the bolts located on both sides.
The required bolts are marked with a marker.
Installation is carried out in the reverse order of removal.
Replacing rear side lights
- Unplug the headlight power connector
- Unscrew the upper and lower fasteners with a screwdriver. Please note that when replacing the side light bulbs on a Logan II (2016), instead of self-tapping screws, plastic clips are installed; they need to be unscrewed by hand
- Removing the headlight
- We replace a burnt out light bulb. To do this, you need to put a little pressure on the light bulb and turn it slightly. We take out the worn lamp and insert a new one (pressed and turned)
- Putting the headlight in place
- When servicing Renault Logan, lamp replacement should be carried out immediately from both sides
Check out the video tutorial on how to replace a rear light bulb:
Related material: How to replace the air filter on a Lada Lagrus
Some experts recommend using a diode analogue instead of the classic W5W light bulb. There are side light bulbs with 13 diodes. This is an energy efficient lighting option.
These two types of light bulbs are approximately equivalent in cost, but diode light is stronger and uses slightly less electricity.
I hope it has become clear to you how to replace a light bulb in Logan in the front headlight and on the rear side.
VESKO-TRANS.RU
AutoNews / Reviews / Tests
Replacing Light Bulbs in the Renault Logan Dashboard
Renault Logan This is an economical, but comfortable and functional car. The ergonomic dashboard, equipped with many gauges, indicators and various lights, is an excellent confirmation of this. They participate in the management and control of transport, check the condition of vehicle systems and devices, and regulate various processes there. Even very practical items will eventually become unusable and sensors and fuses will explode. Here you will need to change the light bulbs on the dashboard, which, if you know the details, can be done yourself.
What remains to be done for our customer models (with 1.4 and 1.6 liter engines) and generations (2005-2009, facelift 2009-2016, 2014-2017) is done with special attention to a modern, unique and neat appearance.
You will find many photos online that usually show all the torpedo indicators, lights and icons, as well as videos detailing the functions.
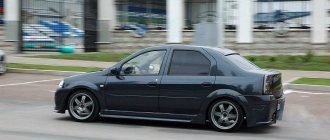
A combination of practicality and ergonomics. the motto of the Renault Logan car line, regardless of the year of manufacture.
In the models released at the beginning (2006, 2007, 2008, 2009), in the revised versions (2010, 2011, 2012, 2013, 2014, 2015, 2016) and, of course, in the 2nd generation (2014, 2015, 2016 ). , 2017) The functionality of the gasoline unit does not differ significantly.
The dashboard contains the following equipment:
- Tachometer. The device has an electrical device and transmits information from the crankshaft sensor. The range of values ranges from 0 to 70, the cost of the 1st unit is 4.5 units. To find the actual metric, you need the value indicated by the arrow multiplied by 100.
- Screen. It displays a number of function types. icons that show the amount of fuel, vehicle mileage and antifreeze temperature, as well as a clock.
- Speedometer. Shows the speed of the car. The separation cost is 5 km/h and the highest rate. 200 km/h;
- A lamp indicating that the fog mechanism is turned on;
- Light signal indicating an open door;
- Spare indicator;
- Rear fog lamp;
- Rental car reset button. It is activated by long pressing.
- A parking brake lamp and, of course, a sign indicating the serviceability of the technical brake, which allows for accounting (software). The backlight can turn on when the ignition is on and the brake water level is low;
- Spare LED for diesel models;
- Engine overheat indicator;
- Circle symbol. indicates engine blockage. This indicates a critical engine failure if the engine does not turn off within three seconds of ignition.
- Turning lamps;
- Fuel level indicator indicating a critically low amount of fuel;
- Oil level indicator;
- Lamp indicating battery charge level;
- Engine warning lamp;
- Rear window heating indicator;
- Indicator for turning on remote lighting;
- Front passenger lamp performance, airbag;
- An indicator indicating that the driver's seat belt is not fastened;
- Airbag service indicator;
- Abs lamp;
- Low beam lamp
Main conclusions
The process of replacing Renault Logan side lamps is not fundamentally difficult, but the technique for working with rear and front headlights is different. The essence of the differences:
- access to headlights;
- method of disassembling lamps;
- you will need different types of light bulbs.
From a technology point of view, working with side lighting devices located on the front and rear sides of the car represents separate activities. There is no significant difficulty, you just need to clarify the procedure in advance and follow the instructions. Please state your options for replacing dimensions on Renault Logan or comments on the replacement process in the comments.
Logan dashboard: icon designation
Some users, when buying a used car, do not understand what the indication in the form of a cardiogram and other pictures mean. For more convenient understanding, the meaning of the signs is given in the table with photos.
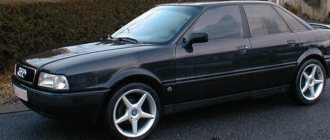
Logan 1 dashboard icons
The first generation started in 2006 and has been actively used by motorists since then. Indicators and icons on the vehicle's dashboard display the status of the modules in real time and indicate to the driver any malfunctions or errors.
The machine contains a minimum set of basic and additional equipment, which makes it possible to limit the number of indicators and instruments.
A special feature of the icons is that when the engine starts, all icons light up simultaneously and go out after 10 seconds. In this case, each lamp belongs to only one circuit.
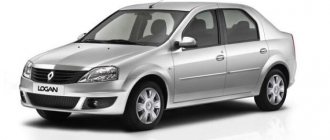
Description of the icons on the Renault Logan 2 dashboard
The second modification of the car has been available since 2014 and differs from the first generation in its improved design. The car's tidy remained the same. All the lights and icons remained in their original places and retained their original appearance and meaning.
Logan 3 dashboard icons
In the third generation, more global changes took place. The design of the tidy has changed a lot, a modern cladding and several edgings have been added. It is noteworthy that no new equipment and systems appeared in the car. Common icons have the same meaning and appearance.
How to change instrument lighting on Renault Logan
What is needed is necessary. The switch lever occupies the following positions in time: Removing the dashboard of the Renault Logan board, phase 1, disassembling, replacing the dashboard backlight of the Renault Logan board. Replacing light bulbs in a Renault console Replacing instrument lighting in a Renault Logan And at the moment, a little about what I want to share with you, directly speaking about how to change the light bulbs in the console, those. Repair Ford Focus 2. Removing and replacing spark plugs.
So at one point I decided to make it white by replacing the LEDs. For work you will need: I will briefly describe how this is all done, for lazy people.
Illuminated heater and dashboard buttons on Renault Logan
First of all, you need to unscrew the two T20 screws on the lower steering wheel cover, be patient because this is not as easy as it may seem at first glance. Removing the dashboard of the Renault Logan board, phase 1, disassembling, replacing the dashboard backlight of the Renault board.
Replacing light bulbs in the Renault Logan console And now a little about what I want to share with you, namely how to change the light bulbs in the console. I pressed the arrows too hard against the dashboard and they moved with difficulty, that is, they touched the dashboard.
I must say I was nuts. In general, when you turn the arrows and put them in place, you don’t need to press them too hard against the dashboard, it’s difficult for them to move like that, have pity on them! In general, everything seems to have been written about all the pitfalls.
To be honest, this is an elementary matter, the main thing is to make up your mind! It is by these steps that we calibrate the arrows, turning clockwise, this is where the margin in degrees will come in handy. The white plastic containing the LCD display can be removed from the housing by pressing three small latches. At this stage you also need to be extremely careful not to crush or damage the film in contact with the display.
Possible malfunctions and ways to eliminate them
The dashboard on Renault Logan and Sandero is quite reliable. Problems with devices occur relatively rarely. In some cases, malfunctions of other vehicle components are mistaken for problems with indicators.
Thus, for adequate operation of the speedometer, tachometer and other elements, stable operation of the corresponding vehicle sensors is necessary. If they display incorrect information, a breakdown is possible with the sensors.
Also, a common problem with these and other cars is a violation of the integrity of the wiring, which could occur during the repair of other components of the car. You can check the wiring using standard instruments.
If one of the panel elements has really become unusable for you, you can replace it either separately or as a whole. Lamps are especially easy to replace, while the speedometer and tachometer will be more difficult to replace.
The video below demonstrates the process of replacing some light bulbs (the author of the video is Aleksei Suchkov).
Also, you can completely dismantle the old panel and install a new one.