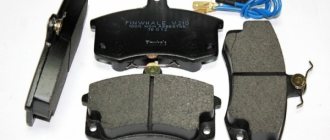
The service life of the rear brake pads on the second generation Ford Focus is higher than that of the front ones, but you shouldn’t relax too much. Normal mileage before replacement can vary greatly on different cars and depends on a lot of indicators and factors. For example, the same branded soft Ford pads on one car can easily go up to hundreds of thousands of km, but on another they won’t last even twenty. First of all, you need to focus on the condition of the brake mechanism. Before changing the rear pads on a Ford Focus 2, let's understand the intricacies of the process, select the necessary part numbers and go through some brands.
When to change
There are several reasons why drivers may need to install new brake rotors:
- Natural wear and tear. The manufacturer clearly regulates the thickness of the part at which replacement is required. Drivers can measure the disc themselves and compare the resulting number with the given one. If it is less, then replacement is necessary.
- Critical damage. Despite the use of high-strength metal elements in the design, discs under increased loads can become deformed and even crack. In such cases, damaged discs must be removed urgently, since driving on them, even if possible, is extremely unsafe.
- The appearance of characteristic symptoms indicating increased wear or other problems with the brake system. They will be discussed in more detail below.
The thickness of the brake discs on the front wheels of the Ford Focus 2 is 25 millimeters. The manufacturer makes recommendations for replacement when the part wears down to 23 millimeters, but according to the experience of many drivers, this figure can be increased to 20 millimeters without any problems. For the rear brake discs, the thickness is 11 millimeters. Recommendations for replacement are 9, but in practice you can change discs when they reach 7-8 millimeters.
As the experience of motorists shows, discs alone last for the life of 2-3 sets of pads, so you can take this condition as a guide. On light cars, during standard driving without sudden braking, the Ford Focus 2 front brake discs work properly for 150-200 thousand kilometers. If we talk about heavy cars, including minibuses, pickups and trucks, the service life of the discs is limited to 100-150 thousand kilometers.
Signs of brake disc wear
Conducting a visual inspection is important, but doing it every week or month is impractical. In this regard, drivers must clearly understand what signs in the car’s behavior indicate the need to replace the brake discs. This list includes the following:
- The appearance of vibrations and characteristic beating of the brake/steering pedal when pressed lightly. This indicates that the disc is bent or deformed.
- Strong beating and noticeable vibrations during braking are a clear sign of a problem. In this case, it is recommended to conduct a visual inspection of the disks and refer for further diagnostics.
- The car pulls to the side. This can happen either due to a faulty suspension or due to uneven wear of the brake discs or pads.
- The appearance of a characteristic grinding sound. This indicates that the pads are worn out, with metal rubbing against metal. It is recommended to urgently replace the parts, otherwise you can seriously damage working disks.
Don't forget to visually inspect the brake discs for chips and cracks. This is not difficult to do by simply getting out of the car. Only professional mechanics in specialized technical centers will perform a complete diagnosis of all components of the brake system, but you can change some parts yourself.
Varieties
Please note that the market offers several types of products that differ in performance characteristics. There are non-ventilated and ventilated models. The first ones are installed on almost all cars. They are cheap, but if the load is too high, they can become deformed or destroyed by high temperatures. Ventilated discs are usually installed on sports cars and luxury cars. The presence of holes in the disk almost completely eliminates severe overheating.
The most expensive are carbon and ceramic wheels. They are installed exclusively on sports and racing cars, but the most ardent enthusiasts can install such models on regular sedans such as the Ford Focus. The cost of ceramics or carbon fiber is comparable to the price of a budget car.
Replacement frequency
The need to replace the Ford Focus 2 brake discs again depends on the thickness of the metal on them. For the front, the indications for replacement are as follows:
- thickness of new disks – 25 mm;
- the manufacturer recommends replacing the part when the thickness is 23 mm;
- According to the experience of car owners, it is generally accepted to change when the thickness is 20–21 mm.
Replacement of rear brake discs on a Ford Focus 2 is carried out with the following indicators:
- thickness of new ones – 11 mm;
- the manufacturer recommends replacing the part when the thickness is 9 mm;
- According to the experience of car owners, it is generally accepted to change when the thickness is 7–8 mm.
As the practice of auto mechanics and car owners shows, brake discs last approximately 2-3 sets of pads.
Untimely replacement of discs leads to deterioration of brake performance, which is very dangerous. Also, the need for replacement may manifest itself in the beating of the steering wheel when braking and the appearance of extraneous sounds when the brake mechanism is operating.
As a rule, when such symptoms appear, even a visual inspection of the disks on a Ford Focus 2 is enough to determine whether replacement is needed. This is evidenced by grooves, cracks and potholes on the part.
Any car service center or service station will help you replace brake discs on the front and rear wheels. The procedure does not take much time, however, you will have to fork out for the services of a specialist. If you have a desire to save money and the ability to hold a wrench in your hands, then the replacement can be done in a garage yourself.
Brake operating modes
A brake pad consists of two dissimilar substances tightly pressed together. Its basis is a steel plate to which the working material is securely welded.
It is made from asbestos components that perform well in high friction environments that are constantly subjected to severe adverse loads.
In addition to friction, the pads are subject to sharp shock and mechanical loads when the driver presses the brake pedal.
Stones, dirt, and dust constantly fly out in their area of action. Brake elements are damaged by rainwater.
Sudden temperature changes and road reagents together lead to the asbestos surface becoming covered with cracks, chips, and scuffs.
The working layer of the pads is becoming smaller and smaller. As a result, when you press the brake pedal, the car begins to brake with less efficiency. There are many factors that influence braking dynamics.
Among them there are objective indicators, such as natural wear and tear, friction, as well as subjective operating conditions of the vehicle:
- Driving style.
Smooth, leisurely driving preserves the brake pads. An aggressive driving style with sudden jerks from a standstill and rapid deceleration creates increased loads, increasing brake wear.
- Driving modes.
City driving and driving in mountainous areas force you to brake more often. Even with the most careful braking, the service life of the pads is inexorably shortened.
- Machine loading volume.
A car trunk loaded to capacity increases braking force due to the redistribution of load on its rear axle. The rear pads will wear out more than the front ones.
- Gearbox design.
Taking into account all the same factors, the brakes on cars with automatic equipment work more heavily. This is caused by pressing the brake pedal more frequently.
A jammed working cylinder, souring caliper guides, or a damaged brake disc will certainly lead to uneven wear of the brake pads and, as a result, they will require early replacement.
- Composition of braking linings.
Cheap, low-quality linings from unknown manufacturers, made from short-lived materials, have a reduced service life.
When working in harsh conditions, they wear unevenly, leaving mechanical deposits and hazardous waste that impair the functioning of the brakes as a whole.
Replacing front pads
After hanging the desired side on a jack and then lowering the threshold onto the stand, remove the wheel. Clean the outer surfaces of the caliper with a brush and proceed to disassembly.
- Press a powerful screwdriver between the brake caliper and the disc so as to push the caliper piston as deep as possible.
- Remove the wire spring that presses the outer pad.
- Remove the plugs from the back of the caliper and use a 7 mm hexagon to try to move the guides hidden under them. Be careful - it is easy to rip off the hexagon, and this will entail removing the caliper along with the bracket and drilling out the guides. So, if the thread does not fit, take out a bottle of lubricant.
- Remove the caliper from the bracket, remove the pads and press in the piston.
- Install new pads, not forgetting the direction of rotation of the disc (indicated by the arrow on the pad).
- Reinstall the caliper, clean the guides and apply fresh lubricant.
- Screw in the guides and install the pressure spring.
- With several presses of the brake pedal, bring the piston to the working position.
Replacement video:
Do-it-yourself replacement of rear pads on a Ford Focus 2 - step-by-step photo instructions
1. We park the car on a flat surface, put the gear in gear, install wheel chocks or bricks under the front wheels, depending on who you are :-).
2. Next, we tear off the bolts on the wheel whose pads need to be replaced.
3. Install the jack and jack up the wheel until it comes off the ground.
4. Treat the connections with WD-40 if necessary and remove the plugs (top and bottom).
5. Take the hexagon at “7” and unscrew the lower as well as the upper guide of the stud.
6. Using a screwdriver, remove the bracket.
7. Now you can remove the brake caliper itself.
8. Carefully take out the old brake pads, look at the wear, and make a decision - change it or leave it.
9. To install new brake pads, you need to press (sink) the brake cylinder, this is best done using a special device that has two protrusions that are installed in recesses on the brake piston. See photo. If you don’t have one on your farm, you’ll have to get out of it, you can, for example, try to press it in by hand or take a bolt, several washers of a suitable diameter and make something similar. The principle is simple - like a corkscrew, you rotate the rod, which rests against one wall, after which the cylinder has no choice but to simply go inside. There are two recesses on the brake piston for the device, install the device, align the holes and protrusions and twist the piston so that it sinks and allows you to install new brake pads on the Ford Focus 2 .
10. Using a metal brush, we process the pad seats and put new brake pads in place. I draw your attention to the fact that the block with the spring must be installed on the inside of the caliper.
Signs that replacement is needed
In order to find out whether the brake pads
on
a Ford Focus
replaced , you need to look at the condition of the friction linings. If their thickness is less than 1.5 mm or they have chips, cracks or any other damage, then this may indicate their poor condition.
As the experts say, replacement
The brake pads should be checked approximately every 10,000 km. With all this, this mileage may decrease if you drive hard and fast, with frequent and sharp decelerations.
If you see the following signs on your Ford Focus 3, then you need to make a replacement:
- Iron plaque appeared on the discs.
- Braking is very sharp, or, on the contrary, unhurried.
- Braking is accompanied by an unusual creaking or squealing sound.
- Wheel squealing during hard braking.
Before you start working specifically, you need to purchase a set of brake pads for the third generation Ford Focus, prepare a set of the necessary keys and graphite lubricant. The following tools will be useful to you:
- Pliers.
- Screwdriver.
- Key head 13.
- Hexagon 7.
- Open-end wrench 15.
- Liquid VD-40.
- Jack.
- Strubnitsa.
- Balloon key.
- Brush.
- Syringe.
Of course, you can do without some tools. The main thing is to provide a safe working environment that will lead you to your final goal.
Article number and prices for the best analogues of branded rear brake pads for Focus 2
Branded Focus 2 brake pads have a high price. Therefore, many car owners believe that it is better to use good analogues of the originals from third-party manufacturers. Recommended consumable options are shown in the tables below.
Table - Alternatives for 1809259 and 1360254
Manufacturer of pads Article Approximate price, ruble
| Zimmermann | 241371681 | 1200-1300 |
| TRW | GDB2086 | 1350-1500 |
| Road House | 284270 | 1080-1200 |
| ABS | 37477 | 780-1000 |
| Remsa | 84270 | 1000-1150 |
Table - Recommended analogues 1756395
Manufacturer of pads Article Approximate price, ruble
| Delphi | LP1969 | 900-1000 |
| Parts-Mall | PK2015 | 750-900 |
| ABE | C2G017ABE | 920-1050 |
| Meyle | 0252453715 | 960-1100 |
| Textar | 2453703 | 1490-1680 |
Table - Good analogues 1385735 and 1689600
Manufacturer of pads Article Approximate price, ruble
| Delphi | LS1983 | 1500-1600 |
| Ferodo | FSB687 | 1700-1900 |
| Bosch | 0986487810 | 1350-1500 |
| Meyle | 7145330009 | 1250-1400 |
| ABE | C0G054ABE | 950-1100 |
Which rear brake pads to choose for Ford Focus 2
If you have rear drum brakes , the following pads will suit you:
- TRW GS 8736 (USA) set price from 2000 rub.
- Ferodo FSB 687 (USA) set price from 1400 rub.
- Bosch 0 986 487 696 (Germany) set price from 1800 rub.
- Ford 1 347 420 (original) set price from 5000 rub.
- LYNXauto BS3004 (Japan) set price from 1000 rub.
- Fenox BP53047 (Belarus) set price from 900 rub.
Above are the most popular options for rear pads, as you can see the price of the original differs by an order of magnitude from its analogues. Often the quality of analogues is no worse; for example, TRW, Bosch and Ferodo pads have proven themselves well.
If your rear brakes are disc , the following pads will suit you:
- Ford 1360254 original set price from 2500 rub.
- ABS 37216 (Holland) price from 1500 rub.
- Nippon ADB01599 (Japan) price from 1300 rub.
- Barum BA2238 (Czech Republic) price from 1800 rub.
- Ferodo FDB 1931 price from 1500 rub.
- TRW GDB 1621 price from 1800 rub.
- Textar 24137 01 price from 1500 rub.
The cost of an original set of rear pads is not high compared to analogues; you can take the original one.
What tools are needed for replacement?
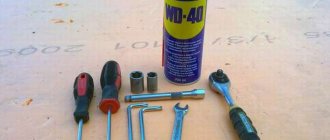
To replace the rear brake pads of a Ford Focus 2, the following materials and tools are required:
- jack;
- a special clamp for screwing the piston into the cylinder;
- set of wrenches: balloon, socket, socket, open-end, hexagonal;
- universal liquid WD-40;
- pliers;
- large steel screwdriver;
- medical syringe or rubber bulb;
- metal brush.
Preparing for the process of replacing pads involves securing the machine securely. The wheel nuts should be loosened with a wheel wrench. Place the jack under the special cutout on the bottom of the Ford Focus 2 car.
Hang up one wheel, unscrew the mounting bolts, and remove the wheel. Carry out similar operations with the second wheel. The car body can be placed on special steel or wooden supports.
To avoid leakage of brake fluid while the piston is immersed in the braking system mechanism, it must be partially removed with a syringe or rubber bulb. After repair work, bring it back to normal.
Completion
With the car on the ground, stretch all the wheels. Titanic effort is not needed here - it will not add strength to the fastening, but it will speed up the wear of the threads significantly. A sufficient moment is 120-130 newton meters.
Bring the fluid level in the brake reservoir to normal: if the pads on both axles have been changed, you may even have to pump it out a little again. It is best to completely empty the reservoir and refill it with fresh brake fluid. Don't forget that at first. While the pads are grinding in, braking will be weaker than usual.
Replacing drum brake pads
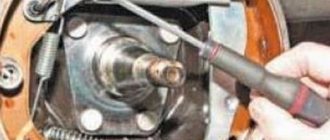
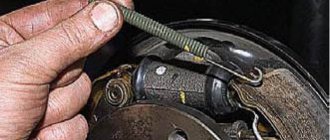
Replacing the rear pads on a second Focus with a drum mechanism will not take much time. To work, you will need a standard set of tools, pliers, and several powerful screwdrivers. Also useful for dismantling a soured or jammed drum are two bolts with 8 threads (in some versions 6 threads) to force the drum to separate from the hub. A penetrating aerosol lubricant, WD-40, for example, wouldn't hurt either. Let's get to work.
- From inside, loosen the front handbrake cable. To do this, remove the decorative cover on the tunnel and lift it up along the lever. We see a locknut and a nut on the end of the cable. We tear off and unscrew the lock nut, loosen the cable tension adjustment nut as much as possible using a 13 mm spanner or a socket with a knob.
We loosen the handbrake.
- We tear off the rear wheel nuts, hang the car on a jack, and install a stand for safety. We remove the wheel.
- We are trying to remove the drum. If it does not give in, we treat the interface between the drum and the hub with penetrating lubricant, find two diametrically opposite holes in the drum, clean them and also treat them with WD-40.
- We screw two prepared bolts into these holes, gradually and alternately, screw them into the drum body. The bolts will rest against the hub and push the drum out of its seat.
“Branded” puller in the form of bolts.
- We remove the pressure plates in the center of the pads, use a screwdriver or pliers to unharness the springs.
We inspect for leaks.
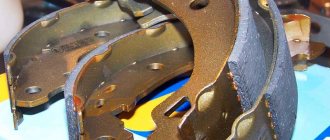
- Disconnect the handbrake cable, remove both pads, remembering how the adjusting spacer bar is positioned. We immediately shorten the bar as much as possible using a nut, since new pads are being installed.
- We recess the pistons of the working cylinder as much as possible into the cylinder body. To do this, we use either a clamp or sliding pliers. This must be done, because otherwise the pads will take a very long time to grind in and will wear out quickly.
The pads were removed.
- We install the new pads in the reverse order, after installation, press the brake firmly several times, check the operation of the brakes and handbrake.
New pads are in place.
- We adjust the tension of the handbrake cable and assemble the tunnel casing.
Video about replacing drum pads on a Ford Focus 2
Procedure for replacing disc brake pads on the rear axle
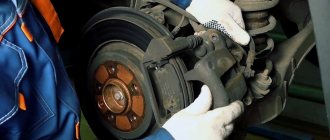
- The car must be placed on a flat surface, engaged in first gear, secured with wheel chocks and loosened the wheel bolts.
- Using a jack, lift the Ford Focus 1 and, hanging the rear wheel, unscrew its mounting bolts and dismantle it.
- Disconnect the end of the handbrake cable. Use a brush to remove dirt from accessible mechanisms.
- Use a syringe to pump out a third of the brake fluid from the reservoir if its level is approaching the maximum. Otherwise, when the brake piston is pressed in, it may splash out.
- Unscrew the caliper mounting bolts. To do this, use a 15mm wrench to secure the nuts, and use a 13mm wrench to unscrew the bolts one by one. If necessary, apply WD-40 penetrating fluid.
- Remove the caliper. If you can’t do it with your hands, you’ll have to carefully tap the bracket with a hammer and try not to touch the brake hose.
- Disconnect worn brake pads. From this moment on, it is forbidden to press the brake pedal so as not to squeeze the brake fluid out of the hydraulic system.
- Press the brake piston back in. There is a special tool for this purpose, but you can also use a popular clamp.
- Install new products, lubricate the caliper guides with special grease and secure it in place. Tightening the nuts at this stage is accompanied by a high probability of stripping the threads. Be careful.
- Continue assembly in reverse order.
- Starting from point No. 2, do the same for the other wheel.
How to distinguish a fake?
Often we are offered to buy goods at a very tempting price. Sometimes this is really a discount from the store, but more often it is a banal deception of the buyer. Under the brand name you will buy outright “China”. When purchasing new brake discs ( Ford
Focus" 2 including), you need to carefully consider the choice.
Visually you can distinguish the way the disk is processed. If this is a perforated version, its working surface should be covered with small grooves. During production, such elements are poured into a large mold and then sharpened on a machine. A fake is cast entirely from a mold, without further processing. With this production method, the reliability of the element is significantly reduced. The risk of cracks and other deformations increases significantly.
The next factor is thickness. If we compare this indicator for the original and the fake, then for the latter it is much lower. Unscrupulous manufacturers often skimp on materials. Even the fact that such a disk is dangerous to use does not stop them. The main goal is to get maximum profit with minimal investment by selling outright junk at an affordable price.
Pay attention to the bulkheads inside the disk. On high-quality elements they smoothly flow into the walls. This design makes the disc resistant to wear and temperature changes. On a fake, these bulkheads merge without a smooth transition. Well, the last factor is weight. Yes, there are lightweight wheels. It is believed that the lighter this element, the better. But if you take an old disk and compare its weight with a new one, it should not be lighter than the worn one. This is an outright fake. Non-original wheels are 20-30 percent lighter than original ones (as evidenced by their thickness). Buying them, even at a tempting price, is extremely dangerous.
Preparing the car - steps for your confidence
In order not to damage the car due to improper preparation, you should carefully consider the process of fixing the car in the desired position. If you leave the vehicle on a regular jack, you risk not being able to hold the car when jerking while trying to remove the brake drum. To perform this task, it is best to place the rear of the machine on special tripod stands or on improvised reliable stands of another type.
The steps to prepare a car for this procedure are simple:
- Choose a comfortable and suitable place with enough light, and also prepare additional lighting for ease of work.
- Secure the front wheels of the car with stands to prevent the car from rolling away while lifting the rear end.
- Lower the handbrake lever, make sure that the rear wheels are not blocked and the brake is not applied. This will make it easier to remove the drum later.
- Raise the right or left side of the car from behind using a convenient jack and place the car on a stand, checking its stability.
- Carry out the same procedure on the other side. Be sure to make sure that the car is securely positioned and will not fall off the stands during the process.
- Unscrew the wheels and set them aside. This will give you access to the drums and allow you to complete all the work.
- Remove the ABS sensor if you have this safety system on the rear brakes.
At this stage, you do not need any professional skills or tools. It’s enough just to do all the work efficiently and accurately. If you make mistakes at this stage, it will be very difficult to get a normal result in the future.
Which wheels to buy
If you don’t want to waste time choosing and studying numerous reviews from other drivers, then buy factory wheels that have been installed on the car since its release. They will be fully compatible with wheeled seats. To do this, you need to find the corresponding article numbers, and then select products based on them in the store.
If the standard models for some reason do not satisfy you, then you can choose compatible front or rear brake discs "Ford Focus" 2. More than 10 different brands represent their products, including Borg & Beck, Bosch, Breck, Brembo and others. The average price of one disc is 1000 rubles.
You can find several surveys online in which Ford owners were asked to choose which brand of wheels they use. The following results were obtained:
- Original FORD – 24.4%;
- ATE – 26.2%;
- Otto Zimmermann – 12.7%;
- Brembo – 17.2%;
- TRW – 5%;
- Ferodo – 1.8%;
- Textar – 1.3%;
- Bosch – 1%;
- Other – 10.4%.
Thus, the leading positions are occupied by factory wheels from Ford and products from ATE. Also popular among drivers are the brands Otto Zimmermann, Brembo, TRW.
Please note that for Russian Ford Focus the diameter of the discs is 278 and 265 millimeters for the front and rear, respectively. Keep this in mind when purchasing new drives from other brands.
Features of the brake system of Ford Focus 2 2005-2008
The Ford Focus II is equipped with two independent braking systems: service and parking. The first, equipped with a hydraulic drive, provides braking when the car is moving, the second brakes the car when it is parked. The working system is dual-circuit, with a diagonal connection of the brake mechanisms of the front and rear wheels. One hydraulic drive circuit ensures the operation of the right front and left rear brake mechanisms, the other - the left front and right rear.
If one of the circuits of the service brake system fails, the second circuit is used to stop the vehicle with sufficient efficiency.
The hydraulic drive includes a vacuum booster. Upon request, the vehicle can be equipped with an anti-lock braking system (ABS), and if available, a traction control system (TSC) and an exchange rate stability system (ESP).
On vehicles not equipped with ABS, to prevent skidding during heavy braking, pressure regulators are installed in the hydraulic drives of the rear wheel brakes, mounted on the master brake cylinder. In the absence of ABS, on station wagon cars, a brake force regulator is installed on the rear suspension beam, which changes the fluid pressure in the brake mechanisms of the rear wheels depending on the load on the rear axle of the car.
The parking brake system has a cable drive to the brake mechanisms of the rear wheels.
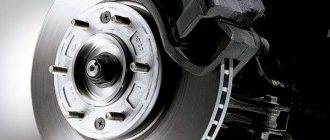
The front wheel brake mechanism is disc, with automatic adjustment of the gap between pads 2 (Fig. 9.1) and disc 1, with a floating caliper. The movable bracket is formed by a caliper 3 with a single-piston working cylinder. The 4 shoe guide is bolted to the steering knuckle. The movable bracket is attached by guide pins 5, screwed into the threaded holes of the block guide. The guide pins are lubricated with grease and protected by plastic bushings. A piston with an o-ring is installed in the cavity of the working cylinder. Due to the elasticity of this ring, an optimal gap is maintained between the pads and the ventilated disc. When braking, the piston, under the influence of fluid pressure, presses the inner pad to the disc; under the influence of the reaction force, the caliper moves on the fingers and the outer pad is also pressed against the disc, while the pressing force of the pads is the same. When the brake is released, the piston is moved away from the pad due to the elasticity of the sealing ring, resulting in a small gap being formed between the pads and the disc.
| Rice. 9.1. Front wheel brake mechanism: 1 – brake disc; 2 – brake pads (the outer one is not visible, since it is covered by the caliper); 3 – brake caliper; 4 – pad guide; 5 – caliper guide pin (located inside the protective sleeve); 6 – air release valve; 7 – brake hose |
Main brake cylinder 1 (Fig. 9.2) of the “tandem” type of hydraulic brake drive consists of two separate chambers connected to independent hydraulic circuits. The first chamber is connected to the right front and left rear brake mechanisms, the second - to the left front and right rear.
A tank 3 is installed on the main cylinder through rubber connecting bushings 5, the internal cavity of which is divided by partitions into three compartments. Each compartment supplies one of the brake master cylinder chambers and the clutch release master cylinder.
When you press the brake pedal, the pistons of the master brake cylinder begin to move, the working edges of the cuffs cover the compensation holes, the chambers and the reservoir are separated and the displacement of brake fluid begins.
The 4th brake fluid level sensor is installed in the upper half of the reservoir body. When the fluid level drops below the permissible level in the instrument cluster, the brake system malfunction warning lamp lights up.
| Rice. 9.2. Main brake cylinder with pressure regulators in the hydraulic drives of the brake mechanisms of the rear wheels and a reservoir: 1 – main brake cylinder; 2 – tank plug; 3 – reservoir of the main brake cylinder; 4 – brake fluid level sensor; 5 – connecting sleeves; 6 – pressure regulators in the hydraulic drives of the rear wheel brakes |
The vacuum booster (Fig. 9.3), installed between the pedal mechanism and the main brake cylinder, during braking, due to the vacuum in the engine intake pipe through the rod and piston of the first chamber of the main cylinder, creates additional force proportional to the force from the pedal.
A check valve is installed in the hose connecting the vacuum booster to the inlet pipe. It maintains the vacuum in the booster as it falls in the intake pipe and prevents the air-fuel mixture from entering the vacuum booster.
| Rice. 9.3. Vacuum booster |
Pressure regulators 6 (see Fig. 9.2), installed on the master brake cylinder, adjust the brake fluid pressure in the rear brake mechanisms during braking, eliminating the possibility of advanced locking of the rear wheels. This is achieved by proportionally reducing the pressure in the hydraulic drive of the brake mechanisms of the rear wheels in relation to the pressure in the hydraulic drive of the front wheels.
The brake mechanism of the rear wheels is drum, with automatic adjustment of the gap between the shoes and the drum. Brake pads 1 and 12 (Fig. 9.4) are driven by one hydraulic working cylinder 9 with two pistons. The optimal gap between the drum and the shoes is maintained by a mechanical adjuster 10 mounted on the spacer bar 7. Some cars are equipped with disc brake mechanisms for the rear wheels, similar in design to the mechanisms for the front wheels, but smaller in size.
| Rice. 9.4. Rear wheel brake mechanism: 1 – rear brake pad; 2 – tip of the parking brake cable; 3 – brake mechanism shield; 4 – brake pad clamps; 5 – support posts; 6 – release lever for parking brake drive; 7 – spacer bar; 8 – upper tension spring; 9 – working cylinder; 10 – gap adjuster; 11 – parking brake cable; 12 – front brake pad; 13 – lower tension spring |
The parking brake, actuated mechanically, consists of a lever installed on the base of the body between the front seats, a front cable with an adjusting device and an equalizer, to which two rear cables are connected, and release levers 6 (see Fig. 9.4) installed in the drum rear wheel brakes. When moving the expansion levers, they move the front brake shoe through the spacer bar until it stops in the brake drum and then, having received a hard stop, press the rear shoe against the drum, blocking the drum. If your vehicle has rear disc brakes, they have pivot arms mounted in the caliper. When the lever is turned, the piston of the brake cylinder moves and the pads clamp the disc.
The parking brake does not require special maintenance. During routine repairs, check the degree of wear of the sector teeth and pawl. Replace excessively worn parts.
If a break is detected, the sheaths or wires of the cables must be replaced with new ones.
The anti-lock brake system (ABS) consists of wheel speed sensors, brake light switch, hydraulic unit, hydroelectronic control unit and warning light. In addition, the anti-lock braking system is equipped with a self-diagnosis system that detects component failures.
ABS serves to regulate the pressure in the brake mechanisms of all wheels when braking in difficult road conditions, which prevents wheel locking.
The ABS system provides the following benefits:
– avoiding obstacles with a higher degree of safety, including during emergency braking;
– reduction of braking distance during emergency braking while maintaining directional stability and controllability of the vehicle, including when turning.
In the event of a system malfunction, diagnostic functions and maintenance of operation in the event of system failures are provided.
Hydroelectronic control unit
(GEBU) receives information about the vehicle speed, direction of movement and road conditions from wheel speed sensors. After the ignition is turned on, the ABS module supplies voltage to the sensors. The sensors use the Hall effect and generate an output signal in the form of rectangular pulses. The signal varies in proportion to the rotation speed of the sensor pulse ring built into the front hub bearing seal and directly into the rear hub.
Based on this information, the power control unit determines the optimal wheel braking mode.
There are the following operating modes of the anti-lock braking system:
– normal braking mode. During normal braking, the solenoid valve is de-energized, the input valve is open, and the output valve is closed. When you press the brake pedal, brake fluid is pressurized into the slave cylinder through a solenoid valve and operates the wheel brakes. When the brake pedal is released, brake fluid returns to the master cylinder through the inlet and check valves;
– emergency braking mode. If a wheel locks during emergency braking, the power control unit issues a command to the solenoid valve to reduce the supply of brake fluid, then voltage is supplied to each solenoid valve. The inlet valve closes and the supply of brake fluid from the master cylinder is shut off; the outlet valve opens and brake fluid flows from the working cylinder into the main cylinder and then into the reservoir, which causes a decrease in pressure;
– pressure maintenance mode. When the pressure in the working cylinder decreases to a maximum, the power control unit issues a command to the solenoid valve to maintain brake fluid pressure; voltage is supplied to the input valve and not supplied to the output valve. In this case, the inlet and outlet valves are closed and the brake fluid does not leave the working cylinder;
– pressure increase mode. If the power control unit determines that the wheel is not blocked, it de-energizes the solenoid valve. No voltage is supplied to the solenoid valves; brake fluid flows through the inlet valve into the working cylinder, the pressure in which increases.
To diagnose and repair the anti-lock brake system, special equipment and accessories are required. Therefore, if it fails, contact a specialized service station.
The hydraulic brake system is integrated into a single whole by metal tubes and hoses. The system is filled with a special brake fluid of at least DOT-4 class, which must be replaced periodically. The procedure for replacing brake fluid is described in section. 4 “Maintenance” (see “Replacing brake fluid in the hydraulic drives of brakes and clutch release”).
Checking the brake system is described in section. 4 “Maintenance” (see “First maintenance (TO-1)”).
| Useful tips Some drivers, in an effort to reduce wear on the parking brake cables, try to use it less often. Such “savings” lead to the opposite result: the cable, rarely moving in the shell, gradually loses its mobility, gets jammed, and as a result the cable breaks. Therefore, use the parking brake whenever necessary. The free play of the brake pedal when the engine is not running should be approximately 3–8 mm. Too little free play indicates incorrect initial installation of the brake pedal or jamming of the working cylinder, causing increased fuel consumption and accelerated wear of the brake pads. Too much free play is a sign of excessive clearances in the pedal mechanism or a leak in the hydraulic brake system. If the free play decreases when pressing the pedal repeatedly, i.e. it becomes “harder” - there is air in the system. If the full pedal travel begins to increase, the system is leaking. If the brake pedal always vibrates when braking, the brake discs are most likely warped. Unfortunately, in such a situation they only need to be changed, and both at once. Periodically appearing and disappearing vibration of the pedal during sharp braking of a car equipped with an anti-lock brake system accompanies the operation of this system and is not a sign of a malfunction. If the car starts to pull to the side when braking, check the working cylinders: they may need to be replaced. If there is a knocking noise in the front suspension that goes away when braking, check the tightness of the caliper mounting bolts. After replacing the brake pads, be sure to press the brake pedal several times before driving to ensure that the pistons in the working cylinders are in place. |
Adviсe
So, you have selected and installed new brake discs. Ford Focus 2 must then be run-in. At this time, sudden maneuvers and braking should not be made. The grinding in of the element is about 200-300 kilometers. Then the element is used in normal load mode. Experts recommend changing discs along with pads, even if their wear is minimal. It is advisable that they be of the same brand. Also remember to bleed your brakes before leaving. The liquid itself should be changed every 2 years, as it strongly absorbs moisture.
Replacing front and rear brake pads in a Ford Focus 3
The design of every modern vehicle includes a braking system that operates using pads. Since this mechanism is used intensively, wear is inevitable. There is a huge selection of parts on the market; moreover, replacing them is not difficult, so even a novice car enthusiast can replace them.
Testing
Don't rush to get on the highway right away. First, check the braking system at a speed of 15-20 kilometers per hour. Make sure that the pedal or steering wheel vibration has disappeared and that the car does not pull to the side when braking. Experts also advise driving at a speed of no more than 100-120 kilometers per hour in the first few days. This is necessary so that the pads get used to the discs.
Brake discs and pads are the main components of the braking system on which your life depends. It is necessary to change these components in a timely manner and regularly carry out visual inspections, as well as measuring the thickness of the discs. The service life is affected not only by the quality of the product, but also by driving style. Aggressive braking and high overloads reduce the service life of the brake disc.
Now you know how to install new brake discs on a Ford Focus 2. These skills will come in handy and will help you regularly save on car service costs in the future, and if you need to replace the pads, you won’t have to study the issue all over again. Don't skimp on brake discs and buy original products or ones of similar quality.
If the material was interesting or useful for you, publish it on your social network page:
conclusions
When all four pads are installed on both wheels, press the brake hard to establish the optimal gap between the pads and the disc . We check the operation of the brakes while driving. Successful replacement, strong brakes and good roads to everyone!
Sources
- https://rulikoleso.ru/remont-ford/zamena-zadnikh-i-perednikh-tormoznykh-diskov-ford-focus-2
- https://razborov.net/ford/zamena-tormoznyh-diskov-ford-fokus-2.html
- https://zapchasti.expert/tormoz/diski/tormoznye-diski-na-ford-focus-2.html
- https://razborov.net/ford/zamena-zadnih-tormoznyh-kolodok-ford-focus-2-2.html
- https://ford-master.ru/zamena-zadnih-tormoznyih-kolodok-na-ford-fokus-2-svoimi-rukami/
- https://carfrance.ru/zadnie-tormoznye-kolodki-na-ford-focus-2/
[collapse]
