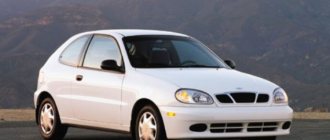
Automakers around the world do not stand still in terms of technological progress. Every year, cars appear that surprise with their innovations in equipment and characteristics. AvtoVAZ does not produce high-tech cars, but from time to time the manufacturer pleases with updates to certain components. For example, the VAZ 2170, better known as the Lada Priora, is now equipped with an updated manual transmission. Its main feature is the main gear and synchronization with the differential.
Gearbox for Lada Priora
29.11.2017
The Lada Priora car attracts many potential buyers with its sophisticated appearance. The car can be equipped with a 16-valve power unit (1.6 liters). Initially, a 5-speed manual transmission was installed; since 2014, automatic transmission has become available. This car has front-wheel drive. In basic configurations there is an 8-valve 1.6-liter power unit (VAZ 21114). The car produces 87 horsepower. Fuel consumption is optimal in all cycles.
Transmission characteristics
The 5-speed gearbox on the Priora model is combined with a differential and final drive. In addition to this, the gearbox on the Priora has a primary shaft, which is made in the form of a block of drive gears. They interact with the driven gears of the secondary shaft. An oil sump is installed under the front bearing of the secondary shaft. Also, the synchronizer belongs to the gearbox system. A special magnet is installed in the clutch housing socket, which retains metal debris, preventing it from going further into the system.
It should be noted that the Lada Priora model has a cable gearbox. It ensures efficiency and clarity of changing speed modes. On the Priora there are no synchronizers in reverse gear. Taking this into account, if there is a problem with activating reverse speed, it is recommended to depress the clutch and place it in neutral (N). Next, you need to squeeze and engage reverse gear.
According to the maintenance regulations, after a mileage of 75,000 km, the lubricant in the gearbox on a Priora should be changed.
Transmission fluid selection
The gearbox can be filled with TM 412 fuel. You should pay attention to the 75-80W version, which belongs to the GL-4 group. Its advantage is that it has excellent viscosity-temperature characteristics. If you use low-quality fluid, noise and crunching noise may soon occur from the gearbox. The replacement procedure can be done with your own hands.
Detection and elimination of gearbox breakdowns
The functioning of the vehicle is influenced by the conditions in which the machine will be operated and how often its system will be serviced, for example, changing transmission oil. Timely replacement of this fluid helps extend the service life of the gearbox. The operation of the gearbox itself directly depends on the quality of the lubricant. Replacing the oil seal is a necessary procedure that is important to carry out if there is a fuel leak from the gearbox.
The need to repair the Priora gearbox arises if the characteristic noise of the gearbox begins to occur when driving on the road. There are several reasons for the noise. In particular, this may be due to the fact that some of the components included in the box have worn out. Typically, disassembly of the device is required. It is better to entrust the removal and disassembly of the gearbox to professional craftsmen.
Over time, gearbox cushions wear out. As a rule, because of this, the gearshift knob begins to rattle. For repairs, only original spare parts must be used.
Defective parts of the secondary shaft.
The most common malfunction is, of course, clogged teeth:
Moreover, this most often occurs in second gear. This is the main reason for transmission failure. Naturally, nicks appear not only on the ring gear, but also on the coupling. Therefore, the clutch also requires replacement. You should also carefully inspect the hub. The hub is made of cast iron, sometimes cracks appear in it and then it collapses. Therefore, it is necessary to carefully examine it; if cracks appear, it must be replaced. As a rule, the hub goes into spare parts assembled with the coupling. There are two types of hubs on these shafts with a 1-2 gear clutch. Nowadays, as a rule, they install double-cone synchronizers and clutches with gears with fine teeth. And the first years after these boxes were released, they put them like those in the second photo. They have ordinary couplings (VAZ 2108) only the hubs and gears of 1-2 gears are original.
On all gears, it is necessary to check the gap between the synchronizer locking ring; at least 0.6 mm is allowed.
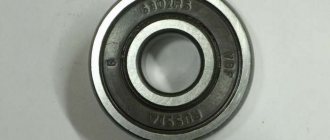
You should also carefully inspect the shaft journals and internal surfaces of the gears for scoring, and replace worn parts if necessary. It is better to replace the rear ball bearing 6305 regardless of condition.
Troubleshooting the Priora gearbox and the algorithm for dismantling the unit
Automakers around the world do not stand still in terms of technological progress. Every year, cars appear that surprise with their innovations in equipment and characteristics. AvtoVAZ does not produce high-tech cars, but from time to time the manufacturer pleases with updates to certain components. For example, the VAZ 2170, better known as the Lada Priora, is now equipped with an updated manual transmission. Its main feature is the main gear and synchronization with the differential.
Return to contents
Characteristics of the Lada Priora gearbox
Structurally, the Lada Priora gearbox consists of three main components:
- clutch housing;
- gearbox housing;
- rear cover of the gearbox housing.
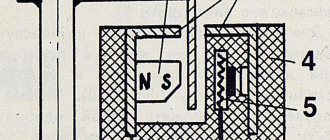
The units are connected to each other using bolt clamps, supplemented by the application of sealant. There is a special magnet in the tray that catches metal elements that are a product of the natural development of the resource. The input shaft is a unit with a set of gears that continuously mesh with the driven gears at all available speeds. The secondary shaft is hollow and is used to supply transmission oil. It contains all the driven gears of the forward speeds.
The shafts use two types of bearings: at the back - ball type, at the front - with rollers. The oil sump is designed to redirect the flow of oil into the hollow part of the shaft. The differential design is two-satellite. The main gear gear is attached to the flange of its box.
A breather is used to communicate with the external atmospheric environment; it is located in the upper part of the gearbox.
Return to contents
Control Features
Control is carried out through a lever and a knob for switching between speeds - a rocker with a cover. To prevent accidental engagement and disengagement of gears while driving, a reaction-type traction rod is integrated into the mechanism. At one end it is connected to the engine, and at the other to the base of the switch lever. Some drivers install a short-throw rocker as an upgrade for greater sensitivity. On one side of the rod, a switch is fixed inside, which affects the mechanism; it is a separate unit and is attached to the pallet. There are three axes fixed in the device casing:
- The first is used to secure the speed selection and switching switch, as well as two locking brackets.
- The second goes through the slots in the brackets and prevents them from turning.
- The third secures the reverse gear fork.
The gearbox has a special solenoid that blocks spontaneous engagement of reverse speed. Its middle part has a protrusion and does not allow the locking brackets to move along the axes to the reverse gear position. The solenoid switch is located on the gear shift handle. When the ring rises, the electrical circuit is closed and the solenoid receives supply voltage. The protruding middle part slides inward, allowing you to engage reverse gear. If the ring is damaged or the electrical circuit is broken, reverse gear cannot be engaged.
To be able to get to the nearest car service center, you need to remove the solenoid from the gearbox housing and install a plug in its place that secures the gearshift fork. In this case, there is a risk of engaging reverse gear instead of first and vice versa, so you should be careful.
After troubleshooting, it is necessary to add oil to the crankcase, as some of it will leak out when the solenoid is removed.
Return to contents
Malfunctions of the Lada Priora gearbox and their elimination
The manual transmission of the Lada Priora is far from ideal and has a number of characteristic faults. Problems common to all manual transmissions also arise. Conventionally, they can be divided into breakdowns in the gearbox and in the gear shift mechanism. The first include:
- damage to synchronizer couplings and their splined connections;
- gear wear;
- oil leakage and low level in the crankcase;
- development of the service life of bearings on shafts (primary, intermediate and secondary);
- deformation and damage to oil seals;
- weak connections.
Failures in the switch mechanism:
- defective drive rod - damaged, weakened, loose, soured and worn out;
- the rod is worn out, there is play in the mechanisms;
- deformation or wear of the locking mechanism;
- The fork is worn out.
The reasons why certain malfunctions of the gearbox and switching mechanism most often occur:
- operating rules were violated - insufficient oil level, poor-quality lubricant, driving with a faulty clutch;
- low quality spare parts;
- the service life of the parts has been exhausted (natural wear);
- improper maintenance and repairs performed by unqualified personnel.
A malfunction in the gearbox can be determined by a number of external factors:
the gearbox is noisy;
- gears are difficult to engage;
- Spontaneous gear shifting (gears are thrown out)
- gears do not engage or are engaged with great difficulty and extraneous sounds, the car jerks while driving;
- The gearbox is noisy, when you press the clutch pedal the noise disappears;
- extraneous sounds when shifting gears - grinding, crunching, squealing, rattling, creaking, vibration;
- oil leak.
When carrying out diagnostics, it should be taken into account that the same symptom may indicate several malfunctions at the same time. Determining the exact cause is carried out only after removing and disassembling the gearbox. Carrying out repair work and identifying worn or damaged parts requires qualifications and experience.
Many malfunctions can occur due to clutch problems, since these two devices are inextricably linked in the gear shift mechanism. For this reason, diagnosing breakdowns requires appropriate qualifications, as well as repairing, troubleshooting and installing new parts.
There is only one way to troubleshoot: disassemble the unit and replace damaged parts, as well as adjust the gaps.
Return to contents
Dismantling and installation of the Lada Priora gearbox
To work you will need a set of tools:
- screwdrivers;
- set of socket heads;
- spanners;
- mounting blades;
- hammer;
- plug for the drive hole (inner CV joint).
Before starting dismantling, you should drain the oil from the gearbox housing. The procedure for removing the box looks approximately the same, the algorithm differs only when dismantling the robotic gearbox:
- Find the release drive shell nut under the dashboard and unscrew it with an 8 mm wrench, then disconnect the cable stop from the clutch pedal holder.
- Remove the compensation device box and ring from the clutch pedal; to do this, pry off the housing with a flat-head screwdriver.
- Remove the plastic bushing (fluoroplastic material) from the pedal rod; if it is worn or has visible defects, replacing the part will help; before installation, lubricate the part with Litol.
- Remove the cable drive seal from the slot in the front of the shield (in the engine compartment).
- To remove the tip, to do this you need to pull it in the direction of travel of the car.
- Unscrew the fastening nut of the wire cable end; it is attached to the bracket, which is installed on the gearbox with a 17 mm wrench or socket.
- Remove the end of the cable from the hole, then pull and pull out the cable.
- Release the latch and remove the chip from the speed sensor.
- Using a socket wrench, unscrew the three mounting bolts of the top cover of the pan and remove it.
- Install a reliable and durable support under the motor (you can hang it using suitable devices);
- Unscrew the fastening of the rear cushion (support) of the power unit to the bracket using a wrench or a 15 mm ratchet socket.
- Remove the rear engine mount stopper.
- Unscrew the two bolts securing the engine mount to the body (rear cushion).
- Remove the rear support.
- Remove the cushion stopper from below.
- Unscrew and remove the engine mount bracket fasteners from the rear of the gearbox housing.
- Using an 8 mm wrench, unscrew the top mounting bolt, then remove the rear engine mount and bracket.
- Unfasten the clamp and remove the wire plug from the reverse speed sensor (reverse signal light sensor).
- Unscrew the fastening bolt of the gear shift drive hinge box.
- Remove the switch rod together with the hinge housing.
- Unscrew the torque rod fasteners.
- Remove decorative trims or caps from the front wheels (if we are talking about stamped wheels).
- Using a screwdriver, remove the protective cap of the hub nut.
- Unlock the hub nuts by aligning them.
- Loosen the wheel bolts and use a 30mm socket to unscrew the hub nut. To unscrew it, considerable force must be applied; it is recommended to supplement the head knob with a piece of pipe as an extension and amplifier at the same time.
- When unscrewing the wheel and hub fasteners, the vehicle must have all wheels on the platform; all fasteners are tightened in the same way.
- Raise the parking brake handle and secure the vehicle; place chocks under the rear wheels to prevent accidental rolling away. Hang the front part and place strong, reliable supports. Remove both wheels at the front and remove the wheel nuts. It is recommended to replace the nuts with new ones during reassembly.
- To dismantle the steering knuckles, first unscrew the fasteners of the ball joints.
- Remove the shank from the hub and at the same time move the front shock absorber strut outward. To remove the left drive, turn the steering wheel to the extreme right position, respectively, when removing the right drive, turn it to the extreme left.
- After removing the left drive, a special plug must be placed in the vacant space; if this is not done, the gears will shift and it will become impossible to install the CV joints in place.
- Press out the right drive.
- Remove the drive on the right.
- Place a strong support under the gearbox.
- Unscrew the mounting bolts that secure the gearbox to the engine.
- Unscrew the lower right and lower left bolts securing the gearbox to the power unit.
- Move the gearbox as far back as possible and remove the support from under it, while holding the gearbox.
At this point, the dismantling is completed, all that remains is to lower the assembly and proceed to further disassembly, troubleshooting and assembly with new parts. Installation is carried out in the reverse order of removal. After installation, you need to fill in new gear oil to the optimal level. For reliability, overflowing above the maximum mark by 100-200 ml is allowed. This is due to the high location of the fifth gear, which often lacks lubrication.
The Lada Priora gearbox is not the best, but at the same time it has a simple design and can be repaired in a garage with your own hands if you have certain knowledge and skills for such work. For convenience, it is better to dismantle with an assistant. The gearbox is a heavy unit, and if removed without insurance, you can easily drop it on yourself and get injured.
Control Features
Control is carried out through a lever and a knob for switching between speeds - a rocker with a cover. To prevent accidental engagement and disengagement of gears while driving, a reaction-type traction rod is integrated into the mechanism. At one end it is connected to the engine, and at the other to the base of the switch lever. Some drivers install a short-throw rocker as an upgrade for greater sensitivity. On one side of the rod, a switch is fixed inside, which affects the mechanism; it is a separate unit and is attached to the pallet. There are three axes fixed in the device casing:
- The first is used to secure the speed selection and switching switch, as well as two locking brackets.
- The second goes through the slots in the brackets and prevents them from turning.
- The third secures the reverse gear fork.
The gearbox has a special solenoid that blocks spontaneous engagement of reverse speed. Its middle part has a protrusion and does not allow the locking brackets to move along the axes to the reverse gear position. The solenoid switch is located on the gear shift handle. When the ring rises, the electrical circuit is closed and the solenoid receives supply voltage. The protruding middle part slides inward, allowing you to engage reverse gear. If the ring is damaged or the electrical circuit is broken, reverse gear cannot be engaged.
To be able to get to the nearest car service center, you need to remove the solenoid from the gearbox housing and install a plug in its place that secures the gearshift fork. In this case, there is a risk of engaging reverse gear instead of first and vice versa, so you should be careful.
After troubleshooting, it is necessary to add oil to the crankcase, as some of it will leak out when the solenoid is removed.
Payment via PayPal
Self-diagnosis and troubleshooting of the fuel tank
After selecting payment via PayPal, the PayPal payment system will launch, where you need to select the payment method: bank card or PayPal account.
If you already have a PayPal account, then you need to log into it and make a payment.
If you do not have a PayPal account and you want to pay using a bank card via PayPal, you need to click on the “Create an Account” button - shown with an arrow in the picture.
PayPal will then prompt you to select your country and provide your credit card information.
After specifying the information required to make the payment, you must click on the “Pay Now” button.
The process of changing the oil in a Priora box
Since the gearbox is located near the engine, when the engine is running, both units heat up, including the oil. It is better to change the oil when the engine is warm, since in this case the liquid becomes more fluid and drains better from the most secluded corners, and all contaminants come out with it. Thus, if your car is cold, take the time to start it and take a short drive for 10-15 minutes. Idling does not count, since in this case the gears of the gearbox do not work, and the gearbox will remain cold even after the engine warms up to operating temperature.
Drain the oil
When starting work on replacing the fluid, you need to find out the required volume of oil in the Priora gearbox and buy lubricant in the store. Next, crawl under the bottom of the car and unscrew the drain plug, first replacing the prepared container. The used liquid will begin to drain. If necessary, you can dismantle the protection if you have one.
When unscrewing the plug, tear it with a key, and then continue to unscrew it by hand and carefully remove it without staining anything around it.
The oil will pour out quickly at first, and then the process will slow down. To speed up the process, pull the dipstick out of the upper hole, which will create a vacuum and the oil will completely drain.
Filling with new fluid
Before pouring new oil into the gearbox, do not tighten the drain plug and pour literally 50-100 g of lubricant into the filler neck so that it pours out from below, washing out the remaining old oil. Screw the drain bolt into place and thoroughly wipe everything with a rag, removing any smudges. Clamp it with a key and start pouring lubricant, but do not overdo it, otherwise you will have to drain it again or suck out the excess with a syringe. Pour out the lubricant gradually, checking the level with a dipstick.
What is the danger of overfilling the gearbox?
You need to figure out what the consequences of overfilling the oil in the Priora gearbox can be? First of all, the lubricant will begin to foam, the pressure in the system will increase and the oil seals and rubber seals will be damaged. Oil may also begin to escape through the dipstick hole.
To avoid oil overflow, do not rush to fill the box with the entire volume of lubricant recommended by the manufacturer. Fill most of it and leave the car for 10 minutes until the oil drains completely down, and then check the level again. If necessary, add fluid to the maximum mark.
“Madame Priora, what should I pour you?”
What oils to use. For Lada cars, it is recommended to use synthetic Lukoil brand fluids; the same lubricants are poured into the gearbox and by the manufacturer as flushing and break-in lubricants. They are used until the first maintenance. For the Lada Priora car to operate properly, it must contain a lubricant that meets the parameters specified in the instructions.
The first thing you need to pay attention to is viscosity. A highly viscous or liquid substance does not adequately protect against wear, and the result is short-lived performance.
Also, you should not use mineral-based fluid, since this is not provided by the AvtoVAZ plant. When pouring mineral water, it is very difficult to determine the replacement period, since these lubricants become unusable much more often than synthetic ones. Mineral water consumption is higher.
Under no circumstances should you add your own additives or other additives to new oil; this may affect the viscosity and other technical characteristics of the lubricant. Lubricants should be purchased from official representatives, they are obliged to guarantee the quality of the product; if you buy “from hand”, there is a possibility of getting a surrogate.
Subsequence:
- Using a size 8 wrench, unscrew the nut of the drive housing. Disconnect the cable from the clutch pedal retainer.
- Remove the compensation system box and ring from the pedal. To avoid damage, carefully pick out the box with a knife.
- Remove the plastic sleeve from the pin. If there are signs of damage, replace with a new one. Lithol treatment is required before installation.
- Remove the drive seal from the hole in the front of the shield.
- Remove the tip, first dragging it in the direction of movement of the car.
- Unscrew the cable end fixing nut. It is screwed onto a bracket, which is attached to the transmission with a 17-point head.
- After removing the tip, pull out the cable.
- Unfasten the latch and remove the speed sensor chip.
- Unscrew the fixing screws of the pallet flap and remove it.
- Secure the engine with a reliable support.
- Unscrew the fixing bolt of the rear engine mount to the bracket.
- Remove the limiter on the rear surface of the motor.
- Unscrew the bolts that secure the motor to the body surface.
- Remove the support from the rear side.
- Remove the limit rollers from below.
- Unscrew the motor bracket clamps on the rear surface of the transmission housing.
- Using a size 8 wrench, unscrew the top screw and remove the bracket.
- Unscrew the screw and remove the speed sensor chip.
- We unscrew the bolt securing the gearbox hinge box.
- Remove the click rod from the hinge base.
- Loosen the torque clamps.
- Remove the designer hubcaps from the front wheelbase.
- Using a knife to pick up the edge, remove the hub protective lining.
- Align the hub nuts.
- Loosen the screws securing the wheelbase. Using a 30mm socket, unscrew the hub bolt.
- When you unscrew the screws that secure the wheelbase, the car is positioned on the platform with all wheels.
- To prevent the vehicle from moving, tighten the handbrake and install supports under the rear wheels.
- Unscrew the ball joint clamps and remove the maneuvering knuckles.
- Remove the shank from the hub.
- After removing the left drive, put a plug in its place.
- Press out the drive on the right side. Remove it.
- Place a support under the transmission.
- Remove the screws securing the transmission to the engine.
- Move the gearbox as far back as possible, remove the support, holding it.
The transmission of AvtoVAZ models has the advantage of simplicity of design and the ability to install it yourself if you have the necessary skills.
How to change gears on a Priora
In this article, I want to give a basic understanding of the essence of the gear shifting process, which will allow you to automatically select the right gear to drive each time in order to ensure the desired driving mode in a specific situation and get:
If we switch to second at this moment, the wheels will also move at a speed of 25 km/h, but the engine will spin at lower speeds, approximately 1800 rpm.
The engine will be under heavy load at this moment.
This is similar to a long and short lever - the long one is easier to move, but you need to cover a greater distance, while the short one will require more force, but you won't need to deflect it much.
Quality of transmission lubricants
Dynamic viscosity - at low temperatures, in winter, the thickened oil resists shearing, which is a bad indicator in the operation of transmission units. Pour point is an indicator of the hardness of the oil in cold weather. But even when the lubricant hardens, there is a possibility that the gears can turn without applying torque to them. Viscosity index is a parameter characterizing the change in viscosity of transmission oil relative to temperature. If a car enthusiast wants his car to feel good on the road, he must constantly monitor the gearbox. Its regular inspection and maintenance of technical condition plays a big role in the operation of machine components.
To properly maintain the level, the oil in the gearbox is periodically topped up using a funnel and a hose attached to it.
https://youtube.com/watch?v=gouyRn4tfTw