Fans of domestic cars often come across a problem with the body. For example, we purchased a used VAZ 2109 car. Externally, the car looks quite decent, but if you take a closer look at the body, it becomes clear to you that it is rusty. And the body is the main part of the car; everything actually rests on it. However, repairing the body yourself is not a difficult task. With a minimum of necessary tools and skills, you can replace a rotten arch, bottom or threshold yourself and without replacing the entire body. Our detailed instructions describe the DIY body repair of a VAZ 2109 step by step.
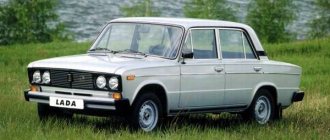
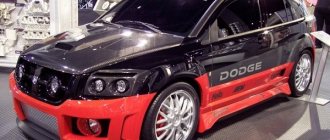
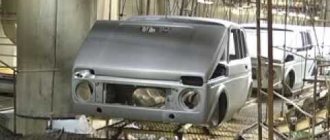
Model VAZ 2109
Where to start body repair of VAZ 2109
Rotten threshold of VAZ 2109
Car body repair begins with a selection of tools. The list is quite impressive. The work is quite labor-intensive and will require a considerable number of measuring instruments. Including electronic and gas. You will also need at least three types of hammers of different sizes. Stripper and flap and wheel (The flap wheel is excellent for removing light rust and paint). You can’t do without an angle grinder either. You need a cylinder filled with about ten cubic meters of carbon dioxide, a carbon dioxide welding machine with a current of at least 150 amperes, a set of chisels and metal drills. At least one jack, preferably two. Buy a pack of cutting wheels 1-2mm thick and one cleaning wheel. Rust converter and brush, fiber disc (or metal brush) Standard driver's kit, two-millimeter cord and plumb bob. This car occupies a special place among the models; the presence of a corner platform allows it to be classified (based on body type) as a hatchback car. Design features suggest the presence of three doors in the body. The body itself is a single all-metal frame made of stamped elements. It is a frameless structure, the elements of which are connected using spot welding, which facilitates its construction and gives the body sporty characteristics. We take into account that the front-wheel drive car body is equipped with removable elements:
- Doors;
- Rear trunk lid;
- The front fenders are also removable.
Straightening works
On the VAZ 2109, body repair for dents involves straightening. It is divided into 3 types:
- correction of dents. This most common defect is eliminated using the vacuum method;
- elimination of bulges. During an impact, the metal on the car body bends in some places. This problem can be removed with a hammer;
- local repair. In this case, all work is carried out without removing components (technological holes located in the body are used).
Dismantling operations prior to body repair of VAZ (VAZ 2109)
So:
- Door dismantling;
- Removing the trunk lid;
- Removing the hood cover;
- Removing the radiator grille;
- Removing both bumpers.
Door dismantling
- Disconnect the door opening limiter. To do this, use a socket wrench to unscrew the bolts securing the doors to the body pillars;
- Unscrew the hinge fastenings and hold the door to avoid distortion. Do-it-yourself body repair of a VAZ 2109 is impossible without dismantling the trunk lid;
- Therefore, we remove the upholstery by unscrewing the screws from the inside and snapping the fastening latches. We disconnect the lighting wiring and remove the harnesses from the internal cavities.
- Then we disconnect the stops and unscrew the trunk lid, unscrewing the bolts attaching it to the hinges, then remove it from the car.
- Now we remove the hood, we start by marking the positions of the bolts on the brackets relative to the hinges, so that during assembly it will be easier to screw it into place.
- We disconnect the power wires and dismantle the lighting lamps, be sure to remove the wire harnesses from the grooves.
- Now unscrew the bolts securing the hood, two on each side, and remove it.
Disconnect the radiator grille
The hood has already been removed, now it is enough to unscrew just a couple of screws on the body that hold the grille.
- Use a screwdriver to press out the plastic latch and pull the grill towards you; it can be easily removed.
Removing the radiator grille
Removing the bumpers
The bumpers are made of plastic alloy. When the bumper is loaded, it bends slightly rather than bursting.
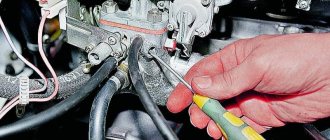
- We remove the front bumper by unscrewing the fastening elements to the bracket and to the body, consisting of a pair of bolts.
Tip: We dismantle the rear bumper using a wrench; pre-lubricate the nuts with liquid wrench (WD-40) or pure gasoline. In these places the nuts rust and are difficult to unscrew.
Sealing and anticorrosive
A successful replacement of the body with another car can be considered as such if subsequent sealing is carried out. It means anti-corrosion treatment of welds and joints. Hidden cavities (transverse, longitudinal spars) are subjected to special treatment with Movil, various mastics, gun fat, and automotive plasticine. The latter is good to use to protect the junctions of various parts and welds, which are especially susceptible to premature aging.
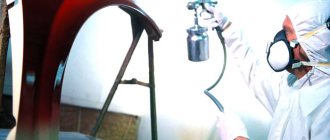
A car prepared in this way can be safely improved further. Today, specialized companies provide a whole range of services, as you can see by watching promotional videos of organizations producing car tuning, such as the VAZ 2109. They try to reflect as comprehensively as possible the entire range of services provided, so you can easily choose the service that is suitable for you and get qualified advice.
When purchasing a used car (for example, VAZ 2108, 2109, 21099), you should first of all pay attention to the condition of its body and body covering. This is not surprising, since the body is the most expensive component of the car.
List of main weak points of VAZ 2108, 2109, 21099 car bodies
- Places for attaching the rear beam to the car body.
The rear beam of VAZ 2108, 2109, 21099 cars is attached with its levers through rubber-metal hinges to triangular brackets on the right and left sides of the body. The brackets, in turn, sit on studs and are secured with nuts (three studs and three nuts per bracket). The studs are welded to a special thicker metal reinforcement located inside the rear side member.
Over time, a corrosion center appears around the brackets (possibly due to a violation of the protective layer of the spar, untimely treatment of its internal cavity with a protective composition, or vibration loading of this part of the body). First, corrosion eats away the metal of the threshold around the bracket, then it is taken over by the amplifier. After some time, the attachment of the beam to the body is simply torn out, and the car becomes uncontrollable. It is very important to repair this connection at an early stage of destruction (before the amplifier inside the spar is destroyed).
Removing rotten parts
We begin the repair by dismantling rotten, deformed and rusty parts.
Problem areas in the car:
- Our car (which we are repairing in this article) has a completely rotten floor, along with jacks and stiffeners. The jack had to be installed under the engine beam.
- The floor in the back was also rotten. The bottom was practically absent. The wings also required replacement.
- The front hood is covered with rust, all floor and gas tank mounts and spare wheel mount are missing. The front spar burst in the gearbox area. And a huge hole appeared in the trunk floor above the muffler.
- The doors were corroded at the corners.
We have prepared the tools necessary for body repair, and we begin installation.
Threshold repair
Tools
Before moving on to the direct instructions for repairing the VAZ 2109 body, I would like to dwell on choosing the right tools. Every professional, master of his craft will confirm that a good tool is half the successful completion of any repair operation.
So, the list of necessary tools for body repair of the “nine” is quite wide, since the work is by no means simple and will require a considerable number of specific instruments:
- Special hammers are required, at least 3 types of them with different sizes for straightening work;
- A grinder with mounted circles (you need different discs that perfectly remove paintwork and rust);
- It is advisable that the garage have a carbon dioxide cylinder (about 10 cubic meters);
The repair itself
Stage 1
So:
- We start with the engine compartment: drain the coolant, then remove the radiator. We take out the “TV”, if it is completely rotten, then you can tear it off and then cut off the flanges to which the TV was welded with an angle grinder.
- We completely cut off the rear panel and fenders. Using welding and patches, we weld holes in the mudguards (if there are any), insert flanges made of new metal, to which we will subsequently weld the “TV”.
You can watch the body repair in more detail by searching for a VAZ 2109 body repair video.
Stage 2
We install and weld new reinforcements for the mudguards, using roofing iron for this purpose. Next we adjust new parts: front and rear fenders, TV, threshold and hood. We attach these elements using self-tapping screws. This is where a set of drills comes in handy. Now comes the welding process. We start welding after all the parts (TV, wings) are installed on the screws.
Tip: I advise you to paint the TV in advance; after fixing it in place, it will not be possible to paint it properly.
Stage 3
We restore the geometry of the car body. To do this, we drive the car onto a machine - a tipper. The procedure is carried out using a slipway on which the car is attached. Special fastenings ensure reliability, and power racks provide special force for alignment. It is recommended that this part be done at a workshop.
Stage 4
Let's move on to the bottom:
- We weld the patches onto the front and rear floors using a welding machine. We digest all the jacks, connections and underbody reinforcements.
- Using a mopping machine, we coat the car cavities with an anti-corrosion mixture.
The photo shows the overcooked bottom of a VAZ 2109
Stage 5
In our case, the arches were completely rotten. Experts recommend not to suffer, but simply to purchase and install new arches. But it is also quite possible to make repairs. Resin mixed with used oil is an excellent coating for arches, but in the future rust will get under it. The choice of anti-corrosion mixture depends on your budget and experience with the material. VAZ 2109 video (body repair) will show you in detail how the polishing processes proceed, using various means, the list of which is determined by the age of your car. Considering that all machines in use today are more than 6 years old, polishing is carried out in two stages.
DIY anti-corrosion treatment
Protecting the car body from corrosion is a must if you want the VAZ 2109 to last as long as possible and maintain an attractive appearance.
There is a nuance, treatment will only help in the case of new hardware; if the body has already begun to become covered with rust spots, it is already a little too late to carry out treatment.
Anti-corrosion protection includes several stages. They can be carried out either together or as separate events.
- Anti-corrosion protection of the bottom. The bottom of the VAZ 2109 is most susceptible to corrosion, as it is in direct contact with water, dirt, and snow. In order to protect it, you need to apply a special mastic with protective functions. It is most convenient to apply mastic using a special spray gun.
- Body sealing procedure. The point of the event is to protect against moisture getting into seams, joints, and hidden cavities. For this purpose, cannon fat or Movil is used. To protect thresholds, mastic diluted with engine oil is used.
- Body lubrication. It is used to ensure that elements that experience friction are protected and last longer. These are primarily the hinges on the doors, trunk and hood, as well as all the locks. For processing, use ordinary motor oil poured into an oil can. For the locks you will need to use an aerosol spray can.
- Applying polish to the body. The polish also has good protective properties and therefore prevents corrosion.
It is not necessary to carry out processing in exactly this sequence. Do what is most convenient for you. It is not important to carry out all the procedures in one day, but it also does not make sense to stretch the process for a long time.
How to replace a car body
Main stages of technology
- To remove the 2109 body from the chassis, it is necessary to carry out a number of preparatory measures, in which case the car must be placed in a viewing hole and a winch (or some other lifting mechanism) must be prepared.
- Remove the hood, radiator grille, upper radiator trim panel along with the hood lock.
- Drain all liquid from the engine cooling system. Disconnect the hoses from the radiator pipes, unscrew the radiator fasteners and pull it out. Don't forget to disconnect the pipes from the interior heater tap.
- Drain the brake fluid from the brake system and clutch drive. In this case, the brake hoses screwed to the pipes going into the body must be disconnected.
- Disassemble the accelerator drive and parking brake. Disconnect the steering column shaft and the steering gear shaft; disconnect the electrical wires coming from the passenger compartment, and also remove the speedometer cable from the gearbox.
- The body and supporting system of the car are connected by bolts that need to be disconnected. The front bolts can be reached from the engine compartment. To gain access to the middle bolts, you will have to remove the plastic floor mat pads in the cabin (they are located behind the footrests). You can “get” the remaining bolts from the trunk (they are there under the floor plugs).
- Unscrew the bolts securing the floor hatch cover and remove it. In this case, the rubber seal must remain on the gearbox.
- Carefully lift the body using the lifting mechanism; must be hung from doorways (keep doors open).
- Assembly is carried out in reverse order.
Treated engine bay
Where and what body should I buy?
If the owner of a VAZ 2114 car has a need to purchase a new body, then you need to decide where to purchase such a spare part. In total, the motorist has three options:
- Visit a market where auto parts are traded.
- Go to a store that specializes in selling auto parts.
- Visit the online auto parts store.
Each of these options has its positive and negative aspects. For example, the advantages of buying at the car market are a large selection and reasonable cost. But here they can sell used spare parts or low-quality Chinese counterfeits. The body performs a protective function, so it must be strong and reliable, able to withstand the impact of a collision with another car.
The advantages of a specialized store are the availability of original designs, the ability to choose, and obtaining a warranty card. The downside is the high cost of the products.
If you have enough money, then it is better to make a purchase in a specialized store, and if finances are in short supply, then it is worth considering the assortment of the car market.
Where to start and where to end
Repair work begins with dismantling the deformed, rotten parts of the “nine”:
- Disassembling the engine compartment, draining coolant and antifreeze.
- Removing the doors.
- Dismantling the amplifier - “TV”.
- Rusty areas are cut off with a grinder.
- The holes will have to be repaired or patched.
- Problem areas are strengthened with iron.
- Mudguards are reinforced with spot welding.
- Spare parts are adjusted in accordance with the geometry of the car.
- Thresholds and wings are fastened with bolts followed by electric welding.
- New arches are installed, and if necessary, the bottom is completely changed.