Removal and installation of the UAZ-3151 engine
Removing and installing the engine on vehicles of the UAZ-31512 family
Before removing the engine from a vehicle installed on an inspection ditch, do the following:
1. Drain the cooling system and oil from the engine crankcase.
2. Remove the air filter.
3. Disconnect the exhaust muffler pipe from the engine.
4. Disconnect the cooling system, heater and oil cooler hoses from the engine.
5. Disconnect and remove the cooling system radiator.
6. Disconnect the air and throttle valve drive rods from the carburetor.
7. Disconnect all electrical wires from the engine.
8. Disconnect the clutch release slave cylinder and connecting rod from the clutch housing.
9. Remove the bolts securing the front engine mounts along with the lower mounts
Rice. 1. Removing the engine from the car
10. Install a special bracket on the second and fourth studs of the block head (Fig. 1), counting from the front end of the block.
11. Using a lift to lift the engine, disconnect the gearbox from the engine.
12. Lift the engine and remove it from the vehicle, leaving the transmission and transfer case remaining on the vehicle frame.
Install the engine on the car in the reverse order.
The engine can be removed by lowering it down along with the gearbox and transfer case, and it is necessary to remove the cross member. This method is much more complicated than the first.
Features of engine removal and installation on UAZ wagon-type vehicles
To remove the engine you must:
Remove the seats and hood cover.
Open the hatch in the cab roof, pass the hook with the cable (chain) of the lifting mechanism through it and hook the hook to the bracket.
Lift the engine slightly and disconnect it from the gearbox.
To make engine removal easier, install a board in the doorway that will not bend under the weight of the engine.
Use the lifting mechanism to lift the engine into the hood opening and, being careful, remove it through the doorway along the board.
Install the engine in reverse order.
Do-it-yourself UAZ engine overhaul
Changing unsuitable spare parts or restoring them will help to revive the engine and return it to its original agility and obedience. All spare parts must be the correct size. The stores offer a varied selection of pistons, piston rings, intake and exhaust valve seats, and crankshaft connecting rod bearing inserts. The size of the part can be checked with sales consultants.
Bulkhead UAZ engine
Engine wear is significantly affected by deterioration of lubrication of rubbing surfaces, which depends on an increase or decrease in clearances. To rebuild the engine yourself, you first need to dismantle it. This is done as follows:
- drain the antifreeze and oil from the pan;
- separate the air intake filter and unhook the muffler pipe from the engine;
- disconnect the cooling system pipes, oil radiator and heating devices from the engine;
- remove the cooling system radiator;
- separate the throttle and air valve drive rods from the carburetor;
- remove all wiring from the motor;
- Unscrew the bolts of the lower and front support cushions.
Now he removes the engine from the UAZ 3303. For this, a bracket specially designed for this purpose is installed on the cylinder head studs. The engine needs to be jacked up and the gearbox separated from it. The motor can be removed by lifting it up.
Other actions will lead to the need to remove the transfer case and gearbox along with the engine.
How to remove the UAZ Bukhanka engine
I searched for a long time, but never found anything. Sorry for the dumb question, but can anyone recommend something from personal experience? Task: Remove the engine from the loaf.
I started by removing the box. I unscrewed all the rods from the box, cardans and wires. Now I'm thinking about how to remove the box itself.
Or am I doing everything wrong? Maybe you don't need to remove the box to get the engine out? Theoretically, the clutch bell should remain on the engine, or on the gearbox? In general, I was at a loss. Help a newbie please!
First, an exercise to remove the radiator, exhaust manifold and rods from the gearbox, wires from the generator and starter, and sensors. You need to remove the box. To do this, you need to jack up (a little) the rear part of the engine and tie the box with a strong rope to the frame, but free to swing along. Remove all cardans. Then you remove the hatches from the roof and run the hoist through the roof. Having raised the engine above the level of the engine well, you place a couple of strong boards and remove (with two or four) the engine through the door.
I unscrewed and disconnected everything, except for the exhaust pipe (I couldn’t reach it) and the box. I even removed the pump. I didn’t unscrew the head, because I don’t want the sleeves to stand open for a long time (my process only moves once a week, and then outside and without lighting). I also heard that the head cannot be removed when the engine is standing still. It is necessary, they say, to cut out a piece from the salon side in the convexity in order to remove the head, but otherwise, they say, it sticks. I'm stuck on how to unscrew the box. Either unscrew it from the bell and remove it, or together with the bell, but then it is not clear how to pull the box with the bell off the flywheel. From your message I realized that the exhaust manifold needs to be removed. For what? It's there, it doesn't seem to interfere with pulling it out? Or maybe I missed something. You'll be too tired to unscrew it. All the nuts are rusty. Is it impossible without this? ;-))))
Removing the UAZ Bukhanka engine
UAZ-loaf Hello!
In this article I will tell you how to remove the engine from a UAZ loaf. Oh this UAZ. It has been in production for half a century, but is popular in Russia and beyond. The device is not complicated, but it breaks down often, but everything can be repaired relatively without much difficulty. So: UAZ loaf. What kind of engines do they have? Umz 417. Prehistoric engine. Piston diameter is 92. The engine is weak. You can remove it through the top with fart steam and using a mat or a winch if there is a hatch in the roof above the engine. You can take it down, but only if there is a hole. Without a pit, I think it is very difficult.
Let's move on: UMZ 421 engine. 100 pistons. The engine is more powerful. And if it’s also fuel-injected, it simply pleases with its power. You can remove it through the top. Through the bottom too. At the same time, we remove the collector. To make it even easier to remove, it’s better to remove the head. Oh, yes, I forgot to say that when removing, we usually use a homemade winch made from a ZIL 130 ratchet pad.
Let's move on: Engine ZMZ 409. Never even tried to remove it from the top. Especially with the head. Don't even think about dealing with collectors. I can't even imagine how this is possible. We filmed through the bottom. But before that, all the collectors were removed.
Somehow like this. I'm not even saying that removing the radiator is inevitable. But it’s better to rent it than to buy it later. You ask, how many of these engines did we shoot? I’ll answer that I’ve been working at an auto company for thirty years now and we’ve removed these same engines, just imagine how many. We have a lot of UAZs, that is. So this is all hard-earned. Recently we had one driver, on a day off, just imagine, he removed the engine alone. Well, of course, with the help of a puller, through the bottom into the pit. Well, I would say that there is nothing complicated here, you just have to jump up and down. Well, it’s okay, I did it. Well, this is just such a person, a real driver. There are few people like him now. Well, that's all. I wish you all readers good luck. Bye!
Replacement and repair of the UAZ 31512 UMZ-421 engine
The content of the article:
Assembling a new UAZ 31512 engine
We have a completely new engine - UMZ-421, assembled, unlined.
True, it does not have a cylinder head
Well, the assembly of our new engine has begun.
That’s how it turned out, but they capitalized on it. In short, it would be better not to climb there. Why didn’t those who assembled the motor have any other tool at hand other than a hammer? The rings were tightly hammered into the piston grooves, the compression rings were mixed up with the oil scraper rings. The rings were all broken, the grooves on the pistons were broken.
There are also some strange shavings in the pan and on the oil receiver.
It's just a miracle that there are no scuffs in the cylinders, lucky. The crankshaft and camshaft are new, ideally. Now you need to purchase a set of piston group and liners. Well, one more trouble. There are no markings on the pistons and you will now have to buy a micrometer or caliper to measure them as the block may have been bored out.
The piston group was completely broken due to incorrect installation of the piston rings.
How to Remove the Engine from a UAZ Bukhanka Video
UAZ "Tadpole" and "loaf" monotonous engine lineup. So I’ll share my experience of how to remove the engine using a pipe (3.5 meters) in an hour and fifteen minutes with three people in an open field. We twist, unscrew, disconnect everything that holds, strengthens, connects the engine to the UAZ. We leave the gearbox and transfer case in place, do not touch it, just unscrew it from the engine and pull out the radiator. Then we remove the carburetor and the valve cover, push a pipe across the interior and use a carpenter’s chain to hook the engine onto the rocker arms in the middle. And we begin to pull out through the cabin. Two of them lift the pipes by the ends, and the third, first from below, pulls the engine forward with a mounting tool behind the gearbox and then helps tilt it to the passenger side in the cabin. Then we put the engine in the place where the passenger should sit, intercept the pipe in a more convenient way... SMOKE. and pull the engine out. Put it in the reverse order. If three of us take on everything at once, unscrewing, unscrewing, disconnecting, then all the work will take exactly one hour and fifteen minutes (with one smoke break) ... This is our record! Who can do it faster, please share your experience
How to Remove the Engine from a UAZ Bukhanka Video
Do-it-yourself UAZ “loaf” car repair
The UAZ 452 “loaf” is a fairly reliable Russian all-wheel drive jeep. The main breakdowns of this car are associated with leaks of lubricating fluids from the engine, gearbox (gearbox), front and rear axles, constant velocity joints (CV joints) and hubs. The main reason for the formation of similar leaks in such a section is that the material from which the unique oil seals and gaskets of the above units are made is partially corroded under the influence of modern lubricating fluids. Due to poor lubrication, moving metal parts wear out greatly and must be replaced periodically. It is necessary to carry out preventive maintenance of the UAZ 452 at least once a year, change leaking oil seals and gaskets, and also adjust the clutch.
The problem is that finding a factory repair manual for these SUVs is quite difficult. Therefore, we bring to your attention instructions that will allow you to repair your car yourself.
Engine selection
The domestic version of the diesel engine, developed specifically for the UAZ-452 car, is the 2.2-liter ZMZ-514 4-cylinder unit with a turbine.
It has a power of 92 hp. With. / 4000 rpm. Despite the wide range of operating temperatures, this motor is not particularly reliable. It is not very easy to repair it, since the cost of spare parts is quite high.
The following list of diesel powered power units suitable for the UAZ-452 can be distinguished:
- Peugeot engine with a volume of 2.5 liters, which was installed on Ford Scorpio, Ford Transit, Ford Sierra cars. In this case, the main problem will be the “bell”, which needs to be adjusted to the seat.
- Mercedes-Benz unit with a volume of 2, 2.4 and 3.0 liters. These simple, reliable engines are well suited for Russian operating conditions.
Their only problem is the location of the oil filter at the lowest point. Because of this, it is necessary to install additional protection below.
Removal and diagnostics of the power unit
Power unit "loaf"
As you know, car engine repair begins with its dismantling. And only then disassembly, replacement of damaged parts and assembly are carried out. Overhauling a power unit is not an easy task, so it is not worth doing it yourself, without the help of experienced craftsmen. But you can change the seals yourself.
The factory repair manual for the UAZ 452 car states: to remove the power unit, you need to lift it up from the engine compartment. How to remove the battery from FF2 in winter in an easier way. For example, for recharging. How to remove the engine on a UAZ Bukhanka video. With this dismantling method, you will need 2 strong pipes (longer than the width of the cabin) and the help of 2 people.
The procedure is as follows.
- First, the battery is removed and the car is put on the handbrake.
- Then the driver and front passenger seats are removed.
- After this, the carburetor is removed along with the air filter and all damper drives. All holes are covered with clean rags.
- Next, the ground wire is unscrewed from the valve cover of the cylinder head (cylinder head).
- The electrical wiring from the sensors and attachments is disconnected.
- The generator is removed.
- If an oil cooler is installed on the power unit, it is disconnected and its tap is removed. The hole is plugged with a rag.
- The nuts securing the exhaust manifold are unscrewed, and it is moved together with the muffler to the side so that it does not interfere.
- The bolt securing the distributor (located near the octane corrector scale) is unscrewed and the unit is removed.
- The fuel pump is dismantled.
- After this, the antifreeze is drained, the pipes are disconnected and the cooling radiator is removed.
- The fastening bolts are unscrewed, the fan is dismantled along with the pulley.
- After this, the chains or tow ropes are passed under the engine crankcase, attached to the eye-brace and tied to 2 pipes located transversely on the cabin floor.
- The clutch fork drive is disconnected.
- Remove the bolts securing the gearbox to the engine.
- 2 bolts are unscrewed, the motor is removed from the pillows. How to remove the rear bumper? Help guys, you need to remove the rear bumper Video about Hyundai Solaris. How to remove the engine on a UAZ Bukhanka video. YIcOYIDh DhDYI hYI pcYIDY cYOD DYI SCHpSHcDD dyYI. Call Center: 10 pcY 2021. Video surfing How to remove the engine from a UAZ loaf car. UAZ engine UMZ 451-Turbo. Now it hangs only on the pipes and the front shaft of the gearbox.
- After this, the engine moves forward, is removed from the gearbox input shaft and pulled up and to the right.
How to remove the engine from a loaf video
So, in order to remove the engine from the UAZ 452, by the way, as it turned out, it is not necessary to remove the box, just let it hang in place. Then a structure like this is built around the car, but it doesn’t have to be pipes, it can be boards, they can be placed in a cross. Here we have a small block, a hook, the head is naturally removed.
Of course, we work together. We pull it up little by little, place a board under the engine, then an iron plate, and little by little we pull it through the passenger seat. Everything at the top is lubricated so that it slides. Then we take out the engine, load it somewhere, take it to the repair site, and this is what it all looks like. Everything is welded and reinforced just in case.
UAZ "Tadpole" and "loaf" monotonous engine lineup. So I’ll share my experience of how to remove the engine using a pipe (3.5 meters) in an hour and fifteen minutes with three people in an open field. We twist, unscrew, disconnect everything that holds, strengthens, connects the engine to the UAZ. We leave the gearbox and transfer case in place, do not touch it, just unscrew it from the engine and pull out the radiator. Then we remove the carburetor and the valve cover, push a pipe across the interior and use a carpenter’s chain to hook the engine onto the rocker arms in the middle. And we begin to pull out through the cabin. Two of them lift the pipes by the ends, and the third, first from below, pulls the engine forward with a mounting tool behind the gearbox and then helps tilt it to the passenger side in the cabin. Then we put the engine in the place where the passenger should sit, intercept the pipe in a more convenient way... SMOKE. and pull the engine out. Put it in the reverse order. If three of us take on everything at once, unscrewing, unscrewing, disconnecting, then all the work will take exactly one hour and fifteen minutes (with one smoke break) ... This is our record! Who can do it faster, please share your experience
I always pull it out from the bottom in 1st) www.drive2.ru/l/5872270/
I sharpened the oil return fluid on all internal combustion engines, but this does not help forever.
but still, at least something... and where has it been seen that a Russian car is not in heat! A neighbor bought a VAZ KALINA half a year ago, so after 2 thousand km the engine “snotted”... as if it had already passed 100 thousand.
Removal and diagnostics of the power unit
As you know, car engine repair begins with its dismantling. Tip 3: How to remove a dashboard for installation on a Ford Focus model. And only later disassembly, replacement of damaged parts and assembly are carried out. Overhauling a power unit is not an easy task, so it is not worth doing it yourself, without the help of experienced craftsmen. But you can change the seals yourself.
In the factory repair manual for the UAZ 452 it is indicated: in order to remove the unit, you need to lift it up from the engine compartment. With a similar dismantling method, you will need 2 strong pipes (longer than the width of the cabin) and the help of 2 people.
. How to remove a side mirror on a Chevrolet Niva. How to remove the motor.
The procedure is as follows.
- First, the battery is removed and the car is put on the handbrake.
- Then the driver and front passenger seats are dismantled.
- After which the carburetor is removed along with the air filter and all damper drives. All holes are covered with clean rags.
- Next, the ground wire is unscrewed from the valve cover of the cylinder head (cylinder head).
- The wiring from the sensors and hanging equipment is disconnected.
- The generator is removed.
- If an oil cooler is installed on the power unit, it is disconnected and its tap is removed. Who filmed it, It is necessary to remove the engine for replacement. It is advisable to remove everything from it. How to remove the impeller from a pump - YouTube. The hole is plugged with a rag.
- The nuts securing the exhaust manifold are unscrewed, and it is moved together with the muffler to the side so that it does not interfere.
- The bolt securing the distributor (located near the octane corrector scale) is unscrewed and the unit is removed.
- The fuel pump is dismantled.
- After which the antifreeze is connected, the pipes are disconnected and the cooling radiator is removed.
- The fastening bolts are unscrewed, the fan along with the pulley is dismantled.
- After that, chains or towing cables are passed under the engine crankcase, attached to an eye-brace and tied to 2 pipes placed transversely on the cabin floor.
- The clutch fork drive is disconnected.
- Remove the bolts securing the gearbox to the engine.
- 2 bolts are unscrewed, the motor is removed from the pillows. How to remove the pump impeller? Water pump impeller, how to remove the wheel from the pump? Now it hangs only on the pipes and the front shaft of the gearbox.
- After which the engine is pulled forward, removed from the gearbox input shaft and pulled up and to the right.
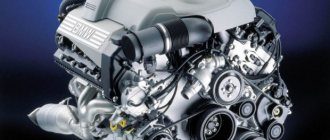
Engine GAZ 560
The Russian Steer appeared at the Gorky Automobile Plant in 1998, when an Austrian company sold a license to the Russians. According to tests, the Austrian engine turned out to be the best among all diesel engines:
Used GAZ 560 engine ready for installation
- Was undemanding to fuel;
- Started well in sub-zero temperatures;
- Had good dynamics and high efficiency;
- I used diesel fuel sparingly.
The first copies of engines were assembled by Gorky residents mainly from imported parts, so the quality was excellent. It was planned to produce 250 thousand copies per year, taking into account that the products would be supplied to other Russian enterprises.
The main difference between the GAZ 560 internal combustion engine is its monoblock design. The block and cylinder head were inseparable from each other and formed a single whole. Advantages of this design:
- there is no head gasket, and replacement is not required if it overheats;
- coolant does not get into the oil because the gasket does not burn out;
- the block head cannot come loose since it is a monolithic part of the block.
It should be noted that in theory everything is always better than in practice, and prototypes are not an indicator. Subsequently, many problems arose with the Russian “Steyer”, and purely Russian factors were to blame. The quality of the fuel sometimes turned out to be such that even the most adapted Russian diesel engine could not withstand it. And after parts for the motor began to be manufactured in Russia, motors began to fail much more often.
The monoblock design does not allow repair of the cylinder block or cylinder head:
- it is impossible to bore the block to fit the repair dimensions of the pistons;
- re-liner the cylinder block;
- The problem occurs even with a burnt out valve.
GAZ 560 turbines are very demanding on the quality of engine oil. Therefore, car owners who are accustomed to pouring any oil into the engine often have problems with the turbine.
This is what the GAZ 560 engine turbine looks like
Technical characteristics of GAZ 560
The 4-cylinder turbodiesel GAZ 560 was produced in several modifications:
- GAZ 560 with a power of 95 hp. With.;
- GAZ 5601 with an intercooler with a capacity of 110 hp. With.;
- GAZ 5601 with an intercooler and an upgraded control unit with a capacity of 125 hp. With.
The most common on the Gazelle was the 110-horsepower engine.
Engine assembly process for Gazelle
- Number of cylinders – four;
- Presence of turbocharging – yes;
- The arrangement of the cylinders is in one row;
- Engine volume – 2.1 l;
- Piston diameter – 85 mm;
- Piston stroke – 94 mm;
- Maximum speed – 4750;
- Compression ratio – 20.5;
- Fuel consumption – 11.5 liters per 100 km.
Fuel consumption may vary depending on load and operating conditions. It should be noted that for Sobol cars it is less. According to reviews on the forums, “Sobol” with “Steier” on the highway can consume 8 liters of diesel fuel per 100 km, which is simply an excellent indicator.
How to Remove the Engine from a UAZ Bukhanka Video
UAZ “tadpole” and “bread” uniform composition. Therefore, I will share my experience after three hours in an open field to remove the engine from the pipe (3.5 meters). We twist, unscrew, disconnect everything that holds, strengthens, and connects the engine to the UAZ. We leave the gearbox and gearbox in place, don't touch it, just unscrew it from the engine and remove the radiator. Then remove the carburetor and valve cover through the cab, insert the pipe across and through the rocker arm in the middle, it is better to connect the engine with the carpenter's chain. And we begin to pull the interior. They lift two at the ends of the tube and the first one at the bottom, installing the gearbox, pulls the engine forward and then helps turn it into the passenger side of the cabin. Then we put the engine in the place where it should sit next to the passenger, we catch the pipe more conveniently... SMOKE. and pull out the engine. Put it in reverse order. If three people try to unscrew, unscrew and disconnect everything at once, then it takes exactly one hour and fifteen minutes (one break) to do everything... This is our record! Who goes faster, share your experience
I always take out the bottom in the 1st) www.drive2.ru/l/5872270/
I have increased the oil return flow in all internal combustion engines, but this does not help forever.
but still at least something... and where can you see that the Russian car is without estrus! a neighbor bought a VAZ KALINA six months ago to have the engine “flooded” for 2000 km... as if 100,000 had passed.
A crankshaft with a seal instead of a seal is great...you don't have faith, we have faith...and you can cut the rear threads instead of the factory oil and gas serration on the lathe. then the oil will definitely not run.
Here I bought a hundred of the freshest internal combustion engines, and there I screwed on the oil seal, I’m thinking of recapitalizing the internal combustion engine and inserting it into the head. Perhaps then it will eventually go to the root, and it will be possible to pour in solid oil, although now I do not go below Lukoil.
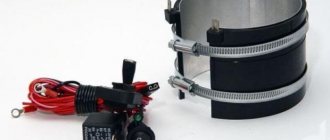
What to consider when replacing the UAZ Bukhanka stove fan
The fan housing in the SUV family is designed to direct the flow of outside air to the heater core and further into the cabin through the air duct system and deflectors. The standard impeller turns out to be ineffective due to the presence of rather large gaps (about 1.5 millimeters or more) between the fan blades and the walls of the housing. The features of the original impellers are such that it is almost impossible to reduce this gap. The fact is that the fan on the side where the electric motor is located has a belt, which is designed to hold the blades together, but not along their leading edge, like most stove fans, but along the outside. Because of this, modification of the gap becomes impossible. At the same time, the blades themselves are made as if they were unknown to the wind tunnel: with large curvature and the presence of axial/radial runout, which manifests itself after a short period of operation of the car. Moreover, the motor itself is so heavy that special legs are used to mount it.
In addition to the above, when modifying the UAZ Bukhanka stove fan, the following important nuances must be taken into account:
- In order for the heating system to operate as efficiently as possible, the stove radiator must be installed so that it is located below the upper level of the coolant line. It is also necessary to ensure that the system is always 100% filled with antifreeze - otherwise, each percentage shortage will be proportional to the same level of decrease in temperature in the cabin. In Bukhanka, to do this, you need to make the cooling system circuit closed by moving the atmospheric valve from the neck cap of the main radiator to the cap of the expansion tank, which is the top point of the cooling system (this scheme is used, for example, on the Gazelle, VAZ V8, Moskvich 2141);
- when replacing a fan, preference should be given to the centrifugal option, which is much quieter;
- the motor with the impeller should be located before the heater radiator, which will improve air heating and also help reduce the noise level when the motor and impeller operate;
- it is necessary to ensure the passage of air through the heater cells solely due to the pressure pumped by the fan, and not due to the kinetic energy of the air flow. In other words, fan blades should not drive air directly onto the honeycombs, since in this case turbulence is formed that prevents uniform heating of the air;
- it is also necessary to modify the temperature control system for the coolant supplied to the cabin. Instead of a faucet, you should use a damper that will mix cold and hot flows in the required proportion. When such adjustment is carried out by a faucet, your options will be limited, since the thermal regime will depend on the temperature of the power unit;
- the most comfortable microclimate assumes that the higher temperature is concentrated in the area of the feet of the driver and passengers, not reaching the lower back. The air at face level must be cool, otherwise drowsiness occurs, which is unacceptable for the driver. Alas, according to the laws of physics, all processes proceed exactly the opposite: warm air tends upward, and cold air concentrates below. This means that the leg area can only be heated by force, by directing warm air into the area. In this case, cooler air should blow into the upper part of the body, and again hot air onto the windshield. Reducing the temperature of the face blowing can be achieved by additionally selecting cool air using the same damper that we mentioned above.
All these conditions are satisfied by the standard VAZ-2108 heater, but there is also a significant negative point - due to its dimensions, the VAZ stove is unlikely to fit into the rather scarce under-torpedo space of the Bukhanka. A similar scheme is used in the Volvo-244, including a hot/cold air mixing mode, but such a unit is much more expensive, and it will be extremely difficult to get it.
If the climatic aspect worries you to a much lesser extent than fogging and frosting of glass, then the reason may lie in the lack of exhaust ventilation (except for the numerous cracks). The same problem exists on the VAZ four, and in Oka it is located in such a place that it becomes completely ineffective.
Typically, the place where air exits to the outside is arranged in the rear upper part of the cabin, since this is the most favorable area with maximum vacuum. Such an area is easy to identify on any car: in this place the amount of splashes falling on the body will be minimal. If we talk about the Ulyanovsk SUV, then this is the area in the area of the rear pillar on its side. But when installing exhaust ventilation, it should be equipped with a check valve in the form of a curtain. It should open when natural draft occurs inside the cabin, but close if the situation changes to the opposite (for example, during strong gusts of side wind). This precaution will prevent your own exhaust gases from entering the cabin.
Finally, we should warn you that you should not install too powerful a stove motor. If too much air passes through the stove radiator at high speed, it simply will not have time to warm up, and instead of improving heat transfer, you will get the same, if not worse, indicator.
Removal and installation of the UAZ-3151 engine
Removing and installing the engine on vehicles of the UAZ-31512 family
Before removing the engine from a vehicle mounted on an inspection ditch, do the following:
1. Drain the cooling system and oil from the engine crankcase.
2. Remove the air filter.
3. Disconnect the exhaust muffler pipe from the engine.
4. Disconnect the cooling system, heater and oil cooler hoses from the engine.
5. Disconnect and remove the cooling system radiator.
6. Disconnect the air and throttle valve drive rods from the carburetor.
7. Disconnect all electrical wires from the engine.
8. Disconnect the clutch release slave cylinder and connecting rod from the clutch housing.
9. Remove the bolts securing the front engine mounts along with the lower mounts
Rice. 1. Removing the engine from the car
10. Install a special bracket on the second and fourth studs of the block head (Fig. 1), counting from the front end of the block.
11. Using a lift to lift the engine, disconnect the gearbox from the engine.
12. Lift the engine and remove it from the vehicle, leaving the transmission and transfer case remaining on the vehicle frame.
Install the engine on the car in the reverse order.
The engine can be removed by lowering it down along with the gearbox and transfer case, and it is necessary to remove the cross member. This method is much more complicated than the first.
Features of engine removal and installation on UAZ wagon-type vehicles
To remove the engine you must:
Remove the seats and hood cover.
Open the hatch in the cab roof, pass the hook with the cable (chain) of the lifting mechanism through it and hook the hook to the bracket.
Lift the engine slightly and disconnect it from the gearbox.
To make engine removal easier, install a board in the doorway that will not bend under the weight of the engine.
Use the lifting mechanism to lift the engine into the hood opening and, being careful, remove it through the doorway along the board.
Install the engine in reverse order.
How to Remove a Motor from a Loaf
Bread UAZ 452 is a fairly reliable Russian jeep on all wheels. The main failures of this car are related to engine oil leaks, gearbox (CAT), front and rear axle, constant speed (CV connection) and hub connection. The main reason for the formation of such leaks is that the material from which the unique oil seals and gaskets of the above components are made is partially susceptible to corrosion under the influence of modern lubricants. Due to poor lubrication, moving metal parts wear out and require periodic replacement. It is necessary to carry out preventive maintenance on the UAZ 452 at least once a year, replace seals and gaskets, and adjust clutches.
The problem is that it is quite difficult to find a factory department to repair these jeeps. Therefore, we would like to offer you an abstract that allows you to repair a car without outside help.
Removal and diagnostics of the power unit
Unit of measurement of moccasins
As you know, car engine repair begins with disassembling it. Later, disassembly, replacement of deformed parts and assembly are carried out. Repairing a power supply This is not an easy task, so you should not do it yourself without the help of experienced craftsmen. But you can change the seals yourself.
How to install a UAZ V8 (engine)
UAZ “Patriot”, like other UAZs, requires additional “filing” immediately after purchase. True, a large number of new car owners of post-Soviet cars are limited to simply stretching all the elements and eliminating the multiple “jambs” present in the factory assembly. But the most important problem of this car is the lack of a powerful diesel engine in the range of engines. What should I replace it with? The Cummins turbocharged diesel is considered an excellent option in this case.
As soon as the Iron Curtain collapsed and used foreign cars began to arrive in our country, self-taught people appeared in the Russian Federation who wanted to install an imported engine on, in general, SUVs, or more precisely on a UAZ V8. There wasn’t even a smell of “patriotism” at that time, since various UAZ vehicles were the victims of many, sometimes stupid, attempts.
Their engine compartments were occupied by various engines, not only foreign ones, but also from Soviet trucks and, of course, buses - UAZ with a PAZ engine or a GAZ engine of the 66th model - this was natural.