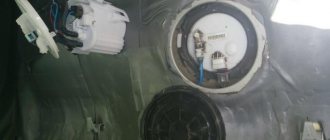
Replacing a taillight, brake light, turn or reverse lamp on an Opel Astra N sedan is not a difficult operation and you can do it yourself.
One day you notice or someone suggests that one of the lamps in the rear light of your Opel Astra H does not light up. On this car, the lamps in the rear lights are turned on by a multifunctional unit. This means that the Opel Astra H does not have separate fuses for dimensions, brake lights, turns, and reversing lamps. Therefore, if one or two lamps do not light, there is no need to look for a blown fuse; the problem is most likely in the light bulb. There are options with a fault in the wiring, contacts in the board with lamps, but this is a topic for another note.
To replace the bulb in the rear light, it must be removed. We need a Phillips screwdriver, a 10mm socket wrench (head), a plastic spatula and a flathead screwdriver.
Replacing low beam lamps Opel Astra H
1. Place the side where we will change the lamp on the jack and turn the wheels. You can, of course, not jack it up if you have a thin hand.
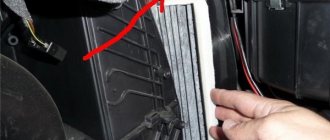
2. Open the hatch in the fender liner. It is used to change the low beam and turn signal .
3. Remove the rubber cover of the low beam lamp boot.
4. Insert your hand into the hatch and turn the lamp socket with the lamp 30 degrees counterclockwise and remove it.
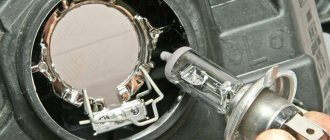
5. Remove the lamp from the socket. In order not to open the iron guide bracket, you can carefully pry the metal rim of the lamp with a flat screwdriver and it will come out.
6. Insert the lamp into the socket and press it by the metal rim.
7. Insert the lamp socket into the seat and turn it 30 degrees. We center the lamp visually.
8. Close the rubber cover.
9. Close the hatch.
How to replace
To change a light bulb in Astra with your own hands, you will need to follow simple steps:
- Prepare a new light bulb, car and tools.
- Replace according to the instructions.
To make the work easier, the machine should be prepared. To do this, you need to thoroughly wash the front wheels, fenders, bumper and fender liner areas.
A clean workspace allows you to work without gloves, and also protects the headlight cavity from foreign objects such as dust, grains of sand, and moisture.
Required Tools
To replace the dimensions, direction indicator lamps and main light parts, you will need the following tools:
- jack;
- wheel wrench;
- flat screwdriver;
- Torx hex sprocket;
- clean cloth;
- soapy water.
Taking into account the removal of the wheels, the work will take about 40-60 minutes. Before starting work, turn off the engine and remove the negative terminal from the battery.
Step-by-step instruction
Replacement is carried out in a warm room or on a flat area in the absence of rain and strong wind.
- Place the Astra on a flat surface, disconnect the terminal and apply the handbrake.
- Raise one of the front sides using a jack and remove the wheel.
- For safety, the tire is placed under the Opel threshold.
- Use a screwdriver to pry up the technological window in the fender liner and remove the rubber cap.
- A headlight plug will appear in the hole, which must be unscrewed counterclockwise and pulled out. Some versions use three Torx screws to secure the cover.
- Disconnect the connector from the halogen lamp and move it to the side. Xenon equipment is powered by an ignition unit, which is rotated in the direction of the arrow on the housing.
- Unfold the spring fasteners.
- Carefully pull the lamp towards you.
When dismantling an old part, it is important to disconnect all connectors and loosen the clamps. Otherwise, the seat may be damaged, which will require repairs.
Installing a new light bulb in the Astra is done in the reverse order. When inserting a part, it is important not to make any effort and ensure that the base fits into the grooves. If you accidentally touch the flask, it must be degreased, otherwise the declared service life will be reduced.
When reassembling the hole in the fender liner, it should be washed with soap and water. This will ensure a tight fit and prevent contamination of the optics with dirt flying off the wheel.
Replacing the brake light bulb Opel Astra H
1. Turn the latch to the left and open the hatch.
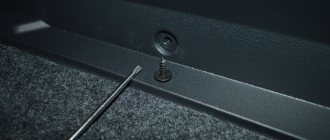
2. Turn off the power and unscrew the two plastic nuts by hand. Nuts secure the taillight.
3. Press the button marked below and pull the headlight out of the latches.
4. Use a Phillips screwdriver to unscrew the three screws securing the rear headlight cover. After unscrewing the screws, open the two latches.
5. Remove the cover and change the headlight bulb. To remove the lamp, you need to lightly press it and turn it to the left, you will feel it come free. We install it in the same way, press it and turn it to the right.
6. Install the cover, close the two latches and tighten the three screws.
7. There is a groove on the headlight, and a corresponding hole on the body. We install the headlight so that the groove fits into the hole on the body and snap it into place.
Snap it in by simply pressing it with your hands. It also happens that during installation the edges of the rubber button jam. We help it come up with a flat screwdriver.
8. Connect the power and tighten the two plastic nuts by hand.9. Close the hatch and secure it by turning the latch to the right.
Replacement features for modifications H and J
The low beam lamp of the Opel Astra J is similar to the Astra modification in the H body, however, there are no windows in the fender liners for easy replacement. Therefore, there are several options for dismantling the lamp:
- Removing the radiator grille and bumper.
- Removing the air box on one side and the washer fluid tube on the other.
Removing the bumper is considered a long and labor-intensive method. This will require many tools and a lot of time. When removing parts in the engine compartment, replacing a lamp in an Opel does not take much time and is not very different from a similar operation in most cars.
Replacing the low beam lamp in the Opel Astra H is carried out by removing the wheels and accessing the cover through a special hole. Some car repair shops do not know about this method and require a large amount of money to remove the headlights.
Opel is equipped with two types of lights. To replace a burnt-out spare part, you will have to spend about an hour of your personal time and use a minimal set of tools. After completing the work, you should check the light angles and adjust them if necessary.
Replacing front headlight bulbs in Opel Astra H
1. Remove the rubber boot of the headlight.
2. We put our hand in and take out the lampshade with the lamp. It is on a latch and simply pulls out.
3. Remove the oversized lamp from the lampshade and install a new one.
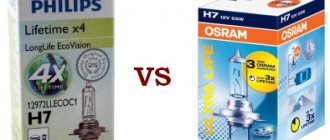
It is better to change to an LED lamp.
4. Insert the lampshade with the new lamp into the seat and snap it into place.
The difference between incandescent lamps and LED lamps is noticeable. Below is a before/after photo.
Replacing Opel Astra lamps
Opel Astra lamps
The Opel Astra car has gas lamps installed in its base. The service life of such lamps varies from 600 to 800 hours of operation. Over time, the lamps run out and they stop working. It often happens that the fault of a non-working lamp is not the lamp itself, but oxidized wires.
Replacing the lamp in the front and rear headlights is not difficult, you just need to have a certain tool and a lot of patience. Before replacing the lamp, you must turn off the ignition and the corresponding light switch.
Replacing the glove compartment lamp in Opel Astra H
1. Use a flat plastic screwdriver to pry out the edge of the lampshade.
2. Disconnect the power connector from the lampshade.
3. Use a flat-head screwdriver to dig out and remove the burnt-out glove compartment lamp.
4. Install a new light bulb. Snap into the contacts by hand.
5. Connect power to the lampshade.
6. We insert the power cable into the hole and snap the lamp into place.
Make sure that the light does not come on after closing the glove compartment.
Replacing license plate lamps in Opel Astra H
1. Use a flat-head screwdriver to pry it up and remove the lampshade.
2. Take the lamp base, turn it slightly to the left and pull it towards you.
3. Remove the lamp from the base by simply pulling it towards you.
4. Install a new lamp.
5. Insert and turn the base slightly to the right. You will feel when fixation occurs.
6. Insert and snap the lampshade into place.