Comments: no Published: 02/10/2016
Rating:
Tags:Bumper repair
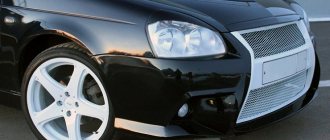
The bumper in a car is the most protruding part of the body, which, in addition to being decorative, has a protective function, absorbing and softening impacts in frontal collisions. From this it is clear that this body element is damaged quite often, so it is often necessary to restore it. This is done in several ways, one of which is repair by gluing individual fragments. Therefore, many car enthusiasts are interested in how to seal a bumper with their own hands and what glue to use. Let's figure this out.
Do-it-yourself car bumper repair: how to seal a crack tightly?
In any collision, be it an accident or bad parking, the bumper takes the blow. Gluing is used as one of the options for repairing cracks and holes. Glue for a car bumper requires a special, mechanically stable one. It should have good and fast adhesion, not spread when applied, fill and restore large damaged areas.
Top 7 adhesives for car bumper repair
Bonding is an alternative way to repair bumpers. Considering that the bumper has a protective function, it is important to restore it in such a way that it does not crack on the first bump and retains its ability to withstand impacts.
What kind of glue can be used to seal it:
- 3M 05900. Professional repair composition for automotive plastic parts (PP, PP/EPDM, PE, ABS, PC). It is a two-component mixture. After hardening, it corresponds to automotive plastic, remains plastic, and is easy to sand. A set of 2 tubes of 150 ml costs 4,500 rubles. and more.
- 3M Automix 55045. Glue for quick car restoration. Its composition is specially developed for simple and durable repairs of bumpers and other parts. The two-component mixture quickly hardens, becoming one with the plastic (suitable for all types). After hardening, the area can be drilled, sanded, or trimmed. Approximate price – 2500 rubles. for 50 ml.
- TEROSON Terokal-9225. Two-component polyurethane-based adhesive. Used for repairing car bumpers and other parts made of polymers (PP/EPDM, SMC, PC, PA, ABS, PUR). The composition quickly polymerizes, can be coated with varnishes, and can be sandblasted. At room temperature, after 5 hours, 85% hardening is observed. A glue gun is required for application. The approximate cost of 50 ml of glue is 1400 rubles.
- JetaPro 5594. Elastic two-component adhesive for repairing plastic body parts. Sets in 1 minute, completely hardens after 2 hours. The composition is well suited for repairing through damage, as well as for fixing car elements. Resistant to mechanical stress, aging, can be drilled and sanded. Glue color is black. Cost 50 ml – 450 rubles.
- Mannol SCT 9918 2K-PUR. Two-component polyurethane adhesive. It is used for structural as well as cosmetic repairs of plastic products. It retains elasticity for a long time, is resistant to aging, moisture, and does not settle. Complete hardening for mechanical processing occurs in 20–30 minutes. Approximate cost – 250 rubles. for a volume of 30 ml.
- Mannol 9904 Epoxi-Plastic. Two-component adhesive (epoxy-based polymer resin) is designed for ultra-strong and quick gluing of plastic parts: bumpers, spoilers, headlights. At room temperature, the mixture hardens in 5 minutes. Complete hardening occurs after 2 hours. The composition is suitable for cosmetic repairs (transparent, matte). Price per tube (30 g) – 240 rubles.
- Novol PLUS 710. Repair kit consisting of polyester resin, hardener and glass material. The fiberglass obtained from it has good strength, fills large holes, strengthens and fixes plastic and metal parts. After hardening, the surface can be sanded and coated with any polyester putty. The approximate cost of the set (250 g) is 370 rubles.
3M glue, as well as some other types of glue, require the use of an adhesion activator (primer). You will also need a special glue gun for application.
How to properly seal the bumper?
The technique for gluing the bumper may vary depending on the adhesive composition chosen. As a rule, these changes are minor and are reflected in the instructions.
To glue a car bumper, you need:
- Wash the part thoroughly and, if necessary, level the surface.
- Degrease the damaged surface on both sides. Wait until dry.
- Clean the edges of the crack, creating a recess for the glue. Then grind an area within a radius of 5–7 cm around the perimeter of the crack (breakdown). Clean both sides.
- Remove dust and degrease the surface again.
- Apply film to the front side of the bumper. It will prevent the composition from leaking.
- Fill the crack with glue from the inside, spread it with a spatula and put a reinforcing mesh on top. The edges of the hole must be overlapped by at least 5 cm.
- Apply adhesive to the mesh.
- After 5 minutes, remove the film from the front side. Fill the crack with glue and spread it in a layer around the perimeter 5 cm from the damage site.
- After 20–30 minutes, sand the surface.
- Carry out further repairs.
How to seal a plastic bumper tightly is shown in the video:
Questions and answers
How reliable is bumper repair using the gluing method?
Soldering plastic parts is considered the most reliable type of repair. However, this is not always possible. A bumper made of thermosetting plastic does not burn together, as it does not melt, but darkens and crumbles. The cracks on it are glued together. If you use professional glue and follow the technology, the reliability will be high.
What is the best bumper adhesive?
Among auto repairmen, 3M adhesives are the most popular. With their help, you can glue holes, as well as recreate missing fragments. The only negative is the high cost and the need to purchase an activator and a glue gun. At home, adhesive compositions of the middle price segment are more often used - JetaPro and Mannol.
So, the most reliable way to fix cracks on a bumper is soldering. However, it is impossible to produce it yourself: you will need expensive equipment. In addition, some types of plastic do not melt at all. At home, gluing a plastic bumper is most often used. Special two-component adhesives or a set of polyester resin and glass mat will help to seal the crack efficiently and reliably. Prices for material start from 240 rubles. and ends with 4500 rubles. If the application technology is followed, all of the listed types do an excellent job.
How to repair a crack in a plastic bumper yourself
Many drivers have encountered the problem of cracks appearing on their car bumpers. If it is plastic, then you can repair the damaged area yourself. There are many different ways to restore the aesthetic appearance of a bumper made of this material without resorting to the services of a car service.
Below we will discuss in detail the process of self-repairing damaged parts of a car body.
Adhesive for repairing plastic bumpers
The bumper in a car is the most protruding part of the body, which, in addition to being decorative, has a protective function, absorbing and softening impacts in frontal collisions. From this it is clear that this body element is damaged quite often, so it is often necessary to restore it. This is done in several ways, one of which is repair by gluing individual fragments. Therefore, many car enthusiasts are interested in how to seal a bumper with their own hands and what glue to use. Let's figure this out.
Damage to the plastic bumper
It is easy to guess that the bumper can be damaged with a high degree of probability if the car is used quite intensively and even with very careful use. The bumper can be damaged not only due to lack of driving experience, but for reasons such as:
- actions of other careless and inexperienced drivers;
- the ejection of small stones from the movement of other vehicles.
Regardless of the cause and nature of the damage, the appearance of the vehicle after a bumper breakdown is significantly worse. The car owner automatically has a desire to solve such a problem by repairing the bumper with his own hands.
Methods for eliminating the problem and mechanical damage directly depend on what kind of defect was applied to the car part. Among the most common types of damage are:
- Scratches , which can be superficial and deep, that is, reaching the ground or the main layer of the part. This damage must be repaired immediately, as cracks may subsequently appear at the site of the scratch.
- Cracks are more serious damage to a car part, which is classified as dangerous. It is not recommended to operate the machine without eliminating it.
- Dents are formed through strong mechanical impact on the bumper. These injuries are very often accompanied by other unfavorable manifestations. Scratches and cracks almost always appear next to dents.
- Chips and breakdowns . These are special through damage that have a fairly large area. They most often appear along the edges of the bumper after a car collides with a certain obstacle.
Of course, you can contact any service center, but in this case the cost of restoring the bumper, even with minor damage, becomes significantly higher than the cost price. Of all the options listed above, self-repair will be the optimal and affordable method of bumper restoration.
Bonding as a bumper repair method
The most effective ways to restore the integrity of plastic are now:
Each method has its own advantages and disadvantages. Experts use gluing or welding depending on the type of plastic . However, the adhesive compositions that are widely available today make it possible to gradually abandon the welding method. After all, gluing is much more convenient and accessible to everyone due to the simplicity of the process.
What is the bonding process? This is a rigid, permanent connection of two or more fragments due to the adhesion of an adhesive to the parts being connected. That is, one of the requirements for glue is its high adhesion to this type of plastic. The better the adhesive adheres to the material, the stronger the connection will be.
MAXI-PLAST adhesive is intended for all types of automotive plastics
However, adhesion depends not only on the characteristics of the plastic, but also on the degree of its preparation for the gluing process. To ensure sufficient adhesion, you should:
- maximize the area of bonded surfaces;
- carry out thorough cleaning of the parts being connected;
- effectively degrease the surface.
These measures must be carried out in combination, that is, none of them should be neglected.
The second quality that glue must have is that its physical properties after hardening correspond to the same characteristics of the material being joined. For elastic parts (rubber, for example), the same adhesive is selected. Plastic requires a rigid connection, therefore the adhesive mass should become solid after polymerization. If you select the adhesive composition very carefully, you should take into account its compliance with the material being joined in many other physical properties.
It is very important to carefully prepare the bumper for painting:
Materials and technology for bumper repair
Materials and technology for bumper repair
Repair work to restore the bumper consists of the following restoration actions:
- Removal of cracks by gluing and soldering;
- Applying putty to smooth the bumper surface and sanding to achieve perfect smoothness;
- Painting the area to be restored, drying and varnishing.
To determine whether repairs are needed in a particular case, you should have an idea of the types of damage. Depending on the type of damage, all subsequent repairs of plastic bumpers are determined.
- Cracks are a type of damage in which plastic or paintwork breaks. The occurrence of cracks may depend not only on the quality and composition of the material itself, but also on the operating mode.
In this case, repairs are made by heat welding. The main thing in such repairs is to correctly align the cracked parts. That is, it is necessary to return the bumper to its original shape and weld the damaged parts with a material that has a similar melt viscosity as the bumper material itself.
- Scratches are damage to the surface of the bumper material that resemble the longitudinal appearance of grooves. Scratches are characterized by deep damage and this is what should be taken into account when selecting a repair technology.
When the scratches are not too deep, you can quite easily do the necessary work to repair the plastic bumper. Usually, for these purposes, the entire bumper or some of its parts are painted. That is, they carry out work to protect the paintwork, dull the areas near the damage by applying a layer of varnish, then apply primer and paint with varnish, and the final process is drying the varnish using a special lamp with a temperature of no more than sixty degrees Celsius.
- Dent - with this damage, the bumper is deformed and its shape changes, which occurs due to mechanical load and heating. As a result, compression or stretching of the deformed parts of the bumper occurs, and if the dents are deep enough, then the paint surface may also rupture.
Bumper repairs are carried out by heating. Repairing a minor dent on a bumper is quite simple, provided that the paintwork has not been damaged - for this, a special technical hair dryer is used, which is capable of heating the bumper material. During the heating process, the bumper becomes soft and, with some effort, you can return it to its original appearance.
Once the type of damage has been determined, the most suitable one can be selected from the bumper restoration options listed below.
Welding method for plastic bumper
Welding method for plastic bumper
Before you begin repair work, you should stock up in advance on materials for bumper repair, such as:
- electrodes;
- metal reinforcing mesh;
- metal plate;
- paints and varnishes;
- electric soldering iron;
- heat gun.
The algorithm of actions is as follows:
- Soften the gap seam to a suitable melting temperature using a heat gun or a technical hair dryer.
- Connect the two parts of the cracks together and weld them, while trying to achieve maximum alignment.
- Place a reinforcing metal mesh directly on the seam and the area surrounding it to strengthen the seam, and solder it to the bumper itself.
- Apply putty to the repair area and sand it. After this, paint, varnish and dry.
In order to restore a torn or lost piece of plastic, it is necessary to take a certain part of the corresponding material and solder it into the surface of the bumper along with a metal reinforcing mesh. After this, all that remains is to carry out the final steps: prime, putty, paint the entire bumper or part of it that has been repaired.
Also, if some bumper mounts are damaged, it will not be difficult to restore them. They can be recreated from ordinary electrodes, or you can build up the plastic using an electric soldering iron, attaching fasteners to the base of the bumper and securing it with a metal plate to avoid quick breakage in the future.
Heating method for plastic bumper
Heating method
Required tools:
- construction hair dryer;
- degreasing agent (alcohol will also work);
- polishing wheel;
- dye;
- varnish
Necessary actions:
- The bumper must be removed and washed thoroughly. There should not be anything superfluous on it, otherwise even small foreign objects will affect the quality of the work performed.
- The next step is drying and degreasing the bumper surface. After inspecting all the damaged areas of the bumper, you should outline for yourself the boundaries that require repair.
- After completing the above work, the next step is to heat the bumper using a hair dryer. But we must remember that the faster the bumper heats up, the faster it cools down. It is also necessary to adhere to safety precautions when working with a hairdryer to avoid possible skin burns. When a certain part of the bumper is being processed, it should be heated from the inside, otherwise the paintwork may deteriorate even in those places where repairs were not required.
- When sufficient heating has been produced, the crack needs to be repaired. Next, use a grinding wheel to polish the fracture site. To ensure high-quality subsequent painting, it is necessary to achieve the most even surface possible.
- After cleaning the bumper from sanding marks, you can begin the painting procedure. Apply paint and wait for it to dry completely. Afterwards, cover it again with a layer of paint. When the second layer dries, apply a layer of varnish.
As a result, by following a simple technology for restoring the bumper, you can easily bring it back to its proper form.
When there is only a minor scratch left on the bumper, you can get rid of it quite easily. You can use the following method for this:
- Clean the scratch area with sandpaper.
- If the scratch is deep, then it is worth applying a layer of putty. After this, sand it.
- Apply primer, then paint and varnish. And at the end, dry the part of the bumper to be repaired with a special lamp, but do not allow it to dry out, otherwise the paint may swell.
Method for gluing a bumper with fiberglass
Method for gluing a bumper with fiberglass
When the bumper material is fiberglass or hard plastic, then repairing a plastic bumper is carried out using this method.
Required materials for bumper repair:
- "Bulgarian";
- tape or special glue (but in no case, not household or construction glue!);
- epoxy or polyester resin;
- fiberglass;
- putty, primer,
- degreasing agent;
- paint, varnish.
Work process:
- Thoroughly clean and rinse the entire bumper.
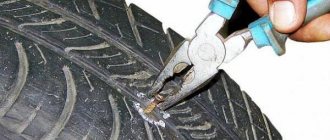
- Treat edges of cracks. When a rupture occurs, threads of material form at the edges of the cracks, which prevent the parts from fitting tightly and accurately. Therefore, these protruding fibers are removed using a grinder.
- After processing the edges with a grinder, you need to join the suitable bumper elements together and secure them with glue or tape.
- The next procedure is to apply prepared epoxy or (more modern) polyester resin to the crack and the area close to it.
- Saturate the fiberglass fabric with the above-mentioned product and lay it on the break.
- Apply layer after layer of glue and fiberglass until the patch is equal in thickness to the bumper at the damage site.
- After the fiberglass has hardened, you need to work on the front side of the bumper. Using a grinder, a V-shaped groove is made from the outside so that the edges of the break meet the patch.
- Fill the resulting recess with impregnated fiberglass until final leveling.
- When everything has hardened, grind it with a grinder.
- The restored bumper element should be puttied, cleaned, degreased, primed in a couple of layers and painted. When painting the bumper in body color, the dried layer of paint is coated with varnish in one, or possibly two layers.
Proper bumper repair by gluing
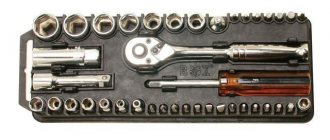
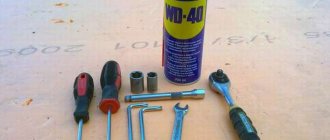
To work, in addition to glue and the damaged bumper itself, you will need:
- self-adhesive tape;
- some kind of abrasive or cutter;
- degreasing liquid;
- detergents.
Work should begin by thoroughly washing the parts to be glued, after which they should be dried. The further process has the following sequence:
- It is necessary to make corner cuts on the joining surfaces to be glued to form a funnel-shaped depression. It is more convenient and faster to do this with a milling cutter. If it is not available, a needle file or file will do.
Create a recess using natfil
- Clean the surfaces to be glued and the areas around the seam from any accumulated dust and degrease. If manufacturers have added special lubricating additives to the plastic, an adhesion stimulator can be used to improve adhesion.
- Having aligned the bumper parts to be connected as much as possible, the seam on the front side is sealed with tape (preferably foil). Self-adhesive tape will secure fragments of plastic and prevent glue from leaking out.
- The bumper is turned face down and the seam is filled with adhesive. To improve the effect, a polymer or metal mesh moistened with the same glue is applied to the inner surface of the bumper on top of the seam. The polymerization (hardening) time for different adhesives is different; it can be from 15 minutes to several hours. During this entire period, it is necessary to ensure the immobility of the glued fragments.
Carefully apply two-component adhesive and reinforcing material to the gluing area.
After the adhesive mass has completely cured, you can begin further work on repairing the bumper (putty, primer, painting).
Possible methods of repairing damage
The scheme according to which the repair of plastic bumpers will be carried out depends directly on the degree and level of damage. The following recovery techniques may be applicable:
- Bonding – used for parts produced by cold molding. A special polyurethane-based adhesive is used here.
- Heat sealing – suitable for bumpers that were made by hot molding. The bumper fragments are connected using special welding equipment.
- Lamination is a method suitable for restoring lost fragments with similar ones. A special reinforcing mesh and putty are used here.
- Use of flat electrodes . The technique is based on the use of a special construction hair dryer, which melts the electrodes and effectively seals cracks.
- Soldering is the best option for repairing a bumper at home. You will need to use a soldering iron, sandpaper and paint.
- Soldering with reinforcement - suitable for repairing large cracks. The process is based on the use of double-sided soldering and simultaneous reinforcement with special staples or metal mesh.
- Sealing - repairing the crack is done using fiberglass and epoxy glue. The restoration material is applied to the glue and strictly on both sides of the bumper.
Below is a description of the most common and labor-intensive methods for restoring a car bumper, depending on the damage caused.
Putty
The previously prepared putty must be prepared according to all the rules of the instructions, and a special hardener must be added. After this, the resulting mass is applied to the area of the bumper where the damage is located. You need to wait about 10 minutes, take sandpaper No. 80 and use special circular movements to grout the composition. The result becomes visible after several manipulations.
When grouting, you should try to carefully observe the overall geometry of the bumper. To ensure optimal proportionality, it is advisable to apply several layers of putty at once. Each previous one must be cleaned very carefully.
Primer
Priming work is no less simple. You need to take the prepared rags and rinse the bumper very well. Once the surface is dry, you need to inspect the entire bumper for correct shape. If there are no dents, you can start priming. This process is carried out according to the following rules:
- The primer must be applied in a circular motion towards the left or right side of the element.
- The composition must be allowed to dry completely.
- After this, take sandpaper No. 800 and rub everything down thoroughly.
- Using a regular water bottle, you need to wash the bumper. It doesn’t matter where the crack or other damage occurs, the bumper must be washed completely. As soon as one layer is completely dry, the plastic automatically takes on a matte finish. The top soil is then completely washed away.
- Only after this can a second layer of primer be applied.
Once all the applied layers have dried, you will need to carefully inspect the part using a lamp. The layers should be completely even and form one whole together.
This is interesting: Tuning Subaru Impreza
Painting
If, after examining the part, it becomes clear that all coatings have been applied as efficiently and evenly as possible, you can proceed to a process such as painting. The room must be prepared, all surfaces that need to be protected from the paint used are covered. The pigment is applied strictly in two or three layers. Drying time between each coat should be between 5 and 10 minutes.
If, during the inspection of the surface between applying layers, particles of debris or dust are found, you need to wait until the paint layer has completely dried and remove them with a special interlayer cloth.
After applying the required paint coating, two layers of varnish are applied to the surface of the bumper. Intermediate drying is also important here. Upon completion of the painting work, you need to check the quality of the applied compounds again; if smudges are detected, you need to lightly sand and thoroughly polish the surface.
Choosing adhesive for bumper repair
Experts distinguish several types of plastics that are used to make the bumpers of modern cars. For each type of plastic there is the most suitable adhesive composition. Therefore, when choosing an adhesive when purchasing, you need to know exactly what polymer forms the structure of the bumper (its marking), selecting an adhesive specifically for this type of plastic.
If you choose suitable adhesive compositions by brand or brand, you should pay attention to such products.
How and with what to glue a bumper on a car with your own hands
Coat all cracks on the outside with hot glue (use a gun) or plasticine. This will prevent the epoxy from leaking out during drying and seal the future seam. Seal the outside with tape over hot glue. This will additionally maintain the shape of the bumper during the repair process.
The main function of a car bumper is to protect the car body from damage. The elements are the first to take impacts in the event of a collision, running into a high obstacle, or during careless maneuvers. Sometimes you can glue a damaged part yourself.
But you need to carefully choose the composition: the glue for gluing a bumper on a car with your own hands is not always suitable for a specific type of part. Before choosing repair compounds, you need to know exactly what material the front pad is made of. Thus, epoxy-based adhesives will be useless for repairing carbon or fiberglass body kits.
We recommend watching a video of repairs performed by body repair specialists.
Video of remaking a previously repaired bumper, an excellent example of the work of a master with his “hands”.
Video example of repairing a large hole in a plastic bumper using a hair dryer, with a detailed description.
Video from a professional what ABS plastic is, how to repair it yourself, what seams to use, etc. Video example of Y-shaped seam repair.
Good day to you and happy holidays! Over the past few years I have observed, studied and applied various options for repairing plastic products. In the automotive field, the following types of work are common: Bumper repair, headlight repair, radiator repair (fender, molding, etc.), motorcycle plastic repair, snowmobile plastic repair, etc.
Before you begin repairing a product, you need to determine what material (plastic) it is made of. As a rule, the parts have designations for the type of plastic (PP, PPE, PPH (+ other variants of PP (Polypropylene)), ABS), but there are parts without designations, which will have to be determined experimentally. Since this post is still about repairs and not about how to determine the type of plastic, let’s continue.
1st method:
I’ll call it “Dedovsky is “
soldering plastic with a soldering iron and mesh
”
In my opinion, its main and only advantage is accessibility. Soldering iron price 100 rubles + mesh. The main disadvantage is that the material changes its properties (burns) and becomes brittle. As practice has shown, once a crack or hole has been repaired using this method, subsequent damage becomes very problematic or even impossible to repair. Conclusion:
it is worth using if there are simply no other options
. 2nd method:
Currently,
plastic welding
.
Here the main rule is to weld the material in a similar manner; if PP plastic is to be repaired, then the electrodes (filler material) must be of a similar composition. At the moment, we have mastered the welding of plastics such as PP (and its modifications), ABS, Plexiglas (aka acrylic, polycarbonate, polymethyl methacrylate, plexiglass), Polyamide (PA is plastic in radiators). In general, all known plastics are welded except fiberglass (since it is a composite material.
The filler material, also known as the electrode, can be made independently from unnecessary spare parts, or you can use a special one (as the manufacturer claims, with increased adhesion). I was able to attend a seminar of one of them
3rd method:
Bonding plastic “
with reinforcing powder
”.
The technology is simple and toxic. Some businessmen position its components as “NANO-technological”
.
It is based on cyanoacrylate glue
one of the variants
Cosmofen CA 12
, 3M, Henkel also have similar adhesives, and even ordinary “super glue” has this base; the reinforcing material is ordinary tea soda. This method allows you to work where welding is simply not possible. Also, with this repair method, plastics of different compositions can be glued together. The repair seam is strong and holds tensile loads well, but do not forget that it is not elastic. Particular attention must be paid to respiratory and vision protection. Toxic both during gluing and during processing.
4th method:
Bonding plastic
with Dichloroethane
Dichloroethane or dichloroethane glue dissolves plastic to a “liquid” state. Thanks to its properties, it allows you to quickly and most aesthetically glue homogeneous compositions. The main thing is not to let the treated surfaces lose their shape. Can only be used with materials that dissolve (tested on PP and Plexiglass).
Possible damage
Main damage to bumpers:
- cracks, through holes;
- scratches, paint chips, dents.
Penetrating damage to metal bumpers and their reinforcements is repaired by welding, patching, and, less commonly, with epoxy resin. Plastic, fiberglass, made by hot and cold molding - gluing using special compounds. Non-through damage (scratches, dents) are pulled out and straightened after removing the part from the car.
Each bumper is marked by the manufacturer. International certification letters help to quickly determine what material the part is made of.
| Marking letters | Material |
| ABS (ABS plastic) | Polymer alloys of butadiene styrene, characterized by increased rigidity |
| RS | Polycarbonate |
| RVT | Polybutylene |
| RR | Regular polypropylene, medium hardness |
| PUR | Polyurethane, minimum weight |
| RA | Polyamide, nylon |
| PVC | Polyvinyl chloride |
| GRP/SMC | Fiberglass, has minimal weight with increased rigidity |
| RE | Polyethylene |
Why do cracks appear?
A cracked plastic bumper is always the result of a mechanical shock, since the material does not corrode and does not wear out. This could be a collision with an obstacle, an accident, or a blow. For polyethylene structures, which are more soft, cracks are an uncharacteristic failure. Even after a significant accident, body kits become wrinkled and deformed. Fiberglass, plastic, and plastic bumpers are more likely to crack.
What types of damage cannot be repaired on your own?
Since 2005, one of the leading research technical centers AZT continues to test manufacturers' bodies for repairs. According to studies of plastic bumpers, the center confirmed the recommendations of automakers for the repair of plastic and fiberglass body elements and issued a directory with catalog numbers of repair kits. According to experts, any damage to a plastic bumper can be repaired.
In practice, repairs after a serious accident are impractical: it is cheaper to buy a new part. But drivers successfully repair minor damage on their own:
Craftsmen do not recommend repairing if part of the element is completely torn off and lost, with a large area of diagonal tear in the side and central parts. It is possible to glue a bumper tightly on a car only taking into account the material of the part and using the appropriate repair method.
Types of damage
During operation, the car is subject to minor damage. As you move, small pebbles, sand or other small details fly off the road. Minor scratches or dents occur. Cracks or breaks may occur as a result of hitting obstacles or minor collisions.
Scratch
Such damage can be minor superficial or deep. In the first case, only the paintwork is damaged without touching the base. Deep scratches penetrate into the material of the structure and eventually lead to cracks. Liquid plastic is used to repair the bumper.
Dents and punctures
Another damage to a part is the formation of a dent or cavity. Occurs as a result of mechanical or chemical influences. This deformation is accompanied by scratches at the damage site. In addition, cracks of a mild, medium or severe nature are possible. Serious damage includes punctures and chips. This is when, when colliding with an obstacle, a through hole or chip of a fragment occurs.
Crack
This is a defect in which end-to-end damage to the structure occurs. It is necessary to repair the bumper when it is cracked as soon as possible. In this case, using a car is not recommended. After all, during movement, the bumper receives vibration loads, due to which the cracks increase. And this makes the part less durable and unsafe to use.
What materials are used for gluing the bumper
Depending on how to glue the car bumper, choose materials and tools. To repair a crack in a plastic or fiberglass part, use the fiberglass bonding method. You will need:
- special glue or tape;
- polyester resin (or epoxy);
- fiberglass;
- degreaser;
- auto enamel;
- putty, automotive primer.
The tool used is a grinder. With its help, the repair edge of the bumper is prepared and final grinding is carried out.
Grinding the bumper with a grinder
When using the heat sealing method for gluing plastic overlays, it is necessary to correctly determine the heating temperature. After overheating, the plastic becomes brittle and is unable to hold the reinforcing mesh that is installed to fix the crack. This method is considered complex and is more suitable for thermoplastic parts.
Polyurethane based adhesive
Properly selected polyurethane-based adhesive has high adhesion, quickly fills the damage area, and does not spread. After drying, it is easy to sand, has maximum vibration resistance and can withstand significant force.
One of the proven compounds that allow you to seal a bumper on a car with your own hands is the Novol Professional Plus 710 repair kit. The glue works with plastic and metal. Does not lose characteristics when applied to acrylic primers. After the composition has hardened, the surface is sanded, polished and painted.
Bumper bonding kit
You can also seal a plastic car bumper with two-component adhesive based on polyurethane Teroson PU 9225. The composition is intended for repairing most elements made of ABC plastic, plastics of the RS, RVT, PP, PUR, RA, PVC brands (polyethylene, polyurethane, polypropylene). The manufacturer recommends applying the composition with a glue gun, and for large cracks using fiberglass to strengthen the structure.
Universal superglue
You can glue a car bumper when you don’t know exactly what class of plastic it is made of, using superglue. The line of synthetic compounds offers more than a hundred items. There is no need to prepare the plastic before gluing; the composition dries from 1 to 15 minutes, and after cleaning it holds up well to paint.
Four brands are the most popular.
- Alteco Super Glue Gel (Singapore), breaking force – 111 N.
- DoneDeal DD6601 (USA), 108 N.
- Permatex Super Glue 82190 (Taiwan), maximum tensile strength – 245 N.
- “The Power of Superglue” (PRC), 175 N.
Repair methods
Repair of plastic bumpers occurs in two ways: gluing and welding. The second option requires skills and experience. But you can experiment with gluing.
Gluing
You can also repair the bumper with your own hands using gluing. To do this, the edges of the parts are well processed. This will allow them to dock well. If a piece of molding is missing, it is replaced with another similar one or an element is made from glue and fiberglass. Holes and grooves for the thread are made along the edges of each element to be glued. The edges are pulled together and the surface is treated, degreased.
Do-it-yourself restoration of a bumper occurs in the following order: first, cut the fiberglass to the required size. Glue is applied to it so that the fabric is well saturated. The adhesive composition is also applied to the seam. Fiberglass is placed on the damaged area and covered with glue on top. To make the gluing process faster, an ultrasonic lamp is used.
Welding
Before repairing a plastic car bumper with your own hands, prepare electrodes from raw materials that are similar to the material of the damaged structure. First, clean the damaged area from dirt and paint. Then the edges of the tear are carefully processed with a soldering iron. The electrode is prepared the same as the size of the seam, and its cross-section should resemble a triangle. The sharpened electrode is placed into the crack and carefully welded with a soldering iron. The remains are removed with a grinder and sanded until the surface is smooth.
Rules for choosing an adhesive composition
It is necessary to begin repairs by choosing an adhesive composition, which, after hardening, should:
- form an integral structure with the bumper;
- do not burst in the cold;
- do not peel off under high temperatures;
- be resistant to the ingress of aggressive reagents, gasoline, oil.
To glue a plastic bumper on a car with your own hands, use the following compounds:
- Weicon Construction. The glue has high elasticity and strength. After hardening it does not crack. To strengthen the structure when repairing large cracks and faults, it is used with fiberglass.
- AKFIX. Spot bonding adhesive. Suitable if the crack or through dent is no more than 3 cm. When using, primer does not need to be applied.
- Power Plast. Firmly seals large cracks. The composition is resistant to aggressive reagents and water. One-component adhesive is toxic; it is necessary to work with gloves and a respirator.
Thermoplastic and thermoactive adhesives are used if the bumper will be painted immediately after repair, in which case the composition will fix the crack as reliably as possible.
DIY tool for welding bumpers with electrodes
The technology of welding plastic parts currently makes it possible to achieve excellent quality repairs at home. For repairs you will need:
- soldering station or heat gun with a special nozzle for soldering car bumpers. A professional soldering station complete with a soldering iron will cost about $100, but a soldering iron can be purchased separately. The only drawback of construction hair dryers is that the soldering attachments lead to overheating of the heating element and rapid failure of the hair dryer. If you plan to repair bumpers and other plastic elements, then purchasing a soldering station will be the best solution.
- Electrodes. Unfortunately, the cost of ready-made twigs for soldering is quite high. Therefore, it is better to make them yourself from available materials. Only compatible types of plastic can be used as electrodes. Most car bumpers are made of polypropylene alloys (PP, PP-EDM) or ABS. Without much difficulty, a similar type of plastic can be found among headlight housings and fender liners, of which there are a great many in the landfills of garage cooperatives and body repair stations. It is most convenient to use an engraving machine to sand and clean the repair area.
Repair technology
Each type of plastic has a threshold melting temperature, significantly exceeding which leads to loss of elasticity and strength. How to weld a bumper yourself:
- sand the old paintwork at the repair point with P80-P120 abrasive;
- to form a strong Y-shaped seam, the crack walls need to be slightly expanded;
- Observing the temperature regime, first heat the plastic and then the electrode itself. When laid correctly, the descending rod should be preceded by a ball of molten plastic.
- For reliable welding, it is important that the area where the electrode is placed is also heated.
- Following the technology, place the electrodes not only along the crack, but also at several points across the fault line.
Bonding technology
Repair consists of several mandatory steps that cannot be skipped or swapped.
- Removing the bumper. If the plastic cover is cracked in several places, before removing it, you need to secure it with tape from the outside (so that the part does not fall apart).
- Preparatory work includes choosing an adhesive composition, selecting tools, cleaning the bumper, and preparing the surface. All work is carried out in a warm, well-ventilated area.
- Gluing process.
- Grinding.
- Painting.
If it is necessary to repair a small crack, chip or deep scratch, after preparing the bumper, glue is applied from the outside, filling the gap with the composition, and lightly pressing the plastic. If the crack is significant and crosses the edge of the lining, use epoxy glue and fiberglass.
Preparation
Preparing the bumper before gluing it with epoxy glue and fiberglass in steps (if there is a significant crack):
- Wash the bumper and dry it.
- Sand the damaged area with coarse sandpaper, this will increase adhesion, and degrease with white spirit.
- Correct the fracture site.
Coat all cracks on the outside with hot glue (use a gun) or plasticine. This will prevent the epoxy from leaking out during drying and seal the future seam. Seal the outside with tape over hot glue. This will additionally maintain the shape of the bumper during the repair process.
Materials and tools
If there is a large gap, the bumper on the car must be sealed with two-part epoxy glue, which is diluted before the main work. The assorted two-component compounds “Khimkontakt-Epoxy” and the one-component “Nowax STEEL EPOXY ADHESIVE (steel 30 g)” earned good reviews from drivers.
What you will need for work:
- epoxy - 300 g;
- fiberglass - 2 m;
- brush;
- automotive primer, degreaser, auto enamel;
- sandpaper, scissors.
Repair process
Measure the required amount of fiberglass to cover the entire fracture area and cut it off. Craftsmen recommend using fiberglass rather than fiberglass to glue the bumper to the car. The material will increase the density of the seam and its strength.
Dilute epoxy glue if using a two-component composition. Take 10-12 parts of resin, 1 part of hardener, mix thoroughly. Leave for 5 minutes in a warm place (20-23 degrees).
Repair process step by step:
- Coat the inside of the body kit generously with glue.
- Apply fiberglass fabric, press it to the bumper, soak it with glue, make sure that no air remains.
- Apply glue and glue the fabric in 2-3 layers.
- Apply the last layer of glue.
- Place the bumper in a warm place for 24 hours, preferably in such a way as to reduce the stress on the crack, but not on its side, since the resin will drain as it hardens.
Bumper painting after repair
The final stage is putty and painting. After the glue has dried on the outside of the bumper, the bumper is sanded and primer is applied, and after drying it is painted.
Features of repair of certain types of damage
In the process of restoring the integrity and appearance of the bumper, the work to be done will depend on the type of damage found. This is an important point, since one option is used for scratches and chips; to remove a dent, a completely different method must be used.
If you need to carry out repairs yourself, or the insurance is not valid, or you do not have the means or desire to contact a service center, you will need to carefully study the nature of the damage. If the driver realizes that the bumper is very damaged, you should not try to restore the part on your own, but it is better to purchase a new one. If relatively small chips or dents are detected, the problem can be eliminated independently, knowing how to act in a particular case. So, how can you quickly and effectively repair scratches, dents and cracks?
Scratches
This problem can be eliminated by using sandpaper. Material No. 50 is taken and grouting is carried out. In this case, you need to carefully eliminate all irregularities, working until the surface becomes completely correct in shape. During this process, the damage may become slightly larger in size, but its depth will become significantly less. Don’t be afraid of this; after thorough cleaning, all uneven areas will be filled with putty.
If you have the desire and certain skills, then instead of putty you can use a special liquid plastic that fully matches the type of material from which the plastic is made. After applying this composition, after it has completely dried, you will also need to clean the surface and thoroughly sand it, sanding it to the most even surface.
Dents
To remove a minor dent that has not damaged the paintwork, you simply need to heat the deformed part of the bumper. The concave part of the plastic must be heated with a previously prepared heat or technical hair dryer until the material becomes soft enough. After this, the dent is manually straightened, simultaneously giving the damaged area of the bumper the correct geometric shape.
Cracks and chips
If cracks appear on the surface of the bumper, you will need to use a previously prepared metal mesh and a soldering iron. The sequence of actions in this case will be as follows:
- The edges of the damage must be brought together and soldered to one side of the mesh. It is advisable to bury it as deeply as possible in the plastic, but you should not overdo it, as a hole may form.
- The end of the mesh is covered with molten plastic.
- In a similar way, you need to walk along the entire crack.
If the damage to the bumper is minor, you can use special construction staples instead of a mesh. When soldering them, it is recommended to use tweezers, which will prevent burns to your hands. Bonding actions should be spaced 2 cm apart and along the entire length of the crack.
Even if the cracks are not very visible, they still need to be carefully soldered. Neglecting this advice can lead to the appearance of various faults on the bumper.
To prevent the mesh and metal brackets from rusting after some time, the items must be covered with special liquid plastic. Upon completion of all work carried out on the inner surface of the bumper, its front side immediately acquires its original appearance.
Fiberglass bumper repair
Fiberglass body kits are marked UP, PUR, and are manufactured using hot and cold molding. The main condition for self-repair is to use resin or polyester resin as an adhesive.
It is important to remember that resin is not glue and has a minimal percentage of adhesion to smooth surfaces. Therefore, before gluing, the surface is sanded with coarse sandpaper and thoroughly degreased. Fiberglass is used as a sealant. Required tools and materials:
- polyester resin + hardener;
- fiberglass.
Materials, equipment and facilities
When carrying out a process such as self-repairing a plastic bumper, you will need to prepare special tools and materials. Among the most important of them are:
- Special hair dryer for vehicles . This accessory is used for drying applied compounds. Unlike a conventional device used to dry hair, it produces hotter air, which, if necessary, can not only dry, but also melt the plastic.
- Soldering iron . Any device is suitable here, even one intended for use at home. If possible, it is better to buy or rent a more powerful device.
- Metal grid . The material is necessary for high-quality and durable fastening of individual parts of plastic. If it is not possible to purchase a mesh, you can use material from a previously used and no longer needed air filter.
- Primer . This is a special composition that is sold in ordinary cylinders. It is advisable to ensure that you have a special compressor or gun for convenient application of the primer.
- Putty . This product is necessary to eliminate cracks of different sizes and depths. You need to know that the composition can only be used in places hidden from outsiders.
- Sandpaper . Required for grouting the applied putty during the final stage of repair work. To work with the bumper, it is better to purchase sandpaper No. 800.
- Rags - you will need it for washing the bumper and for treating the surface with a hairdryer, preventing the risk of burns from the flow of hot air.
This is interesting: Self-replacement of front and transverse stabilizer bushings: 2 step-by-step instructions
When preparing tools and equipment for bumper repair, you need to take care of your protection. It is worth purchasing a special respirator mask, safety glasses and gloves.
Well-thought-out protection will allow you to comprehensively protect your respiratory organs, eyes and hands from exposure. This automatically guarantees that the body will not be harmed by the spray of harmful substances in the air and from high temperatures.
How to restore the shine and uniformity of paintwork at the site of a crack
Sanding and priming are the last stage of work before painting. The difficulty of local painting is that it is almost impossible to choose the original color. Even if you choose auto enamel of the original marking, class and type, the color will still not match. The reason is simple - the paintwork color of the body kit changed during use.
Completely painting the bumper is the easiest way to update the part. After painting, the part is polished with soft circles and a colorless acrylic varnish is applied, which preserves the gloss of the paintwork for a long time and evens out the discrepancy in tone if it was not possible to choose the original shade.
Source