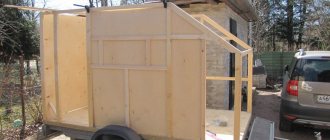
Many people know that you can assemble a compressor from an old refrigerator, and in a home workshop, without special skills. But not everyone is familiar with the technology and secrets. If you think carefully, an air compressor can be useful in any garage, workshop or household. With its help you can paint a car, pump up tires, or start any pneumatic tool. Even blowing off dust is also useful. Let's consider the version for painting.
Compressed air is a faithful assistant for painting, for inflating tires and in everyday life.
There is always a use for an air compressor in the garage: from simply blowing away dust from surfaces treated with abrasive to creating excess pressure in pneumatic tools. A considerable part of the compressor's working life is spent on painting the car. And this imposes certain requirements on the air flow created.
It must flow strictly evenly and not have any impurities in the form of drops of water, oil or solid suspended particles. Defects such as graininess, shagreen and cavities on a freshly applied paint coating occur precisely due to foreign particles entering the jet. Paint drips and dull spots on the enamel occur when the mixture flows unevenly.
Branded electric mini air compressors from the manufacturer have all the functions for ideal operation of the airbrush, but their price is very high. You can save money and create a functional model that is not inferior to professional ones on your own by studying theoretical information and watching the video material “do-it-yourself compressor” as a guide.
The operating principle of all models, both homemade and professional, is quite simple and is as follows. The device is connected to a 220V electrical network, and excess pressure is created in a device for storing compressed air, called a “receiver”. Air can be pumped either manually or mechanically.
Interesting! When feeding manually, financial resources are saved, but a lot of effort and energy is spent on controlling the process. With automatic injection, all these shortcomings are eliminated; the only thing that remains is a routine oil change in the air pump.
Next, compressed air is supplied through the outlet fitting in a uniform flow to the actuators. As you can see, there is nothing complicated, and you can create a working model in a few minutes.
&feature
Factory or homemade compressor
There is a list of specific requirements for a painting station. The main condition is the need for a uniform supply of air, without any impurities. Standard defects that occur due to the presence of foreign particles include graininess, shagreen, or cavities in the enamel coating. If the paint flows unevenly, drips or matte heels may form.
Of course, if you pay attention to branded air compressors, then such installations are equipped with all the necessary functions for high-quality operation of the airbrush. The only drawback of such units is their cost.
To save money and at the same time create a functional model that is not inferior to professional equipment, you need to familiarize yourself with the theoretical information base or watch a video on the topic “compressor for painting a car with your own hands.”
one of the first homemade compressors
The operating principle of any model, regardless of whether it is homemade or factory-made, is the same. Excessive pressure is created in the tank. The method of air injection is different (manual, mechanical). In the case of manual feeding, there is a significant saving in money, but a lot of energy is consumed. After all, the process requires constant monitoring.
Automatic inflation allows you to avoid these disadvantages, with the exception that the oil for the air compressor requires periodic replacement. Thus, there is a uniform supply of air to the distribution device. In theory, this looks extremely simple, so it is possible to create an efficient compressor station in a short time.
How to make a simple household compressor with your own hands
One option would be to make a compressor for painting from a used car inner tube. For production you will need:
- receiver - car camera . It can be with a tire, it can be without it;
- supercharger - car pump with pressure gauge;
- nipple from an unusable camera;
- tire repair kit;
- tailor's awl.
Having collected the necessary materials, we proceed directly to the manufacture of the device.
We take an unnecessary car inner tube and check it for leaks by inflating it with a pump. If the balloon holds air, then everything is fine, and you can move on to the next stage. If there are leaks, localize the damaged areas and seal them or vulcanize them with raw rubber. Next, a hole is made in the prepared receiver for an additional nipple, through which a uniform stream of compressed air will subsequently emerge. We glue the additional fitting using a rubber repair kit and connect it to the spray gun. We unscrew the nipple in it - the air flow should come out freely.
Useful! We leave the nipple in the original nipple of the car camera - it will work like a valve, holding excess pressure.
Then we experimentally determine the required level of air pressure in the receiver by spraying paint on any surface. The enamel should lie evenly, without jerking. The amount of excess pressure is determined using a pressure gauge and should be such that when you press the aerator button, its level does not change abruptly.
Assembling such a model of compressor yourself will not be difficult, but you will immediately be convinced of the effectiveness of repairs using a compressor rather than using cans of paint. The main thing is to follow the rule - no moisture or dust should get into the car chamber, and, therefore, then into the spray gun. Otherwise, they will mix with the car enamel, and all the painting work will need to be done again.
The assembled model will work properly, but it is better to automate the air injection and make additional changes to the design.
Mechanical supercharger for VAZ - pros and cons
The larger the engine and the more cylinders it has, the higher its power. This is the very first conclusion when observing motors and machines. But this is not always the case. The more fuel burned in the engine cylinders, the more power it can produce. But the cylinder volume is finite, and I want to have increased power. This is where a mechanical air blower comes to the rescue.
The principle of its operation is extremely simple and works on any car, including the VAZ 2107, 2106, 2114, 2112 family - it provides additional air to the engine, resulting in:
- the purging of the cylinders increases, and they are better freed from the remains of burnt fuel;
- more fuel enters the engine cylinders, which ensures more power;
- The compression ratio increases, which also gives an increase in power.
Semi-professional compressor for DIY painting
According to experts, homemade compressors with receivers have a longer service life than models from domestic and foreign manufacturers. And this is understandable - everything is done with your own hands and, even if some part fails, replacing it will be a matter of a couple of minutes. Let's consider how to make an air compressor for home and work that is not inferior to products from well-known companies from easily available materials that we will need according to the list below:
- pressure gauge;
- gearbox with oil and water separating filter;
- pressure control relay;
- gasoline fuel filter;
- plumbing crosspiece (quad) with three-quarter internal thread;
- threaded adapters;
- car clamps;
- compressor motor;
- receiver;
- semi-synthetic motor oil with viscosity 10W40;
- toggle switch for 220 volts;
- brass tubes;
- oil-resistant hose;
- thick board for the base;
- pharmaceutical syringe;
- rust converter;
- studs, nuts, washers;
- sealant, fum tape;
- metal paint;
- needle file;
- furniture wheels;
- filter for diesel engine power supply system.
Finding all the components is not difficult; you should start with the heart of the entire system - the air blower.
Supercharger made from a plastic bottle
Many people know the situation when there is a problem with filling oil into a gearbox, transfer case, automatic transmission, etc. After thinking a little, I collected the necessary funds that were at hand and assembled the supercharger myself. At the same time, I remembered the program about crazy hands.
This device requires such components as a 5-liter plastic bottle, two valves, several fittings, and a metal tube.
To operate the supercharger, you need to fill it with 1 liter of oil, then connect a compressor - a car compressor will do - and increase the pressure to 2 kg/cm2. After this, close the air valve. Done, you can use the device. To do this, insert the hose into the filler hole of the gearbox and open the oil injection valve.
Homemade air blower from a refrigerator: we use a moisture separator, a receiver and a motor
We will use a compressor from an old refrigerator as an internal combustion engine. As a rule, they are equipped with a start relay, which is very convenient for constantly maintaining a certain level of pressure in the receiver.
Expert opinion
Ilya Vyacheslavovich
Consultant for body repair at krasymavto.ru
Ask a Question
It is preferable to use compressors from old Soviet-style refrigerators; they allow you to pump higher pressure than their imported counterparts.
After removing the control unit from the old refrigerator, clean it of accumulated dirt and rust. Then treat with a rust converter to prevent further oxidation. This will prepare the engine housing for further painting.
Next, you should change the oil in the compressor.
Rarely has a refrigerator undergone regular maintenance and lubricant replacement, which is quite justified - the system is completely isolated from the effects of the atmosphere. You can use semi-synthetic motor oil; it is in no way inferior to compressor oil and, in addition, has many useful additives.
There are three tubes on the compressor - 2 open and one sealed. The open ends are intended for air circulation, one of the tubes is the inlet, the other is the outlet. To determine which path the air is taking, briefly apply power to the compressor.
Important! And remember which duct draws in air and which exhausts.
The sealed tube is intended for routine oil changes. The closed end must be carefully removed. To do this, we file the tube in a circle with a needle file, trying to prevent metal filings from getting inside the system. Then we break off the sawn-off tip and drain the old oil into some container to determine the amount to be replaced. And fill in the semi-synthetic in a slightly larger quantity using a syringe.
Then the engine lubrication system must be turned off. To do this, select a screw of the appropriate size, wrap it with tape to seal it, and screw it into a tube. A refrigerator blower tends to leak grease - that is, there are droplets of oil in the output air stream. They will be retained by the oil/moisture separator for the compressor . With our own hands, we then mount the engine with the starting relay on a wooden base in the position in which it was attached to the frame.
The compressor relay is sensitive to its position in space and its top cover is often marked with an arrow. Only with proper installation will the process of switching modes proceed correctly.
Medium Power Air Compressor
A medium power air compressor is created from a gas cylinder or fire extinguisher To do this, connect an old fire extinguisher (cylinder) and a powerful auto compressor to inflate the wheels. When making the device yourself, you must follow the following rules:
- Containers with mechanical damage and corrosive deposits cannot be used.
- The structure must be well fixed.
- A steel sheathing must be made. This is necessary if the receiver accidentally ruptures.
- It is necessary to provide a pressure reserve. If you plan to increase the pressure to 5 atmospheres, then its strength should be from 10 atmospheres.
- To ensure that the compressor automatically turns off when the pressure reaches its maximum, an emergency shutdown sensor is installed. Or you should install a mechanical valve, which, if necessary, will provide an emergency pressure release.
- The high-pressure device should not be left for a long time if it is used in rare cases. To maintain tightness, 0.5 atmospheres is enough.
Do not neglect safety precautions: do not forget about installing emergency sensors. An overinflated tire will simply burst, and if a steel cylinder explodes, you can get seriously injured.
Making a compressor with your own hands is not difficult . Its design can be simple or complex, the main thing is what it is intended for and how much you are willing to spend on its manufacture. But do not forget that the device must meet technical safety requirements.
Painting a car is a complex and specific task. Its complexity largely lies in the fact that not every person has the opportunity to use special equipment. Doing the work with your own hands is not so difficult if you practice beforehand and learn how to operate the equipment efficiently. But the equipment itself is very expensive to rent. You can try to make all the necessary funds yourself and save a lot of money. A homemade compressor for painting a car can be a successful technical solution that will serve very well.
There are several options for producing a homemade device for professional or amateur painting. For some, an adapted compressor from an old refrigerator will be a worthy option. But in reality, you need to take into account the high requirements of the car body for the application of paints and varnishes. So the equipment must meet certain quality and functionality parameters. Otherwise, it will not be possible to perform the work efficiently and reliably. Homemade devices for painting cars often do not work the way you want them to. So before making a compressor, make sure you have the technical skills to do so.
Compressed air receiver
Fire extinguisher cylinders are best suited for storing compressed air. They are designed for high pressure, have a large margin of safety and are ideal for mounting attachments. Let's consider the metal body of an OU-10 fire extinguisher with a working volume of 10 liters as a receiver. This cylinder is designed for a pressure of 15 MPa or 150 bar with a large margin of safety.
the locking and starting device (ZPU) from the future receiver and in its place we screw in an adapter, onto the threads of which we wrap fum tape .
If the fire extinguisher has traces of corrosion, they must be removed using abrasives and a rust converter. On the outside, everything is easy to do, but on the inside you will have to tinker a little. To do this, pour a rust remover inside the bottle according to the instructions and shake the contents thoroughly. Then we screw in the plumbing cross, using sealant and fum tape for sealing. So, the two main parts of our compressor are ready, and we can proceed to the next stage.
Oil blower from fire extinguisher
On occasion, I took fire extinguishers to one organization to recharge. At the same time, I found out from a friend that there was a defective fire extinguisher that was going to be sold for scrap.
This defective fire extinguisher was the beginning of this project.
Step-by-step description of supercharger manufacturing:
1
.
First you need to take a decommissioned powder type fire extinguisher with a volume of 2-3 liters and empty its contents. 2
.
Next, you need to measure the PVC intake pipe of the fire extinguisher, taking into account the tightly screwed nozzle. If necessary, cut the tube to the required length, carefully and accurately. 3
. You need to take a new standard rubber tip for tubeless rims that have a spool.
4
.
Let's prepare a drill with a drill whose diameter corresponds to the internal groove of the tip. 5
.
Now, in the side of the body of the former fire extinguisher, you should drill a hole for the rubber tip. 6
. Next, metal shavings are removed from the fire extinguisher body, and the hole made is checked to see if there are burrs on it. If there is, take sandpaper and process it.
7
.
After this, taking the wire, you need to pull a rubber tip for tubeless discs from the inside of the body, which should fit tightly into the hole made with a groove. 8
. Let's start filling the tank with transmission oil.
9
. Now you need to assemble the supercharger and apply a pressure of 1-2 atmospheres to it with a compressor.
10
.
The device is ready for use. eleven
. We have a pleasant time operating the supercharger and enjoy the results obtained.
With this device, created on your own, oil will no longer flow on your hands and clothes.
How to assemble an air blower
For ease of storage and movement, it is best to arrange all compressor parts compactly on one base. We will use a wooden board as a base; on it we securely mount the engine - supercharger and the fire extinguisher body as a receiver. A typical device assembly diagram is presented below.
We fix the compressor motor using threaded rods threaded into pre-drilled holes and nuts with washers. We place the receiver vertically, using three sheets of plywood to secure it, in one of which we cut a hole for the cylinder.
We attach the other two using self-tapping screws to the supporting board and glue them to the sheet holding the receiver. Under the bottom of the receiver, at the base, we hollow out a recess of appropriate size. For maneuverability, we screw wheels made from furniture fittings to our base. Next we perform the following operations:
- we use a coarse fuel filter for gasoline engines as an air intake For this purpose, we use a rubber hose that tightly presses the filter fitting and the inlet tube of the supercharger. There is low pressure at the compressor inlet and reinforcement of contact using automotive clamps is not required. Thus, we made an inlet filter for the compressor with our own hands.
- An oil separator should be installed at the compressor outlet; it will not allow liquid particles to pass through. We use a diesel engine power system filter as this protection element. We connect it to the supercharger using an oil-resistant hose . Since the pressure at the outlet of the compressor is increased, here and everywhere else, to strengthen the contact, we use automotive clamps with fasteners tightened with a screw.
- We connect the oil-moisture separating filter to the input of the gearbox. We need a reducer to decouple the pressure of the receiver and the outlet of the supercharger. We screw its high-pressure outlet into the water crosspiece on the left or right.
- We screw a pressure gauge from the opposite entrance of the quad, using it we will control the pressure of compressed air in the cylinder. We screw the adjusting relay on top of the cross. We seal all connections with fum tape and sealant.
- The relay will allow you to set a wide range of pressure levels in the receiver, promptly interrupting the supercharger power supply circuit. You can choose PM5 or RDM5 as an actuator . These devices will turn on the compressor if the compressed air pressure in the receiver drops below the set level, and turn off when the specified range is exceeded. The required pressure is adjusted on the relay using two springs. The large spring sets the minimum pressure level, and the small one regulates the upper limit, setting the compressor shutdown limit. RDM5 and PM5 were originally produced for use in the water supply network and are electrically passive, that is, they are ordinary switches with two contacts. We connect one contact to the zero of the 220 V network, and the second to the supercharger.
- We connect the phase wire of the network through a toggle switch to the second network input of the compressor. The introduction of a toggle switch into the electrical circuit allows you to quickly disconnect the system from power without having to run to the outlet every time. We solder all electrical connections and carefully insulate them.
Now all that remains is to paint the entire compressor and move on to field testing.
Disadvantages of the electric option
Many of my readers think that making such a system is very simple, you need to take some kind of cooler and insert it into the air intake pipe and that’s happiness! Such “miracle coolers” are usually sold in Chinese online stores; we’ll talk about these types below.
However, guys, not everything is so simple here. In normal (idling) mode, a naturally aspirated 1.6-liter engine consumes approximately 300 - 400 liters of air per hour of operation. And at high speeds, say 4000 - 5000, we multiply this figure by 4 - 5, that is, 1200 - 1600 liters. Just imagine this volume! If you calculate the minute consumption 300/60 = 5 liters per minute, or 20 at high speeds.
So - the electric turbine should increase this figure, and not slow it down! If you install a weak engine, it will not pump up the required pressure, but will create an “air lock” effect, that is, with its blades it will slow down the flow of air into the engine and interfere with normal passage.
Now imagine what an electric version of the engine is needed to pump such a volume! I repeat, to increase performance you need at least 6 - 7 liters of air at idle, and 25 at high, and this is for the 1.6 liter version; for larger volumes you need more.
If we draw an analogy with German manufacturers, then they use at least a brushless 0.5 kW electric motor, which rotates at crazy speeds, can reach up to 20,000 and its pressure capacity ranges from 1 to 5 atmospheres.
For more powerful cars, more powerful engines up to 0.7 kW are used.
As it becomes clear, a standard generator may not be able to handle such electricity consumption, so it is replaced with a more powerful one, or an additional one is installed.
And as you know, high energy consumption simply slows down the generators, and therefore increases engine braking, which will affect its output and reduce efficiency.
However, the experiments carried out revealed an increase in productivity by approximately 20–30%, which is significant. But due to the complexity and high cost of the devices, application on cars is not yet in mass production.
For example, mechanical compressors are much cheaper and more efficient. Sometimes the difference in price can reach 5 – 7 times.
Adjusting the pressure in the receiver chamber
After assembling the structure, you should check its functionality. We connect a spray gun or a tire inflation gun to the compressor output. After that, with the toggle switch off, plug in the plug into the network. We set the control relay to minimum pressure and then apply power to the supercharger.
The pressure created in the receiver is controlled using a pressure gauge. After making sure that when a certain level is reached, the relay turns off the engine, we check the tightness of the air ducts and connections. This is easy to do with a soap solution.
After making sure that the compressed air does not leave the system, we bleed it from the receiver chamber. As soon as the pressure in the cylinder drops below the set mark, the relay should operate and start the compressor. If everything is functioning properly, you can try painting some unnecessary part.
Preliminary work to prepare the surface for applying enamel is not required here - it is important for us to develop skills and determine what pressure will be required to paint the product. We experimentally determine the value in atmospheres at which the excess pressure is enough to paint the entire part in a uniform layer with a minimum number of blower activations.
As you can see, creating a car compressor with your own hands is not particularly difficult. A device made according to the second option requires more time to manufacture, but it will all pay off with further use. The system of automatic pressure control and supercharger start-up will allow you to work with greater convenience, without being distracted by control over the receiver chamber. The compressor can be used not only for car care . You can use it to paint a fence or garage door.
Important! In order for a self-made compressor to serve for a long time and properly, routine maintenance should be carried out. This is, first of all, regular oil changes and timely replacement of filter elements.
Since we have securely attached the motor to the base, there is no point in unscrewing it. We use a syringe to drain the oil. Having unscrewed the screw that closes the filler hole, put the hose tightly on the tube and pump out the waste. We also pump in fresh engine oil using a syringe. With filters everything is simpler - we change them as they become dirty and the filling rate of the receiver chamber decreases.
What's the result?
Let us immediately note that installing an air blower is quite possible with your own hands, especially if we are talking about using a ready-made kit for a specific engine. Also, taking into account the above, it becomes clear that although increasing engine power with the help of a mechanical compressor is quite possible, it is a mistake to believe that it will only be enough to install a compressor, after which the engine will immediately become much more powerful.
In fact, to obtain a pronounced effect, the power unit needs to be modified, and in many cases quite seriously (the block is bored to increase the working volume, then the piston stroke is also increased by replacing the crankshaft, the pistons themselves and connecting rods, valves, camshafts, etc. are changed. d.).
The only thing is that if the boost pressure is not higher than 0.5 bar, the standard power supply system on many cars does not need to be upgraded. Also, the engine in this case may not need deep tuning at all. The service life of an “unprepared” engine, of course, will be reduced after installing a mechanical compressor, but if the boost pressure is not high, such an engine can work normally for quite a long time.
Selecting a mechanical supercharger or turbocharger. Design, main advantages and disadvantages of solutions, installation on an atmospheric tuning engine.
Increased power of naturally aspirated and turbocharged engines. Deep or superficial tuning of internal combustion engines. Modification of the intake and exhaust system. ECU firmware.
Possibility of installing a turbocharger on an engine with a carburetor. The main advantages and disadvantages of turbocharging on a carburetor car.
Features of installing gas equipment on a turbocharged engine. What gas equipment is best installed on engines with a turbine. Tips and tricks.
How to increase engine power on “classic” VAZ models. Engine tuning increasing displacement, intake, exhaust, cylinder head. What to pay attention to.
Boosting the engine. Pros and cons of modifying an engine without a turbine. The main methods of boosting: tuning the cylinder head, crankshaft, compression ratio, intake and exhaust.
Which one to choose - do it yourself or buy ready-made products?
Today, the market for air compressor offerings is replete with variety. Piston, vibration, screw and many other classes of these devices are produced for various purposes . Ready-made compressors can be bought in household appliances stores, auto parts stores, and on specialized websites. The variety of products offered is so great that choosing the required product will take a lot of time.
If you decide to purchase a ready-made device, carefully study the technical specifications, price range and customer reviews.
A simple and convenient air compressor for inflating tires with your own hands
Of course, it is better not to save money and purchase expensive products from famous brands.
But a big-budget purchase is only worth it if you plan to repair cars professionally. Choosing little-known products is fraught with unjustified risks. Cheap models suffer from low-quality materials. It often happens that engine parts fly out instantly, and repairs under warranty take several months.
Useful video
Watch also the video on how you can make your own air compressor from a fire extinguisher cylinder in the garage:
From a reliability standpoint, hand-made assembly wins in many respects.
Firstly, according to statistics, compressors in refrigerators have been operating for decades .
An old refrigerator is thrown away not because of a broken engine, but because of a refrigerant leak or corrosion of the walls and bottom. And there is nothing to say about the fire extinguisher - they are made with a tenfold safety margin, which is immediately checked at the factory. So maybe you shouldn’t buy a pig in a poke, but make a powerful device on your own? Moreover, after studying the material, you know how to make a compressor with your own hands at home.
A well-made and properly functioning powerful air compressor will not only please the owner, but will also become the envy of fellow car enthusiasts.
Previous
CompressorsBasic questions when choosing a compressor for a spray gun
Next
CompressorsHow to choose and calculate the performance of a compressor for painting
Compressor from a car chamber
Compressors from a car's chamber have become quite widespread. This can be attributed to the low cost of the resulting device. Among the features of this version, we note the following points:
- You can assemble the mechanism in a home workshop. This will take a relatively short amount of time, and the work requires a standard set of tools.
- The cost of the final product is relatively low. This is due to the fact that almost everything you need can be found in the garage.
- Can be used for inflating tires or for painting work. Due to this, the scope of application of the device is significantly expanded.
- Long service life can be achieved if assembly instructions are followed.
Today, compressors are found in almost every garage. In order to save on their purchase, you can assemble a homemade structure.
In conclusion, we note that the selection of the most suitable homemade design should be based on the task at hand. An example is paint shop equipment designed for long-term operation. For inflating tires, a less functional compressor is suitable, which is simpler to manufacture and will cost much less.