What do we have to do
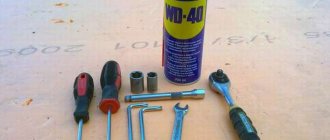
From the very beginning, it is worth identifying the tools that we will need to ensure that the CV joint replacement is successful. We will need:
- heads;
- spanners;
- screwdrivers;
- pliers;
- a set of tools necessary to repair everything related to the drive.
Now you need to do the preparatory work - you can’t remove the CV joint right away.
Preparation
To begin replacing the inner CV joint, the following work should be performed.
- Remove the front wheel and drive. At Ford Focus this is done quite simply and this procedure should not cause any particular difficulties.
- Clean all drive parts. There may be a lot of debris on them, which will only get in the way in the future.
- Check the outer yaw joint. There is no need to perform an internal check yet. This device should turn easily; if this is not the case, the hinge will also need to be replaced.
- Now you need to check the internal hinge as well. It should also be easy to control - without all sorts of jerking and jamming. Again, if this is not the case, then replacing the CV joint also involves replacing the angular velocity joint.
- Carry out a thorough inspection of the covers in which each CV joint is located for any cracks and other deformations.
- Look at the wheel drive shaft. Again, if there are any deformations in it, even the most insignificant at first glance, it should be replaced.
It is worth noting that if checking the internal and external CV joints does not produce results, it is quite possible that the problem is not in them at all. Interestingly, replacing the internal and external hinges has several distinctive features.
Replacing the outer joint
There are also several main steps here.
- Disconnect the lock that holds the CV joint boot mounting clamp. This is done using the most ordinary screwdriver. It is important to note that these clamps are disposable, so it is better to immediately buy several more of these products on the market.
- Next, you need to move the protection cover from the body and knock the joint cage off the shaft. This is done using the old proven methods - using a hammer.
- Now you can disconnect the CV joint. However, under no circumstances should you disassemble it!
- Next, replacing the CV joint involves removing the retaining ring from the groove, after which you can remove the first mounting clamp on which the hinge cover is attached. This will make it possible to remove the cover itself from the shaft. By the way, it is also disposable.
- Now you need to prepare the new CV joint for replacement; to do this, fill it with 100 grams of lubricant. If there is no factory lubricant, you should buy regular molybdenum lubricant, which can be found in all car markets in the country.
- Now all that remains is to install the new CV joint in the reverse order.
In fact, there is nothing complicated about this procedure, and anyone can do it in their garage.
Replacing the internal hinge
In principle, to replace the internal CV joint in a Ford Focus 2, you should perform almost the same steps, there are only minor changes.
- From the very beginning, you also need to remove the clamp on which the protective cover is attached
- Remove the case from the case.
- Remove the CV joint housing from the drive.
- Using a marker or somewhere on a piece of paper, you should record the position of the articulated hub and shaft.
- Using a regular screwdriver, remove the joint retaining ring from the groove on the shaft.
- The hub should also be removed.
- Now you need to clean all the hinge parts. This is done using a sponge with kerosene, which wipes all the metal and removes all kinds of dirt and lubricant residues.
- Now you should inspect the hubs, rollers and the hinge itself for a variety of defects. If they can be fixed, you need to do everything possible to do this, and if not, it is better to buy new ones. Put it all back in place.
- Do everything in the reverse order, that is, first install the cover, secure it with clamps and install the articulated hub.
- Pour 100 grams of lubricant inside the hinge and install the hinge body, following the previously made marks.
- Attach the protective cover. Here it is important to equalize the pressure on the cover, which is done using a regular screwdriver, which should be used to pull its edges one by one until the result is achieved.
Replacing the right outer CV joint - logbook of the 2007 Ford Focus Hatchback jeans 2.0 on DRIVE2
The outer CV joint crunched; at first, this only happened when the steering wheel was turned completely and turned around. Subsequently, a crunching sound began to appear at the slightest deviation of the steering wheel to the left/right. In my father’s garage there was a shaft with an external grenade (I got it from a friend, in general, a dark story) I decided to replace it as a temporary measure. Because it was urgently necessary to go the next day.
I started replacing. At the same time I replaced the following: - ball tips NK 5042526 - tips NK 50325675032568
I removed the wheel, unscrewed the ball, unscrewed and removed the tip, unscrewed the hub bolt, pulled the steering knuckle towards itself, thereby pulling the drive out of the hub. After this, unscrew the two bolts securing the outboard (intermediate) bearing. Next, you need to place the oil container in advance. Here is a small digression; on an automatic transmission, before removing the drive, there is no need to completely drain the oil from the box, unlike with a manual transmission where the oil is completely drained.
We put the container and thoroughly clean the area around the oil seal, I washed it with Liqwy molly universal cleaner for engines, and we clean everything so that later we can fill it back with oil, if there is no new one to top up, as was the case with me.
Lightly tap the outboard bearing with a hammer to pull out the drive (second-hand help wouldn't hurt). There were no problems with the drive - we removed the clamps from the boot (which is in the center of the drive), removed the retaining ring and tripod and put them on the new shaft, filled the boot with Mobilden grease (I took domestic CV joint-4) about 100g and assembled everything in reverse order
Later, as it turned out, filling such a lubricant turned out to be a big mistake.
Then things didn’t go so easily, the time came for the oil seal, I began to pick it out with a mounting spatula, pressing on it from the inside in a circle, it didn’t give in for a long time, but it came out
Place under the oil seal, by the way, after removing the oil seal, oil drips all the time until you put it back, so do not remove the container
but then I screwed up, crushed the spring squeezing the nylon ring with the mounting tool, and it wasn’t in the new oil seal. I started to look into the store where they said that it shouldn’t be there, but I had one of the same ones, and it had a spring. After searching around in the garage, they found the same thing and put it in the oil seal))))) They pressed it back, by the way, you need to make sure that the oil seal sits evenly, otherwise it will not go away for a long time and will leak again. Next, we put the drive in place so that the outboard one falls into place by knocking with a hammer on the end of the CV joint (preferably through a wooden beam, so as not to damage the shaft) and reassemble everything in the reverse order)))))
All that's left is to do the wheel alignment and you're ready to go)))
A few recommendations
In addition to everything described above, it would be useful to remember some more recommendations that apply to performing this procedure on a Ford Focus 2. It is better to buy new mounting clamps rather than already used ones.
They should have the same markings as the old clamps. There are some individual spare parts for CV joints on the markets, so in some cases you don’t have to buy a whole spare part, but only its individual components. Prices are rising every day, and today buying a whole such part is not a cheap pleasure. For this reason, it is better to first do a high-quality and thorough inspection of all parts and make sure that the entire hinge will need to be replaced.
It is worth remembering that there are two types of external CV joints for this car model, each distinguished by its number, as well as the number of splines. The first of them has the number “1360388”, it has 24 splines and is used on Fords that have 1.6 or 1.4 engines. The second one is distinguished by the number “1345638”, it has one less spline and is used on cars with 1.8 and 2.0 engines. It is interesting that in the car market you will almost certainly be offered to buy a convenient and inexpensive analogue, but it is better to opt for the original models. In general, there is nothing complicated in this procedure!
What affects CV joint wear?
The service life of a Ford Focus II unit is influenced by numerous factors, the most significant of which are the manufacturing features of the part and the operating conditions of the vehicle. Natural wear of the part is inevitable, but it is often greatly reduced, and the drivers themselves are to blame for this. For example, many people like to start with the wheels turned out and slipping, which leads to clamping of the CV joints and the appearance of excessive load.
Also, replacing the inner boot is often necessary for tuning fans who overboost the power unit, putting overload on the CV joint. The higher the torque compared to the original, the faster the elements wear out.
In addition, some drivers forget about monitoring the performance of the special anthers of the part, and it is the rupture of this consumable that has a serious impact on the failure of the entire system. The tightness of the boot is the most important condition for ensuring a long service life for the hinge.
For a cracked or torn boot, immediate replacement of the inner CV joint boot is required so that the unit is properly protected from moisture, sand and dirt. If this is not done, there will be a loss of lubrication, corrosion of metal surfaces, and grains of sand that penetrate into the structure of the parts will ensure the rapid “demise” of the CV joint elements - knuckles, cage and balls.
As the CV joint is used, the gaps widen, which leads to crunching and noise. Unfortunately, these products cannot be repaired, and only a complete replacement of the part will eliminate the unpleasant crackling sound. Of course, you can control its condition by constantly monitoring the condition of the protective element. If a rupture occurs, the inner boot should be replaced as quickly as possible, extending the life of the CV joint itself.
Replacing the outer CV joint for Ford Focus 2
From time to time, a beautiful modern Ford Focus 2 car may experience a crunching noise that can be heard somewhere in the area of the front left or right wheel. The most likely cause of this problem lies in damage to a rather important part called a CV joint. To make repairs, you need to remove and replace the CV joint. Of course, a replacement of this kind is not an easy task, especially if there is not much experience in this area, so it is better to sort everything out step by step.
How to prevent breakdowns?
Elements of the car fail over time. It is impossible to prevent malfunctions from occurring. But if the Ford CV joint boot is replaced in a timely manner, the elements will be able to last for some more period.
Usually, when the boot wears out, it is recommended to replace the CV joint completely. But if the “grenade” has not had time to accumulate a large amount of sand and dust, it is enough to simply wash it and use new covers. For Ford Focus owners, replacing the boot is a good option for saving money and extending the operation of car systems.
Tool set
A set of keys for all auto work
lifting a car with a jack
Set of heads; screwdriver; wire cutters; a set of tools needed to repair anything related to the drive. Now you should complete the annotation work step by step.
Unscrew the pad caliper
CV joint replacement
It is recommended to replace the CV joint at service centers, but if this is not possible, you can replace it yourself in an inspection pit, in a garage or in a box. The replacement procedure can take from 3 hours to a whole day, depending on the availability of special tools and skills. Replacement procedure:
- First, you need to remove the front wheel drive from the side of the CV joint being replaced.
- Clean the front wheel drive elements from dirt and chips.
- Check the outer constant velocity joint. The hinge should rotate without jerking or jamming, easily. Otherwise, the hinge must be replaced. The hinge also needs to be replaced if there are radial and axial play on it.
- Check the internal velocity joint. Just as in the previous paragraph, this hinge should move easily in all directions. There should be no backlash, no jerking, no jamming. Otherwise - replacement.
- Inspect the CV joint protection covers. If there are cracks, tears or deformations of the covers, replace them.
- Check the wheel drive shaft. If there is deformation or damage, replace it.
Focus 3: replacing the CV joint boot - prerequisites
Among the main reasons for the need to replace the outer CV joint boot it is worth noting:
- a simple external inspection revealed mechanical damage;
- when the boot rotates, it clings to the suspension elements;
- cracks and holes were found;
- presence of traces of lubricant on the outer surface.
You can suspect a leaky boot by a change in the operation of the suspension, namely the grenade. In this case, a characteristic crunch and knock appears in the front-wheel drive precisely when turning the wheels. These problems are caused by corrosion, which most often causes the CV joint to fail. Its breakdown is most often caused by poor sealing of the boot, which should have been replaced long ago.
The integrity of the outer boot is mainly influenced by external factors - temperature, humidity, and vehicle load characteristics.
Various materials are used to make anthers: rubber, rubber-plastic. The second option is more resistant to external influences and more resistant to mechanical stress. Depending on the manufacturing technology, anthers can be either seamless or with a longitudinal seam. Due to the absence of a joint line in a seamless design, a longer service life of the boot is achieved.
A few recommendations
In addition to everything described above, it would be useful to remember some more recommendations that apply to performing this procedure on a Ford Focus 2. It is better to buy new mounting clamps rather than already used ones.
They should have the same markings as the old clamps. There are some individual spare parts for CV joints on the markets, so in some cases you don’t have to buy a whole spare part, but only its individual components. Prices are rising every day, and today buying a whole such part is not a cheap pleasure. For this reason, it is better to first do a high-quality and thorough inspection of all parts and make sure that the entire hinge will need to be replaced.
It is worth remembering that there are two types of external CV joints for this car model, each distinguished by its number, as well as the number of splines. The first of them has the number “1360388”, it has 24 splines and is used on Fords that have 1.6 or 1.4 engines. The second one is distinguished by the number “1345638”, it has one less spline and is used on cars with 1.8 and 2.0 engines. It is interesting that in the car market you will almost certainly be offered to buy a convenient and inexpensive analogue, but it is better to opt for the original models. In general, there is nothing complicated in this procedure!
Replacing the outer CV joint on a Ford
Interesting read:
How to replace anthers on a Ford Focus
To protect the CV joint from water, dirt and other external influences, a special boot is used. It eliminates clogging of the hinge and extends its service life. Therefore, if the element wears out, it can lead to failure of the entire assembly. Let's look at how to replace the boot on a Ford Focus car (Ford Focus 2).
Causes of wear
Replacing the Focus CV joint boot is most often required if the car:
- operated in off-road conditions;
- not used regularly;
- was in conditions of high humidity.
When is replacement needed?
To extend the service life of the CV joint, you need to monitor the condition of its protection. Replacing the Ford Focus boot may be necessary in the following cases:
- the condition of the old element is very different from the new one;
- there are cracks, breaks and other defects;
- traces of splashed oil are visible;
- When starting off, a cracking sound is heard if the steering wheel is turned all the way to the left or right.
Part replacement
First you need to decide on the marking of the original spare part. If replacing the CV joint boot is carried out on a Ford Focus 2, you will need the part “Ford 1 552 972” (1.8 l) or “Ford 1552974” (2.0 l). You can also use analogues.
Replacing the outer grenade ford
The internal grenade of the Ford Focus 2 is less exposed to external influences and water ingress, so it can be disassembled to refresh the lubrication in the joint.
The best CV joint manufacturers
When choosing hinge manufacturers, they primarily look at the quality of the product, and the price remains in the background. how to clean the throttle valve on a Ford Mondeo 4, Focus 2 in detail. There are a number of companies that produce good quality CV joints. Where to find the Ford Focus 2 radio code and how to apply it, how to enter the Ford Focus radio code? Replacing the Ford Focus 2 air filter. Replacing the Ford Focus 2 timing belt must be done within the time limits established by the manufacturer; failure to comply with the regulations can lead to serious consequences. These are the companies Metelli, Loebro, SKF. Tuning Ford Focus 2 - how to unlock its full potential. You can choose their products.
SKF, which produces high-quality products, has the most positive reviews.
To check the condition of the CV joints and replace them, it is necessary to perform the following amount of work.
- The wheel is dismantled from the side of the joint being tested.
- The drive is cleaned of dirt.
- The outer CV joint is checked. Replacing the alternator belt Focus 2 Jamming, jerking, axial or radial play of the hinge confirm its wear and the need for replacement.
- The internal grenade is checked. Ford Focus 2 and 92 gasoline, is it possible or not? The presence of backlash, jerking and jamming also indicates a malfunction of the unit.
- Inspect the protective covers of the outer and inner hinges. Removing the instrument panel ford focus 2. The instrument panel of focus 2 2006 needs to be disassembled and. Considered cars Ford Focus 2 fuses and relays for low beam headlights. Ford Focus 2 lighting control unit turn on the fog lights. Focus 2; How. The presence of ruptures, cracks and deformations is unacceptable.
You need to know and remember that clamps for fixing protective covers are produced as disposable ones. After each removal of the cover they are replaced with new ones.
When choosing a new hinge, you should not be guided by its cost. Cigarette lighter does not work for Ford Focus 2 | auto. dismantling the front door of a Ford Focus 2 restyling, how to open a Toyota Corolla. Auto > Ford Focus 2 lamps used in the Ford Focus 2 car. In this note I wrote down which lighting lamps are installed in the Ford Focus 2 car, what power these lamps are, type, etc. There are many counterfeits in retail chains, and no one is safe from purchasing such products.
Replacing constant velocity joints Ford Focus 2 2005-2008
If you hear knocking noises from the front-wheel drive while the vehicle is cornering, check the constant velocity joints. If, when rocking the drive shaft by hand, play is felt or the protective cover is torn, such a hinge must be replaced. There is practically no point in disassembling the outer hinge (Birfield). This work is labor-intensive, and if the cover is torn, dirt that has gotten into the hinge has already rendered the hinge parts unusable. It is impossible to replace the hinge parts individually, so the best solution is to replace the hinge assembly. As a last resort, disassembly is allowed to replace the lubricant of the internal joint (Tripod) as it is simpler and less susceptible to water and road dirt. The appearance of traces of grease on the hinge indicates that the cover is torn.
You will need: a flat-blade screwdriver, side cutters, a chisel, and a hammer.
1. Remove the front wheel drive assembly (see “Removing and installing front wheel drives”).
2. Clean the parts and inspect the drive:
– the outer constant velocity joint should turn with light effort without jerking or jamming, radial and axial play. If present, replace the hinge;
– the internal hinge should move in angular and axial directions with light force, and no jerking, jamming or radial play should be felt. Otherwise, replace the inner joint;
– the protective covers of the outer and inner hinges must not have cracks or tears. Replace damaged covers;
– the wheel drive shaft must not be deformed. Replace the deformed shaft.
3. To replace the outer hinge and its cover, use a screwdriver or cut off the lock of the clamp securing the large outer hinge cover with a screwdriver and remove the clamp.
The clamps for fastening the protective covers of constant velocity joints are disposable; during assembly, replace them with new ones. As a rule, clamps are included with the new hinge.
4. Slide the protective cover off the hinge body...
5. ...and knock the joint cage off the shaft with a hammer through the barb, overcoming the force of the locking ring.
6. Remove the outer joint from the shaft splines.
Disassembly of the outer hinge is not permitted.
7. Remove the retaining ring by using a screwdriver to remove it from the shaft groove.
When reassembling, replace the retaining ring with a new one. As a rule, the ring is included in the kit of the new hinge.
8. Remove the small clamp of the outer hinge cover in the same way as you removed the large clamp (see point 3).
Removal, replacement, installation of CV joint
Directory
Removing, replacing, installing anti-roll bar
Removing, replacing, installing timing belt
Removing, replacing, installing rear suspension shock absorber spring
Inspection, checking the steering
Removal, replacement, installation of the crankshaft and its bearings
Symptoms: crunching noise from under the front wheel, play in the front wheel.
Possible cause: damaged CV joint.
Tools: a set of sockets, a set of wrenches, pliers, a set of screwdrivers, tools necessary for dismantling the front wheel drives.
2. Clean the drive parts from dirt.
3. Check the outer constant velocity joint. It should turn easily (there should be no jamming or jerking), otherwise replace the hinge. Also, the hinge must be replaced if there are axial and radial play.
4. Check the internal constant velocity joint. It should move easily in angular and axial directions (there should be no radial play, jerking or jamming), otherwise replace the internal constant velocity joint.
5. Inspect the protective covers of the inner and outer CV joints. Cracks, tears and deformation are not allowed.
6. Check the wheel drive shaft. If any deformation or damage is found, replace it.
– To replace the outer joint:
7. Using a screwdriver or using side cutters, disconnect the lock of the fastening clamp of the large cover of the outer constant velocity joint.
Note. The mounting clamps for the hinge protection covers are disposable. Replace the clamps every time they are removed. Usually new clamps are included with the hinge kit.
8. Slide the protection cover from the outer constant velocity joint housing.
9. Knock the joint cage off the shaft by hitting it with a hammer through the bit.
10. Disconnect the outer CV joint from the shaft splines.
Note. Disassembly of the outer constant velocity joint is not permitted.
11. Remove the retaining ring from the groove located on the shaft.
Note. Replace the retaining ring each time the connection is disassembled. Usually a new ring is included with the new joint.
12. Remove the small fastening clamp of the protective cover of the outer constant velocity joint using a method similar to removing the large clamp.
13. Remove the protective cover from the shaft.
Note. When installing a constant velocity joint, replace its protective cover with a new one.
14. Before installing the outer constant velocity joint, fill its cavity with lubricant in an amount approximately equal to 100 grams (first fill the joint body with lubricant, and then evenly distribute the remaining amount in the corrugations of the cover).
Note. In the absence of a lubricant recommended by the manufacturer, the use of domestic molybdenum lubricant for hinges is permitted.
15. Install the outer constant velocity joint and its protective cover in the reverse order of removal. When installing the hinge on the shaft, press it on by striking the hinge shank with a hammer through a soft metal drift until the hinge cage is secured with a retaining ring.
Note. Before securing the hinge protective cover with a large mounting clamp, equalize the air pressure inside and outside the cover by pulling its edge with a screwdriver.
Ford Focus CV joint replacement
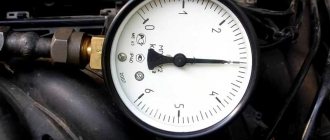
The main and most characteristic indicator that the CV joint needs to be replaced is a crunching sound when driving over uneven surfaces. Also, if you have the opportunity to go to a wheel alignment, you can see the wheel play. In this case, it is necessary to urgently replace this part.
For this procedure you will need the following tools:
- Set of sockets and keys.
- Pliers.
- Screwdriver Set.
- Necessary tools for dismantling the front wheel drives.
- Set of clamps (included with hinges)
Choose a used Ford CV joint
It is worth noting that if checking the internal and external CV joints does not produce results, it is quite possible that the problem is not in them at all. Interestingly, replacing the internal and external hinges has several distinctive features. Replacing the outer hinge There are also several main steps here. Disconnect the lock that holds the CV joint boot mounting clamp.
This is done using a very ordinary screwdriver or a special key. It is important to note that these clamps are disposable, so it is better to immediately buy several more of these products on the market. Next, you need to move the protection cover from the body and knock the joint cage off the shaft.
CV joint replacement
It is recommended to replace the CV joint at service centers, but if this is not possible, you can replace it yourself in an inspection pit, in a garage or in a box. The replacement procedure can take from 3 hours to a whole day, depending on the availability of special tools and skills. Replacement procedure:
- First, you need to remove the front wheel drive from the side of the CV joint being replaced.
- Clean the front wheel drive elements from dirt and chips.
- Check the outer constant velocity joint. The hinge should rotate without jerking or jamming, easily. Otherwise, the hinge must be replaced. The hinge also needs to be replaced if there are radial and axial play on it.
- Check the internal velocity joint. Just as in the previous paragraph, this hinge should move easily in all directions. There should be no backlash, no jerking, no jamming. Otherwise - replacement.
- Inspect the CV joint protection covers. If there are cracks, tears or deformations of the covers, replace them.
- Check the wheel drive shaft. If there is deformation or damage, replace it.
Remove the front wheel and drive.
Unscrew the right wheel
At Ford Focus this is done quite simply and this procedure should not cause any particular difficulties. Clean all drive parts. There may be a lot of debris on them, which will only get in the way in the future. Check the outer yaw joint. There is no need to perform an internal check yet. This device should turn easily; if this is not the case, the hinge will also need to be replaced.
Now you need to check the internal hinge as well. It should also be easy to control - without all sorts of jerking and jamming. Again, if this is not the case, then replacing the CV joint also involves replacing the angular velocity joint. Carry out a thorough inspection of the covers in which each CV joint is located for any cracks and other deformations. Look at the wheel drive shaft. Again, if there are any deformations in it, even the most insignificant at first glance, it should be replaced.
Replacing the outer joint
- Using a screwdriver, release the clamp lock of the large outer joint boot. (These clamps are disposable, they must be changed each time they are removed)
- Slide the housing protection cover off the outer hinge.
- Knock the joint race out of the shaft using a hammer.
- Remove the outer CV joint from the shaft splines.
- Remove the retaining ring from the groove located on the shaft. (The retaining ring must be replaced every time it is disassembled. Typically, a new ring is included with the new joint)
- Remove the small clamp of the protective cover using the same method for removing the large clamp.
- Remove the protective cover. It is recommended to replace the cover with a new one when installing a constant velocity joint.
- Fill the outer joint cavity with lubricant (approximately 100 grams) before installing it in the required location. Typically, molybdenum joint lubricant is used as a lubricant.
- Installation of covers and other parts is carried out in the reverse order of removal. When installing the hinge on the shaft, it is necessary to press it, striking with a hammer until the hinge cage is secured with a locking ring. Before securing the protective cover with a large clamp, it is necessary to equalize the air pressure in the cover. This can be done using a screwdriver by pulling the edge of the cover.
- It is necessary to install clamps with identical markings from the old ones. The diameter of the large clamp is 86.5 mm. Small - 36.5 mm.
Replacement procedure
During work, rusty, dirty surfaces should be cleaned using a brush or rag soaked in gasoline.
Removing the faulty component
Before starting work, you should consult with a specialist about the condition of the protective cover. If the internal element is in perfect order, it will be possible not to remove the drive completely, but to replace only the boot from the outer CV joint.
Experts usually recommend that car enthusiasts perform a complete drive removal on their Ford. This method will take more time, but will avoid many mistakes. In addition, even if one of the anthers is torn, it is better to replace both, since soon the time will come to change the right (second) protective cover.
You need to do this:
Replacing the internal hinge
- Remove the clamp of the protective cover of the inner hinge.
- Remove the clamp that secures the joint cover to the shaft.
- Slide the cover off the inner CV joint housing.
- Remove the constant speed joint housing from the drive.
- Make marks for the location of the articulated hub and shaft.
- Pry off the hinge retaining ring with a screwdriver.
- Remove the retaining ring from the groove located on the shaft. (It is recommended to subsequently replace the retaining ring with a new one)
- Remove the hub and rollers from the shaft splines.
- Also remove the inner hinge protection cover.
- Clean all hinge parts from dirt. In this case, it is recommended to use kerosene.
- Inspect the rollers, hub and joint housing planes for dents, chips, and corrosion. If the above elements are present, urgently replace the necessary parts. The rollers should rotate freely, without jamming or excessive noise. If there are defects, the entire internal hinge must be replaced as a set.
- Installation of the cover and other parts is carried out in the reverse order of removal. New clamps must be installed. The markings of the new clamps must match the old ones. The diameter of the large clamp of the internal joint cover is 80.5 mm. Small clamp – 41.7 mm.
- The articulated hub must be installed on the shaft splines at the previously marked locations.
- A new retaining ring must also be installed.
- The inner joint cavity must be filled with lubricant (approximately 100 grams). Typically, molybdenum joint lubricant is used as a lubricant.
- Before attaching the protective cover, it is necessary to equalize the pressure inside and outside by pulling the edge of the cover with a screwdriver.
Consumable replacement process
These parts should be replaced in an inspection pit or on a suspended car, but this is not always possible, so you can simply put the vehicle in a dry and warm place, for example, in a heated garage. After this, you should jack up the car, place a reliable support and remove the wheel. If a removed wheel is used as a support, you must be careful not to bend the wheel.
Next, the following actions are performed:
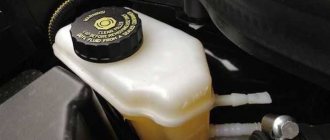
- We drain the lubricant from the car's gearbox, since replacing the CV joint boot requires removing the entire assembly, which will lead to the appearance of a hole through which oil will leak. In this situation, you should not mix the old lubricant with the new one, especially if you are not sure of purchasing the same oil.
- We dismantle the brake pads and caliper, securing the part with a suitable hook to the shock absorber so that the caliper does not sag on the brake tube. Next, using a 13mm socket, unscrew the bolts securing the wheel drive.
- The next step is to press the ball joint out of the corresponding knuckle. After dismantling the caliper, nothing will interfere with this action, but you need to unscrew the 3 ball bolts using a 21 key. Taking a small hammer in your hands, you need to carefully knock out the ball joint. We remove the hub and brake disc, after which access to the drive of the hinge itself opens.
- We remove the retaining ring, and then remove the tripod using a purchased or homemade puller. Before dismantling this unit, it is necessary to mark the location point on the shaft in order to then correctly assemble the structure.
- We cut the old clamps and the failed boot, remove all the lubricant and wipe the assembly. You can wash the CV joint using gasoline or kerosene, and then fill the element with new lubricant to increase the durability of the part.
- We install the new boot in its place in the structure and firmly tighten it with new clamps. Next, the vehicle assembly is reassembled in the reverse order.
With the help of such simple manipulations, you can restore the performance of your car's CV joint and avoid its failure without resorting to the services of specialists. However, if you do not have the necessary repair skills and tools, it is better to entrust this work to professionals.