In this article I will give several quick and not-so-quick ways to check your computer’s fans for functionality. If the cooler does not work, for what reason, and can it be restored if something happens? A cooling fan, also known as a cooler, is the simplest and most durable mechanism in the belly of a computer. I don’t know what caused it to stop, but there are very few reasons for it.
Cooler not working? Come on …
The fact that the fan is not spinning does not mean that the cooler is not working. More precisely, it is inoperative. High-quality products are able to perform their function even after many months of inactivity, being clogged with dust, but with power supplied (under load), and without burning out. But also for the old woman, as they say...
Let's check it out
In the article I will use available tools that the most obvious humanist can afford to use. If the house contains measuring instruments, such as a multimeter, you will not find anything new in the text below.
So the cooler doesn't work. What options?
Well, miracles don't happen. Here either:
- the mechanism is locked, something physically interferes with the blades
- should not spin, because there is no control signal for rotation (the system believes that the temperature threshold has not been reached)
- lack of electrical signal to the fan itself
How to disassemble the cooler?
What for? Cheap and expensive coolers are disassembled up to a certain stage: I'm talking about removing the impeller. But most likely you will encounter a situation where the radio elements themselves are simply inaccessible: the structure is soldered or glued for stability, so YES - the cooler is often a non-repairable device. But this is not the topic of our article.
Where can you find the widest selection of fans for your computer or laptop? AliExpress offers the widest selection of coolers, including for any video card and a single radiator. With this choice, you can put ANY device inside your PC under cooling. Why overpay the “sellers” if you can buy the same thing right now, just by waiting a little?
Clean and lubricate.
What can prevent the fan blades from spinning? Chunks of dust or dangling wires. If the first reason is easy to get rid of by cleaning, purging and subsequent lubrication, then the second option is often accompanied by a characteristic sound. In any case, you should look at the fan directly. Debris can also get inside the mechanism, jamming the mover. We diagnose it easily - use your finger to rub the blades, giving them rotation. If there is no resistance to your fingers, the blades rotate easily, skip the paragraph. For now we just clean (with a brush or compressed air). Lubricate if necessary.
We tear off the sticker in the part where the power wires enter and take out the rubber plug in the center that protects the mechanism:
Immediately pay attention to the places where the wires are soldered to the board. If you are the owner of a 4-wire cooler, it is better to immediately clean this area with an unnecessary toothbrush or toothpick - often the contacts are simply too tight there:
it's called "making more expensive"
We put screwdrivers, toothpicks, etc. on the tip. oil (any technical oil will do; vegetable oil from the kitchen dries quickly, leaving behind dirt) and blot the mechanism in the center, rotating the blades with your finger. Do this several times:
well, I’ve had an oil can for a long time for these purposes
It is better to return the plug and sticker to their place so that dust does not get in here.
Checking the fan: method one.
For owners of more “advanced” coolers (or if no resistance to rotation is detected), I would immediately advise you to check the cooler for functionality. To do this, it does not need to be removed from its installed position. If possible, disconnect the connector from the board. If not, we leave it in place, however, we immediately notice the color of the wires. And to test for functionality we only need two of them.
Whether the connector is in your hands or not, inspect the fan markings. We are looking for voltage:
For further testing we need an appropriate power supply. Battery. It, of course, should not exceed the voltage parameter indicated on the cooler. I have both 12 V fans. So a regular 9 -volt “crown” will do. Better new, not worn out. Let's mount a pair of conductors on the knee to its contacts:
It’s better not to connect them with each other for a long time: nothing will explode, of course, but you may still need a power source.
Let's go back to the cooler. On the connector there is black wire – “ – “, usually a red one – “ + ” (yellow is not needed, it reads the speed; if you have a fourth one, let’s leave it alone, its purpose is to adjust the speed of the cooler, which must be supported by the motherboard). Read more about the device and operating principle in the article Cooler design.
We connect the negative wire of the improvised battery to the black contact of the cooler jack, and the positive wire to the red one:
For clarity, I cut off the connector from the cooler and connect it directly to the battery in the video:
Red for “plus”, black for “minus” (there is always a black wire on the cooler). This cooler is working.
Checking the fan: method two or very skillful hands.
And with this option, you can both check the functionality and use a working but unused cooler as a fan from power sources that have a 12 V output (for example, in a car). And it, the cooler, will be connected via a USB cable. To do this you will need:
- used USB cable from any unnecessary device (a good cable, of course, should not be damaged on purpose)
- working cooler
Everything is simple here. We cut off the connector from the cable to another device, leaving the USB connector itself. We need wires with the color markings familiar to you: black and red. We connect to the corresponding cooler wires. We isolate and connect:
red to red, black to black
This is roughly how the most inexpensive USB fans are designed. It won’t blow you away, but it’s just the right time to play around or check it out. Absolutely any female USB connector is suitable for testing. This simple trick will allow you, by the way, to check four-pin coolers: first connect the “black” contacts of the cooler and the cable, and then one by one connect the red wire of the USB cable to all contacts on the cooler connector. Doesn't spin? In the trash.
I'm warning you. Do not leave the fan spinning for a long time, powered in this way! The method is indicated only for testing functionality.
Software check
You can make sure that the fan is working without using special software. It is enough to bring your hand to the hole of the cooling system on the case, having first loaded the system. Try, for example, to run a resource-intensive game - the noise from the cooler will indicate that the laptop is trying to cool the components.
If the fan cannot cope with the load and the component overheats, the laptop may freeze or turn off on its own. This is how the overheating prevention system works, but if it had to come into play, then the problem with the cooler is very bad, and it needs to be cleaned or replaced urgently. But this way you can only determine the fact that the fan is operating. You can find out whether it is functioning well through the SpeedFan program.
- Launch the utility. Click the "Configure" button.
- Go to the “Options” tab and in the “Languages” line select “Russians” to Russify the interface.
There is no need to change the language: SpeedFan uses icons to clearly demonstrate which components are heating within normal limits and which are too hot. For example, in the example given, the cooler cannot cope with cooling the processor, so there is a fire icon next to the CPU.
Try to fix this using the SpeedFan program by increasing the laptop fan speed. Find the cooler at the bottom of the main utility window, which is responsible for cooling the CPU. If it is not running at 100%, increase its power to see if the CPU temperature drops. If even at maximum speed the fan cannot provide normal cooling of the laptop component, then it is necessary to determine the reason for the laptop overheating.
The unit does not turn on
In this situation, there may be 2 options: the light indicating that the unit is ready for operation may light up or not. Depending on this, the breakdown diagnostic algorithm will differ.
The light doesn't light up
If, after plugging the device into the socket, the light located on its body does not light up and it does not start, then, first of all, you need to check whether there is voltage in the socket. This is done simply: take any electrical appliance and plug it into this outlet. If the device works, then you need to look for a fault in the electrical plug and cord.
To check the plug, unscrew it and check that the wires are securely connected to the terminals. To check the cable, you need to disconnect it from the terminal block of the device and “ring” it with a tester. If a break is detected in the cable cores, it should be replaced.
The light is on
The reason for this behavior of the unit, when the indicator light is on, but the fan does not work, and no sounds are heard, may be caused by a breakdown of the block with buttons. To check the buttons, you will need to disassemble the button block located on the stand of the floor fan or the stand of the desktop device. But, before disassembling the device, make sure that it is unplugged from the outlet.
The operation of the buttons is very simple: there is an “on” and “off” position. It is necessary to check the “output” and “input” on each key using a tester.
If a faulty button is detected, it cannot be repaired. Therefore, the switch should be replaced or the connection made directly. This approach to solving the problem will help to put the unit into operation if you are far from the store, for example, in the country.
Faulty speed switches can also be the reason why the fan does not turn on. To check the regulator, you will need to put it in the maximum position and check the “input” and “output” using the same tester.
Hardware check
If it is difficult to understand whether the fan is working, you will have to disassemble the laptop and check its functionality. Before removing the cooler, read the disassembly instructions for your laptop model. If the laptop is still under warranty, then you should not disassemble it. Take your overheating problem to a service center to avoid voiding your warranty due to mechanical interference.
If you are still going to disassemble the laptop yourself, then remember that it is not necessary to remove the cooler from the case; it is enough to free the wires so that you can test the fan on another device. To check, you will need a USB cable with a plug on one side and two wires on the other, red (+) and black (-). It is necessary to connect the wires of the USB cable with the wires of the cooler - black to black, red to red. The USB is then inserted into another computer.
If the laptop fan is spinning, then the cause of the increase in temperature must be looked for elsewhere. Try replacing the thermal paste on the processor and thoroughly cleaning the cooling system again.
How to disassemble the cooler?
What for? Cheap and expensive coolers are disassembled up to a certain stage: I'm talking about removing the impeller. But most likely you will encounter a situation where the radio elements themselves are simply inaccessible: the structure is soldered or glued for stability, so YES - the cooler is often a non-repairable device. But this is not the topic of our article.
Where can you find the widest selection of fans for your computer or laptop? AliExpress offers the widest selection of coolers, including for any video card and a single radiator. With this choice, you can put ANY device inside your PC under cooling. Why overpay the “sellers” if you can buy the same thing right now, just by waiting a little?
Clean and lubricate.
What can prevent the fan blades from spinning? Chunks of dust or dangling wires. If the first reason is easy to get rid of by cleaning, purging and subsequent lubrication, then the second option is often accompanied by a characteristic sound. In any case, you should look at the fan directly. Debris can also get inside the mechanism, jamming the mover. We diagnose it easily - use your finger to rub the blades, giving them rotation. If there is no resistance to your fingers, the blades rotate easily, skip the paragraph. For now we just clean (with a brush or compressed air). Lubricate if necessary.
We tear off the sticker in the part where the power wires enter and take out the rubber plug in the center that protects the mechanism:
Immediately pay attention to the places where the wires are soldered to the board. If you are the owner of a 4-wire cooler, it is better to immediately clean this area with an unnecessary toothbrush or toothpick - often the contacts are simply too tight there:
it's called "making more expensive"
We put screwdrivers, toothpicks, etc. on the tip. oil (any technical oil will do; vegetable oil from the kitchen dries quickly, leaving behind dirt) and blot the mechanism in the center, rotating the blades with your finger. Do this several times:
Which electric motors can be tested with a multimeter?
There are different modifications of electric motors, and the list of their possible malfunctions is quite large. Most problems can be diagnosed using a regular multimeter, even if you are not an expert in this field.
Modern electric motors are divided into several types, which are listed below:
The first stage of any diagnosis is a visual examination. If burnt windings or broken parts of the motor are visible even with the naked eye, it is clear that further inspection is pointless and the unit must be taken to a workshop. But often an inspection is not enough to identify problems, and then a more thorough check is necessary.
Checking the fan: method one.
For owners of more “advanced” coolers (or if no resistance to rotation is detected), I would immediately advise you to check the cooler for functionality. To do this, it does not need to be removed from its installed position. If possible, disconnect the connector from the board. If not, we leave it in place, however, we immediately notice the color of the wires. And to test for functionality we only need two of them.
Whether the connector is in your hands or not, inspect the fan markings. We are looking for voltage:
For further testing we need an appropriate power supply. Battery. It, of course, should not exceed the voltage parameter indicated on the cooler. I have both 12 V fans. So a regular 9 -volt “crown” will do. Better new, not worn out. Let's mount a pair of conductors on the knee to its contacts:
It’s better not to connect them with each other for a long time: nothing will explode, of course, but you may still need a power source.
Let's go back to the cooler. On the connector there is black wire – “ – “, usually a red one – “ + ” (yellow is not needed, it reads the speed; if you have a fourth one, let’s leave it alone, its purpose is to adjust the speed of the cooler, which must be supported by the motherboard). Read more about the device and operating principle in the article Cooler design.
We connect the negative wire of the improvised battery to the black contact of the cooler jack, and the positive wire to the red one:
For clarity, I cut off the connector from the cooler and connect it directly to the battery in the video:
Red for “plus”, black for “minus” (there is always a black wire on the cooler). This cooler is working.
Causes of malfunction on the VAZ-2114
- Fan motor malfunction . The problem is resolved by replacing it with a working one;
Replacing the fan motor
Changing the fan relay
Checking for an open circuit
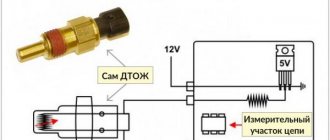
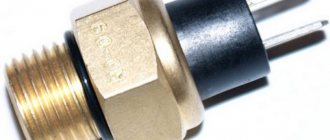
Changing the coolant temperature sensor
Video about replacing the fan switch sensor
Checking the fan: method two or very skillful hands.
And with this option, you can both check the functionality and use a working but unused cooler as a fan from power sources that have a 12 V output (for example, in a car). And it, the cooler, will be connected via a USB cable. To do this you will need:
- used USB cable from any unnecessary device (a good cable, of course, should not be damaged on purpose)
- working cooler
Everything is simple here. We cut off the connector from the cable to another device, leaving the USB connector itself. We need wires with the color markings familiar to you: black and red. We connect to the corresponding cooler wires. We isolate and connect:
red to red, black to black
This is roughly how the most inexpensive USB fans are designed. It won’t blow you away, but it’s just the right time to play around or check it out. Absolutely any female USB connector is suitable for testing. This simple trick will allow you, by the way, to check four-pin coolers: first connect the “black” contacts of the cooler and the cable, and then one by one connect the red wire of the USB cable to all contacts on the cooler connector. Doesn't spin? In the trash.
I'm warning you. Do not leave the fan spinning for a long time, powered in this way! The method is indicated only for testing functionality.
How to check the operation of a laptop - what to look for
More and more buyers began to look closely at purchasing used laptops. Used devices usually cost several thousand UAH. cheaper than new ones, and their performance remains almost the same. In order not to make a mistake with your purchase and take a decent model that will last for many years, you need to check the operation of the laptop. To do this, the equipment is checked visually, looking closely at the case, screen, touchpad and keyboard. There are also special programs that allow you to verify the health of the laptop and check the load capacity.
Before purchasing, be sure to check the operation of the camera on the laptop and inspect the ports for dust. Also open the disk drive to make sure it is working properly. The performance of the hard drive and the performance of the processor must be at a high level, otherwise the performance of the laptop will be in doubt.
Pay attention to visual defects of the laptop
Online stores with used equipment always have tables classifying the level of wear of a laptop:
- class A - there may be small scratches on the device body, the display has no defects;
- class B - the device has some flaws that do not affect stable operation. For example, dead pixels, scratches on the cover, case, display glare.
In principle, visual defects can very rarely affect the performance of a laptop. However, they can be used to determine whether the device has been dropped or been subjected to mechanical damage. The motherboard is a very sensitive component of a laptop, so shocks and chips can affect its performance.
Loading the operating system
New laptops can come with or without an installed OS. Most often, modern devices are equipped with a Windows operating system. Before purchasing, the seller offers to accept the user agreement, thereby installing a licensed version of the OS. Each buyer makes his own choice, taking into account the pros and cons of the license.
- no problems with updating;
- possibility of free update to the new version;
- Possibility of round-the-clock feedback with the manufacturer.
Among the disadvantages is the high cost. Also, installing a licensed operating system is not a panacea for laptop lags.
A used device must have a working OS installed. You shouldn’t buy a laptop without it, because this way you won’t be able to check the reaction of the equipment to the load. And this is fraught with consequences: the laptop will slow down, increasing the time spent on launching applications, etc.
There are three ways to check the speed of your laptop:
using a special program - there are a number of products designed specifically to test laptop performance. Among them are 3Dmark, SiSoftware Sandra, PCMark. Any of these programs can be downloaded from the official resource, transferred to a flash drive and used to determine the reaction speed of equipment;
through the task manager - by clicking on the task manager, you need to go to the “Performance” section, where the performance of the CPU, memory, disks, Wi-Fi, etc. is displayed; I would also like to note that a laptop processor plays an important role, so you should pay special attention to its performance. This will allow you to choose an excellent device with high performance.
Thanks to the performance level index is a utility program installed on some Windows operating systems. You need to go to the section called “Performance Meters and Tools”, which displays an assessment of the performance of components such as the hard drive, graphics, memory, etc.
Checking the screen
Sometimes white stripes on the screen interfere with watching movies or working with documents. The reason for this is dead pixels - small areas on the screen that are illuminated only in white or only in black. To determine the presence of dead pixels, you need to change the color of the entire screen and look closely at the unlit areas. This method of detecting a visual screen defect is mechanical and does not always work 100%. Therefore, you can use a special program, which should be recorded on a flash drive in advance.
What is an electric radiator fan?
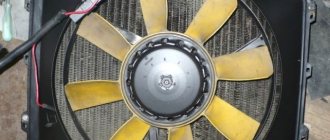
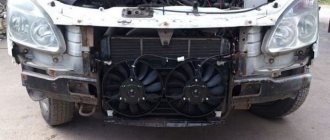
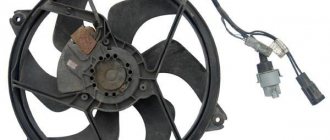
A car cooling system fan is a regular electric motor that is powered by the car’s on-board power supply. An impeller is attached to its shaft, which directs a strong air flow to the radiator, to the front of which it is attached using a special frame. For more efficient operation, the cooling system is equipped with a fan diffuser. Most cars have one fan, but there are cars with two independent electric motors with an impeller that turn on simultaneously. Two fans are installed to cool the motor faster.
Source
