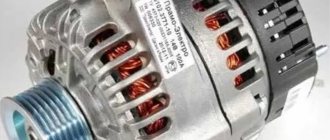
Every car with an internal combustion engine has a gas distribution mechanism, and the VAZ 2114 is no exception. This mechanism is one of the most important components in engine operation. If it breaks down, serious damage to the engine can occur, as well as its complete stop.
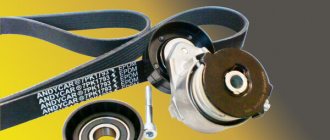
The timing belt is driven by a chain or belt, but in the VAZ 2114 this mechanism rotates using a belt. Although this part is reliable, it often fails.
This article describes in detail the VAZ 2114 timing belt, namely the purpose of the mechanism, replacing the timing belt, and so on. After studying the article, you will learn a lot about this part and can easily replace it yourself.
How to replace the tension roller on a VAZ 2113-VAZ 2115?
Removal: 1) At the beginning of the operation, install the entire timing mechanism according to the marks, detailed information in details and pictures on how to do this is explained in the article called “Setting the valve timing according to marks,” so go to this article and do everything as described in it , by the way, just above we indicated in this article about the cover that will need to be removed in order to get to the timing mechanism, so read about how to remove this cover in the same article to which the link is given in this paragraph.
2) Go ahead and move on to point 2, now you will need to remove the tension roller itself from the car, but before removing it, remove the timing belt from the camshaft and from the tension roller itself, to do this, slightly loosen the nut that secures this roller (This nut in the photo above is indicated by a blue arrow, by the way, we’ll run straight ahead behind it, there will also be a washer located behind this nut, so don’t lose it when you completely unscrew the nut) and turn the roller by hand so that the belt loosens (the roller itself is made in the form of an oval, that’s why he regulates the belt tension, that is, at some point he strongly pulls the belt, and at some point he doesn’t pull it at all), after which remove the belt from the camshaft as shown in the photo below (Just do everything carefully), and well also remove it from the roller itself and let it hang (To completely remove the belt, you need to unscrew the bolt that secures the generator drive pulley, you also need to remove the belt itself from the generator, in general there are a lot of brands and so as not to completely remove it, just like we already indicated a little higher, remove it from the camshaft pulley, from the tension roller and let it hang from you).
3) Well, at the end of the operation, when the belt is no longer in the way, completely unscrew the nut that secures the tension roller, remove the nut and the washer located behind it, and then remove the roller itself along the shaft as shown in the photo below, after the roller will be removed, check its bearing, to do this, grab the central part of the roller with your hand and rotate the outer part of the roller, it should not jam and should spin normally, there should be no play, and grease should not leak from the bearing (B In this case, the roller will be contaminated with grease).
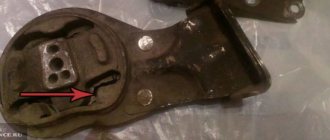
Note! When the roller is removed, a spacer ring will be installed behind it, which we also recommend that you remove and check for defects. If it is in good condition, that is, not crimped or cracked, then you can not replace this ring with a new one and install it on your place again, by the way, due to this ring, as you already understood, the fact how the tension roller will stand depends, for example, if the ring is installed large, then the roller will come out a little and the belt will not stand straight, but at an angle, so if The belt doesn’t eat you up, and if it doesn’t fly off while driving, then you don’t even have to touch this roller, since it does its job, as they say, with a bang!
Installation: The new roller is installed in its place in the same way as it was removed, but only the entire operation is performed in the reverse order of removal, in addition, the roller must also be installed in such a way that the two holes that are on it (see photo below) are directed not inwards, but outwards, by the way, if you look closely at the tension roller which is shown in the photo below, you can even notice with the naked eye that it is covered in lubricant, such a roller needs to be replaced and cannot be reused, because there is a possibility that it will soon time, the bearing will jam, but a jammed tension roller will not lead to good things (Either the timing belt will fly off in this case, or it will break), after you install the new roller and secure it with a nut, be sure to put on the timing belt and adjust it, in more detail For information on how to do this, read the article: “Replacing the timing belt,” point 1.
Additional video clip: We have attached a very interesting and visual video clip for you just below, so that you can watch it and see in more detail how the process of replacing this tension roller is carried out, so watch this video clip and delve into it.
How to change it yourself?
You can replace the belt on an 8-valve VAZ 2114 with an injector engine yourself or by ordering the appropriate service at a service station. During the shift process, there are nuances that must be taken into account when performing the task. If you make mistakes and do not change the strap correctly, this can lead to rapid wear and breakage. Below are instructions for replacing the belt in a VAZ 2114 8 valve.
Tools
If you change the belt yourself, prepare the following:
- a set of open-end wrenches, you will need tools for 13 and 17;
- long flat blade screwdriver;
- 10mm ring wrench, you can use a ratchet head;
- key for installing the tension roller;
- wheel wrench;
- jack.
User Pro Remont shared a video that describes in detail the procedure for replacing the timing belt pulley and timing belt in a VAZ 2114 car.
Algorithm of actions
How to change a belt correctly:
- Drive the car into a garage with a pit. The surface on which work is performed must be level. Switch the gear selector to neutral position.
- Loosen the bolts on the front right wheel. Place this part of the car on a jack so that the wheel can be rotated.
- Open the hood of the car. Using a 10mm wrench, remove the three screws that secure the plastic strap protector.
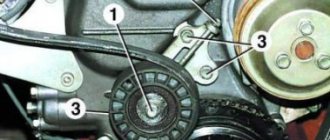
- Using a 13mm wrench, you need to loosen the bolt that secures the tension roller. Remove the device.
- You can see a mark on the camshaft gear; it is made in the form of a rectangular protrusion on the edge. When performing work, it is necessary that this mark coincides with the protrusion located on the fastening of the strap casing. If these marks do not match, you need to turn the wheel until they match.
- Then find the rubberized plug installed on the top of the clutch housing; it is located to the right of the power unit’s BC. The part is carefully pryed off with a screwdriver and removed from the seat. Under the plug you can see the flywheel crown; there is a mark on this device. It should be opposite the triangular protrusion located on the left. If the marks do not match, then take a 17mm wrench and loosen the tensioner. Using a pulley removal wrench, turn the device counterclockwise to loosen the timing belt.
- When the upper part of the belt is removed from the gear assembly, take a 17mm wrench and turn the crankshaft until the flywheel marks are opposite each other. The flywheel itself must be secured in this position; to secure it, use a screwdriver and install it between the teeth. If you have an assistant, ask him to hold the tool to prevent it from turning.
- Now you can remove the right wheel. Unscrew the screws that secure the arch protection and dismantle it.
- Using a 17 mm wrench, unscrew the nut securing the generator set pulley. When unscrewing, make sure that the flywheel does not turn.
- Dismantle the generator pulley and remove it from its seat.
- Remove the timing belt from the crankshaft disc.
- Using a 17mm wrench, completely unscrew the tensioner pulley lock and remove it from its seat. If you loosen the fastening, the belt can be removed.
- Install the new product onto the crankshaft disc. When installing, make sure that the marks are not broken. Install the generator set drive pulley by first placing a strap on it.
- Place the product on the gear of the mechanism. Install the tension roller.
- The strap is being installed. During installation, the tension roller must be turned with a special tool purchased in advance at the store. If you don't have one, you can use two self-tapping screws and a screwdriver. Self-tapping screws are installed in the grooves, and a screwdriver secures them. Turning is done counterclockwise. Tension the belt using the tension roller and tighten the screw that secures the roller.
- It is necessary to set marks if they are lost during the work process. The installation procedure for all components is performed in reverse order.
Photo gallery
Photos of belt replacement are shown below.
Unscrew the screws securing the timing belt protective casing. The mark on the camshaft gear should coincide with the mark on the casing fastening. Loosen the belt tension roller by turning it counterclockwise. Remove the belt from the pulleys and install a new product. Unscrew the nut securing the generator shaft. Put on the new belt and tighten the roller.
How to find a timing belt for a VAZ 2114?
Finding this part is very easy, because it is located under the hood and when opened it immediately catches your eye. The timing belt can be distinguished from the rest not only by the fact that it has a toothed surface, but also by the fact that it also synchronizes the operation of some auxiliary mechanisms. This is what causes the part to wear out quickly and you should always monitor the condition of the belt, correcting breakdowns or replacing it in a timely manner.
After a while, the timing belt begins to come off, the part slips or breaks. Sometimes it happens that a breakdown occurs while the car is moving. In such a situation, as mentioned above, the car will stall and it will not be possible to start it until the problems are corrected. In some versions of the VAZ 2114, a sensor on the panel may light up, indicating an error in the phase sensors.
How often to change the roller and belt
The recommended replacement rates for VAZ 2114 cars, determined by the manufacturer, define the replacement period as 60 thousand km, but this statement is only true for vehicles under five years old, otherwise this figure should be reduced by approximately 15 thousand km.
The replacement period is also affected by the performance of the liquid pump, with a maximum service life of 90 thousand km. You should not take the original pump under any circumstances, because it will quickly break on its own or “eat” the belt from the outside.
Also, do not forget about the need to replace the crankshaft seals, which also have similar wear measured at 40 thousand.
A few tips before you start replacing the timing belt
Firstly, it is recommended to immediately change the tension roller along with replacing the timing belt. Secondly, before installing a new timing belt, you need to check whether there is grease on the roller and whether there is any play in the pump. Thirdly, if after replacing the timing belt you hear a characteristic whistle, then its tension needs to be slightly loosened. It is worth noting that the operation of replacing the timing belt is not complicated and therefore you don’t have to pay the technicians at a car service center, but carry out all the work yourself. The timing belt replacement process is divided into two phases, which we will discuss below.
Replacing the alternator belt
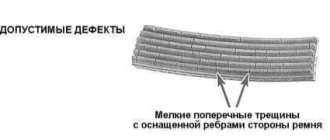
If, after checking and inspecting the belt, it turns out that it is cracked or crumbled, then it should be replaced with a new one, which is extremely important - a similar one. So, the size of the VAZ 2114 8 valve alternator belt is individual
It differs from the size of the belts of other VAZ cars, and therefore you should purchase a belt for the 14th model at a car store. Its standard length is 698 mm (if power steering is installed on the car, the belt length will be longer).
Replacing the VAZ 2114 alternator belt The replacement itself is performed in the following sequence:
- loosen the belt tension adjustment nut and the lower mounting nut of the generator;
- loosen the tension on the alternator belt;
- move the generator towards the engine - this will loosen the belt as much as possible;
- remove the belt from both pulleys - the generator and the crankshaft;
- put a new belt on the drive pulley (on the crankshaft axis);
- put the belt on the driven pulley (on the generator axis);
- tension the new belt according to the scheme described above.
Thus, replacing the drive belt is quite simple, and the procedure itself will take very little time.
Timing roller location
Before you begin diagnosing or replacing the timing belt and rollers on a VAZ 2115 with 8 valves, you need to determine where the system itself is located. You can find it on the left side of the engine if you stand in front of the hood. It is located under a protective cover that prevents debris and dust from entering the system. For visual diagnostics, simply unscrew a couple of bolts and remove the upper part of the casing. However, if you are planning a more serious operation, such as replacing a belt or rollers, this will not be enough.
Removing a worn out timing belt and replacing it with a new one
- After the car is put into manual control, you need to activate fourth gear.
- Remove the protective cover from the belt and, loosening it, remove the timing belt.
- It is necessary to carefully remove the crankshaft generator drive pulley. Once only the bolt remains at its attachment point, you can move the car to neutral.
- While turning the crankshaft clockwise, you need to carefully monitor both the position of the mark and the flywheel through the hole in the clutch housing.
- When the mark is in a position parallel to the middle stripe on the scale, you should begin to loosen the bad timing belt by unscrewing the roller nut. Now the timing belt and pulley can be removed to prepare for the procedure of replacing the belt with a new one.
- Replacing the timing belt is done in the reverse order. Particular attention should be paid to the position of the pulleys and marks, which in no case should be knocked down.
- When the new belt is put on the camshaft pulley, you can tighten it using a roller that turns counterclockwise. In this case, the crankshaft should rotate until the marks return to their previous position.
- Replacing the belt at the final stage involves adjusting it, for which it is necessary to finally tighten the belt. An amplitude of 5-6 m is ideal, and you can do it without the device used in such cases at service stations. After starting the engine, you must make sure that the manipulations were performed correctly, after which the front timing cover can be returned to its place.
Instructions for replacing the timing belt on a VAZ 2114 + video review of the work
To get started, the first step is to fulfill some conditions, namely: remove the alternator belt, and also set the timing marks - that is, so that the marks are aligned on the camshaft with the cover and on the flywheel.
Next, you can proceed directly to removing the timing belt, which will be clearly shown in the video clip:
It is worth noting that when replacing the timing belt, you should immediately change the tension roller itself, since it is because of it that in some cases a break occurs. The bearing may jam and then the belt will break. Also check if there is any play in the operation of the pump (water pump), and if there is any, then it must be replaced.
If the pump breaks, then over time you may notice a defect such as the side part of the belt being eaten away. This occurs due to the fact that the water pump pulley moves from side to side, thereby moving the belt away from straight-line movement. This is why damage occurs.
When installing, pay special attention to belt tension. If it is tensioned too loosely, it may cause several teeth to jump, which is unacceptable. Otherwise, when the timing belt is overtightened, premature wear occurs, and a high load appears on the entire mechanism as a whole, including the pump and tension roller.
The price of a new timing kit can be about 1,500 rubles for original components from GATES. It is the consumables of this manufacturer that are most often installed on VAZ 2114-2115 cars from the factory, so they have practically the best quality among their competitors. Analogs can be purchased at a lower price, starting from 400 rubles for a belt and from 500 rubles for a roller.
What threatens a broken timing belt on a VAZ 2114 engine?
For cars that have an eight-valve engine with a volume of 1.5 liters, such a break is unlikely to lead to serious consequences, however, if you drive a VAZ-2114 with a 1.3 liter engine, this can already result in serious damage to the valves and, as a result, breakdown of the entire motor system.
It is for this reason that many experts say that replacing this element in the VAZ-2114 should be carried out after a maximum of 45,000 km, and its condition must be monitored regularly even before this limit approaches.
Causes of timing belt failure
There are several reasons for this breakdown on the VAZ-2115:
- natural wear and tear;
- pollution;
- ingress of oil and foreign objects;
- pump failure;
- changing the position of the tension roller;
- camshaft or crankshaft jamming.
The role of the timing belt installed on the injector of a VAZ-2115 car is to ensure that the engine valves open at the right time. It synchronizes the camshaft pulley with the crankshaft. Therefore, it is important to change it in time when it wears out so that problems with the engine do not arise.
Causes of breakdowns
Most failures of rollers, belts and other components of the gas distribution system are in one way or another related to improper belt tension. An overtightened belt can lead to wear on the bracket, the surface of the pulleys and the bearings in the rollers. In turn, if the tension is insufficient, the belt begins to slip over the rollers and gears, its teeth break off and fall under the belt itself, leaving dents on the rollers. That is why during installation, set the correct belt tension. Under no circumstances should it be installed on a hot or even warm engine. Because as soon as the engine cools down, the belt will begin to sag. To check the tension, you will need a spring scale and a caliper. We grab the scale by the section of the belt between the crankshaft gears and pull it down to the ten kilogram mark. Then, using a caliper, we measure the deviation from the normal position. If the deviation is 5-5.5 millimeters, you have set the belt tension correctly.
In addition, among the common malfunctions are fuel or oil leaks. During a leak, liquid gets onto the belt and begins to corrode it. This can be determined by the pieces of rubber and synthetic threads stuck around the rollers. Another common cause of breakdowns is the entry of debris and foreign bodies into the system. This can be determined by cracks and potholes on the working surface of the roller, caused by debris getting under the belt. Do not forget about malfunctions caused by system overheating.
Procedure for replacing timing rollers
Before replacing, you first need to install the car on a viewing hole or lift and let the engine cool for two to three hours. If you perform a hot replacement, you risk serious burns. Before the replacement itself, you need to remove the key from the ignition switch and disconnect the negative contact of the battery pack.
You will need the following tools:
The procedure for replacing rollers and timing belt on a VAZ 2115 is as follows:
We carry out further assembly in reverse order. When assembling, make sure that you do not knock down the inserted marks.
Preparatory operations
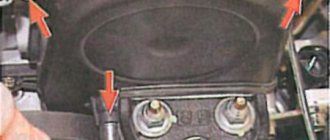
Open the hood.))
It's immediately obvious that the owner loves his car.
VAZ engine 8 valves.
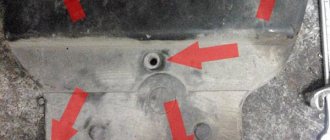
If you plan to replace the pump, then let the engine cool, remove the protection and then drain the antifreeze. It is enough to drain only from the cylinder block.
Plug on the cylinder block.
Jack up the car and remove the front right wheel and plastic mudguard.
Which timing belt is better to choose for VAZ 2114 8 valves
The material used to manufacture modern timing belts is dense metal rubber. The reliability, wear resistance and service life of the product directly depend on its quality. If it is necessary to replace it, the car owner is faced with a difficult question: which belt to choose, which manufacturer and brand to give preference to.
The situation is complicated by the presence of a large number of counterfeits of well-known brands on the market. Due to high-quality imitation of appearance, including packaging, inscriptions, holograms, it is almost impossible to distinguish them from original products.
For example, some manufacturers, such as Gates, increase the service life of belts by increasing the resistance of materials to significant temperature changes, exposure to technical fluids, and oil.
This happens due to the use of nitrile instead of neoprion. Unscrupulous manufacturers use simpler and cheaper materials.
If you buy an outwardly identical fake, you may end up with premature failure of the belt, roller, pump, and be undeservedly disappointed in the brand.
To avoid such a risk, it is better to buy from official services and trusted suppliers.
According to test results, belts from domestic manufacturers perform no worse than foreign ones, for example BRT. Given the affordable price, this is a big plus.
Imported ones - Contitech and Lemforder - have good quality. Slightly more expensive and stronger than Dayco. Also Roulunds and Bosch, but much more expensive..
Where does the belt slip and why?
Note! The belt can slip either towards the engine or in the opposite direction from it.
This happens regardless of how exactly it was installed in the middle of the gear, since the reason for this is not only the belt itself, but also the elements and mechanisms accompanying its operation. In order to solve this problem, you need to use the methods described below.
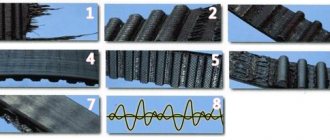
Timing belt
In modern times, in the automotive spare parts market, facts of counterfeits and low-quality products are becoming more and more common.
The top is the original timing belt and the bottom is a fake.
Specifically touching on the issue with the timing belt, we can talk about its uneven structure, increased elasticity (the ability to stretch excessively - approx.), as well as the presence of significant differences between the two edges (distortion - approx.).
The degree of straightness of the newly installed belt can only be determined on the mounted mechanism.
And, if even minor deviations are observed after starting the engine, then the reason is in the belt.
Belt is on and tight
water pump
The timing belt can slip due to play in the pump (pump - approx.). It is very easy to determine its presence; you just need to grab the working surface of the gear with your hand, and if there is even the slightest play, the unit must be changed. In this case, read the material: “choosing a reliable pump for the VAZ-2114”
Leaks on the cylinder block from the timing side indicate that the pump has failed
Tension roller
The next element that needs to be diagnosed when the timing belt is slipping is the tension roller.
Although it may seem like a simple part, deviation from its performance specifications can significantly affect the overall correct operation of the part. In simple terms, a curved roller will not be able to provide the belt with linear movement , wearing out and moving it to the side.
The diagram is clear and understandable.
Another reason for discussions on popular forums about the belt moving to the side is the installation of rollers of different types, because the analogue has a different, slightly modified design.
The difference between the rollers
The difference between these two spare parts is that the old side has a different shape, made of metal, while the new one is made of plastic.
Therefore, as the theory shows, a spare part made of plastic causes much less friction than its metal counterpart.
Timing and frequency
According to the regulations for carrying out technical work, on the VAZ 2114 the procedure for replacing the timing belt and rollers should be carried out every 120 thousand kilometers. However, in reality this deadline usually comes earlier. Many car enthusiasts advise preparing for replacement after 90 thousand kilometers. Do not forget about regular inspection of the components of the gas distribution system. If you notice the slightest problem, the defective components should be replaced immediately. Failure to promptly replace faulty parasitic rollers will sooner or later lead to a broken timing belt. During a break, desynchronization of the valves and piston occurs, which leads to breakdowns and deformation of these components.
Signs of a faulty timing belt and their causes
During the production of the VAZ-2114, it was stated that the timing belt installed in it would not require replacement until the car had covered 50,000 km, and only then should one be interested in its condition.
Some experts say that belt replacement is required after approximately 75,000 km under standard vehicle operating conditions, or after 60,000 km under heavy-duty conditions. At the same time, experts often recommend periodically diagnosing the car anyway, since in fact, replacing it with a VAZ-2114 may be necessary earlier due to the following defects:
Other ways to adjust the roller
If you look at the standard and proper operation of the timing belt, then the tension roller should be located exactly in the middle of the pump and camshaft gears. However, some VAZ-2114 owners, in order to avoid the belt slipping, pull the roller to the side, closer to the camshaft, thus the belt, receiving the greatest bend in its upper part, is more firmly fixed in its place.
All tension roller components for VAZ-2114.
Not a tricky way to adjust the belt
There is another simple way that helps VAZ-2114 owners avoid the belt slipping by adjusting the position of the tension roller.
In order to fix it in this position, it is necessary to pre-make a blank in the form of a half washer made of aluminum (an aluminum can works well - approx.), which must be fixed between the spacer ring and the cylinder block.
Such a need can arise only if the spacer ring has differences in its thickness. You can take its measurements yourself, using only a caliper.
Camshaft and crankshaft
New camshaft gear
Also, judging by the numerous reviews of “our tubers”, it is possible to eliminate the occurrence of timing belt slippage after replacing the camshaft and crankshaft gears.
However, such a procedure can bring results if the car’s mileage on old spare parts is at least 100 thousand kilometers. Otherwise, such a replacement may not bring the desired result.
Rust on the crankshaft gear
Crankshaft gear rusted
This situation arises as a result of the lack of dirt protection. The gear rusts and begins to work incorrectly.
VAZ 2115 and VAZ 2114: differences in replacing timing rollers
The design of the timing system is identical on all cars of the Lada Samara family. This applies to both models of the first (VAZ 2108 - VAZ 21099) and second generation (VAZ 2113 - VAZ 2115). The only relevant difference is the width of the crankshaft pulley and the timing belt itself. On second generation models, they are much narrower than on older ones. Because of this, separated timing parts are not interchangeable for different generations of cars. Therefore, before purchasing parts, make sure that they will fit your specific car model.