+4
Noise insulation. What causes the need for additional sound insulation or how to make your car even more comfortable? How to soundproof your car correctly?
Speaking about the positive aspects of car sound insulation, first of all it is: increased comfort, reduced stress and fatigue on long trips, reduced extraneous noise and wheel rumble.
First of all, eliminating extraneous noise from the car itself frees us from the need to turn up the volume of the radio. Consequently, we perceive information from the outside better: we pay attention to signals given by other cars and traffic police officers, and we are less likely to create emergency situations on the road.
The insulation installed by the manufacturer initially does not correspond to your desires, and with intensive use it becomes worse. A novice car enthusiast pays attention to the appearance of extraneous sounds. In such a situation, many people turn to car repair shops and begin to look for problems in the technical part of the car. And these are additional costs and loss of time.
Speaking about the disadvantages of sound insulation, first of all it should be said that this is not a cheap pleasure, which requires additional costs, hassle and our precious time. But believe me, it's worth it.
Next, we will look at how to increase the sound insulation of a car, what materials and sequence of work will be required for this.
There are also noise insulation haters who get so used to the sound of a running engine that they experience discomfort when they don’t hear the usual rumble of the engine in the cabin. It is by its sound that they judge the operation of the mechanism, identifying the slightest malfunction by ear. But this is a completely different topic for conversation, and so we move on to the main thing - sound insulation.
Do-it-yourself car soundproofing
For many, a car has become a second home: long traffic jams, frequent trips, an office on wheels.
I want to “live” my forced life in comfort. Listen to high-quality music, do not overstrain yourself with street noise, and do not be distracted by loud sounds from under the hood. It is for these purposes that it is recommended to soundproof the car, the price of which will be quite affordable. This procedure will relieve the owner of headaches caused by extraneous sounds. Noise insulation of a car is one of the key factors in comfort, clear sound acoustics and safety. Although if you are reading these lines, it means that the question of the value of sound insulation has already been resolved for you. All that remains is to figure out how to make soundproofing of a car with your own hands. Let's figure it out together.
Let's start with what tools we need:
1. Screwdriver (phillips, socket, sometimes asterisk). 2. Stitching roller. 3. Knife. 4. Scissors. 5. Degreaser, for example, Nefras, Galosha gasoline, technical degreaser (the metal surface must be cleaned and degreased before applying sound insulation materials; it is prohibited to use regular gasoline and kerosene).
This is the basic list of tools that you will need if you decide to install sound insulation yourself.
Let's check. Is everything in stock? Let's get started.
Below you will find text and video instructions for installing sound insulation from the specialists of the official installation center StP-Install.
Soundproofing a car in service
The fastest and easiest way to get rid of extraneous noise in the cabin is to have your car soundproofed at a car service center by experienced specialists.
But this method has one significant drawback - the cost of the work performed. The second problem is the choice of the car service itself; many promise to do it efficiently and on time, but not many implement this in practice.
The best way to choose a workshop is through reviews of familiar car owners who have had their car soundproofed at this service. Reviews on the Internet have no meaning, since in order to attract potential clients, managers independently write praise on websites.
Before starting work, you should visit the service and ask the master how and with what materials the work will be performed. It’s good if noise insulation work is carried out in the workshop, it will be possible to evaluate the level of skill of the specialists and their attitude towards the work being carried out. If you have the funds and quality service, this is the best option for soundproofing your car.
How to properly glue sound insulation in a car, video:
Soundproofing doors
Naturally, the first thing we have to do is remove the decorative door trim.
When this process is completed, we can proceed directly to sound insulation.
The first layer is to install vibration-proofing material “StP Aero”
to the “street” panel. This is necessary to dampen the doors’ own structural vibrations.
IMPORTANT!
There is no need to glue material to the stiffening ribs.
The second layer on top of the vibration-proofing material is glued joint to joint with the sound absorber “StP Accent Premium”
10 mm thick. The material must be installed in such a way that it does not reach the drainage holes located at the bottom of the door by 3-4 cm.
A sound absorber is needed to absorb and disperse the sound wave from the speakers, which makes the sound better. In addition, the second layer will help reduce heat transfer, as well as noise from the street and passing traffic.
We cover the technological holes of the door panel from the passenger compartment with the third layer using the material “StP Aero”
, to create a vapor-waterproofing layer and an “acoustic box” for the speakers.
The fourth layer is mounted directly on the door trim. To achieve a greater sound insulation effect, we cover the decorative door panel with sound absorber “ StP Biplast Premium 15A”
.
If the skin is tightly adjacent to the metal of the door, it is permissible to use the material “ StP Biplast 10 K”
.
Selection of vibration-proofing material
Bitumen-mastic tiles (vibration damper)
This type of insulation is intended for primary body treatment. Vibration dampers are made on a self-adhesive base, which is intended for cleaned metal. In general, it turns out that bitumen gives additional strength to the car frame and is suitable for quieting the engine compartment and underbody, absorbing vibrations emitted by vehicle mechanisms.
Sound insulator
It is intended for the second layer, after bitumen-mastic slabs. Allows you to reduce the noise level from the outside and insulate the hood, thereby ensuring better performance of the car in winter.
Sound absorber
The structure of this insulation is softer, porous, and designed to absorb sound waves. Manufacturers of expensive sound absorbers boast an efficiency of their products of 95 percent.
Anti-creak (sealing material)
Every part of the car that is subject to vibration, shock, and rotation is equipped with rubber gaskets, bushings, and spacers. They absorb the load, prevent metal-to-metal friction, etc.
See also: How to choose a car battery charger
Trunk noise insulation
We remove the casing. When removing the panels on the sides of the trunk, pay attention to the gap between them and the body. This is necessary to understand whether it is possible to glue sound-absorbing material under these panels. If the gap is very small, the panel simply will not fit back.
First of all, when processing the rear wheel arches, it is necessary to glue the vibration-absorbing material “StP Bimast Bomb Premium”
. We install everything joint-to-joint over the entire surface of the arch to achieve the best result.
We proceed to processing the wings, if possible, and apply the first layer of “StP Aero”
.
“StP Aero Plus” is installed on the trunk floor.
.
We glue the sound-absorbing material “StP Biplast Premium 15A”
.
Here it is also permissible to install sound-absorbing material “ StP Biplast 10 K”
if the arch casings fit very tightly to the metal.
For the second layer of car wings we use the material “StP Biplast Premium 15A”
15 mm thick.
“StP Barrier 4 KS” on the trunk floor as a second layer.
.
Soundproofing the trunk lid does not cause much trouble. “StP Aero” onto the metal
We treat the trunk lid trim with sound absorber “StP Biplast Premium 15A”
(it is acceptable to use the material
“StP Biplast 10 K”
).
Soundproofing the car interior
This is the most extensive work. The process is labor-intensive, in which a large role is given to the dismantling and installation of interior equipment. It will not be easy to remove and replace all the instruments and plastic parts located in the cabin with your own hands. Moreover, dismantling and installation is carried out in an awkward body position.
The most difficult part is the work of removing the duct. Having reached the base of the partition, remember to clean the metal and degrease it. The first protective layer is a vibration dampening sheet. It is heated for ease of use using a hair dryer. Then a sound-absorbing material is applied. It has a dual purpose.
- Reduces external noise through absorption.
- Is a car interior insulator.
Roof sound insulation
Sound insulation of the roof gives a very good effect during complex treatment of the car.
To do this, you need to remove the trim and check the roof for the presence of standard sound insulation. Try to remove it (especially if it doesn't stick well). If the standard sound insulation is represented by plastisol or bituminous materials and holds very tightly, then you can leave it.
Apply the first layer of “StP Aero”
. To achieve the optimal effect, it is enough to treat 70% of the surface. However, we try to apply this material to the entire available area without covering the stiffeners. Otherwise, you will disrupt the ventilation of the amplifiers, creating closed and unventilated cavities in which condensation will constantly accumulate.
Sound insulation of the hood
Perhaps the easiest stage of all. When vibration isolating the hood, it is necessary to choose a vibration-absorbing material based on bitumen, since any other material may not withstand high temperatures.
It is not recommended to glue the vibration damper onto the stiffeners, otherwise the factory sound insulation (if it was originally installed) will not fall into place.
If everything is done correctly, you will get rid of about 60% of the noise inside the cabin. As with most things, the main thing is to take your time and be careful. If something goes wrong, don't quit halfway through. Have a nice trip!
Source
Soundproofing the floor
To soundproof the floor of the car, we remove the front and rear seats, as well as the decorative carpet, from the interior. Clean and degrease the surface.
To treat the car floor as the first layer, we use vibration-insulating material “StP Aero Plus”
. We glue the material joint to joint. Having folded back the standard soundproofing carpet under the feet of the driver and front passenger, we glue the material as high as possible onto the engine compartment panel. Next we process the front wheel arches and the floor underfoot.
Try to cover as much area as possible, as the floor is one of the noisiest places.
“StP Accent Premium” to the interior floor.
6 mm thick, and we install
“StP Biplast Premium 15A”
(an option is also possible using the heat-insulating material
“StP Barrier 4 KS”
).
Apply the third layer of soundproofing membrane “StP NoiseBlock”
2 mm thick.
Sources of noise in the car
Most of the high-frequency sounds that we hear in a car come from the engine compartment, where the culprit is actually located. The engine, in addition to making a loud sound during its operation, also produces vibration, which is an additional disadvantage.
See also: How to choose a DVR for a car
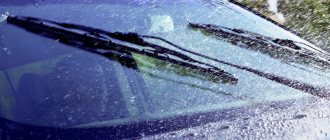
The next source is wheels. Although car manufacturers install special protection over the tires on their models, the sound of rubber rubbing against asphalt is very audible. Not only enhanced vibration isolation can help here, but also the correct selection of tires that suit the road surface and weather conditions.
In addition, the air that gets into the joints between parts of the body, the creaking of the interior trim, a part of the chassis that requires replacement, creating resonance due to its door design, is not a little, right?
External processing of arches
In order to carry out external treatment of the arches, remove the locker and degrease the metal.
We apply vibration-damping mastic “ StP NoiseLUQIDator”
.
IMPORTANT!
Be sure to close the brake disc and caliper to prevent mastic from getting on these areas.
Wipe the locker with a degreaser.
“ StP Aero” to the plastic fender liner
and roll it over the entire area.
IMPORTANT!
Felt fender liners are not processed!
Congratulations! All that remains is to assemble the car and you can enjoy comfort with StP
.
If you have any questions, feel free to contact our consultants in the Standardplast group on VKontakte or call the hotline.
An important element of acoustic tuning is the soundproofing of car doors. When installing any music system in a car, complete sound insulation, if not mandatory, is very desirable. But the preparation of car doors for acoustics must be carried out in any case. Because without this the music will play poorly.
The content of the article:
If you don’t listen to music in the car very often, and the main purpose for which you do sound insulation is to make the car quieter by getting rid of a significant amount of external noise, then you should also pay close attention to the doors, since it is through them that about 30 % of total noise.
Why is the car noisy, what are the reasons?
All cars are subject to wear and tear. Sound insulation, even on luxury cars, loses some of its protective properties over time, not to mention cars that have traveled a certain mileage on domestic roads.
Vibration is a real problem with sound insulation. Experienced drivers can determine where the unpleasant sound is coming from and where the crickets appeared. They will tell you what problems have arisen. Perhaps some part has failed. Due to inexperience, many car owners immediately turn to a service station for help. As a result, the driver’s wallet “loses weight.” Money is paid for a technical inspection of a car that is not necessary.
You can solve the problem of losing the protective properties of sound insulation or install it on a car with your own hands and strength. This requires certain equipment, desire and noise-insulating materials.
Materials for insulating external noise sources
material consists of three parts.
- Vibration isolation,
- Noise insulation,
- Anti-creak.
Let's take a closer look at the material for car sound insulation.
- Vibration isolation.
The first layer of products designed to suppress noise serves as protection against vibration, or rather is aimed at suppressing it. Vibration is sound. The driver and passengers begin to hear a hum in the car when the vibration frequency reaches 20 Hz.
Vibration insulation as a material is a bitumen layer. It can be of different densities and thicknesses. It “wraps” the metal, preventing vibration of the latter. Vibroplast is aimed at creating silence.
- Noise insulation.
This is a soft material that absorbs external noise. It usually has a layer of foil that serves as a thermos. Speaking about sound insulation, we can note the porosity of the material. The greatest effect is felt by drivers living in areas with low t0.
- Anti-creak.
Actually, this is a fabric that is glued to the ends and joints of car elements. It is mainly used for assembling plastic and car bodies. On uneven roads, the car body “plays”. Self-adhesive fabric prevents metal contact at joints. Serves as a gasket.
Technological working stages
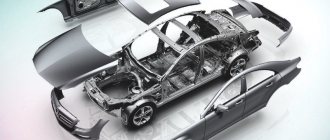
The situation of protecting a car from noise cannot be resolved in one fell swoop. Therefore, the whole process needs to be divided into several stages. Install sound insulation on each body element separately. The greatest effect of vibration absorption can be achieved by approaching the problem comprehensively. We are talking about processing the following vehicle segments:
- Sound insulation of the car hood;
- Soundproofing of all doors;
- Sound insulation of the partition dividing the interior and engine compartment;
- Soundproofing of the floor, interior and luggage compartment;
- Sound insulation of the upper part of the body - roof.
Now let's look at the specifics of the finishing material of each segment of the car.
The first option is minimal sound insulation of car doors.
It is not suitable for installing acoustics. But to reduce street noise, this is quite enough. In order to treat the doors to a minimum, you need to stick a vibration-absorbing material (StP vibroplast, Shumoff) onto the outer panel of the door, in a continuous layer, or at least 70-80%.
A vibration damper with a thickness of 2 mm can be used. And noise-insulating material (accent, splen) can be glued to the inner panel of the door card; it will reflect noise and also serve as a kind of dust and moisture protection. Scraps of vibration-absorbing material can be glued to flat areas of the door card.
This option is the cheapest in cost. But such soundproofing of car doors allows you to improve the noise picture inside the cabin without spending a significant amount of money.
Vibration and noise insulation materials
70% of the effectiveness of the event depends on the selected materials.
Soundproofing materials come in different thicknesses, qualities and types. Conventionally, they are divided into 3 main groups:
Additionally, when performing soundproofing of a car, seals are installed - “anti-creaks”. They are used to paste handles, pulls, and are used for winding electrical wiring.
The second option is average sound insulation of car doors.
We can say that such soundproofing of car doors is optimal in terms of price/quality ratio. This method uses more special materials, and they are mounted a little differently. This allows you to seriously reduce noise from the road, and also makes it possible to install acoustics in the door and get good results from it.
The first layer, on the outer panel of the door, should use a vibration absorber 2 mm thick (vibroplast from StP, Shumoff M2). And in the place opposite the speaker, you can glue a 3 mm sheet (Shumoff M3). It is also advisable to add an acoustic lens here. You can glue soundproofing material on top of the “vibra”, or you can do without it. There is no consensus on this matter.
In order for the speakers to play well, you need to make something similar to acoustic speakers from the doors. To do this, you need to roll a rigid vibration absorber (for example, Vizomat MP) onto the outer panel, closing the technological holes.
The door cards themselves need to be glued with a thin vibration absorber, a thickness of 2 mm is suitable (vibroplast silver, gold, Shumoff M2). And then cover the entire inner surface with a noise absorber 5-10 mm thick (bitoplast from StP, sealant from Shumoff).
Valentti › Blog › On the eve of winter - 3. Car soundproofing.
How to soundproof a car and what materials are needed.
With a limited budget, when you do it yourself, you don’t need to strive to soundproof the entire car at once, but do it piece by piece, “getting the hang of it” and improving your experience. We start with soundproofing the doors, then the floor, trunk, and so on.
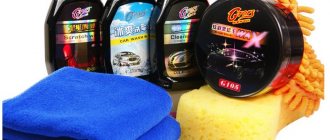
What materials will you need if you are going to do it yourself?
- a construction hair dryer, - a rolling roller, - scissors, - a solvent (you can use white spirit as a degreaser before applying sound insulation), - desire.
Materials for car sound insulation.
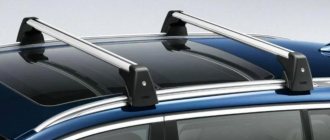
Treatment areas
:
interior floor, doors, roof, body sides, hood and trunk lid, front panel on the interior side.
Vibroplast Gold
The same as the Silver vibroplast material, but thicker, which means it has greater vibration insulation. Mechanical loss coefficient 0.33 arb. units Weight 4 kg/m2. Thickness 2.3 mm.
Treatment areas:
interior floor, doors, roof, body sides, hood and trunk lid, front panel on the interior side.
BiMast Bomb
Vibration-absorbing material. It is a multilayer structure consisting of a front layer (aluminum foil), a sheet based on a bitumen composition, a sheet based on a rubber composition, protected by an anti-adhesive film. During installation, it requires heating to 40 - 50°C. The material does not absorb moisture and does not decompose from environmental influences. The best vibration-absorbing material. Has the highest efficiency. Ideal for audio preparation of speakers. Mechanical loss coefficient not less than: 0.50 arb. units Material thickness: 4.2 mm. Weight: 6 kg/m2.
Treatment areas:
front panel, tunnel, wheel arches, area above the muffler, driveshaft.
Treatment areas
:
front panel of the passenger compartment, wheel arches, doors, tunnel.
There is also splen 3008, the thickness of which is 8 mm, and splen 3002, respectively, 2 mm thick.
Splen 3004 is glued as a second layer to vibration-absorbing material. Splen is glued to doors, front and rear arches and sidewalls. To create a strong connection, the surfaces to be bonded must be as clean and dry as possible. White spirit or acetone can be used to clean the bonded surfaces.
Thickness 5 mm. Weight 0.4 kg/m2. Also available in thickness 10 mm (bitoplast 10).
Treatment areas:
hood and trunk lid, engine compartment partition.
Application:
— gaps between the decorative elements of the interior and the car body — gaps in the instrument panel — sealing of air ducts
Soundproofing the hood and hood cover
Don’t think that by soundproofing the hood you can get rid of engine noise. This is wrong. Sound insulation of the hood is done to better insulate the engine in winter. For this you will need an accent (10 mm) and a silver vibroplast.
When soundproofing the hood cover, the weight of the material should be taken into account; if it is made too heavy, the hood shock absorbers will soon leak and will have to be replaced.
As a vibration-isolating material, you need to use vibroplast silver (or an analogue), which is light in weight. A special material is used as thermal insulation - an accent, which is designed to retain heat inside the engine compartment in winter, and is also resistant to high temperatures and will not catch fire from the heat of the engine. Thickness - the thicker the better.
It is worth paying attention to the presence of factory-made thermal insulation material. Under no circumstances should it be thrown away, and our hood soundproofing should be a help, not a replacement. So when choosing the thickness of the “accent” you should be guided by the principle that it will be easy to put on standard hood sound insulation later.
Some cars do not have a hood, then sound insulation of the hood is simply necessary, and the thickest material - 15 mm - can be used as a thermal insulation material. And together with vibration-proofing material, this will give the best effect in terms of heat and sound insulation of the car hood.
Soundproofing car doors
For minimal noise insulation of doors, you only need vibration-proofing material, such as “silver” or “gold” vibroplast. You need to glue it to the inside of the door opposite the column. The larger the area covered with vibration-isolating material, the better, and the thinner the metal, the greater the amount of vibration-isolating material required - vibroplast.
When soundproofing car doors, the weight of the materials should be taken into account. If you make the door very heavy, then perhaps over time the door will sag and you will have to change the hinges. What is needed here is a reasonable approach based on the goals set. And if you have a good audio system and you are going to improve its sound, you won’t get off with little money. We need an integrated approach and sound insulation of at least 4 layers (!).
The first layer is the inside of the door, when the sound insulation is glued through special holes in the door. The material you can use is vibroplast silver, or a small amount of vibroplast gold (or bimast bombs) in the place behind the speaker. The second layer is a 4 mm splen layer laid on top of the vibration-proofing material.
Next comes the soundproofing of the door from the outside, under the door cards and is more suitable for lovers of high-quality car sound. In this case, you need to completely seal all the technological holes to make the volume of the door in which the speaker plays airtight. In addition, after this operation, the rigidity of the door will increase, which will also have a positive effect on the sound of music. We cover the outside with vibroplast and silver and splen on top for sound insulation.
The next step is soundproofing the door cards. This is done so that they do not creak or make unnecessary sounds. For this purpose, anti-creaking and noise-insulating material “bitoplast” is useful. The thicker the bitoplast, the better. Also, do not forget about the “crickets” inside the door itself and additionally cover the rods and handles with “Madeline - anti-creak” material.
The rear doors are soundproofed in the same way as the front doors. Only if there are no speakers in the door, the number of layers can be reduced and the type of vibration-proofing material can be used more simply.
Sound insulation of the roof and ceiling of the car
Sound insulation of the roof is done to reduce external noise, mainly from rain, and also to remove all “crickets”. After soundproofing the ceiling, the effect during rain is amazing - even when it rains heavily, there will be no loud “drumming” in the cabin, there will be slightly muffled impacts, almost imperceptible and not causing discomfort.
The material can be used vibroplast gold or silver. Weight is also important, because the heavier the ceiling, the higher the center of gravity of the car, which will negatively affect handling. We will use 4 or 8 mm splen as a sound-absorbing material, possibly even in 2 layers. The possibilities for soundproofing the roof are limited only to the fact that you can then properly install the ceiling lining in its place.
The third option is maximum sound insulation of car doors.
This kind of soundproofing of car doors is used when you plan to install a powerful speaker system with good midbass in the doors. In this case, the doors must be prepared for such speakers. External noise is no longer the main goal. Although with this treatment you are guaranteed to get rid of most of them.
– As the first layer, on the outer panel, you can use a vibration-absorbing material 3 mm thick (shumoff m3), but not thicker, so as not to make the doors too heavy.
Vibration isolation on the car door
It is believed that for gluing the inside of doors you need to choose bitumen-mastic tiles. On the one hand, this is not a bad solution, but due to the uneven surface of the walls, it is more difficult to work with this material; it can break at bends if the surface is not heated sufficiently. It’s better to use soundproofing rubber foam - it’s easier, faster, better quality, although a little more expensive.
Door pasting consists of the following steps:
- Disconnect the negative terminal from the battery;
- Remove the door card by first unscrewing all the fastening screws and removing individual elements;
- Disconnect the chips on the wires so as not to interfere with the process;
- Remove the audio speaker;
- Clean the surface from the factory film or sound insulation, degrease;
- The far wall of the door needs to be covered with rubber insulation (remember to remove air with a roller);
- Cover the near wall with a sound absorber. As a bonus, it will prevent squeaking from the door card rubbing against the metal.
See also: How does Webasto work?
The fourth type of sound insulation for car doors is extreme.
This kind of soundproofing of car doors is intended to treat doors under powerful acoustics, the so-called “loud front”. These are systems with which they go to competitions for the volume of front speakers, or for sound pressure. The door is processed with the thickest and most efficient materials. The risk that this will make them too heavy is not taken into account.
– First the door needs to be reinforced. This can be done either with strips of rigid “vibration”, or with aluminum strips, which are glued at small intervals onto the outer panel.
– Then a thick vibration absorber 4 mm thick is rolled between them (bimast bombs, Shumoff Mix F, Shumoff Prof).
– The next layer is soundproofing of car doors or sound absorber with waterproof glue or latex film (sealant). The technological windows on the outer panel are also closed. Here you can use polyester resin or aluminum sheets. They are rolled up from above with a thick “vibra”, 3-4 mm (bimast bombs, shumoff m3, m4). After this, a layer of sound insulator is glued on (splen, shumoff p4).
– The door card is processed with pieces of vibrato to get rid of vibrations and rattling. And underneath it is glued the thickest sound absorber that will fit (for example, sealant A15, A30).
The area covered by the sound absorber depends on how many speakers will be in the door. Since the door card can contain several midbass, “middle”, it is attached to the door hardware with through bolts, and the acoustics are installed later.
Before implementing any option for soundproofing car doors described here, think carefully about which one you need, for your car and purpose. Remember, no matter how well you treat the doors, you cannot do anything with the windows. And a large percentage of noise will enter the cabin through them.
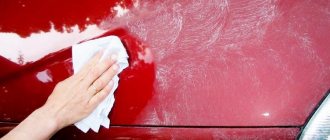
How sound insulation is glued - general principles
Carrying out sound insulation is a complex task. You need to have a sufficient level of “handiness” to disassemble the interior, thoroughly wash and degrease surfaces, make patterns from soundproofing materials, roll...
On average, processing one node takes 7 hours.
The work is carried out in several stages. First you need to decide where the so-called “Shumka” will be glued and why (to improve acoustics or to suppress extraneous sounds). Based on the area of pasting and the purpose of sound insulation, choose the appropriate type and thickness of material.
Stages:
- Disassembly of the interior.
- Surface preparation: cleaning and degreasing.
- Gluing sound insulation: vibroplast, and then other layers: sound insulator, sound absorber.
- Interior assembly.
Video about how to soundproof car doors with Shumoff material
The main and necessary condition when installing vibration-damping materials is to “roll” them as tightly as possible to the surface. It is necessary to prevent air, water, and debris from getting under the material. The surface must be clean, grease-free and dry (see “Surface preparation”)
Material cutting
Unlike soundproofing materials, vibration dampers do not require stickers with the largest sheet possible. To facilitate installation (without loss of quality), apply the material in small pieces depending on the location and material (see “Application Schemes”)
Using a tape measure, estimate the size of the required piece. Round the size to the nearest 1 centimeter. Vibration-isolating materials produced by Standardplast have markings in the form of molded cells. The size of one cell is 1x1 cm. This eliminates the need to use a ruler and marker, which significantly saves time. Use scissors to cut a piece according to the measurement. However, try to use rectangular shaped pieces. This saves material significantly.
In the case when the required piece of material is different from rectangular and requires an accurate pattern (hood, arches, engine shield), use a paper template. Mark the front surface to avoid cutting out a mirror image of the template.
In hard-to-reach places, such as the inner surface of a door or wing niches, materials are cut based on the size of the technological holes. The material is cut into narrow strips or squares of such a width that they fit into the technological holes and do not require strong bending of the materials.
Installation
After the required piece is cut out, place it in place. If the installation site has a curved surface, shape the material by hand. This is especially true for hard materials (Bimas Super, Bimas Bomb, Vizomat). Lightweight materials (Vibroplast) do not require such actions.
Carefully remove the protective film or paper. Avoid contact of the exposed adhesive surface with your hands or other surfaces that could contaminate it.
Warm up the material with a heat gun if necessary. Place the material with the protective film removed on a flat surface away from other objects. Watch out for fire safety! The gun heats the air to very high temperatures that can cause a fire. Turn the gun on to minimum power. After a few seconds, increase it to the required level (350 C). Warm up the entire surface using smooth movements. A sign that the material has warmed up is the appearance of a glossy sheen or a slight “sludge” of the material. Do not overheat the material and bring the surface “to a boil” - this will worsen its properties.
Place one edge to the surface and, pressing and stroking, gradually stick the entire piece with your hands, going around all the irregularities if necessary. Do not apply the entire piece at once (especially a large one) - air bubbles will be inevitable. While the material is hot, it is possible to make small adjustments to the position. Make the final rolling of the material with a roller or improvised means, achieving maximum fit. Be careful not to tear the foil surface.
Installation of soundproofing and soundproofing materials
The main difficulty when installing sound and noise insulation is the very high adhesion of the adhesive layer. The glued material is almost impossible to tear off without damaging it. Therefore, installation must be done extremely carefully.
The main technological feature is the need to install thermal and sound insulation with the largest sheet possible, creating a soundproof shield. This is especially true for materials such as Accent, Isoton and Splen.
Material cutting
Using a tape measure, estimate the size of the required piece. Initially, mark a rectangular piece and cut it out. When measuring, round up to have some margin.
Place the cut piece in place. Shape it by hand to accommodate irregularities and curves. Mark with a marker the excess that needs to be cut off. Trim the excess along the marked outline.
All types of soundproofing materials can be easily cut with scissors. Difficulties arise when particles of the adhesive layer stick to the blades. This is especially noticeable when working with bitoplast. Wipe the blades of the scissors with a rag soaked in white spirit.
Installation
Before applying material, make sure all wires are up and will not be covered. Also, if necessary, mark the fastening points by inserting or screwing pins into them (available means). This will significantly save your time during assembly, because... Some attachment points are then very difficult to find.
Place the cutout in place. Do not tear off the protective backing immediately! Carefully peel back the edge of the protective film and stick the corner of the material in place. After this, gradually separate the protective layer by smoothing the material with your hand. Glue the entire piece in this way. Go over the entire surface of the material with your hands, smoothing and finally shaping it.
You can start gluing the material not only from the corner. When installing on large, flat surfaces (roof, hood), it is more advisable to start from the middle. Carefully cut the protective film with a knife down the middle of the material. Release a strip of adhesive surface 3-5 cm wide. Attach the piece to the mounted surface, fixing the middle. Next, glue the material in the same way as described above.
When installing soundproofing materials, avoid stretching them. This is especially true for bitoplast. It stretches very well. However, when stretched, the adhesive layer is much weaker, which will invariably lead to partial or complete peeling off over time.
In places where it is impossible to lay sound insulation in a single sheet, glue the pieces end to end. Place the adjacent piece with an overlap of 1-2 mm. After sticking, tuck the edge into the joint with the adjacent piece of material. Additionally, the seams can be strengthened and sealed with tape.
After reviewing the installation of sound insulation, you can purchase materials through the SGM online store.