All body doors are frame type and identical in design. The lower part of the door, i.e. its body, consists of two stamped panels (outer and inner), connected to each other by bending the edges and welding. To increase the rigidity of the door body, reinforcements are welded on the side of the hinges and the window sill. The upper part of the door is a U-shaped frame, butt-welded from two sections of profile formed by rolling a steel strip on a roller machine. The lower ends of the frame are passed inside the housing and connected to it using hard solder. The use of frame-type doors allows you to reduce the thickness of the door pillars and increase the area of the door window.
Rice. Fastening the doors to the body: a - section along the front door hinge; b — section along the hinge of the rear door; 1 — hinge cheek adjacent to the body; 2 — loop seal; 3 and 12 - holders; 4 - screw; 5 - plate; 6 — body pillar; 7 - plugs; 8 - bolts; 9 — door reinforcement; 10 — hinge cheek adjacent to the door; 11 — hinge seal on the door
On the outside, the door frames are lined with decorative aluminum trims, which are attached to the frames during assembly by bending the outer edge.
The outer decorative trim of the door window sill, in which the rubber glass seal is clamped, is put on the edge of the outer door panel and held on it by spring holders.
Door fastening
Each door at the front end is suspended from the body on two hinges. The cheek 1 of each hinge, adjacent to the body pillar b, is secured with screws 4 screwed into a plate 5 held inside the pillar by a holder 3. The dimensions of the holder allow the plate to be moved during adjustment. The hinge cheek 10, adjacent to the door, is attached to it with bolts 8, which pass through the holes in the door reinforcement V and are screwed into the threaded holes of this cheek.
To prevent dust from penetrating inside the front and rear doors, the cheek piece 10 of the hinge passes through a sponge seal 11, which is held by a holder 12 welded to the door. To protect the body from dust in the places where the front door hinges are attached, the cheek piece 1 of the hinge passes through a sponge seal 2 glued to the body pillar. and the mounting holes in the rack are closed with a rubber plug 7. The cheeks of the hinges are steel; They are made from a special rolled profile that is cut. The cheeks are connected with a finger. The finger is lubricated through the hole in the head of the cheek. The described fastening allows you to adjust the doors, that is, move them in any direction: up, down, forward, backward, inward and outward. This adjustment ensures the correct position of the door, determined by a uniform gap around the perimeter of the door and the absence of steps between the surface of the door and the areas of the body adjacent to it.
Rice. Door stop (horizontal section): I - door in open position; II - door in closed position; 1 - limiter; 2 — roller shank; 3 — limiter jumper; 4 — plate holder; 5 - plate; 6 — bracket; 7 - screw; 8 — door amplifier
Wings
The wings (removable) are often removed and replaced with new ones, even if they can be straightened. Correcting fenders can be more expensive than replacing them with new ones.
The wings are attached to the body with screws, which are usually locked, that is, screwed into elastic metal plates. The fenders are attached to the top of the mudguard, the A-pillar and the front panel. To remove the wing, you first need to remove the buffer, and in some cases, the radiator grille, the optical elements of the headlights and signal devices. After removing the wing, it is necessary to treat the contact points and remove all traces of corrosion.
Before installing a new (or used) wing, the contact points must be covered with a layer of sealant. Then you need to install the wing on the mudguard, insert the screws into the mounting points and tighten them slightly without tightening them to adjust the gaps of the doors and hood, and then tighten the screws completely. Then you can install nearby parts that were removed before removing the wing. Connect the electrical wires to the headlights and signal lights, observing the color of the wires, if any.
If the wings are welded and not very much deformed, then they are usually straightened, since replacing such wings is quite labor-intensive. If straightening welded fenders takes a very long time and if internal parts or A- and C-pillars are damaged, the fenders should be replaced.
Not all parts of the wing are straightened with the same amount of effort, even if the wing is straightened. It is easier to straighten the top rounded part of the wing than its side surface, which usually has a slight convexity.
To increase rigidity, stiffening lines are often made on the side surface of the wing. After general editing with a mallet, it is necessary first of all to restore the final shape of the stiffening lines, and then to level the surface of the wing. Then the side surfaces of the wing are straightened. If swelling occurs, they are eliminated by spot heating the part.
If part of the surface has a slight convexity that extends beyond the boundaries of the rigidity lines, it can be eliminated by drawing out the metal without disturbing the shape of the interface between the rigidity line and the main surface. This operation can only be performed with a sufficiently long surface length, since with a short processing length the convexity may become larger than before straightening.
This means that in all cases it is necessary to choose the correct strategy for straightening a particular part from the very beginning. An error can lead to irreparable defects.
Door stop
To limit the opening angle and hold the door in the open position, each door is equipped with a spring stop 1. The ends of the stop, which serve as the axis of its rotation when opening the door, are attached to the body pillar with a bracket 6, which is secured with screws 7 screwed into a plate 5, held in place by a holder 4 , thanks to which the screws can be removed completely. The dimensions of the holder allow the plate to be moved when adjusting the door hinge.
When the door is opened, the shank 2 of the roller, mounted on the amplifier 8 inside the door, rests against the stopper loop, thus delaying further opening of the door. In this case, the limiter jumper 3, due to its elasticity, compresses the roller, preventing the door from closing under the influence of its own weight. The door opening angle with this design is not adjustable. To prevent the door from creaking, the stopper must be periodically lubricated.
Rice. Position of the lock and latch when closing the door: I - direction of door movement; II - direction of rotation of the rotor; a - the door is completely closed; b - the door is closed by one tooth; c — the door begins to close; 1 - rotor; 2 - latch; 3 - cracker; 4 — clamp; 5 — latch shelf
Door lock
All body doors have rotary locks of the same design. The lock holds the door in the closed position due to the fact that the rotor 1 is engaged with the toothed latch 2 mounted on the body pillar. The locks of all doors can be opened from outside the body by pressing the button on the outside handle, except for the front left door, and opened from inside the body by turning (up) the handle of the internal lock drive. When this knob is turned down, the lock is locked and cannot be opened from the outside. The left front door lock cannot be locked from the inside and can only be locked from the outside with a key using a lock located in the button on the outside handle.
The door lock, internal drive and gear latch are secured with screws. The lock mounting screws are screwed into the lock body, the drive screws are screwed into the fixed nuts of the door panel, and the latch screws are screwed into a plate held inside the post by a holder. This fastening allows you to remove the screws completely.
The outer handle is secured with two studs screwed into the handle and nuts.
The rotor 1 of the lock, made in the form of a six-tooth gear, rotates when opening and closing the door, rolling along the teeth of the latch 2. The rotor is held from rotation by a pawl 2, which is pressed against the ratchet 1, sitting on the same axis with the rotor, by the tension of the spring 3. When the door slams shut The rotor, resting against the latch teeth, rotates, overcoming the small force of spring 3, due to which the door closes with a slight push.
Rice. Door lock mechanism: 1 - ratchet; 2 - dog; 3 - spring; 4 - latch; 5 — lever foot; 6 — shelf of the lock body; 7 — pawl shank
The ability to freely roll the rotor along the toothed latch when closing the door allows you to slam all doors except the left front one, even when the inner handle is locked, i.e., in the lower position, which is very convenient if you need to close the door from the outside.
When opening the door, in order to free the rotor for rotation, the pawl 2 is moved away from the ratchet or the latch 6, pressing it with the bolt of the button 1 of the outer handle, or by lifting up the shank 7 of the pawl, turning up the handles of the internal drive of the lock (using the drive rod and the rocker arm in the lock ). When the drive handle is turned down, the rocker arm enters between the shelf 6 of the lock body and the foot b of the lever and locks the door, since when you press the button on the outer handle, the latch 4, resting against the rocker arm, cannot turn and move the pawl away from the ratchet. In the lowered position, the internal handles do not spontaneously return to their original position when the door slams, since this is prevented by the locking spring that holds the roller on which each handle sits in the extreme position. At the same time, the locking spring does not prevent the handles from returning to their original position when the door is opened from inside the body. Some force that must be applied to the handle when opening the door prevents it from opening if the handle is accidentally touched.
When a car moves on an uneven road, the body doors, which have significant weight (about 20 kg), create a large bending moment on the hinges due to the vertical movement of the body, i.e., an additional load that weakens the fastenings of the hinges and leads to their wear. As a result, the door sags, begins to knock while moving, and the tightness of the door seal is broken. To compensate for the bending moment on the hinges, the door lock, in addition to its main purpose, also serves as an additional support for the door. In the lock under the rotor, a latch 4 is fixed, which, when the door is locked, rests on the shelf 5 of the latch attached to the body pillar. To prevent the door from bouncing, the latch is clamped in the latch with a special movable plastic block 3. When the door is closed, in the correct position, the latch should smoothly enter the latch shelf without impacting and lifting the door upward.
The necessary tension of the door, i.e. its pressing against the body opening, is ensured by adjusting the position of the lock latch on the body pillar. By loosening the fastening screws, the latch can be moved and installed in the required position, after which the screws must be tightened well. The correct position of the latch relative to the door lock is controlled by the size of the mark that the latch leaves on the latch flange. The length of the trace should be no more than 25 mm. During operation, to ensure easy closing of doors and their proper sealing, it is necessary to periodically check and tighten the fastening of the hinges and lock latches of each door. If the mark left by the latch on the latch flange begins to deepen, this indicates a loosening of the door hinges and a violation of the correct position of the door, which must be restored immediately.
Types of car rear doors
Basically, the design of the rear door depends on the type of body and the purpose of the car. The two main body types with a rear tailgate are hatchback and station wagon, as well as their variations.
The station wagon body is usually equipped with a vertically positioned straight door with top hinges. This is due to the convenience of unloading and loading, since the “raised” door provides maximum free access to the luggage compartment, which is important, for example, when handling large items.
The body of an SUV is also a type of station wagon, however, as a rule, its height is greater, which is due to the use of doors with side hinges. Moreover, if the car is large enough and the door, accordingly, has impressive dimensions, it is made of double doors, which ensures ease of access.
Double doors were used, for example, on the Nissan Patrol Y60 or Chevrolet Suburban. It should be noted that double-leaf doors gradually lost their relevance due to the development of drive mechanisms that eliminated the use of human force to open and close the tailgate, and on the same Patrol of the latest generation, despite its impressive dimensions, a classic station wagon door with an overhead position was used loops
Hyundai car back door
If the doors of cars with a station wagon body, as a rule, are quite simple in terms of design due to the vertical installation, then in cars of the hatchback or liftback type the trunk door often follows the shape of the body and can, in fact, be part of, at the same time, the roof of the car and the rear wall .
In connection with this feature, new design modifications of the rear doors have appeared. An excellent example of this would be a split door, divided into two parts horizontally along the line where the roof pillars meet the rear wall. This design was often used to create American station wagons, such as the Buick Skylark Sport Wagon. The lower part of the door was converted into a tailgate, which became a convenient loading area. The disadvantage of this system is that the lower part of the door, which folds down,
Subsequently, the design of the split rear doors received a new development. With the advent of electric drives, it became possible to make the lower part of the double door tilt down, not up. As a result, the driver does not need to lift the entire door to get a small object; it is enough to “lift” the small rear door. Often in modern cars, the rear door functions are controlled using buttons on the key. This scheme is implemented, for example, in the BMW GT car.
With the advent of electric drive systems, remote control of the tailgate has become a mandatory attribute of modern high-class cars. For example, a number of Mercedes models are equipped with an EASY-PACK rear door. The door drive is combined - electro-hydraulic. After pressing the button on the driver's seat or on the ignition key, the door begins to rise. In this case, the rise can be stopped by fixing it at any height to avoid contact with a low ceiling.
External door handle
Button 1 of the outer handle of the left front door is equipped with a cylindrical lock that locks the button. When the key inserted into the lock is turned 90°, the lock cylinder rotates. In this case, the protrusions 5 located on the cylinder become across the slot in the bottom of the cup 3 of the spring 2 of the handle and thereby prevent the button from moving. With the exception of the lock button, all handles are interchangeable.
In order for the door to open unimpeded when you press button 1 of the handle, the button must move freely in the handle until it stops and return to its original position by the force of spring 2. If under these conditions the door lock does not open, then, consequently, push bolt 4 of the button does not reach latch 6 of the lock. For proper operation of the lock, it is necessary that a small gap of 0.3-1 mm be maintained between the head of bolt 4 and the latch 6 of the lock. If the bolt rests against the latch, then free angular movement of the door lock rotor will appear, which is unacceptable.
The position of the push bolt can be adjusted without removing the outer handle. To do this, you just need to remove the door trim and use the hatch that is in this part of the door. After installing the bolt in the correct position, tighten the bolt lock nut 4 well.
Door window. Release glass
The windows on all four body doors can be lowered and raised using power windows. The supports for the guide grooves along which the glass slides are the pillars of the door frames and additional pillars parallel to them, dividing the door window into two parts. In the front door, the dividing pillar is part of a non-removable frame of pivoting glass, which is attached to the door with three screws.
In the rear door, the dividing pillar is attached independently with two screws.
The guide grooves on the door frame pillars, as well as the upper groove into which the edge of the raised glass fits, are attached to the door frame profile with special spring holders. The lower ends of the grooves are held by a metal groove welded to the door with a hook at the end. The guide grooves on the dividing posts in the upper part are riveted to the posts, and in the lower part they are held by a hook riveted to the groove, which fits into the slot of the bracket 13 attached to the door.
The lower part of each sliding glass is pressed together with a rubber gasket into a steel clip 8, to which a bracket is welded, equipped with a clamp 5 for attaching the clip to the window lift cable 16.
Rear door glass
In the rear door window, due to the impossibility of completely lowering the glass due to the arched projection of the door above the wheel, the sliding glass is narrowed, and the additional glass, which is made fixed, is enclosed along the contour in a rubber seal.
Rice. Door seal: a - section along the top of the door window; b - cross-section along the B-pillar through the windows of the front and rear doors; c - cross-section along the door threshold; 1 - edge of the facing lining; 2 — external seal; 3 — arch of the headliner; 4 — internal seal; 5 — sliding glass; 6 - groove; 7 — door frame; 8 — threshold facing; 9 - outer door panel
Window lifter
For the sliding windows of 1 doors, the same window lifters with a cable drive are used. The glass lifters of the right and left doors are interchangeable, and the front and rear doors differ only in the length of the cable. The window regulator is secured to the door with three screws screwed into the window regulator body.
The window lift cable is fixed to drum 17 and in the working position is tensioned in the form of a triangle. The axis of the upper roller 4 is riveted to the reinforcement of the inner door panel.
The lower roller 14 is fixed in a fork 12, which is constantly pulled down by a spring 11 to compensate for the pulling of the cable. To reduce the friction of the cable on the side of the roller and ensure silent operation, the hook 10 of the fork is fixed at one point, as a result of which the plane of rotation of the lower roller 14 can deviate in accordance with the movement of the cable 16 along the grooves of the window lift drum 17.
Rice. Sliding glass and front door windows: 1 - glass; 2 — internal glass seal; 3 - window sill invoice; 4 - upper roller; 5 — cable clamp; 6 — external glass seal; 7 — external decorative trim; 8 — sliding glass holder; 9 — lower roller bracket; 10 - fork hook; 11 - spring; 12 - fork; 13 — buffer bracket; 14 - lower roller; 15 - buffer; 16 — cable; 17 - drum; 18 - handle
The cable and glass are moved by rotation of the drum using the window lifter roller gear and the drum ring gear 17.
The upward movement of the glass is limited by the glass resting on the upper groove fixed to the door frame. The downward movement of the glass is limited by the stop of the glass clip 8 in the rubber buffer 15, inserted into the bracket and fixed to the inner panel of the door.
The windows are fixed in any position by a brake spring placed inside the window lifter brake cup. The correct operation of the brake spring is checked by the amount of free play of the handle 18, which should be no more than 35 mm along the chord for the tip of the handle. Due to the fact that normal operation of the window lift can only be ensured with proper cable tension, elongated holes are made to attach the lower roller bracket 9 to the inner door panel, allowing the bracket to be installed in the desired position. Cable 16 must be well lubricated. If bracket 9 is loosened, the cable may come off the rollers and the window regulator will stop working. In this case, you should remove the inner handles and door trim, correct the position of the cable on the drum and rollers, pull bracket 9 down and secure it so that the cable is stretched like a string.
Rice. Pivoting glass of the front door: 1 — glass frame seal: 2 — pillar; 3 - nut; 4 - bracket; 5 - axis; 6 - spring; 7 — washer; 8 — seal for the open edge of the glass; 9 — bracket; 10 - button; 11 — handle; 12 — vaschelka
Pivoting front door glass
The rotary glass, which serves for ventilation of the front part of the body, is a separate unit, which is attached to the door frame with two self-tapping screws screwed into brackets 9, and to the door sill with one screw screwed into a fixed nut 3. The rotary glass of the front door is pressed together with the rubber - a new gasket into the rotating frame and holds firmly in it.
The rotating glass frame is equipped with a friction mechanism that locks the glass in any position, even with strong pressure from the oncoming air flow.
The ease of movement of the glass, which should turn with little hand effort, and the reliability of its fixation depend on how tight the spring 6 is, creating friction between the washer 7, put on the lower axis 5 of the turning frame, and the bracket 4 of the glass mounting frame.
Since the pivoting glass is assembled into one unit along with the installation frame and the window dividing post, if it is necessary to adjust the spring tension, the entire unit must be removed from the door, which can only be done after removing the armrest, internal door handles and its upholstery.
In the closed state, when the glass handle 11 is held by the latch 12, the glass frame and its open edge must be tightly pressed along the entire contour to the rubber seals 1 and 8.
The window handle has a locking device with a button 10, which prevents the locked handle from turning upward (from a horizontal position) and opening the window from the outside of the car using any hook. When you press the button from inside the body, the glass handle rotates freely. When lowered to the horizontal position, the handle locks without pressing the button.
How does it work
In appearance, the electric drive resembles a gas-filled tailgate stop - only thicker and longer (according to the laws of mechanics, greater movement requires less force). In addition, numerous devices must fit inside. The main element is a screw-nut pair that passes through almost the entire drive. An electric motor is installed at the end, which rotates the lead screw through a reduction planetary two-stage gearbox. A coil spring that works in compression helps lift a heavy door.
Luggage compartment door drive: 1 — Hall sensor; 2 - electric motor; 3 - gearbox; 4 — lead screw nut; 5 - spring; 6 - lead screw.
Luggage compartment door drive: 1 — Hall sensor; 2 - electric motor; 3 - gearbox; 4 — lead screw nut; 5 - spring; 6 - lead screw.
A device with feedback is required
, indicating that the device has reached one of two extreme positions.
This role is played by the Hall sensor, which controls the rotation of the motor armature. The operation of the two drives is controlled by an electronic unit. The tailgate can be opened by command from the remote control, or by pressing the button on the door when the car is disarmed, or, finally, in the most effective way - by running your foot under the bumper.
You can close the opening from the remote control by pressing a button on the door trim or a button from the interior.
Door seal
All four doors have a double seal to protect the interior of the body from water and dust. The first seal is external, carried out by a continuous seal 2 made of sponge rubber, glued to the door along its entire perimeter, including the upper frames of the door 7. At the lock chord of the front door, the seal is additionally pressed with a steel lining.
The second seal 4 is internal, made in the form of an elastic, also continuous rubber profile, attached to the doorway of the body. In the lower part of the doorway, in the threshold area, the seal 4 is pressed against the flange of the opening by the threshold lining 8.
The rotating window glass is equipped with rubber seals 1 and 8. The sliding glass 5 is sealed with pile grooves 6 along which the glass slides, as well as with an internal pile seal 2 on the window sill 3 of the door and an external rubber seal 6 clamped in the lower decorative lining 7 of the door.
The effectiveness of the main outer door seal depends primarily on the tension (adjusted by the position of the lock latch on the pillar) at which the door closes with a slight push, and the sponge seals are deformed to the point that there are no gaps between them and the door. To do this, check the tight fit of the door seals to its opening by rubbing the seals with chalk. When the door slams, there should be a chalk imprint on the body.
If, with a well-adjusted door tension and correct operation of the lock, the chalk imprint is missing, then in these places you need to carefully separate the seal from the door and place a rubber pad of the required thickness under it with glue on it.
A car is a technically complex device consisting of a large number of parts, assemblies and mechanisms. Every self-respecting car owner is obliged to understand them, not even in order to be able to independently fix any malfunction that may arise on the road, but simply to understand the principle of operation of his car, and the ability to explain the essence of the problems that have arisen in a language understandable to a specialist. To do this, you need to know at least the basics, what main parts the car consists of, and what each part is called correctly.
car door
The utility model relates to the automotive industry, to the designs of stamped parts of car bodies, namely to sheet-stamped car doors and elements that perform the functions of fastening the door hinge. The technical result of the proposed solution is to reduce the metal intensity and labor intensity of manufacturing a car door, increase the strength and rigidity of the door structure, increase the manufacturability of the product, as well as reduce the cost of its manufacture. The technical result is achieved due to the fact that a car door consisting of parts - an outer door panel, an inner door panel, interconnected by flanging, and parts of a hinged door reinforcement attached to the inner door panel using spot resistance welding, including functionally separated hinged parts that perform the functions of fastening elements for the door hinge (door hinges, door opening limiter, etc.) and create additional strength and rigidity of the entire structure, made of individual stamped parts of different shapes and thicknesses, interconnected by welding, forming a single prefabricated stamped structure .
The utility model relates to the automotive industry for the designs of stamped parts of car bodies, namely, sheet-stamped car doors and elements that perform the functions of fastening the door hinge.
The design of a car door is known, consisting of parts - an outer door panel, an inner door panel, interconnected by flanging and parts of a hinged door reinforcement, which includes functionally separated hinged parts of different shapes and thicknesses and performs the functions of door hinge fastening elements (door hinges) , door opening limiter, etc.) and creating additional strength and rigidity, made in the form of one stamped part made from a figured welded sheet blank of variable thickness, and in the area of the door hinge and in the area of the amplifier under the lock, where maximum loads are applied, its thickness is greater than other parts of the amplifier.
The disadvantage of a car door of this design is the increased metal consumption and labor intensity of manufacturing the sheet-welded blank “hinged door reinforcement”, the need for special expensive equipment and, as a consequence, the high cost of the part, as well as the fact that individual hinged parts that fulfill their functional purpose cause stress concentration along their boundaries and do not significantly strengthen the door structure as a whole, and the rigidity and strength of the structure is largely determined by the rigidity and strength of the main parts of the car door - the outer and inner panels.
The closest to the claimed technical solution is a car door, consisting of parts - an outer door panel, an inner door panel, interconnected by flanging, and parts of a hinged door reinforcement, attached to the inner door panel using spot welding and including functionally separated hinged parts of different shapes, performing the functions of fastening elements for the door hinge (door hinges, door opening limiter, etc.) and creating additional strength and rigidity, made in the form of one stamped part from a shaped blank of constant thickness [1].
The thickness of the shaped blank “hinged door reinforcement” is selected as maximum based on the maximum load applied in the door hinge area and the area of the lock reinforcement.
The disadvantage of this design is also the high labor intensity and increased consumption of metal used for the manufacture of the hinged door reinforcement, the design complexity for stamping the part of the hinged door reinforcement, associated with the combination of several stamped parts that perform different functions and are located in different areas of the door. The shaping of parts is carried out by drawing on a double-action press; obtaining minimum stamping radii corresponding to the drawing using this technology is difficult and it was not possible to obtain them in real production. The required rigidity and strength of the door assembly is ensured to a large extent by combining all the hinged parts into one, but it becomes difficult to maintain the required accuracy of door positioning, because Installation errors of individual parts, when added up, reduce the positioning accuracy of the entire door structure as a whole.
The technical result achieved by the claimed solution is to reduce metal consumption and labor intensity of manufacturing, increase the strength and rigidity of the door structure, increase the manufacturability of the product, as well as reduce the cost of its production.
This result is achieved due to the fact that a car door consisting of parts - an outer door panel, an inner door panel, interconnected by flanging, and hinged door reinforcement parts, attached to the inner door panel using spot resistance welding, including functionally separated hinged parts that perform the functions of fastening elements for the door hinge (door hinges, door opening limiter, etc.) and create additional strength and rigidity of the entire structure, made of individual stamped parts of different shapes and thicknesses, interconnected by welding, forming a single prefabricated stamped structure .
The claimed design solution is illustrated by drawings, where:
Fig. 1 - general view of the part - car door;
Fig.2 - general view of the part - hinged door reinforcement assembly;
Fig.3 - front view of the part - mounted amplifier assembly;
Fig.4 - general view of the part - loop part;
Fig. 5 - general view of the part - longitudinal door reinforcement.
An automobile door made of stamped parts, the outer door panel 1 and the inner door panel 2, interconnected by flanging, and a prefabricated stamped part of the hinged door reinforcement 3, consisting of a power part - the hinge part 4 and the longitudinal door reinforcement 5 with excellent characteristics and requirements on the characteristics and requirements of the hinged door reinforcement 3, connected to each other by weld seam 6. On the prefabricated stamped part of the hinged door reinforcement 3, there are technological holes 7 for fixing in the welding jig. The hinged door reinforcement 3 is attached to the interior door panel 2 using spot welding.
The proposed technical solution makes it possible to reduce the metal consumption for the manufacture of one car door by 8.37 kg (16.74 kg per car). Manufacturing a hinged door reinforcement part from individual stamped parts ensures a reduction in stamping radii, which increases the accuracy and strength of the entire assembly (door) as a whole; simplifying the design of the door reinforcement makes it possible to transfer stamping production to an automatic stamping line. The use of parts of different shapes and thicknesses helps to increase the rigidity and strength of the car door, due to which the outer door panel and inner door panel parts are made of metal of a smaller thickness (from 0.9 to 0.8 mm).
Sources of information taken into account when preparing the application:
[1] “GA3-3302, GA3-2705, GA3-3221”, Catalog of parts in Russian and English - M. Third Rome Publishing House, 2004.
An automobile door consisting of parts - an outer door panel, an internal door panel and a hinged door reinforcement, which includes functionally separated hinged parts that perform the functions of fastening elements for the door hinge, characterized in that the hinged door reinforcement is made of separate stamped parts of different shapes and thicknesses , connected to each other by welding, forming a single prefabricated stamped structure.
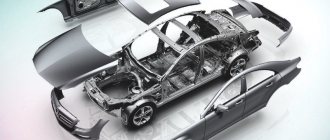
Car body
The basis of any car is its body, which is the body of the car that houses the driver, passengers and cargo. It is in the body that all other elements of the car are located. One of its main purposes is to protect the people and cargo in it from the influence of the external environment.
Usually the body is mounted on a frame, but there are also cars with a frameless design, and then the body simultaneously performs the functions of a frame. The car body structure is:
- single-volume, when the engine, passenger and cargo compartments are located in one volume (an example would be minivans or vans);
- two-volume, in which the engine compartment is provided, and places for passengers and cargo are combined in one volume (station wagons, hatchbacks, crossovers and SUVs);
- three-volume, where there are separate compartments for each part of the car body - cargo, passenger and engine (pick-ups, sedans and coupes).
Depending on the nature of the load, the body can have three types:
Most modern passenger cars have a supporting structure that absorbs all the loads acting on the car. The general structure of a passenger car body includes the following basic elements:
- spars, which are load-bearing beams in the form of a rectangular profile pipe, they are front, rear and roof spars;
Body load-bearing system. This system allows you to reduce the weight of the vehicle, lower the center of gravity, and therefore increase driving stability.
- pillars - structural elements that support the roof (front, rear and middle);
- beams and cross members, which are located at the roof, side members, under the engine mounts, and each row of seats, there is also a front cross member and a radiator cross member;
- thresholds and floors;
- wheel arches.
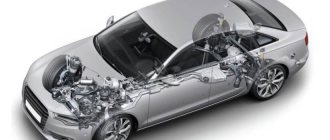
Car engine, its types
The heart of the car, its main component, is the engine. It is this part of the car that creates torque, which is transmitted to the wheels, causing the car to move in space. Today there are the following main types of car engines:
- ICE or internal combustion engine, which uses the energy of the fuel burned in its cylinders to produce mechanical energy;
- an electric motor powered by electrical energy from batteries or hydrogen cells (cars powered by hydrogen cells today are already available from most leading automakers as prototypes and are even in small-scale production);
- hybrid engines that combine an electric motor and an internal combustion engine in one unit, the connecting link between which is a generator.
It is a complex of mechanisms that convert the thermal energy of the fuel burning in its cylinders into mechanical energy.
By type of fuel burned, all internal combustion engines are divided into the following types:
- gasoline;
- diesel;
- gas;
- hydrogen, in which the fuel is liquid hydrogen (installed only on experimental models).
According to the design of internal combustion engines there are:
Transmission
The main purpose of the transmission is to transfer torque from the engine crankshaft to the wheels. The elements of which it consists have the following names:
- A clutch, which is two friction discs pressed against each other, which connect the engine crankshaft to the gearbox shaft. This connection of the shafts of the two mechanisms is made detachable so that, by pressing the disks, it is possible to break the connection between the engine and the gearbox, to change gears and change the speed of rotation of the wheels.
This is a power transmission that connects the engine with the driving wheels of the car.
- Gearbox (or gearbox). This unit is used to change the speed and direction of movement of the car.
- A cardan transmission, which is a shaft with articulated joints at the ends, serves to transmit torque to the rear drive wheels. It is used only in rear-wheel drive and all-wheel drive vehicles.
- The main gear located on the drive axle of the vehicle. It transmits torque from the driveshaft to the axle shafts, changing the direction of rotation by 90°.
- A differential is a mechanism that serves to provide different rotation speeds of the right and left drive wheels when the car turns.
- Drive shafts or axle shafts are elements that transmit rotation to the wheels.
All-wheel drive vehicles have a transfer case that distributes rotation to both axles.
Chassis
The complex of mechanisms and parts that serve to move the car and dampen the resulting vibrations and vibrations is called the chassis. The chassis includes:
- the frame to which all other elements of the chassis are attached (in frameless cars, elements of the car body are used to attach them);
The chassis is a set of devices that interact with each other to move the vehicle along the road.
- wheels consisting of disks and tires;
- front and rear suspension, which serves to dampen vibrations that occur during movement, and can be spring, pneumatic, spring or torsion, depending on the damping elements used;
- axle beams that serve to install axle shafts and differentials; they are only available in cars with dependent suspension.
Most modern passenger cars have independent suspension and do not have axle beams.
The appearance of the rear door as a body element in the history of the automotive industry
With the development of the automotive industry at the beginning of the 20th century and the emergence of the first assembly plants, a rapid design revolution took place, affecting all standard components, including the body.
If at the dawn of motorism the body of a car, such as, for example, the well-known Benz Velo, was not fundamentally different from the body of a horse-drawn carriage, then by the end of the first decade of the twentieth century it was possible to count about five or six different types of bodies. The most common type was the sedan. This type of body is clearly divided into three volumes: the engine compartment, the interior and the luggage compartment. At the same time, the luggage compartment often consisted of a suitcase or trunk attached to the rear, in which personal belongings could be transported.
At the same time, freight transport was developing. For the time being, these two spheres did not intersect, and this continued until cars replaced horse-drawn carriages in the field of taxis and the delivery of small quantities of goods. It is to these two areas of professional activity that we owe the appearance of station wagon and hatchback cars with a rear door leading to the luggage compartment.
Subsequently, the tailgate evolved along with these types of bodies and was modified depending on the needs of the user and the orientation of the vehicle according to the type of use.
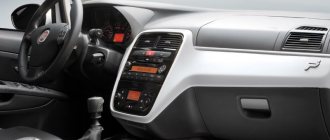
Steering
To move normally in a car, the driver needs to make turns, U-turns or detours, that is, deviate from straight-line movement, or simply control his car so that it does not drift to the side. For this purpose, its design provides steering control. This is one of the simplest mechanisms in a car. Let's look at the names of some of the elements below. The steering system consists of:
- steering wheel with steering column, this is the name of the ordinary shaft on which the steering wheel is rigidly mounted;
These devices consist of a steering system that is connected to the front wheels by steering and brakes.
- steering mechanism, consisting of a rack and pinion mounted on the steering column shaft, it converts the rotational movement of the steering wheel into translational movement of the rack in the horizontal plane;
- steering gear, which transmits the influence from the steering rack to the wheels to turn them, and includes side rods, a pendulum lever and wheel turning arms.
Safety
The working stroke of the side door closers is so small (6–7 mm) that only a finger can be pinched. On the interior side, the manufacturer does not leave any places where, for example, a child could find a gap in which a finger would be pinched. But the outer edges of the door still form gaps. However, you can only put a pencil in there.
This is how the Audi Q8 door closer bites through a pencil.
This is how the Audi Q8 door closer bites through a pencil.
Children should not operate the tailgate drives. Well, for an adult, the maximum force developed by the drive and not exceeding 10 kg at the edge of the door is not dangerous. If this force is exceeded, the door stops and even - on some cars - begins to open.
Brake system
An important part of the machine that ensures safe driving is the braking system. Its main purpose is to forcefully stop a moving vehicle. It is also used when it is necessary to sharply reduce the speed of the car.
The brake system is of the following types according to the type of drive:
- mechanical;
- hydraulic;
- pneumatic;
- combined.
Modern passenger cars are equipped with a hydraulic brake system, which consists of the following elements:
- brake pedals;
- main hydraulic cylinder of the brake system;
- master cylinder filling tank for filling brake fluid;
- vacuum booster, not available in all models;
- front and rear brake piping systems;
- wheel brake cylinders;
- brake pads pressed by wheel cylinders to the wheel rim when braking a vehicle.
Brake pads are either disc or drum and have a return spring that presses them away from the wheel rim when the braking process is complete.
Electrical equipment
One of the most complex systems of passenger cars with many different elements and wires connecting them, entangling the entire car body, is electrical equipment, which serves to provide electricity to all electrical devices and electronic systems. Electrical equipment includes the following devices and systems:
- battery;
- generator;
- ignition system;
- light optics and interior lighting system;
- drives for electric motors of fans, windshield wipers, window lifts and other devices;
- heated windows and interior;
- all electronics of the automatic transmission, on-board computer and protective systems (ABS, SRS), engine management and others;
- power steering;
- anti-theft alarm;
- sound signal.
This is an incomplete list of devices included in the electrical equipment of a car and consuming electricity.
Every driver needs to know the structure of the car body and all its components in order to always maintain the car in good condition.
A car is not a luxury, but a means of transportation. This phrase, familiar to many, has long justified itself; every year more and more people become motorists, giving preference to comfort and speed of movement. Today we will look at such a familiar element as a car door, study its varieties and how it works.
Rear doorman
For ease of use of the trunk, we came up with a hands-free access system
. We have already discussed the principle of its operation. And here is how the power drive of the luggage compartment lid works.
An electric motor with a gear reducer that turns the lid by its hinges.
An electric motor with a gear reducer that turns the lid by its hinges.
Moreover, such devices are used both on heavy fifth doors of station wagons and on the lids of sedans.
There are also cars with a hydraulically driven trunk lid.
, but
the drive in the form of a sliding rod with a built-in electric drive
.
Hydraulic drive of the trunk lid of the Volkswagen Phaeton sedan: 1 - hydraulic cylinder; 2 - hydraulic unit; 3 - electric motor; 4 — trunk loop.
Hydraulic drive of the trunk lid of the Volkswagen Phaeton sedan: 1 - hydraulic cylinder; 2 - hydraulic unit; 3 - electric motor; 4 — trunk loop.
Main varieties
It may seem to many that the structure of a car door is quite simple. In fact, it turns out that there are a whole variety of types of similar structures, fastenings and schemes of their operation.
The first type is a standard door, which has a classic composition and fastening scheme. Thus, the hinges and holders are located at the front of the body, and the frame opens towards the front wheel.
Lambo doors were first used on representatives of the Lamborghini brand. This mechanism has the most complex design, and therefore is used only on premium racing and sports cars with small dimensions. The principle of operation is that the door does not swing outward, but moves hingedly relative to the plane using a complex holder. The main advantage of this variety is its ease of use in tight parking, which is appreciated by many owners of Lamborghini cars.
Examples of unusual uses for a car's rear door
Despite the fact that cars with a hatchback or station wagon body are suitable for transporting most large cargo (naturally, taking into account the size of the trunk), in everyday life a person uses a number of items that do not fit into the average trunk, for example, sports equipment. As a rule, transport devices are installed on the rear door.
The most common additional device is a bracket for storing a spare wheel. Often used in station wagon SUVs, as the frame design and high ground clearance prevent the traditional method of storing a spare tire. Recently, modules for transporting bicycles have become widespread, allowing one to avoid removing the front wheel. In addition, the device allows you to transport several bicycles at a time, which is almost impossible when loading into the trunk.
Complex electronics
When it comes to the design of modern car doors, one cannot fail to mention such a useful electronic mechanism as the hazard warning light. Such electronics are intended, first of all, to prevent doors from opening while driving, to ensure the safety of the driver and passengers.
The alarm system includes a system of wires, limit switches and a system of emergency indicators displayed on the instrument panel and sound alarms. The limit switch includes a button and a pair of normally open contacts along with fasteners that allow you to connect and disconnect the alarm from the network.
The alarm itself is usually located near the dashboard of the car. There may be an audible alarm, built on the basis of a relay system, and a lamp system, which is an indicator component of the alarm.
The operating principle of the alarm is quite simple. When the door opens, the limit switch located between the door frame and the housing frame closes. The closed circuit supplies voltage to the siren system located on the dashboard. As a result, a characteristic sound is heard, the required lamp lights up, and a warning message appears on the car’s on-board computer about the need to close a particular door.
Such a system is not only an effective protection against accidental opening, but can also save the life of the driver and passenger, who may fall out of the cabin at the next sharp turn.
Useful invention
An electronic alarm is not all that is part of the door mechanism of a modern car. Another element is the limiter, which has been widely installed on opening mechanisms for quite a long time.
Why is such a mechanism needed? What is the role of the limiter and why is it so important for every modern car? It turns out that when the door is opened, its metal frame and holders experience a fairly high load. If the door is opened too wide, it can come off the hinges and cause a lot of trouble for the owner.
To prevent this from happening, a device such as a limiter is used. This design is a metal loop that connects the door frame and the holder to which it is attached. When opening and closing, this device does not interfere with the movement of the mechanism, but when the door reaches its dead center, the limiter reaches the stop and does not allow it to open wider. In this way, it is possible to prevent damage to the expensive holder mechanism, as well as save money and time on repairs.
Doors
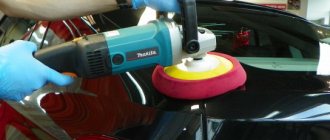
Removing dents on cars
|
Doors are also movable elements of the car body; they are removable. Structurally, the door consists of a frame, which serves as a support for the cladding. Until recently, the door panel was usually adjusted and welded to the frame by spot welding, then another method began to spread - gluing. Gluing provides the best sealing in the rolling areas, which significantly reduces the possibility of corrosion.
When replacing a door panel, it is recommended to use the same installation method as at the factory.
Other door components include glass, a window lifter, a remote control lock, and trim that covers the inside of the door in the cab.
Most doors with minor damage can be repaired. However, in practice, such editing is not always economically beneficial if, for example, the inner frame of a door is deformed. In this case, the damaged door is replaced with a new one and suitable parts and components removed from the damaged door are installed on it, due to which the owner’s repair costs are somewhat reduced.
If the inner frame of the door is not damaged, repairs can be made in two ways: replacing the damaged door panel with a new panel or straightening the door panel if the dent did not cause significant stretching of the metal.
Straightening as straightening
|
To make straightening work easier, the door is removed. (Only the hinge pins can be removed and the door stops removed.) Then the door is dismantled. First, remove the window lift and lock handles, which are fixed on the axles either by means of tension rings and cotter pins, or with the help of keys, access to which is difficult, since they are closed with decorative overlays, which, in turn, are pressed by springs. The interior trim is usually attached to the door using expandable clamps that fit into the holes in the interior cavity of the door. To remove the upholstery, you need to insert the blade of a screwdriver (it is pre-covered with fabric) between the door frame and the upholstery close to the clamp and press on it like a lever. The fabric prevents the paint from coming into direct contact with the metal of the screwdriver, which could cause damage to the body paint. In order not to destroy the connection of the clamp with the door upholstery, which is sometimes possible due to a damp upholstery panel, do not apply great force to the screwdriver.
Replacing the door panel on some car models can be done without removing the glass, window lifter, and other fasteners. In general, the door panel is replaced only if it is provided for by the manufacturer and if the panel is supplied as a separate part.
The fastest way to remove a door panel is to align the cut of the door at the folding points. This is done as follows. It is necessary to trim, if necessary, the welding connection at the upper points; disconnect the panel strip from the door frame if it is spot welded; correct the deformation of the door frame.
When installing a panel on a door frame, preference is given to gluing if this is possible or recommended by the manufacturer in order to protect against corrosion. For gluing, choose the recommended adhesive mastic or something similar.
If it is necessary to edit the panel, it is not always necessary to remove the window regulator and lock.
Editing the door panel
Straightening a door panel is a more delicate job than straightening a fender. The stamping depth of the panel is small, and its sides are rigidly connected to the internal frame and have a certain shape and length. Any tapping with a hammer as a result of stretching the metal creates a convexity on the surface.
But there are also conveniences. The surface of the internal frame, which forms the partition of the cabin, has cutouts into which a tool can be inserted and a force applied to it, opposite to the force that caused the dent. Force on the tool can be provided by a small foot-operated expansion jack or a small lever. The force should not be applied to the center of the dent, but as close as possible to the panel fastening points. Under the influence of force, the shape of the door panel is basically restored, after which all that remains is to level its surface, on which there are folds at the fastening points. To eliminate them, the panel is heated at several points, then cooled and leveled. Then the operation is repeated until the shape is completely restored.
If any part of the inner frame has been cut away to make the panel easier to access, it will need to be welded back into place.
If the center of the panel dent is large enough, then in some cases it can be knocked out as usual from the inside using a sledgehammer, striking near the top of the dent. On panels with a pronounced curvature, the dent can be knocked out from the outside with light blows applied along the periphery of the dent crater. After leveling, you must reapply the soundproofing coating to the inside of the panel, then install the panel accessories and upholstery.