We determine the paint consumption for painting a car. Table for calculating the required volume of material.
When you paint a car yourself, you save a lot of money, which is why many people are interested in the question of the technology for carrying out all the work. But one of the main questions that worries novice car painters is: “What is the paint consumption for a car?” Paint is not a cheap material at all, and you don’t really want to buy too much; you’ll end up throwing money away. You will not be able to get an exact answer to this question, since many factors influence the volume of material.
What affects consumption?
At first glance, the main parameters include the surface area that needs to be processed and the number of layers of material that are planned to be applied.
But in fact there are other factors.
In particular, many craftsmen recommend the use of primers, paints and varnishes from the same manufacturer. This way, you can avoid defects and save on car paint consumption for all sorts of alterations.
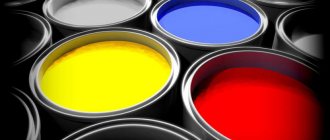
Which paint should you choose for your car?
In fact, there are several different types of auto enamels that are used to apply to the car body at home.
Car paint consumption rates
On average, to paint, for example, a door or fender, you will need about 150 ml of paint, about 250 - 300 ml of material for a bumper, and about 600 ml for a hood.
On average, the consumption rate is 200-250 ml per 1 sq.m. treated surface. The varnish consumption is approximately the same, this does not take into account the solvent and hardener.
An average sedan, if the technology is followed, requires about 2 - 2.5 liters of acrylic paint, excluding solvent and hardener. If you use alkyd paint, its consumption will be slightly higher than 3 - 3.5 liters. If your task is to paint all surfaces inside the body, then the material consumption will increase by 1.5 - 2 times.
If, when repainting a part, the old paint was, for example, black, and you decided to apply a white layer, then the consumption will increase by 50%. This occurs due to the application of additional overlapping layers.
We will provide a table that will help you roughly navigate the paint consumption for individual parts of the car body.
Here is a useful video on the topic of calculating material consumption when painting a car.
What if you use aerosol cans?
They are mainly used for local repairs, and one can has a volume of 150 grams of paint. The average paint consumption for painting a car using an aerosol can will be from 0.25 sq.m. up to 0.5 sq.m.
For 1 sq.m. For the surface to be treated, we will need about 2 - 4 cans of paint and the same amount of varnish.
Source
What to consider when calculating
If you go to the store to buy paint, you will realize that it is quite expensive. Therefore, there is no point in overpaying by buying extra goods; it is enough to make the correct calculation. At the same time, if during work it turns out that there is not enough paint, you will have to buy it additionally. But then it can be quite difficult to choose the right shade, because even in different batches they can differ.
To understand how much dye you need, you need to consider the following factors:
Calculating the amount of paint for painting a car Having examined the most important points in detail, it will be much easier to understand the issue of painting.
Factors that determine paint consumption per car
Painting at a service will entail considerable expenses; it is cheaper to do it yourself. But when choosing the latter option, you need to have certain skills and calculate the paint consumption for the car. The quantity is influenced by several factors:
Next, we will analyze all these factors in more detail.
Machine size
It is quite difficult to accurately determine how much paint is needed to paint a car. Below is the approximate paint consumption for individual parts.
| Detail | Consumption in ml/l |
| Door | 200 |
| Wing | 150 |
| Trunk | From 300 to 400 |
| Roof | 400 |
| Bumper | 300 |
| Back panel | 250 |
| Radiator grille | 100 |
| Threshold | 150 |
Paint color and original body color
The consumption of paint and varnish material will depend on the original color of the car. If the color is contrasting with the original, more paint will be used than with standard coloring.
You need to know: dark colors do not overlap well with light shades.
It is necessary to apply paintwork in several layers. For example, red or yellow do not cover the substrate well. It may take about 9 or 10 coats of paint to completely cover. Black, green and their shades cover the base well.
Paint viscosity
Of all the parameters when painting a car, the most significant is the viscosity of the paintwork material. It depends on how correctly the coloring composition was diluted. Most cans indicate the proportions that must be followed when mixing the activator and paint. It could be 2:1 (or another value). In this case, dilute 2 parts of the dye and 1 part of the activator.
It is strictly forbidden to add all the ingredients by eye. Such an experiment can lead to the paint being either too thick or thin. In the first case, when painting, an “orange peel” effect occurs, and in the second, drips form.
A viscometer and a graduated container will help you calculate the required number of components. The operating principle of this device is to pour a certain amount of liquid into a special container through a hole of a certain diameter. The device's stopwatch records the time.
If you don’t have a professional measuring tool, you can use a regular ruler. It is placed in a container and a coloring agent is poured. The ruler scale determines the amount of activator that needs to be added.
Important: Viscosity may depend on the room temperature, as well as the surface of the parts. When the temperature in the garage is cold, “tears” form on the painted surface. It is better to perform coloring at a temperature not lower than +23C.
It is worth considering that the thicker the paint, the better its coverage, as a rule. This means that fewer layers will need to be applied than when using a less viscous material.
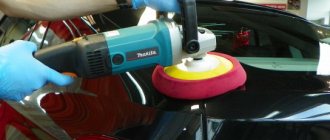
Type of spray gun, tools
Experience in car painting
Having skills will help reduce the consumption of paints and varnishes. There are a number of rules that should be followed when painting a car, otherwise the enamel layer will lie unevenly and you will have to additionally cover it. This may entail additional material costs. Therefore, if you have no experience in painting, then you should practice on some unnecessary surface.
How much paint is required to paint a car?
Over time, the car has to be repainted to update the body color or after a major overhaul of the car. You can carry out this operation yourself, but you must first calculate it to find out how much material (paint) is required for a given car brand. Otherwise, you will have to purchase an insufficient volume, which may differ slightly in tone.
How to calculate the consumption of paint and varnish?
To calculate how much paint or varnish is needed to paint a car or its parts, you can use the average rate. According to approximate calculations per 1 sq.m. body, ¼ liter is spent. material. It follows from this that a vehicle will need 3.5 - 4 liters of paintwork.
As for the varnish, its consumption will be the same as the coloring composition (for a two-layer coating, the amount of substance must be multiplied by two). The amount of varnish also depends on the covering power of their base. Taking this parameter into account, in order to save on consumption, it is better to choose compounds made from synthetic resins. Nitro-combined and acrylic analogues “cover” the paint worse.
Read more about grouting damaged paintwork
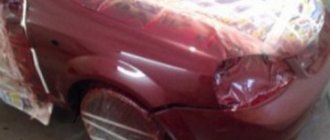
Before you start grouting, you need to place the car under the light and inspect the body parts. Mark all scratches, cracks and gouges with a marker.
Now that we have established all the irregularities that are on the body, we take 60-100 sandpaper and a 5 mm chisel. We carefully rub the defect down to the metal. We try not to increase the area of the surface to be rubbed; the smaller it is, the easier it will be to correct it and bring it to the overall color. The periphery zone between the entire part of the car and the defect should be invisible, without scratches, waves or peeling. How much paint is needed to paint a car depends on the quality of the prepared surface.
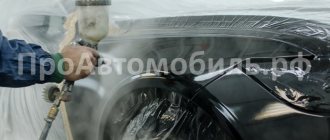
Before painting, it is necessary to clean, wipe off all dust both from the car and from under it, otherwise the dust will settle when applying the paint solution.
Paint consumption in cans
An economical option when painting a car is a can of automotive enamel. In addition, using a can is very convenient when painting individual parts.
In this situation, as in the case of ordinary paint, there are only approximate cost estimates. The table shows approximately how much varnish and spray cans are needed for painting different car parts.
| Detail | Aerosol quantity | varnish |
| Front, rear bumper | 3 pcs. | 350 ml. |
| Front, back door | 3 pcs. | 250 ml. |
| Roof | 4 things. | 400 ml. |
| trunk lid | 3 pcs. | 300 - 400 ml. |
| Hood | 3-4 pcs. | 400 ml. |
| Wing (front, rear) | 2 pcs. | 250 ml. |
| Threshold | 1 PC. | 100 ml. |
| Trunk lid hatchback, jeep | 3 pcs. | 300-400 ml. |
| Side racks | 1 PC. | 100 ml. |
| Side mirror | 1 PC. | 100 ml. |
Taking into account all the above nuances when painting a car, you can reduce the likelihood of overuse of paint and calculate the approximate amount of material required. Of course, the main criterion for paint consumption is the size of the machine and the viscosity of the material itself.
How many layers should I apply?
The number of layers depends on the color of the car and the type of paint. Two-component paint applied without varnish, as well as the varnish itself, usually requires 2-3 coats with drying time between coats. Some low coverage colors and metallics may require more coats.
First, a binder layer is applied, which provides a good basis for subsequent layers and reduces the likelihood of smudges. This is a thin surface layer. It's better if it remains a little sticky. Usually it is enough to dry it for 1-2 minutes. Next, full wet coats are applied.
Factors determining paint consumption per car
The quality and quantity of material for body paint repair are directly related: enamels have different covering abilities, but the technology for applying the selected material is taken into account when calculating paint consumption for painting a car. There are nuances to using a brush and a spray gun: by using the right or correctly configured tool, you can reduce the amount of wasted auto enamel to the minimum specified by the manufacturer. Masters claim that this parameter is primarily influenced by experience, but the problem of calculation often faces novice painters, so in the calculations below it is assumed that the painter acts without fanaticism and serious miscalculations.
Interlayer drying
After applying each layer, you need to wait the required amount of time for the solvent to evaporate. If you wait too little time, the solvent will remain in the bottom layer of paint and after the top layer has dried, it will begin to come out, which will lead to the appearance of defects.
Manufacturers of paints and varnishes indicate the required drying time at a certain temperature. If the ambient temperature is lower or there is poor air circulation in the room, then the interlayer drying time must be increased.
Determination of flow rate by area
The division into varnishes, enamels and primers is more necessary for manufacturers and sellers to expand the list of products - in fact, the composition of these materials includes the same substances with different ratios. It is generally accepted that no more than a quarter liter of paint is used per 1 m² of car surface. The same figures can be seen in the recommendations for calculating the consumption of varnish, primer, etc. On average, 2.5 - 3.5 liters of finished enamel are spent to completely cover the substrate of the entire car. Approximate calculation for class “D” car parts:
door – 300 ml;
The above data is suitable for calculating complete painting with finished enamel (i.e., adding a hardener and bringing it to the desired viscosity), but several factors can affect the result for the worse or for the better. Local repair of damage involves the use of auto enamel of the same color, so covering power is not of paramount importance here and the amount of wasted material can be minimized. For the worse, the result will differ if the car's substrate does not match the color of the applied material: painting a white substrate with black enamel and vice versa means that the figures given can be increased by 30-50% (at least 1 additional layer will be required). On average, light colors and rich greens have the best hiding power; deep red and blue are in the middle of the calculation scale, but blue depends on the shade; yellow and light shades of red provide the worst color overlap.
Analysis of the main factors
Before you move on to choosing a material, you need to know what features affect the consumption of paint and varnish. There are actually several of them.
This also includes such a parameter as skill. It is also important, because if you have already done painting work with your own hands more than once, then you have probably become skilled in the technology of applying layers of paint and will be able to use material more economically.
Taking into account the viscosity parameter
Viscosity is one of the basic parameters of paints and varnishes. If you dilute the paint too thickly, you will end up with a layer defect in the form of an “orange peel”. If you dilute the material too much with a solvent, then smudges may form during application.
To avoid these defects, and this, in turn, is an overconsumption of material to eliminate them, you must strictly follow the instructions given by the paint manufacturer regarding the proportion of material and solvent. To maintain the dosage, you can use the tool as a viscometer, but if you don’t have one in the garage, you can use any containers with marks corresponding to the volume of the substance. You can also use a ruler as an indicator.
Also, the viscosity parameter may depend on the temperature conditions observed in the working area.
We determine the paint consumption per 1 sq.m. area when using different types of paint.
There is a rule among craftsmen that usually per 1 sq.m. For body parts, you need to prepare about 200-250 ml of paint. If we take varnish into account, then the calculation scheme is the same, but also take into account the volume of hardener and solvent. If there are several layers of any material, multiply this value by two.
Now, let's roughly determine how many liters of paint are needed to completely paint a car.
Also, if there are additional surfaces for painting, for example the same internal surfaces of a part, then the volume of paint for the entire car must be increased by 1 liter. And if you bought a new part that definitely needs to be painted on both sides, then the entire volume of material can be multiplied by 2.
And yet, how much is needed?
If we sum up some results, we can operate with the following more or less reasonable figures.
Individual parts
For an average part such as a wing, door, etc., it will take about 0.15 liters, for painting a bumper, taking into account the dimensions, it will take from 0.25 to 0.30 liters, for the hood - 0.4-0.6 liters of paint. For varnish the consumption is exactly the same without taking into account the hardener and thinner and for two-layer application.
The table below summarizes all the figures discussed in this text.
It indicates the volume of undiluted enamel, taking into account the cost of tinting. The colors of paints with low covering ability are also reflected, i.e. the maximum costs.
Why do you need to release the trigger at the end of each pass?
Smudges can form on the edges of the panels due to the application of several layers of paint. To do this, you need to release the trigger before the border of the panel so that the paint does not get on the adjacent panel. Release the trigger when you reach the gap between the panels.
Release the gun trigger at the end of each pass. Then pull the trigger again when you start a new pass from the other edge of the panel. This technique will allow you to avoid smudges on the edges of the panels, minimize over-pollination and save materials.
The spray gun must be in motion before the trigger is pulled and must continue to move when the trigger is released.
If we look in more detail, the sequence is as follows:
- Start passing outside the panel, press the spray gun trigger halfway so that only air flows.
- When the spray gun reaches the edge of the panel, press the trigger all the way so that the paint begins to spray.
- Release the trigger halfway so that the paint stops spraying when the spray gun reaches the other edge of the panel.
- Continue the movement another 5 cm and repeat the sequence.
Pressing the trigger halfway (when only air comes out) eliminates the sharp “spitting” of paint when the trigger is fully pressed.
Factors affecting paint consumption
In addition to the quality characteristics of the selected material, specific conditions can affect consumption. It is not difficult to guess that thick enamel will require a larger volume, but the working viscosity of the paint may depend not only on the manufacturer’s instructions, but also on the ability of the master to control the process. An attempt to fill the surface with enamel diluted to the limit will lead to the appearance of smudges, but temperatures above normal will require a liquid material. The solvent should completely evaporate from the car enamel during the drying process, but the air temperature and the viscosity of the substance make serious adjustments to the car painting process.
The amount of hardener should not depend on temperature, but the volume of solvent is indicated by the manufacturer for a temperature of 20-23 ˚C. The selection of viscosity should not be done by eye, otherwise it will be difficult to avoid not only increased material consumption, but also obvious defects. The technology for controlling viscosity with a viscometer is to determine the viscosity of a substance by measuring the time of pouring the required volume of liquid through a hole of a certain diameter - you will need the viscometer itself and a stopwatch.
Surface preparation also has its share in quantitative costs. Surface treatment for different types of materials differs, and this difference is most noticeable in the grain size of the abrasives. It is difficult to coat a primer sanded with P400 with acrylic, but preparation for the primer itself involves working with coarse grains. For standard enamels, matting the primer or metal with P800-P1200 abrasives is required: finer-grain sandpaper will lead to worse adhesion, coarse grain will require a larger volume of substance and will cause defects.
Car body repair and painting photo, video
Everything related to vehicle maintenance often falls on the shoulders of the car owners themselves, many of whom prefer to do even the most complex tasks without the help of others. Similar types of activities include vehicle painting, which requires certain knowledge and skills. For example, do you understand how many l. Do you need paint to paint your car? If not, then this article will probably help answer this question.
Temperature and weather conditions
This parameter, as already noted, affects the viscosity of the coating material. It is also important for drying paintwork materials. There are paints that dry at a temperature of 20. And, there is material that requires the highest temperature to dry. Such enamels are used in workshops where there are proper conditions.
Fundamentally: to save paint, it is better to apply a new layer after the previous one has dried
How to dilute varnish for car painting?
There are several types of varnish compositions. Their consumption will depend on the ability to form a glossy surface on the car body and on the type of surface to which they are applied. The varnish must be diluted in strict accordance with the instructions.
headlight varnish treatment
All ingredients must be carefully filtered (you can use a special filter or regular nylon for this). It is better to prepare the mixture in a special container and not dilute a large amount at once. You need to add to the varnish:
Various additives will make the painting process easier, but there is an increased likelihood of side effects. Therefore, it is necessary to strictly follow the dosage indicated in the instructions.
Next article: DIY ventilation in a paint booth. Previous article: Do-it-yourself tinting of headlights (lanterns) with film and varnish, video.
Painting rules
We have already said that product consumption is affected by weather conditions, location of work, etc. Here are some important rules:
- the temperature of the air, painted elements, paint and varnish should be at the same level;
- You cannot heat the paint or elements of your car before painting it;
- sufficient time will allow you to avoid drips;
- In order for the paint to lay evenly, you need to use a “sticky napkin”, which will remove particles of debris and dust;
- wear a special suit and face mask
During work, adhere to painting technology so as not to waste material.
If you practice a little on old parts, you will realize that painting is not difficult. After a successful upgrade, all that remains is to thoroughly polish the car and you can get behind the wheel again!
Author: Ekaterina
Consumption of different types of paints
It's no secret that alkyd enamel costs more than acrylic enamel. The difference between these enamels for cars ranges from 40-60%. Thus, 3 or more liters of alkyd enamel will be used to completely paint the car. The quantitative characteristics of the technology, which includes working with varnish, depend on the covering power of the substance used as a base. Varnishes made from synthetic resins have proven themselves to be the best; the covering power of nitro-combined analogues is noticeably behind.
The most difficult thing is to standardize the painting of metal with a spray can. On average, no more than 4 cans are consumed per 1 m² of a car, however, most manufacturers indicate that consumption per 0.5 m² is equal to 1 can, i.e. you will need half the amount of paint. Using a good spray gun also allows you to save on car enamel, but the adjustment of HLVP systems depends on specific circumstances (in particular, on the pressure in the compressor), and therefore requires test paints or extensive experience working with this particular tool.
Detailed information
For high-quality painting of a car you need 2-4 cans per 1 square meter. m. To find out the exact equivalent, take into account all the factors that were described above. This will help you calculate exactly how much paint you will need.
If you want to paint individual parts, the calculation for them will be as follows:
When you varnish the surface, the consumption of the substance will be exactly the same. To make a two-layer application, the amount of substance must be doubled.
Based on these data, we can conclude that a medium-sized sedan needs about 2 liters of paint and the same amount of varnish.
Preparing the surface for painting
Does the car body need polishing immediately after painting? Each bath requires a personal approach. Restoration work and preparation for it are no exception.
Preparing an iron bath for painting with enamel
Before painting, the bathtub must be prepared for work. The inner surface of the cast iron bathtub must be completely cleaned of residual grease and traces of limescale. To combat them, the most common alkaline agent is suitable. For example, the traditional Pemolux. On the contrary, it is recommended to refrain from using substances containing chlorine.
Product with a little added water:
Next, the master will have to begin cleaning the bathtub from rust, traces of old paint and dirt. For this you will need:
In this case, the power tool is unlikely to reach the inner corners of the bathroom and the drainage area. This is where sandpaper comes into play.
The result of manipulations with an electric drill or grinder should be a matte and rough surface to the touch. There is not much left to do before painting begins:
Preparing a bathtub for acrylic painting
Acrylic painting also requires special preparation. Otherwise, within a few days after the work, an emergency may occur - the paint will begin to peel off. To prevent this from happening, you must:
Getting moisture under the paint can ruin the whole job. Even a minimal amount of water will be destructive and lead to irreversible processes.
Drying the bath during the preparation stage should be given the closest attention.
It is also important to ensure that after applying acrylic nothing falls into the freshly painted bathtub
It is also recommended to secure the washing machine - wrap it in plastic and secure it with tape.