Elimination of car painting defects
To ensure high-quality paint coating on the car body, it is necessary not only to select high-quality materials, but also to use a special tool, and also adhere to certain rules. Otherwise, defects in the car’s paint may appear, which are very difficult to eliminate.
Paint is a material that is sensitive to factors such as humidity, temperature, quality and quantity of thinner. Obvious painting defects can occur at all stages of the work. Knowing the rules for applying paintwork, you can avoid the appearance of defects on the car body.
Material subsidence (subsidence).
After painting the car, the solvent gradually evaporates from the materials, and they begin to “visit” - some of the material becomes thinner and lower and forms “risks”. This can happen for several reasons:
- non-compliance with the rules for grading abrasive material (at risk of mixing large ones with medium ones, and only then fine ones);
- too thick layers of primer or putty;
- insufficient drying time for materials;
- incorrect amount of thinners or hardeners;
- low quality materials.
To correct the error, in the best case, you will have to re-varnish the element, in the worst case, you will have to prime it again.
Finishing touches
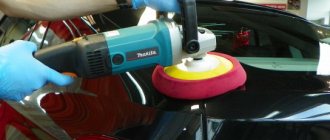
Protective polishing is performed to reduce the hygroscopicity of enamel and smooth out microscopic roughness. This procedure uses pastes containing Teflon or wax.
As with abrasive polishing, you must first apply a paste with protective components to local areas. Then, after waiting a few minutes and until the paste has a matte color, you can begin polishing.
By consistently completing all the steps, you will not only eliminate defects, but also add shine to the paintwork, provide protection from aggressive environments, and your car will look like it just came off the assembly line.
Previous DefectsIf after painting a different tone appears Next
DefectsCauses of poor adhesion of the paint layer after drying
Varnish boiling.
Some time after applying the varnish, white dots appear on it. This effect is called boiling of the varnish - the solvent contained in the varnish did not have time to evaporate and come out, “rested” on the already hard top layer and remained in the varnish in the form of a bubble. This happens:
- due to too thick layers of varnish (each varnish has its own technology and its own layer size);
- Drying the top layer of varnish too quickly (using different varnishes on the same painting or drying too hard in a chamber or under lamps).
Such a defect can only be eliminated by repainting the element.
Craters.
After the varnish dries or almost immediately, depressions appear on it, sometimes quite large (up to 3 mm) - craters. This effect is also called “silicone”. They arise for only one reason - the presence of silicone (fat). Silicone gets in for various reasons:
- insufficiently degreased surface;
- presence of oil in the compressor;
- the presence of silicone in the air – insufficient cleaning of the room;
- the presence of silicone on the old surface (use of various chemicals to rub the car).
Such defects can only be removed with a new varnish coating, but you need to make sure that no more silicone gets in. In such a situation, the worst thing is if various cleaning products (PLAK, etc.) were used on the car.
Painting defects caused by the manufacturer.
Worn spray gun.
Often, defects in the paintwork on a car body occur due to disruptions in the production process. At different times, when producing one batch of cars, paint and varnish materials of different quality and viscosity can be used. Due to negligence, third-party components can get into the paint - water, oils due to poorly dried or insufficiently cleaned containers. Equipment that is not properly adjusted can cause enormous costs to the auto industry if such a batch is removed from sale and recalled from circulation.
The most common reason why a paint gun can reduce the quality of work is its wear and tear. The spray gun may require replacement in the following cases:
- Defects in the equipment cover that cause the air flow opening to become blocked or deformed.
- The nozzle is damaged and prevents the paint from flowing evenly onto the work surface.
- The end of the needle is damaged and does not close the nozzle correctly. In this case, the paint material drips, rather than sprays.
All these malfunctions lead to the fact that the paint torch comes out with a changed shape. In turn, unevenness of the applied material can lead to coating defects such as smudges, shagreen, and dullness of the surface.
Decreasing performance characteristics of the spray gun compressor prevent the spray equipment from providing sufficient pressure for operation. This can lead to both defects and complete inoperability of the pistol.
It is necessary to monitor the condition of the equipment, this will help to avoid defects during the application of the paint layer.
Lack of conditions for car painting.
Lack of conditions for painting
The most important factor for providing quality auto painting services is the conditions in which the work is carried out.
Defects during work will be impossible to avoid even for the most experienced craftsman if the room is insufficiently ventilated, which will inevitably lead to excessive humidity.
Certain requirements are also put forward for the drying and painting chamber - the absence of deformations in the filter design. Otherwise, air will not flow properly and dust control will be lost.
Failed measuring instruments (barometers, viscometers, tonometers) pose a direct threat to the appearance of defects in the coating. Based on incorrectly taken data, it will not be possible to accurately determine paint viscosity, temperature readings, or estimate the pressure level.
To perform the job efficiently, it is also necessary to prepare the air for spraying. For this purpose, an air supply system is equipped, consisting of a compressor with a condensate release valve, a pressure gauge, a pressure regulator, a dryer, and a filter for separating water and oil. If any of the air supply components are missing, paint defects will occur.
Hologram effect (after polishing).
A freshly painted part is polished, and instead of shine and gloss, it becomes cloudy and has a hologram effect. The reasons may be:
- insufficient drying of the varnish;
- too thick layer of varnish;
- incorrect amount of hardener in the varnish;
- incorrect polishing technology or low-quality materials.
If the reason was not polishing, then the parts will have to be re-varnished.
Painting defect “Matt spot”
Matte spot
Surface clouding with a dull effect can appear on any layer of paintwork, but most often forms on putty areas, where the absorption of the varnish is higher than in other areas. Without eliminating the defect, this may lead to swelling of the material in the future. Such spots, which look like a milky-white “fog”, can be caused by:
1.Insufficient thickness of individual layers of paintwork.
2.Carrying out auto painting work at high humidity and below normal temperatures. Drafts and high speed air circulation in a paint shop can also negatively affect work results.
3.Poor quality components of paints and varnishes.
4.The solvent is chosen incorrectly or is used in too large an amount in relation to the main paints and varnishes.
To prevent matte spots on putty areas, it is necessary to prime the surface before painting. The slight clouding effect can be eliminated by polishing, secondary smoothing and painting.
The appearance of bubbles.
Immediately after painting or after some time, paint blisters appear on the surface. Such bubbles can be caused by various reasons:
- insufficiently cleaned surface;
- presence of moisture – insufficient drying or “wet” work with putties;
- insufficient removal of micro-foci of corrosion;
- the presence of microcracks and microholes in the metal.
You can tell whether the problem is caused by moisture or corrosion. During corrosion, such bubbles most often appear in single or small quantities, and in the presence of moisture – in large quantities. With corrosion, you will have to strip everything down to the metal and remove it; it is easier to deal with moisture - most likely, simply repainting will help.
Painting defect “Flakes”
Flakes on the surface of the paintwork
The formation of flakes on the surface of a paintwork coating (LPC) is one of the most common defects that can occur after car painting work. The material comes in clumps randomly or evenly, in multiple or single elements.
The reason for such a defect may be:
1.The solvent does not match the type of paint used. Incompatible paints and varnishes form so-called “flakes” on the surface of the paintwork, which actually makes the composition unsuitable for further use
2.Violation of the technique of moving the spray gun.
The lack of coverage in such a defect is eliminated by re-painting.
"Wrinkling" effect.
In another way they say about him “chewed.” This phenomenon can occur over a fairly large surface or only in some places. Reasons include:
- incompatibility of materials is the main reason. Most often it occurs when repairing surfaces where cheap materials (spray cans, etc.) were previously used. The solvent of the fresh material dissolves the old one, and it begins to react. You can often see halos of such “chewedness” in places where the new primer was rubbed down to the old material, and then the paintwork was applied;
- too thick layers of materials;
- insufficient drying of materials.
Such a defect can be removed only by repainting the element using insulating materials.
Painting defects due to non-compliance with technological requirements
The car painter must strictly fulfill all the technological requirements of the process. Coating defects can be caused by mixing incompatible paint components or materials from different manufacturers. This can lead to wrinkling of the paintwork, which entails the removal of the coating to a smooth layer without damage.
Often, a nitro solvent is used as a universal means for diluting paints and varnishes. This approach to technology can cause the appearance of such defects in the coating as shagreen, dullness, boiling and others. It is important to use materials recommended by the paint manufacturer.
Color change.
One of the painting defects that affects color delivery. The color changes immediately after applying the varnish to the base or gradually over time. Main reasons:
- use of low-quality materials (primers, varnishes, etc.);
- incorrect quantitative ratio of hardeners in materials;
- insufficient insulation of polyester materials (putty), reactive primers;
- residues of bitumen, resins and other reagents on the surface (for example, resin dripped onto the car from a tree, or bird excrement can cause such a defect).
Only repainting and removing the cause will help eliminate it - the same traces of resin sometimes have to be cut out to the metal.
Painting defect “Peeling of varnish”
Peeling varnish
Delamination of the material can occur both during the initial application of the coating and during repeated repainting.
Peeling of varnish from the underlying coating can be a consequence of:
1.Poor stripping of old paint. Insufficient surface degreasing.
2.Use of incompatible materials – underlying sublayer and varnish.
3.The varnish was applied to a metal surface without the use of a protective coating.
4.Drying the first layer took longer than required according to the instructions.
5.The removal of rust was carried out poorly, resulting in traces of corrosion. Water seeps through the capillaries and increases humidity, which in turn accelerates the rusting process, which leads to peeling of varnish and paint. The result is also negatively affected if there is dust or water on the paint.
6.Drying, which is carried out after grinding using water, provoked the crystallization of lime deposits absorbing moisture. When evaporating with heat, moisture can form blisters on the paintwork. You can avoid this situation by wiping the work surface with soft chamois, drying the area and avoiding exposure to limescale impurities.
Large shagreen (orange peel).
This defect occurs when applying varnish and often occurs with inexperienced painters. The reasons are:
- too thick or, conversely, thin layer of varnish;
- too large a distance between the gun and the surface during application;
- gun pressure too low;
- The gun nozzle is too small.
In some cases, it can be removed by polishing, but if the shagreen is too large or the varnish layer is too thin, you will have to reapply the varnish.
DIY car paint repair
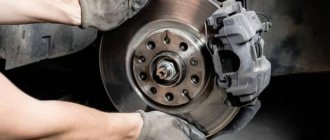
Car damage is inevitable. Age and condition do not play a major role here. The paintwork often suffers. This happens, for example, when driving on dirt roads at high speed. Pebbles and tree branches scratch the fenders, bumper, etc.
Partial (local, spot, transition) painting of a car is a common procedure. It is needed to restore the coating and eliminate small chips. An attentive car owner does not delay this matter. If you are late, the area of damage quickly grows. Dampness additionally leads to corrosion. Driving in rain and cold is especially dangerous for paintwork. Corrosion begins in damaged areas and progresses quickly.
Spot painting is done correctly. You can take it to a service station or do it yourself. Repairs do not require much effort, skills or money.
Drips of varnish or base.
Drips appear on the surface immediately during the application of paint or varnish or after a short time. Causes:
- too much feed or pressure in the gun;
- material is too thick;
- The distance between the gun and the surface during application is too small.
Drips of varnish (or acrylic paint), if they are small, can be removed with sandpaper (sometimes you even have to putty them) and polished. However, large drips will most likely cause rubbing to the base, and then the element will have to be painted again. If the base drips, there is only one option - repainting.
Cloudiness (“yayuloki”).
In the light, stripes or spots are visible on a large surface (hood), slightly different in color from the main one. Such a defect is possible only on grain base paints. Causes:
- incorrect application of the base;
- insufficient drying of the base before applying varnish;
- low quality base paint.
Most often, the defect occurs on gray metallics. Removal requires repainting.
Peeling paint or varnish.
The defect may look different, depending on which material has lost adhesion (adhesion) to which. The varnish may peel off from the base, the base from the primer, the primer from plastic or metal. The main reasons are:
- non-compliance with application technologies (improper drying, non-compliance with gradations of abrasives, incorrect use of hardeners, etc.);
- improper processing of plastics or failure to use primers for plastics;
- low quality materials.
Of course, such a defect can only be removed by repainting.
Dirtyness.
When painting a car outside a special chamber, it is almost always accompanied by the following defect - debris getting into the base or varnish. A certain amount of dirt is present in the cells and is considered acceptable. Main reasons:
- insufficient cleaning of surfaces or premises;
- neglect of filtering materials through strainer filters;
- poor ventilation.
Debris in the varnish can most often be removed by polishing, but in the base it needs to be repainted.
real estate joomla templates
Preparation for painting (surface cleaning)
Preparing for painting
You can begin painting work after the surface is cleaned and well dried. If this is not done, painting defects such as “craters” will appear immediately. Over time, bubbles and cracking are possible.
At the initial stage, all contaminants should be removed from the surface to be painted.
Important nuances of some stages of work:
- To clean rust and dirt, the working surface is degreased and dried. Particular attention should be paid to the edges. The cleaned area should not be touched with hands.
- The old paint is sanded down to the very base.
- It is not recommended to work if the room temperature is less than +18°C. When sanding, water with high hardness is best. At the end of the process, all remaining moisture must be removed.
- Compressed air in painting equipment must be dry and clean.
- Secondary primers are applied in a dose with a diameter of 1.5-1.8 mm, topcoat enamels - 1.1-1.4 mm.
- Drying and painting chambers must be equipped with dust filters, air supply, and vapor removal.
- All areas that have been over-sanded must be re-coated with anti-corrosion protection.
- The next layer of paintwork is applied after the previous one has completely dried.
Defects can be detected at different stages of painting: during body preparation, immediately at the time of applying paint and varnish materials, upon completion of work. Basically, all gross flaws in paintwork can be corrected by repeated cleaning and painting.