Signs of wear on the crankshaft oil seal
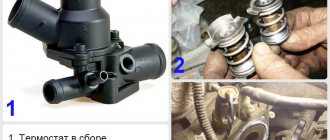
Cracks appear on a worn element and it becomes rigid. The part begins to leak engine oil through itself, spraying it under the hood.
First you need to determine which of the seals has failed:
- if the front crankshaft seal is worn, traces of grease will be visible on the front of the pan directly under the oil seal and on the oil pump cover;
- if the rear one is worn out, then there will be oil on the gearbox.
Rear oil seal
It is necessary to replace it if an oil leak appears and lubricant gets onto the clutch discs. Because of this, clutch efficiency drops significantly or disappears completely.
Back cuff
The reason for the appearance of oil on the clutch discs may also be the front oil seal, the replacement of which we will talk about later.
To replace the rear crankshaft oil seal, follow these instructions:
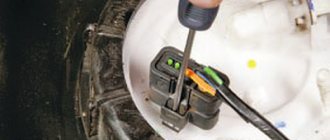
- De-energize the car by disconnecting the negative terminal from the battery;
- Remove the flywheel;
- Remove the clutch housing rear shield;
- Using a socket wrench, remove the rear oil seal holder mounting bolts;
- Remove the oil seal holder, taking the sealing gasket along with it. It will be replaced when installing a new rear oil seal;
- Using a vice, clamp the holder into place. Arm yourself with a mandrel (such as a core) and press the damaged rear oil seal out of the holder;
- Clean the holder with a rag, removing all dirt. Make sure that the holder has no mechanical defects, damage, or chips. If they are, you will also have to change the holder itself;
- Having picked up a new, quality-tested oil seal, arm yourself with a mandrel that matches the diameter of the oil seal. This will allow you to press the element into place. Please note that the cuff must be mounted with the working edge inward;
- Be sure to change the rear oil seal holder gasket. This recommendation does not depend on the condition of the old gasket;
- To facilitate the process of fitting the oil seal onto the crankshaft flange, make a small chamfer around the perimeter with a needle file;
- The edge is lubricated with ordinary engine oil, like the crankshaft flange, after which the element is put on the holder;
- Using a wooden stick, straighten the edge of the cuff;
- Reassemble the structure following the reverse dismantling sequence.
Before assembly, make sure the front oil seal is in good condition. If there are signs of wear, deformation, or oil leakage, it is better to also replace it along with the rear crankshaft oil seal.
Reasons for element wear
It happens for the following reasons:
- natural wear and tear during long-term use;
- incorrect installation of this oil seal;
- excess pressure in the engine crankcase;
- play of the crankshaft itself.
A previously incorrectly installed seal will not last long and will soon fail. As a result, the crankcase ventilation system will become clogged or the breather hoses will break. This leads to excess oil pressure in the engine crankcase, which forcefully squeezes out and distorts the oil seal. Because of this, it wears out faster and leaks lubrication. The same symptoms occur with increased play in the crankshaft, which squeezes out the element. This is caused by wear of the main bearing half rings. During normal operation, they eliminate crankshaft play. When the half rings wear out, the shaft begins to move from side to side, causing the half ring to fall into the crankcase. The crankshaft itself begins to grind the main bearings and connecting rod caps.
In case of late replacement of half rings, the element may not be installed in its seat. This will threaten the driver with replacing the entire cylinder block. It is worth keeping all these reasons in mind, always checking the correct operation of the engine and if a problem is detected, be sure to fix it. Otherwise, the new oil seal will last very little time and will have to be changed again. In order not to lead the engine to oil starvation, you should replace the crankshaft oil seal in a timely manner (including on a VAZ 2109 car). Below we will look at how to do this.
Causes and symptoms of malfunction
If the seals are faulty, you will only see puddles of oil, and even if the rear seal is leaking, the clutch may slip.
Bad seal that needs to be replaced
Let’s say right away that there may be other reasons for the appearance of grease on the surface, which are most often associated with problems in the crankcase ventilation system.
VAZ 2109 oil seals should be replaced every 45-55,000 km; they last less than in foreign cars, but they have about the same problems. The main reason for replacing the oil seal is time. So, over time, the components become loose and relax, which leads to oil leaks and, accordingly, to a loss of engine performance. Untimely replacement of the oil seal may be a consequence of the following causes of premature wear:
- Oil change not on time;
- Inaccurate repairs;
- Engine overheating, which is a common occurrence in the VAZ 2109.
The most common reasons for premature replacement of oil seals are untimely oil changes and overheating. The VAZ 2109 is a rather old car and all the components in it are and were manufactured according to rather old principles. The oil change in this car should be carried out not every 7500 km, but every 5000 km.
Overheating in the VAZ 2109 is common, this is due to the low power of the engines, from which the owners try to squeeze the maximum and even more. When overheated, the rubber (rubber) from which the inner part of the oil seal is made changes its structure and weakens, allowing oil to leak out.
Traces of oil drips are the main and main sign that indicates wear of the crankshaft oil seal. The presence of traces of oil indicates that the tightness of the engine lubrication system has been compromised.
Oil seals can be destroyed under the influence of several factors:
- Natural wear and tear, aging of the rubber used for the manufacture of crankshaft oil seals;
- Incorrect installation, which led to premature wear and loss of functionality. This usually happens during repairs at dubious service stations or when an inexperienced car owner does the replacement with his own hands;
- Mechanical damage to the element;
- Use of a defective, counterfeit oil seal.
The blame should not always be placed solely on the cuffs, which come in front and back. Before you suspect seals, make sure that other potential causes are not to blame.
By checking all elements of the lubrication system, you can make sure that the cause really lies in worn out, deformed oil seals. And then they can be replaced with new elements.
Object to be checked
Peculiarities
Engine oil level
Oil can leave the system for various reasons, including the oil seal. Therefore, it is recommended to be patient and check the level every day, adding a little oil while actively maintaining it. The sensors do not always work correctly, so you need to make sure that there is no pressure violation yourself
Crankcase ventilation system
If the ventilation system is clogged, this will lead to active accumulation of crankcase gas. By creating pressure, it pushes the oil through the seals. In this case, simply replacing the cuff will not do anything, since it will be necessary to clean the ventilation
They can bend, become deformed, or crack. As a result, oil comes out and the engine loses lubricant.
Lubrication system pressure
If the pressure increases, it causes oil to be pushed out through all sorts of passages. There are quite a few reasons for an increase in pressure, so check why exactly this indicator is increasing
If problems are detected with the crankshaft seals, the only correct solution is to replace them.
Replacing the front crankshaft oil seal with your own hands: methods
The operation should be performed with an assistant. A job such as replacing the crankshaft oil seal on a VAZ 2109 car is a fairly lengthy process and depends on which oil seal is being replaced: front or rear. If the first, then this is not such a complicated operation, which cannot be said about the rear element. To get to it, you need to remove the gearbox, clutch, unscrew the engine flywheel, and then begin dismantling and installation.
Replacing the crankshaft oil seal on a VAZ 2109 (2 methods):
- in place, without removing the oil pump assembly;
- with removal of the pump assembly.
The first method is much faster. But sometimes you have to work in tight spaces. Although drivers and auto mechanics most often use this method. You can work both from the hood side and in the inspection ditch.
Diagnostics
Since oil drips are the first and main sign of wear on the crankshaft seals, they also tell us that the tightness of the engine lubrication system is compromised. Therefore, at the beginning of troubleshooting, we will have to make sure that it is the sealing collars that are causing the oil leak:
- First, we check the oil level in the engine (there is no need to rely entirely on sensors), top up if necessary and check every day until we find out the cause of the leaks;
- We check the crankcase ventilation system in the engine (clogged ventilation contributes to the accumulation of crankcase gases which, in turn, push oil through the sealing cuffs);
- Check the oil pipe hoses for kinks;
- We check the pressure in the lubrication system.
As a rule, replacing the crankshaft oil seal on a VAZ 2109 is a rather labor-intensive procedure, however, it can be done with your own hands. Therefore, before replacing the crankshaft oil seal of the VAZ 2109, we need to know the reasons why it fails in order to delay this unpleasant moment as long as possible. There are several reasons for the destruction of oil seals:
- First of all, this is, of course, its natural wear and aging (coarsening) of rubber;
- Due to improper installation and, as a rule, internal stresses, cracks appear on the working surface of the cuff;
- Mechanical damage;
- Poor quality tires (fake).
Replacing crankshaft oil seals on a VAZ 2109
It should be noted that most often the front radial crankshaft cuff is the first to fail, since it is more exposed to the external environment (dust, sand, dirt) and vibration loads from the car engine. And although the rear oil seal is in more favorable conditions, it is advisable to change the oil seals as a set, since their working life is almost the same.
Replacing the front crankshaft oil seal of a VAZ 2109 is relevant if oil leaks appear on the front cover of the engine block, in the area of the crankshaft pulley, which become more and more progressive as the “disease” develops. Since it is practically impossible to see the beginning of wear of the rear oil seal, replacing the rear crankshaft oil seal on a VAZ 2109 takes place if, when the car is moving, clutch slipping is observed, which is caused by the leaked oil spraying onto the clutch basket and onto its release plate as well.
If you notice at least one of the listed signs on your car, then I would not advise you to delay the repair procedure, since the price of a new repair kit is not comparable to the cost of engine repair. What does the engine have to do with it, you ask? The thing is that leaks of lubricating fluids lead to their uneven distribution to the mating surfaces, which is fraught with possible oil starvation of individual engine parts. In the first category of risk of oil shortage is the engine crankshaft itself, which manifests itself in scuffing on its working surface.
Consequences of oil starvation
Also, a consequence of oil leaks through the crankshaft seals is the passage of solid mechanical particles into the oil seal, which, like an abrasive, wear out the working surface of the oil seal on the crankshaft, which already leads to more complex and costly repairs.
Front cuff workplace
Replacing the crankshaft oil seal on a VAZ 2109: step-by-step instructions
First, the car is set to the handbrake. The nut securing the generator to the tension bar is loosened, and the generator drive belt is removed. Next, you should call an assistant to engage fifth gear and keep the brake pedal depressed to prevent the crankshaft from turning. This will prevent you from unscrewing the bolt securing the accessory drive pulley. For convenience, you can remove the front right wheel and use a long wrench to unscrew the pulley bolt.
What's next? After removing the element, you need to get to the timing pulley. To do this, the plastic protective cover is disassembled, one wheel of the car is hung out, and third or fifth gear is engaged. By rotating the wheel clockwise, two marks are set: on the camshaft pulley and the crankshaft pulley.
Then you can remove the timing belt. Using a flat-head screwdriver, pry up and remove the crankshaft toothed pulley, and then the key on its flange. Now you can use a screwdriver to pry out the old oil seal. We pry it off by the outermost contour. This should be done with caution so as not to leave scratches on the crankshaft flange.
These deformations will wear out new seals faster even if installed correctly. Some people use a cunning method of removal: they screw a self-tapping screw into it, clamp it with pliers and pull it out along with the seal. Before installation, the working (inner) surface of the oil seal is lubricated with engine oil. Next, install it on the seat. The new oil seal should be pressed in using a machined mandrel or block, gently tapping it with a hammer.
It is important not to damage the element body. The new seal must be pressed in all the way and fit clearly in its seat without distortion.
Replacing the back cuff
As mentioned above, replacing the front crankshaft oil seal on a VAZ 2109 is the most common and popular procedure, therefore, when carrying out repair work, it is very important to strictly follow all the recommendations of the manufacturer and be extremely careful, since the properties of the rubber from which the oil seal is made are such that it is very easy to damage during installation. There are two ways to replace the front crankshaft cuff: quick - “homemade” and recommended by the manufacturer.
First way
The method invented by the car owners themselves is as follows:
- Remove the timing belt;
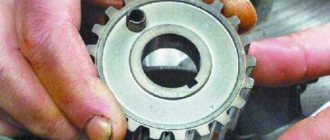
- Using two screwdrivers/winders, remove the toothed pulley from the crankshaft, do not forget about its key;
Removing the crankshaft pulley and its key
- Using a hook or screwdriver, tear out the old cuff;
Taking out the old cuff
- We put the new cuff in place, and to make installation easier, lubricate its surface with oil;
- Using a mandrel, hammer it in until it stops.
Installing a new oil seal
Second way
When replacing the front crankshaft oil seal on a VAZ 2109, we will need the following:
- A pair of screwdrivers;
- Socket wrench set to “17”;
- Socket and open-end wrenches, as well as a “10” head;
- As a mandrel, the head is set to “27”;
- Timing pulley tensioner key;
- Since the “correct” replacement of the front cuff requires dismantling the oil pump, you need to stock up on a new gasket;
- And, of course, a new oil seal.
Next, you need to provide access to the engine crankcase, for which we put the car on an overpass or a lift, drain the oil and, as with any repair, disconnect the battery.
- If available, remove the engine protection, or rather its crankcase;
- Using a ten key, unscrew the four bolts securing the protective timing cover and remove it;
- We unscrew the six bolts securing the protective cover of the right half of the engine compartment using a key “8”;
- We remove the generator drive belt by loosening its tension with a key “17”;
- Remove the right front wheel;
- Having engaged a low gear, using a nineteen key, we “tear off” the bolt securing the pulley, then unscrew it and remove the pulley itself;
- We install the piston of the first cylinder at top dead center (attributable to the compression stroke). In this case, the installation marks on the rear protective casing and the camshaft drive must match, and the mark on the flywheel, visible through the clutch housing hatch, is located opposite the middle division of the installation scale.
- Using the key “17”, loosen the tension roller and remove the timing belt;
- We dismantle its lower cover from the clutch housing by unscrewing the four bolts securing it with a “10” key;
- Using a “10” head, unscrew the sixteen bolts securing the engine crankcase cover and remove it along with the gasket;
- Using the same head, unscrew the bolts securing the oil receiver to the oil pump and to the second main bearing, remove it;
- By analogy with the first method, use two screwdrivers to dismantle the toothed pulley (we also keep an eye on the key so as not to lose it);
- Using a “10” wrench, unscrew the 6 bolts of the oil pump (fastening it to the engine block)…
- ...and after tapping the pump housing, remove it together with the oil seal.
Removing the oil pump
We considered the further replacement process in the first option, but the assembly process itself occurs in the reverse order. Don’t forget to put a new gasket under the oil pump, having previously coated it with sealant (this makes it easier to install on the cylinder block).
It is also advisable to install a fresh gasket under the crankcase cover.
As a rule, along with replacing the front seal, the rear seal is replaced, which significantly prevents the possibility of its sudden destruction, especially since the degree of wear of the seals is almost the same, while detecting a leak in the rear seal is much more difficult. Before replacing the crankshaft oil seal on a VAZ 2109, you need to make sure where the leak is coming from - from the gearbox or from the car engine.
- We remove the engine flywheel by first unscrewing the bolts (six in number) securing it to the crankshaft, while using a screwdriver to keep it from turning (to do this, we screw in the bolt securing the gearbox);
- Unscrewing the last bolt securing the flywheel, remove the locking plate, and then the flywheel itself;
- We remove the rear clutch shield from its guides and unscrew the eight bolts of the rear cover of the engine block, after which we remove it;
Removing the back cover
- We dismantle the oil seal housing, carefully prying it away from the cylinder block with a screwdriver;
- We take out the old cuff from its seat...;
Pull out the back cuff
- ...in its place, using a mandrel with a diameter of 99 millimeters, we press a new radial cuff;
- We replace the old gasket of the cuff body;
New housing gasket
- Having applied a thin layer of engine oil to the working edge and the crankshaft flange, we install the crankshaft seal housing in place, while adjusting the edge of the oil seal with a wooden spatula (shown in the photo);
Reinstalling the cuff body
At this point, the procedure for replacing oil seals on a VAZ 2109 is considered complete. I hope that in this manual everything is described and illustrated quite clearly and no additional video is required. I hasten to say goodbye to this, and all you have to do is collect everything that you took apart in reverse order and continue to exploit your iron horse.
Regardless of whether your VAZ-2109 has a carburetor or is driven by an injector, the work of replacing oil seals follows the same principle. The front oil seal wears out the fastest. It is easier to change, since it does not require dismantling the clutch system.
To carry out the work you will need to have on hand:
- standard sets of keys and screwdrivers;
- clean container;
- rags.
After such preliminary preparation, you can begin work on replacing the front oil seal:
- Loosen the generator mounting bolts.
- Remove the belt drive.
- Drain the engine oil into a prepared container.
- Remove the protective casing from the power unit.
- Remove the oil pan.
- Gently and carefully remove the belt from the camshaft. Make sure that the crankshaft or camshaft does not rotate while removing the belt. Otherwise, the pistons will hit the valves and deform them. This will result in the need to install new valves.
- Using two screwdrivers, remove the crankshaft pulley.
- Remove the key.
- Find the 2 oil pickup bolts, unscrew them and remove this unit.
- The oil pump is held in place by 6 bolts, remove them before removing this unit.
- Use a flathead screwdriver to remove the old seal from the crankshaft. It is important that it has a fairly impressive size and is made of durable metal. Otherwise, the blade of the screwdriver may break off while performing this procedure. Remember that work with the shafts must be carried out carefully, avoiding rotation.
- Clean the oil seal location and lubricate it.
- Place the cuff, tucking its working part inward.
- Crimping is carried out using a frame of the required diameter.
- Wash the oil pump cover with gasoline and return it to its place.
- Starting with the oil pump, reassemble the mechanism in reverse order.
The final stage is the return of oil to the mechanism. If it is dark enough, then it is best to replace the lubricant with a new one. If you don't have time to do a complete disassembly, you can do without cleaning the oil pump cover. However, it is better to spend time servicing it, so as not to disassemble these units again later.
Second method
Replacing the VAZ 2109 crankshaft oil seal with the second method involves removing the entire oil pump. Changing the seal in this case is very convenient, but you will have to spend more time. Having completed all of the above, unscrew the 3 bolts of the engine sump, directly under the pump cover. Then the cover fastening elements are unscrewed. The oil pump is carefully removed. Having removed the old one and pressed in the new oil seal, lubricate its working surface with oil, and everything is installed in the reverse order of removal. The difficulty lies in installing the oil pump in place.
It must be properly centered so that the element does its job correctly and does not squeeze out. As you can see, on a VAZ 2109 car, replacing the crankshaft oil seal, done with your own hands, is a completely understandable and not very difficult job. If it turns out that the axial free play of the shaft is higher than normal, then this indicates wear of its half rings. They should be replaced immediately to avoid complications.
How to replace the front cuff
Regardless of whether your VAZ-2109 has a carburetor or is driven by an injector, the work of replacing oil seals follows the same principle. The front oil seal wears out the fastest. It is easier to change, since it does not require dismantling the clutch system.
To carry out the work you will need to have on hand:
- standard sets of keys and screwdrivers;
- clean container;
- rags.
Since the work is carried out on the engine, disconnect it from the power system - remove the negative terminal from the battery. If you are not confident in your abilities, watch the video instructions in advance.
After such preliminary preparation, you can begin work on replacing the front oil seal:
- Loosen the generator mounting bolts.
- Remove the belt drive.
- Drain the engine oil into a prepared container.
- Remove the protective casing from the power unit.
- Remove the oil pan.
- Gently and carefully remove the belt from the camshaft. Make sure that the crankshaft or camshaft does not rotate while removing the belt. Otherwise, the pistons will hit the valves and deform them. This will result in the need to install new valves.
- Using two screwdrivers, remove the crankshaft pulley.
- Remove the key.
- Find the 2 oil pickup bolts, unscrew them and remove this unit.
- The oil pump is held in place by 6 bolts, remove them before removing this unit.
- Use a flathead screwdriver to remove the old seal from the crankshaft. It is important that it has a fairly impressive size and is made of durable metal. Otherwise, the blade of the screwdriver may break off while performing this procedure. Remember that work with the shafts must be carried out carefully, avoiding rotation.
- Clean the oil seal location and lubricate it.
- Place the cuff, tucking its working part inward.
- Crimping is carried out using a frame of the required diameter.
- Wash the oil pump cover with gasoline and return it to its place.
- Starting with the oil pump, reassemble the mechanism in reverse order.
The final stage is the return of oil to the mechanism. If it is dark enough, then it is best to replace the lubricant with a new one. If you don't have time to do a complete disassembly, you can do without cleaning the oil pump cover. However, it is better to spend time servicing it, so as not to disassemble these units again later. The same can be said about preventative oil changes. If you pour a new compound into the power unit during repairs, the performance of the car will only improve.
Changing half rings
To do this, you do not need to remove the crankshaft of the VAZ 2109. Replacing the oil seal, half-rings, liners (the crankshaft sensor, we note right away, must also be removed) begins with searching for the location of the elements. These parts are located on the sides of the central (third) main bearing. A yellow ceramic-metal half-ring is installed on the side of the middle crankshaft support. On the other hand - steel-aluminum. The elements must fit tightly, and depending on the wear of their sockets, they come in three sizes:
- standard;
- first repair;
- second repair.
How to change the rear oil seal
The job of replacing the rear oil seal is more difficult. If it is faulty, the clutch may stick, so do not delay repairs. As in the first case, turn off the power to the engine. Next, follow the algorithm:
- Remove the clutch flywheel.
- Remove the clutch housing rear shield.
- Locate and remove the bolts securing the rear oil seal holder.
- Remove it from its place along with the gasket.
- Place the holder on a flat surface so that you have easy access to it.
- Remove the oil seal from the cage.
- Carry out a visual inspection of the holder. It should not have chips, cracks or other damage. If they are present, then it is worth replacing this clip. Using a rag, thoroughly clean the holder.
- Install a new one in place of the old cuff.
- Turn the working edge inward and press the part using a special frame. In this case, you will have to more carefully select the frame for the diameter, since it is quite large. It's best to have a set of frames in the garage for this job.
- Inspect the sealing gasket that you removed along with the holder; if it is badly worn, then this consumable must be replaced.
- Clean the edge and flange of the crankshaft from dirt, then lubricate it with machine oil.
- Replace the holder and reassemble the clutch mechanism.
Please note that oil seals are made not only in different diameters. They need to be selected depending on what kind of engine oil you fill in your VAZ-2109. If you buy an oil seal for a mineral composition and fill the engine with a synthetic one, the seal will simply dissolve.
Before installing any oil seal, it is necessary to lubricate the seat with oil. Also be sure to try the cuff on the shaft. Sometimes even branded options do not fit the shaft diameter. In this case, you should not put effort into installing the oil seal, but rather spend additional money on a new component.
Finish the job by checking the seals. To do this, you need to start the engine and warm up the car. Then drive a couple of meters (for example, drive the car out of the garage) and leave the VAZ-2109 in this place for a few minutes. Move to another location (for example, return to the garage) and inspect the parking area. If there are no oil stains on it, then the seals are holding it securely in the system.
What's next?
After draining the oil from the car engine, unscrew and remove the pan. Then the two bolts securing the middle main bearing cover are unscrewed. It is removed and the gap between the bearing and the half ring is measured using feeler gauges. You should add to it the standard parameter of 2.31 mm.
As a result, the required size of the new half ring will be obtained. After this, by displacing the old half-ring, they are installed in their nests. It is important that the new element fits in freely. After the work has been done, all removed parts are installed back.