Hello dear friends! It's time to talk about how to bleed a clutch without outside help. When servicing a car, we cannot always count on someone’s help. In some situations, it makes no sense to entrust the work to workshops, since nothing complicated needs to be done, and they charge a lot of money for such services.
As you remember, we have already discussed with you the replacement of brake pads, and also talked about starting the engine independently when the battery is dead. Both here and there we managed on our own. Therefore, you will probably easily cope with pumping. I believe in you.
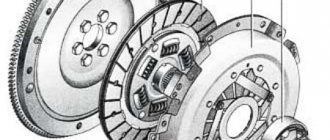
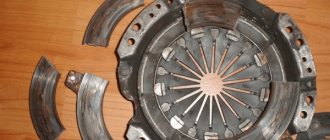
When the clutch in a car is repaired, it is dismantled completely or partially. Dismantling leads to the fact that air can get inside the system (hydraulic), which will negatively affect the operation of the clutch itself.
Therefore, all mechanics and car enthusiasts know that after any intervention in the clutch, it must be pumped, thereby removing excess accumulated air. This will be required after replacing elements, when the main cylinder fails, the PSU or any other components of the unit break down.
Why bleed the clutch?
Bleeding the clutch is necessary to remove air pockets from the system and restore proper operation of the unit. To understand the importance of the procedure, let's briefly consider the clutch device and the way it is connected to the pedal in the cabin.
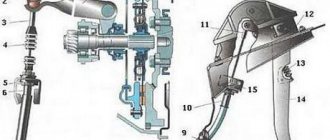
Main hydraulic drive device
In addition to the release bearing, basket and disc with friction linings, it uses a hydraulic drive. In the engine compartment of most cars there is a single reservoir with fluid (it is called TZh, antifreeze, “brake fluid”), which is used for the brake and clutch circuit. Correctly, such a liquid is designated as DOT with the corresponding number. In some older versions of the car, these systems are separated (brake and clutch) and each has its own reservoir. Pressure is supplied by the master cylinder.
It works with hydraulic fluid according to the following scheme:
- The driver presses the clutch pedal.
- The force is transmitted through a metal rod to the hydraulic unit, from where the fluid is pressurized.
- The clutch master cylinder pushes a slave cylinder piston and a fork connected to the release bearing.
- The discs open and any gear can be engaged, despite the rotation of the input shaft.
- The driver releases the pedal and the return spring forces the clutch sides together.
- Excess fluid flows from the working and master cylinders back into the reservoir.
General diagram of the transmission of force from the pedal to the clutch
When the system is working properly, all actions occur silently and switching is smooth. But if air gets into the hydraulic circuit with the liquid, then malfunctions will begin and the clutch will need to be pumped.
Signs of system airiness
If air enters the system, the non-compressibility property of the working fluid disappears; when the pedal is fully depressed, the working stroke of the actuator cylinder rod or release bearing clutch is reduced or completely disappears.
The clutch is constantly engaged, including partially (driving), shifting gears is difficult or impossible. The pedal moves much easier than on a working car; it falls completely or part of its stroke.
The driver presses the pedal, but the lever refuses to move to the first or any other gear position. An attempt to apply force leads to the fact that the first gear synchronizer clutch begins to play the role of the clutch, the car tries to crawl forward, sometimes even engagement is successful, but the engine stalls. If you add speed, then switching on becomes completely impossible, the synchronizer will not cope.
On the subject: How a car clutch works
Additionally, you can verify that the squeeze is not fully pressed by trying to engage reverse gear, where there is usually no synchronizer. The stationary gear will begin to engage with the rotating gear, a characteristic grinding of teeth will be heard, after which the desire to continue applying force to the lever will disappear.
Signs of a system malfunction
There may be air in the circuit or cylinders for three reasons.
Firstly, the driver did not keep track of the level of technical fluid in the tank. There are Min and Max marks on the walls of the container. Antifreeze or other liquid corresponding to the characteristics of the car model should be located between these marks.
Lowering the level leads to air being “swallowed” by the system. A decrease in the volume of technical fluid is associated with leaks.
Liquid leaks can be detected drop by drop under the engine compartment after the car has been parked for a long time. Having noticed such traces, it is important to find the source and eliminate the leak.
Clutch expansion tank
Secondly, air can enter the system through poorly tightened connectors or broken communications. In this case, a leak is not always present, but the operation of the hydraulic drive deteriorates and the clutch will need to be pumped.
Thirdly, the technical liquid itself is hygroscopic and absorbs moisture even from the air in the expansion tank. When you press the pedal frequently (especially the brakes), it heats up and boils. This causes additional air bubbles to form in the system, interfering with the operation of the cylinder.
Among the warning signs indicating the presence of air pockets in the circuit fluid are the following:
- Crunch. An unpleasant sound is heard when upshifting or downshifting. The driver presses the clutch pedal, pushes the rocker lever to the right place, but hears a strong crunch. Sometimes you feel a blow to your arm. “Speed” does not turn on, although the pedal is pressed to the floor. Then the pedal is released and pressed again and everything works fine. This means that the first force from the working cylinder is not enough.
- Unable to switch gears. When the clutch pedal is depressed, the “speed” simply does not turn on, even in a car without moving. Here it is even more necessary to bleed the clutch, since the line is very airy.
- The pedal fails. The pedal becomes “soft” due to the compression of the liquid along with the air, which then finds a way out. As a result, the leg sinks, although before this there was a feeling that the pedal was pressed all the way.
- Increased fluid level. If the TJ was always at the same level or gradually decreased in the tank, this is normal. But an increase in level indicates an increase in volume. If you did not add fluid to the tank, then the changes occurred due to airing and the clutch needs to be pumped.
Leveling sequence
After everything has been prepared, we carry out the work in the following sequence:
- First of all, pour brake fluid into the clutch expansion barrel to a level that is 2 cm below the upper level. We keep it clean; sand and dust should not get into the tank.
- The assistant sits behind the wheel, presses the clutch pedal 3 times sharply and all the way down. Make the next presses immediately, wait no more than 2 seconds.
- When you press the pedal a third time, you must lock it or keep it pressed.
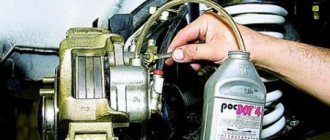
- The second person connects the prepared hose to the drain fitting and loosens the special nut with a wrench to expel the air plug (this is called “bleeding off the pressure”). Air with a certain volume of liquid will be drained through the hose into the prepared container. Don't neglect this and dump it on the ground.
- The fitting for draining liquid and bleeding air must be unscrewed 1/2 or 3/4 turn. The brake fluid with air bubbles will begin to merge and at the same time the clutch pedal will begin to sink more. The fluid is drained until the clutch pedal goes all the way, after which the assistant gives the command to tighten the fitting.
If the assistant gave the command: “that’s it, the pedal is down, close the fitting,” and the air is still coming out, then he again does this work in the same algorithm. Carry out this proper bleeding of the clutch until air stops escaping from the fitting.
While pumping the clutch system, monitor the fluid level in the reservoir and top up as the level drops.
If after 4-5 pumping cycles air still comes out, it means the seal is broken and air is being sucked into the system from somewhere.
After removing the air plug, tighten the fitting. Remove the hose, put the protective cap on the valve fitting, remove the container, and wipe the dirty parts.
The liquid that was drained during pumping cannot be immediately poured into the tank. Cover the container with a lid and remove it for several hours. The air will gradually come out of the liquid, after which it can be reused.
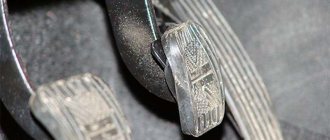
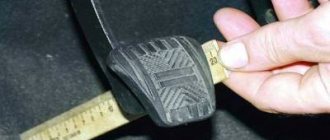
After pumping, check how the pedal is pressed. Then, you need to press the clutch pedal all the way and measure the stroke length of the clutch cylinder rod. The stroke length should be 27-28 mm. If it turns out that the stroke length is very different, you need to adjust it.
Required tools and materials
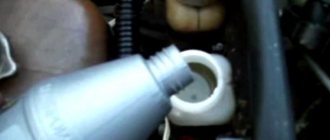
To bleed the clutch, you will need to purchase a special fluid. This could be: DOT3 (for early versions of cars), DOT4 (common on most modern cars), DOT5 (almost does not absorb water, but is very expensive). On cars with ABS, uses an ABS product.
Example of good brake fluid
Important! Do not mix liquids when pumping! If there is yellow and almost transparent liquid in the expansion tank, then it is DOT4 and you will need to fill it with the same one. Red or pink - DOT5.
You will also need a spanner or open-end wrench to unscrew the cylinder fitting. For most cars, the size of the fitting edge is 8-10 mm. An alternative is a socket and drive, but it is less convenient to use when bleeding the clutch.
Stock up on a drainage container and a flexible hose. The latter is put on the fitting to bleed air bubbles. It is desirable that it be transparent. Then it is easier to control the process of movement of the vehicle. A tube from a medical dropper sold at a pharmacy will do.
Popular brands:
BMW X5, Hyundai Solaris, Renault Megane
Tools for leveling
As with any procedure, before starting work, you need to prepare the necessary tools and materials.
To bleed the system, you need to prepare:
- a set of standard tools (wrenches, pliers, screwdrivers, etc.), which are usually used during repair work;
- container into which the brake fluid will be drained;
- new brake fluid;
- a rubber hose that will connect to a fitting of the appropriate diameter. It is desirable that the hose be transparent, then it is easier to control the air outlet;
- any device with which you can fix the pedal if there is no assistant and you do the work yourself.
In order to carry out all the work efficiently, it is better to call in assistants, preferably someone who knows how to bleed the clutch.
Step-by-step instruction
Bleeding the clutch cylinder can be done with an assistant or independently, which determines the sequence of actions. It is important to do everything correctly, otherwise the hoses and hydraulic drive will become even more airy.
Leveling with the help of a second person
Let's take a step-by-step look at how to bleed the clutch in the easiest way with an assistant:
- Open the hood of the car. All actions are performed with the engine turned off.
- Closer to the partition of the engine compartment and passenger compartment there is a fluid reservoir. Remove the lid and add the missing volume so that there is 2 cm left to the neck. The reserve will be needed, since part of the fuel fluid will be poured out during pumping.
Adding fluid to the reservoir in the engine compartment
- Next to the clutch, locate the slave cylinder that pushes the fork with the release bearing. There will be a fitting on the top of the unit body. It is closed with a rubber cap to prevent clogging.
- Remove the cap from the fitting and place a transparent hose of the appropriate diameter on it.
- Take a cut plastic bottle, fill it with 150-200 ml of TJ and dip the free end of the hose into it.
- An assistant pumps the clutch pedal 2 times and on the third presses it in the maximum depressed position. This helps build pressure into the system.
- Using an open-end wrench, unscrew the fitting one turn. Through the transparent hose you will see liquid and air leaving the system. The latter will appear in the form of bubbles in the receiving container.
Draining liquid through a tube into a bottle
With this action, the fork will return to its original position and connect the driven and driven discs, as the pressure is released. After this, the clutch bleeder screw is screwed in and the process is repeated two more times. If, upon completion, air continues to come out of the hose, then there is a lot of air in the system and more cycles will be required. The clutch bleeding is completed by adding technical fluids to the Max mark.
How to upgrade with the help of one person
If you do this work yourself, you will have to regularly move from the hood to the interior and back. You will need a brick or other heavy object to hold down the pedal. But without the help of a second person, you can pump the clutch in the opposite way.
Bleeding the clutch using the reverse method using a syringe
To do this you need:
- Open the hood and get to the fluid tank.
- Unscrew the cap and remove some liquid with a 10-cc syringe.
- Remove the rubber plug on the fitting and attach the transparent hose from the dropper to it.
- Insert a syringe with technical fluid into the free end of the hose.
- Make one turn of the fitting with an open-end wrench to open the channel.
- Slowly squeeze out the contents of the syringe.
- With this pumping method, the air will move in the opposite direction and it will exit through the tank. The pressure is created by the syringe, so the pedal is not activated.
- Tighten the fitting and make sure the fluid level is correct. Top it up if necessary.
Using this sequence, you will be able to bleed the system without the help of a second person.
Bleeding instructions
Before the procedure, open the instruction manual and take a good look at the device; the book should tell you about its repair and pumping. Using the diagram indicated in the manual it will be easier to find the necessary fittings.
There are two ways to bleed the clutch; they have some differences. If there are any problems with the pedal, for example, it began to freeze in the uppermost position, or some kind of rigidity appeared, the system is not working well, first of all you need to make an adjustment. Since bleeding cannot be performed if there is no free play of the master cylinder piston pusher. The piston and pusher act as a shut-off valve. If there is no free play, the shut-off valve will be closed. If the pushrod does not move freely, air will not escape from the system and it will not function properly. A similar situation arises if the tension spring is faulty and, accordingly, in this case the pedal sticks when it moves to its upper position.
The first scheme is the simplest and is used for most domestically produced machines. First, check the fluid level in the storage tank and top it up if necessary. There should be 1.-2 cm from the top edge. The tank must be filled using a filter to prevent the ingress of dirt or any impurities. Then the cap is unscrewed from the working cylinder fitting and one end of the hose is put on. The second end of the hose is lowered into a container, which should be one third filled with liquid to prevent air from entering. Next, the clutch pedal is pumped several times at intervals of several seconds, and then it is pressed to the end and kept pressed. The pressed pedal displaces the liquid along with the air through the hose. When it flows out, the cap is wiped dry and screwed back onto the fitting until it stops. The pedal is released.
This procedure must be repeated 6 to 8 times. During the procedure, you must constantly monitor the fluid level in the hydraulic drive and constantly top it up. It should not fall below 3.5 cm from the edge. The level must be above the connection between the hose and the fitting. Bleeding will be more efficient if you constantly close the bypass valve. After bleeding the clutch, check the brake fluid level. To do this, you first need to depress the pedal. If the level is below the permissible level, then the required amount is added.
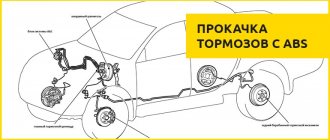
The second method is more complex and is used more for foreign-made cars:
- You need to lift the car with a jack in order to easily remove the protection from the engine;
- it is necessary to remove one front wheel, since the clutch is pumped through the brake system;
- the caps are removed from the fittings of the central cylinder and the front brake, their surface is thoroughly cleaned;
- first, put a rubber hose on the front brake fitting and bleed the system so that no air gets in;
- after filling the hose with liquid, the end of the hose is put on the main cylinder fitting, both fittings are opened;
- the brake pedal is pressed all the way;
- tighten the fitting on the front brake and release the pedal;
- then unscrew the fitting again and press the pedal;
- the procedure is repeated several times until air bubbles stop appearing in the storage tank.
If the clutch is not pumped, the operation of the system cannot be guaranteed, which can lead to various problems. If you are confident in your abilities or want to gain invaluable experience, you can upgrade yourself. It is better to contact a service station to carry out this procedure; specialists will carry it out quickly and efficiently.
Where is the working hydraulic cylinder fitting located?
On passenger cars with a transverse or longitudinal engine, the fitting of the working hydraulic cylinder should be looked for next to the box. Since the clutch is located between the engine and transmission, the hydraulic drive will also be here. The fitting itself is located on top of the housing to naturally collect and remove air from the system.
Example of the location of the trigger element on a Renault Megane
For an easier search, you can “follow the trail” from the pedal and rod leading from the passenger compartment to the mechanism for separating the two discs. It is convenient to accurately find the air release point when you are in a hole under the car. But connecting the hose and bleeding itself is easier to do from above.
When is it necessary to bleed the clutch hydraulic drive?
If the hydraulic system is faulty, then bleeding, that is, removing air, will not help it. But an attempt is always made, since it will not be particularly difficult, and sometimes it helps for a long enough time, for example, to get to the place of repair.
In general, the clutch is pumped in the following cases:
- after repairs associated with intervention in the hydraulic drive, replacement of hoses or cylinders;
- during routine maintenance to replace the fluid, its service life is limited and is indicated in the vehicle documentation;
- to identify faults associated with incorrect clutch operation.
If operation is restored, even for a short time, then the reason is definitely air ingress. This will be noticeable during the pumping process.
It is more difficult to determine the exact location of the loss of tightness, but in a typical case, leaks on the lines will be visible visually, the main cylinder is to blame for the failure of the pedal if no other problems are found, and the leakage of the worker’s cuff is visible in the fluid under the machine.
If you have access to the entry point of the master cylinder piston rod, you can find liquid there too. On some cars it even gets into the cabin, at the driver’s feet.
Errors when bleeding the clutch
Those who perform such work for the first time may make a number of mistakes. Because of this, it will not be possible to expel air from the system or the operation of the unit will deteriorate even more. The most common problems are the following.
Liquid level drop
The car owner is so carried away by the bubbles escaping through the hose that he does not notice how the fuel fluid in the expansion tank goes very low and the circuit “captures” a new portion of air. Then the work done loses its meaning and everything has to be repeated again.
Upgrade only once
Another common mistake is doing only one loop.
This helps remove some of the air lock, but does not completely solve the problem.
An unpleasant crunching sound and other symptoms may remain when you press the pedal.
Wrong choice of liquid
Beginners often make mistakes when choosing DOT fluid. As a result, different liquids are mixed, which leads to a change in composition. You have to pay for inexperience with leaking connections and hoses, since the mixed composition can be even more aggressive than the original one. Operation of the system will lead to accelerated corrosion of metal elements and a reduction in the overall service life of the hydraulic drive.
Carrying out work on an unadjusted clutch
If you bleed air locks on an unadjusted drive, then all the work may be useless.
When the pedal pressed all the way to the floor does not transmit 100% of the force to the hydraulic cylinder, the latter does not pump pressure into the system. As a result, it will not be possible to release air bubbles through the hose.
But the car owner will think that everything is fine with the system and will begin to look for the cause of the problem elsewhere.
Trivial mistakes
Among the simple violations during operation is a spill of a puddle of brake fluid under the car. This occurs due to the absence of a receiving container and a hose, when the pressure is simply released through an unscrewed bleeder. In a garage, such a stain will make it difficult to track the leakage of other systems (engine oil, gearbox, antifreeze from the radiator, etc.).
Often, when pumping, beginners lose the rubber cap that protects the drain hole from clogging. Since it remains wet and is located at the bottom of the car, after the procedure, road dust easily sticks to it while driving. It will be problematic to perform pumping next time. In view of all this, it is better to turn to professionals for services.
When pumping is required
The system can be pumped quickly and efficiently even if you do not have extensive experience in such matters.
There are several reasons why a hydraulic clutch may become filled with excess air. The main ones include:
One-way road: we analyze traffic rules, signs and fines for violation
Category: Traffic rules
- carrying out diagnostic measures;
- performing repair work;
- use of low-quality spare parts;
- poor tension of connecting elements;
- faults and cracks in pipelines;
- initially defective clutch due to the fault of the manufacturer;
- natural wear processes;
- aggressive use of the clutch pedal;
- mechanical damage;
- consequences of improper repair of clutch-related components, etc.
Before you start pumping alone, it is strongly recommended to find the cause of the problem. It's one thing if it's just a standard procedure after repairs.
Things are completely different if there is damage in the system, some defects or malfunctions. Is it necessary to start pumping under such circumstances? No. The procedure will be pointless. Don't waste your energy and precious time.
First, fix the problem, make sure that the fluid level in the hydraulic system is normal, and only then start pumping yourself.
There are several characteristic signs that indicate that the clutch needs to be pumped:
- when driving, the car begins to jerk actively;
- when you press the clutch pedal you feel a beat;
- it is not possible to fully depress the pedal;
- the effect of the depressed clutch occurs only after 1-3 presses;
- excessive force has to be applied to the pedal;
- the car reacts inadequately to gear shifting;
- traces of leaking hydraulic fluid are formed, etc.
If a car's clutch does not work properly, continuing to operate it is potentially very dangerous. Therefore, be sure to fix the identified malfunction.
No one forbids you to go to a car service center, where technicians will quickly bleed the system. But if there are no clutch failures, this procedure can be easily performed independently. You just need hands, feet and a small set of tools.
Air in the clutch: how to bleed it
To begin with, bleeding the clutch is similar to bleeding the brakes when air gets into the hydraulic system as a result of a malfunction or as part of a scheduled brake fluid change. By the way, a note for beginners - the clutch hydraulic drive also uses brake fluid.
Article on the topic: Quick and gentle flushing of the Hi-Gear engine: review of flushing compounds and features
To bleed the clutch with an assistant, you will need to prepare:
- brake fluid
- set of tools;
- brake fluid drain container
- a hose that fits the drain fitting in diameter;
Please note that if the clutch is pumped independently (without outside help), a stop is also needed to additionally secure the clutch pedal. It is also advisable to use a hose that is transparent. This will allow you to more effectively control the air exiting the system. Also remember that brake fluid is toxic. Avoid contact with skin, eyes, etc. It is best to use safety glasses and gloves.
So, before bleeding, you must first adjust the clutch. If the clutch is not pre-adjusted, it will not be possible to bleed it, since there may be no free play of the master cylinder piston pusher. To be clear, the piston and pusher are in fact a shut-off valve.
If there is no free play, the valve will be closed. A similar situation occurs when the tension spring is faulty. This leads to the clutch pedal sticking when moving to its final upper position.
Having completed all the recommendations and adjustments, you can proceed to pumping:
- At the initial stage, you should pour brake fluid into the master cylinder reservoir (maintain the level at least 2 centimeters from the top edge). It is better to pour liquid into the tank through a mesh filter to avoid debris, foreign particles, etc. from entering the system.
- The next step is to remove the rubber cap located in the upper part of the CCGT housing from the bypass valve. Next, a rubber hose is put on the valve.
- The free end of the hose is lowered into a container (a container with a volume of 0.5 liters is sufficient), into which 200-250 ml of brake fluid should first be poured.
- Now you need to unscrew the bypass valve 1 turn, after which you will need to press the clutch pedal all the way (an assistant presses the pedal or places a stop). Next, wait until air bubbles stop coming out of the hose into the container.
- At the same time, you should ensure that the level of brake fluid in the reservoir does not fall below 3 centimeters. If there is a noticeable drop, the fluid should be added.
- After air bubbles have stopped escaping into the container, you need to tighten the bypass valve with the recommended force. If bleeding is carried out without an assistant, the stop from the clutch pedal can be removed.
- The final step is to remove the hose from the fitting, after which the cap is put back on. You should also check the fluid level in the tank by adding fluid and bringing its level to a mark no more than 2 cm from the top edge.
Article on the topic: Engine misfires at idle: main reasons
Let us add that it is often impossible to pump the clutch efficiently in one approach. As practice shows, it is optimal to repeat the procedure several times (2-3). After each press on the clutch pedal, the bypass valve must be closed, then release the pedal and repeat the above steps. This approach allows you to quickly and effectively remove air from the system.
At the end, all that remains is to check the performance of the clutch after bleeding. To do this, press the clutch pedal all the way, after which the stroke of the piston pusher is checked (in accordance with the standard for a particular car). If deviations are noticeable, additional clutch adjustment is required.
Let's start pumping
- The first thing you need to make sure is that the brake fluid in the expansion tank is at a normal level. If not, add more.
- Next, we find the pneumatic hydraulic booster (usually under the expansion tank). Remove the cover from the air valve of the PSU. We put the pre-prepared hose on the valve. We lower the second end of the hose into a container with liquid. Throughout the entire procedure, the liquid level in the container should be 3-4 centimeters. If the fluid level drops, top it up immediately. The same applies to the amount of brake fluid in the expansion tank.
- Meanwhile, your friend should press the clutch pedal 2-3 times at intervals of two seconds. Then the air release valve is unscrewed one turn. As soon as the turn is made, the partner must depress the pedal and not let go. This will allow fluid to leave the system. You need to keep the pedal pressed until liquid with air bubbles stops coming out.
- The partner gives a signal, and the air release valve twists to its original position. The procedure is repeated, and if there are no bubbles in the emerging fluid, then the process of pumping the clutch cylinder can be considered almost complete. If after several repetitions the air still comes out with the liquid, then the problem is different and serious diagnostics are needed.
- Remove the hose from the outlet valve and put the PSU air valve cover back in place. Check the brake fluid level in the expansion tank again.
- We check the stroke of the piston pusher. To do this, press the pedal all the way. The stroke should be about 28 millimeters. If you have such indicators, the clutch has been pumped successfully.
Tips & Recommendations
To bleed the clutch, use only the recommended brake fluid (information is contained in the manual or technical literature). Using the wrong fluid may cause the rubber parts to swell, crack, etc. As a result, the tightness of the system will be broken, leaks of working fluid will appear, and the clutch will stop working.
There is a high probability that the hoses or threaded connections may be damaged or not tightened well enough, an unnoticeable leak of working fluid occurs, air appears in the clutch due to the presence of cracks, defects, etc. As a rule, such problems are often directly related to wear of the oil seals, cuffs and seals of the clutch slave and master cylinders.
Recommendations
After any repair work related to the clutch hydraulic system, it is necessary to bleed it. If you forgot to keep the fluid level in the tank, then air has entered the system and needs to be expelled.
Brake fluid is toxic, so wear gloves and avoid splashing it in your eyes. After finishing work, wash your hands with soap.
If air enters the system through a poorly tightened threaded connection or a microcrack in the main or working cylinders, or in the tubes, then after some time after bleeding, air will reappear in the system. This means that next time, before bleeding the hydraulic clutch, you need to tighten all threaded connections and inspect the pipes.
How to bleed the clutch master cylinder
The algorithm for removing air from the cylinder is not complicated, so you can do it yourself in the garage. The work is divided into three stages:
- preparation for replacement, search and collection of tools.
- connecting the hose to the clutch fitting.
- releasing the pedal and draining the liquid.
Note!
When replacing, you must follow safety precautions:
- Work is only permissible with gloves. The liquid is considered poisonous.
- No dirt should get into the new product.
- You cannot mix different liquids.
- It is not advisable to re-fill.
Important! If the drive is being pumped after repair, you first need to make sure that the master cylinder piston pusher is in good condition and adjust it if necessary. Without this, you won't be able to bleed the clutch.
Required tools and materials
Before work, make sure you have everything you need and organize your tools. This will save you from unnecessary nerves and searching for a wrench at the last moment.
So, to bleed the cylinder you need:
- rubber hose of suitable diameter.
- wrench (most often you need an 8/10 wrench, but just in case you can take several).
- transparent container for new liquid. 200-500 ml will be enough.
- fresh liquid.
Note!
The hose should fit tightly to the fitting and not allow air to pass through.
Important! On some vehicles, the drain fitting is located at the bottom, so an inspection hole may be needed.
It is advisable to have an assistant nearby. He will supply what is needed and press the clutch pedal while the fluid drains. In emergency situations, you can use any heavy object, such as a brick, on the pedal as an assistant.
Attention!
The object must constantly press on the pedal.
Carrying out repairs yourself will be more difficult and longer, because you need to simultaneously twist the fitting and press on the clutch.
Step-by-step instruction
To bleed the clutch you need:
- Check the fluid level. It should reach the neck of the tank.
- Remove the protective cap from the fitting and put on the rubber hose.
- Place the other end of the hose into a container with new fluid.
- Press the clutch pedal sharply and firmly 3-4 times. Note! The opposite end of the hose must always be lowered into the liquid, otherwise air will get into it.
- After the last press, the pedal must be left depressed. Important! The pedal must not only be pressed all the way, but also return to its original position. If it fails, it must be returned manually. Pressure can only be pumped up to full amplitude.
- While the pedal is pressed all the way, turn the drain fitting about half a turn. The old liquid will come out with air into the container with the new liquid. The presence of air can be judged by bubbles.
- The pedal should move down slowly. When it is pressed down as much as possible, you need to turn the fitting. Note! Until the clutch pedal is lowered, the fitting cannot be turned completely.
- Bleeding the system can only be completed when clean liquid without air bubbles comes out of the hose.
- After obtaining the desired result, carefully tighten the fitting valve, remove the hose and put on the protective cap. Important! If air is constantly flowing, it means that air is getting into the system from somewhere and it cannot be pumped. You need to fix this first, and then bleed the clutch again.
After bleeding the clutch, it is recommended to check the travel reserve of the pusher, as such an operation can change it. The required value must be found in the manual or on the Internet. If the distance differs from the specified one, it needs to be adjusted.