07/19/2021 11,433 Daewoo Lanos
Author: Ivan Baranov
In order to ensure that the air in the cabin of your car is always clean and fresh, you need to pay at least a little attention to the air conditioning system from time to time. No special knowledge is required here and it is often enough to monitor the condition of the filter and know how to tighten the air conditioning belt on Lanos. In some cases it may need to be replaced.
It just so happens that a domestic car enthusiast, before going to a service station, will definitely try to do this or that work on his own. This makes sense, because in this way you can save quite a decent amount. Replacing the air conditioner belt is exactly the case when there is no need for the services of a service station, and you can do it yourself.
[Hide]
How to Tension the Alternator Belt on Lanos
Changing and adjusting the tension of the alternator belt and power steering pump
The manufacturer recommends the alternator every 60,000 km or 6 years of operation.
Check the condition of the drive belts and their tension every 25 thousand km.
Check the belt for shine or cracks. A shiny belt will slip, while a good belt will have a hard-to-see factory invoice. Cracks usually start at the inside corner and spread outward. Replace the belt if it shows the first signs of cracks or strong glow.
Belt tension should be clear or slack. When pressing with your thumb on the belt in the middle of the two pulleys, the belt can be deflected by 8mm. If one of the belts is bent more than the specified amount, the belt tension must be adjusted. Improper tension will cause slipping and wear, while excessive tension will cause bearing failure, belt cracking and grinding.
Typical Belt Failures
Cracking and erosion . There are deep cracks in the belt that cause kinks. Severe bending leads to overheating and premature wear. Cracks can result from using a belt on the wrong size pulley. The belt recess is designed for a smaller diameter pulley.
Softening (lubrication). Oil and grease on the belt softens the material and separates it from the cord, which strengthens the belt. First the belt slips, then it completely fails.
Shine. The shine is the result of the belt sliding. A slipping belt can cause the battery to overcharge, overheat, or cause other systems to malfunction. The more the belt slides, the more shine there will be on the surface of the belt. If the gloss is not strong, then tighten the belt.
Remove the Lanos alternator belt whistle
This video demonstrates how to temporarily fix a squealing alternator
, if at the moment in.
Chevrolet Ability to tension the belt and inspect the vehicle
how to properly tension a belt
on Chevrolet
Lanos
1.5.
Worn surface. The surface of the belt wears and peels off. The belt cord begins to break, causing the belt to break. If the belt surface wears quickly or nuts appear, check the groove pulleys for nits.
Bundle. This belt is on the verge of breaking and twisting. The belt layers separate and the belt cord breaks. Don't wait until the break.
Wear V-belts . Ѵ Belts are very important for the engine. they lead different units. They require a little maintenance (occasional tightening), but they don't last forever. Slipping or damage to the belt leads to overheating and whistling of the engine.
Uninstall and install
You will need two 12 keys.
2. Slightly loosen the bolt that secures the alternator to the tension bar...
3. ... and two generator nuts to the engine block
(photos taken below for clarity)
4. Move the generator into the cylinder block. The belt tension will decrease.
6. Install a new alternator belt and adjust its tension.
7. Replace the air conditioning compressor belt.
Power steering and power steering
When pressed with a force of 100 N (10 kgf), the belt deflection should be 10-15 mm.
Control the tension with your thumb.
Release the tension on the alternator drive belt
generator hinge and mounting bolts.
Using a wooden handle, stick or even a mount as a lever, turn the generator one way or the other until the desired voltage (10.15 mm) is reached.
Carefully tighten the mounting bolts.
If a new belt was installed, check the tension again after 300 km.
How to replace a Priora alternator belt with air conditioning
Hello! I have a car Lada Priora3, station wagon, luxury, with electric power steering and air conditioning, produced in 2012! Mileage 50,000 km. I wanted to change the belts myself, but I wanted to clarify how best to remove the alternator belt when the engine mount is in the way?
- Battery lights up on devices in Priora - 5 answers
- What accessory belts should I install on the Priora and do I need to change the pump? – 5 answers
- No charging at idle - 4 answers
- After starting, the battery indicator on the VAZ Priora is on - 4 answers
- The generator only charges after giving up the gas in the Lada Priora – 4 answers
The support is in the way, so the man changed it: drive2.ru/l/804826
When you need to remove and change the belt in a Lada Priora without additional equipment (that is, without power steering), then everything is much simpler and the procedure can be performed with keys “10” and “13”.
Because you don’t need to remove anything other than the wheel and fender liner, and the strap can be removed if you loosen the bolt securing the generator and the tension mechanism, but if it’s a 16-valve Priora with power steering and air conditioning, then the procedure for replacing the hanging belt will be much more complicated.
These photographs with a brief description describe in more or less detail how to do this without completely removing the support, but only by unscrewing the fastening bolt (so that the strap can be pulled through).
- A jack is used to lift a car to remove a wheel and also jack up the engine crankcase;
- Wheelbrace (remove the wheel);
- Key to “17” (to unscrew the generator belt tensioner roller) also keys to “13” and “15”;
- TORX E10 (to unscrew the bolts securing the Priora engine mount);
- Set with star keys (unscrew the side mudguard).
For a Priora with air conditioning and electric power steering, you need to purchase a hanging belt 6PK1115.
Instructions for replacing the alternator belt on a Lada Priora with air conditioning in the photo instructions:
Now we check whether the belt is seated on the air conditioner pulley and return the tension roller and tighten the belt (preferably with a special wrench).
Any car generator is needed to transform the energy generated by the rotation of the engine crankshaft into electricity to power the on-board network. Without this device, it is impossible to imagine recharging the battery and the possibility of using headlights, music in the car, air conditioning, heater and other electrical equipment of a modern car.
Generator characteristics
The VAZ 2170, or Lada Priora, is equipped with a classic alternating current device, supplemented by a diode bridge for rectifying electricity and a voltage regulator. Works in parallel with the battery in all modifications of Lada Priora with engines operated at temperatures from -40 to +45 degrees.
The Priora factory generator 5102.3771 is produced by the Russian brand “Pramo”.
its peculiarity is the increased current output parameters at low speeds (at 300 rpm up to 6 Amperes). Undoubtedly, this is a significant advantage, especially when operating a car in winter at subzero temperatures. Moreover, the use of such a unit allows the use of an automatic transmission.
Generator device
The standard Priora device has the following characteristics:
- weight 5410 grams;
- gear ratio 1/2.4;
- power 205 watts;
- current strength at maximum values 80 Amperes;
- voltage range 13.8–14.4 V.
The peculiarity of the generator connection involves power supply using the fuse box, which means that the chain then leads to the battery and the ignition switch. The generator is also connected to a lamp indicating low battery.
When the propulsion system starts, power is supplied to the device winding through three diodes of the rectifier unit. The correct operation can be easily monitored by the lamp indication. When the ignition key is turned to the first position, the warning light lights up on the instrument panel.
The engine starts - it goes out (if the generator is working). If the lamp is on, the device has obvious problems.
Structurally, the generator consists of a drive pulley, bearings, covers, tie rods, rotor and stator, rectifier unit and voltage regulator. The rotor is the moving part of the device; it rotates on bearings installed in the covers at the front and rear. As the rotor rotates, the brushes rub against the contacts. The alternating current thus generated passes through the diode bridge (rectifier unit), where it is transformed into direct current.
LANOS Do-it-yourself replacement of timing belt, air conditioner and generator
Every car enthusiast carefully monitors his car, some visit car services, while others, on the contrary, do not trust them and try to do everything on their own. Of course, this allows you to save a lot and gives you confidence in your car that it won’t let you down at the most important moment. And if the driver also has a garage, then this is a real workshop place where you can tinker with your favorite car.
Replacing the timing belt, air conditioner and generator turned out to be not such a difficult procedure that can be done with your own efforts. You just need to read the instructions, stock up on tools and find a convenient place for repairs - a ditch, a lift, a hole in the garage. Mountains of literature do their job, and you don’t need to go to a service center for this. On the Internet you can find the necessary instructions, supported by pictures. The belt needs to be replaced after 60 thousand km, or if it shows signs of wear, cracks or delamination. Therefore, this information will come in handy sooner or later, because every driver will be faced with this issue.
The necessary tools for work are a socket wrench “10”, “24”, ring wrenches “12”, “17”, a hex wrench “5”, a flat-blade screwdriver, pliers and a wrench or a wrench with an extension and a socket head at “17″.
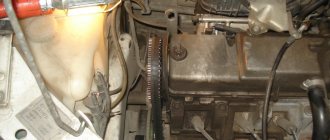
Let's look at the step-by-step instructions for replacing the belt: 1. It is necessary to remove the pipe and the air filter housing by unscrewing the bolts.
We unscrew 1 and 2 with a screwdriver, pull out the bracket and pull out sensor 3, use pliers to move 4 2. Loosen the bolts holding the power steering pump pulley and the bolt holding the generator belts in tension, remove the belt, and then the pulley itself.
3. The power steering pump is attached to the cylinder block with two “12″” bolts, unscrew them.
4. The upper part of the timing belt cover is secured with four “10″ bolts; they must be removed. We proceed to install the piston of the first cylinder at the top dead center.
Sequence of actions (also for cars with air conditioning)
- The hood of the car is opened, using a set of open-end wrenches, the air filter and the air supply pipe that is attached to it are removed (to remove the pipe, the fastening clamps are loosened with a flat screwdriver).
- There are 3 bolts on the power steering pulley. They are weakened. After this, the top bolt on the generator is unscrewed (there it is 1). As a result, the tension of the alternator belt weakens and it can be easily removed. Next, the power steering pulley is removed.
- The timing belt cover is secured with four 10mm bolts. These bolts are unscrewed, after which the cover is removed.
- After opening the belt cover, the crankshaft rotates until the mark on the pulley matches the mark on the top cover (the coincidence of these marks means that the piston of cylinder 1 has reached top dead center).
- If there is no inspection hole, the right wheel of the car is jacked up and removed. Then the right fender liner is unscrewed. Behind it there is an air resonator, which is also removable. This gives access to the plastic protective panel, behind which the belt is located.
- The protection is removed using a 10-mm open-end wrench (it is held in place by 2 bolts and 2 nuts). In some Chevrolet Lanos models, this panel may be made not of plastic, but of steel.
- The bolt on which the crankshaft pulleys are attached is now visible. It is unscrewed with a wrench (and its wrench should be very long, and the socket head should be 17). All this is done in order to loosen the tension roller from the air conditioner drive (provided that the car has this device). Through the above procedure, the tension roller is released so that the air conditioner belt can be removed freely.
- Access to the crankshaft and timing belt is provided. There are 2 marks on the crankshaft (one on the key and one on the tooth). Before further actions, you need to remember their position.
- On the lower protective plate covering the belt, use a 10mm socket to unscrew 3 bolts.
- The tension roller is fixed in the retracted position using a screwdriver. There are holes on the bar of this roller that must be aligned.
- Now the timing belt is removed and inserted into the slot, which is located next to the power steering housing.
- When installing a new belt, be sure to ensure that the mark on the tension roller bar exactly matches the slot on the bracket.
Video on the work + information about tags
How to tighten the alternator belt on a Chevrolet Lanos
Not so long ago, when starting the engine, creaking sounds appeared from the alternator belt. Typically, such a squeak indicates that the belt has stretched.
That's it... the belt no longer squeaks, makes other unpleasant sounds, or slips. I will also add that it is useful to periodically use belt conditioner:
I use Hi-Gear
.
but the conditioner is VeryLube
.
which I used before - much more convenient, because... You can insert a tube into the sprayer. For some reason, Hi-Gear
does not provide this feature, so spraying the spray is not very convenient.
The belt also whistled. especially when there is a load on the generator, that is, when the fogs are on or the glass is heated. when you start, there's a whistle. I was at the service center for half a day, they did it when I opened the hood to see what they had done there, so they just sprayed the bastards with some water. Of course we took it to the fullest. They wrote in the paper - throttle traction and what does it have to do with it. I drove for a week and again the same squeak.
Recently I changed the timing belt and all the other belts and rollers. so I heard the familiar whistle of the new belt again - let it work a little, then I’ll tighten it if there’s a squeak..
with a mileage of 61500 km.)
1. Remove the front right wheel.
2. Remove the plastic protection from the wheel side. You can immediately jack up the engine.
3. Remove the air filter housing by unscrewing bolts 1,2,3 and the air duct, disconnecting the supply air temperature sensor 4 and loosening the clamps 5,6 and 7.
In what cases is replacement necessary?
The service manual for each car, be it a Chevrolet Aveo or a Chevrolet Lanos, must indicate the timing of belt replacement. In the case of the Lacetti, this figure is 50 thousand kilometers, but this period is relative. As practice shows, wear of the alternator belt (RG) for various reasons can occur earlier, but it also happens that even if the car has covered 100 thousand km, the condition of the belt is excellent.
If the strap in a Cruze or Lacetti car is worn out, the car owner will encounter the following symptoms:
- When driving, uncharacteristic whistling sounds began to be heard from under the hood; as a rule, they appear when there is an increased load on the on-board network. In particular, if the driver turns on the side lights, optics, car radio, stove, etc. A whistle may also occur when you press the gas pedal.
- The strap tension has weakened, usually due to its stretching or failure of the tension roller. If this is the case, then it will be necessary to change not only the RG, but also the video itself.
- When visually diagnosing the condition, traces of wear can be seen on the RG, in particular, cracks and small tears, delamination of the structure.
- A whistle may also occur when starting the power unit. When activating energy consumers, engine speed may increase. It may be that the lighting fixtures begin to shine dimly, but when you press the gas pedal, the brightness of the headlights returns to the required level.
- An indicator may appear on the dashboard to warn the driver that the battery charge is low. In this case, the battery charge state may be normal.
Changing the generator and power steering belt tensioner roller on a Chevrolet Lacetti
According to the maintenance regulations for the Chevrolet Lacetti, the tensioner roller, alternator drive belt and power steering must be replaced every 40,000 km. mileage But there are situations when a belt break or failure of the tensioner with a roller occurs much earlier. Therefore, monitor the condition of these elements of engine auxiliary units during each scheduled vehicle inspection.
Instructions for replacing the alternator belt tensioner roller, power steering and air conditioner clutch
Before you begin replacing the tensioner pulley and belt, prepare the necessary spare parts and tools.
- Dayco catalog number
- Tensioner with roller - Gates part number T38376 . Unlike the original plastic one, it is more durable)
- Also find a 12mm wrench with a long handle or a similar socket adapter
- Remove the air filter housing
- To access the power steering pump, remove the exhaust manifold protective screen
- To access the tensioner rabbit, you need to unscrew the power steering pump
- Using a 15mm wrench, set the roller to the dismantling position and remove the old drive belt
- Unscrew the tensioner roller and replace it with a new one.
- We start and install the drive belt according to the diagram
On vehicles without air conditioning, the replacement procedure and part numbers for the belt and tensioner pulley are identical. Instead of the car air conditioner clutch drive pulley, there is a roller with the same diameter.
Thank you said: 2 times
Of course, I apologize if I got into the wrong topic. I’ll ask here, if it’s off topic, please point me where to write.
In general, the car began to rattle, knock, and chatter, and I went to the service center. We looked and came up with a list of what to replace.
I wrote down the names of the spare parts, but I only found the catalog number for one, because I’m a duduk in automotive engineering, and perhaps they are called something else, but I don’t know what to look for. I want to order it on existential.
We make the replacement ourselves
The replacement process is simple and does not require dismantling large units and complex systems. There is also no need for special tools.
Tools
- a set of keys;
- jack;
- rags;
- belt;
- bearing;
- hammer.
Stages
Depending on whether the bearing needs to be replaced along with the belt or not, there are two replacement methods.
A quick way to replace only the drive
- If there is no hole or lift, then use a jack to raise the car.
- Remove the front right wheel.
- Unscrew the plastic protection from the mudguard.
Dismantling the protection
- Let's move it a little to the side.
- Using the opened gap, release the tensioner.
- We remove the belt.
- We install a new belt.
- We install the protection and the wheel in place.
This option is suitable if your problems started on the road or far from the garage. There is another method, which is more labor-intensive and also involves replacing the roller. In this case, it is difficult to do without an overpass.
Replacing the belt and roller
If our goal is to replace only the air conditioner drive, then we should not remove other components and parts. Do everything in the strict sequence we suggest.
- The first step is to unscrew the crankcase protection securing bolts from the front. There is no point in completely dismantling it. The resulting opening is absolutely enough.
- Unscrew the nuts that secure the motor protection.
- We free up space by moving it towards the wheel for work.
- Next, you need to disassemble the tensioner mechanism.
- We carefully inspect it for defects and damage.
- We clean it of dirt.
- Having installed a spacer washer under the pulley, we begin assembling the mechanism.
Start of assembly
Installed new belt
We start the car and check how the system works. If no extraneous noise is heard and the air conditioner works as expected, then the work can be considered complete.
Changing the timing belt on a Chevrolet Lanos
Today a representative of the Zaporozhye Automobile Plant with the big name Chevrolet Lanos came to us, replacing the timing belt at 120,000 kilometers and doing a little maintenance before a long journey. We definitely need to change the pump.
To replace the timing belt, in addition to the standard tool, sockets, spanners and hexagons, we also need a special wrench for the pump, since on this engine the timing belt is tensioned by it. You can either order it in advance on the Internet, or make it yourself from one and a half millimeter metal, it will not be very convenient, but it will be enough for once.
So, for replacement, we purchased a timing belt and a tension roller, a pump, two shawarmas and coffee.
Actually, the patient himself looked like this before the replacement.
Drain the antifreeze. Remove the air filter along with the housing and all pipes. To do this, unscrew three 10 bolts securing the body and loosen several clamps.
While the attachment belts have not been removed, we loosen, but do not unscrew, the three bolts securing the power steering pump pulley.
We loosen the tension of the generator belt by unscrewing the nut to thirteen, after which we move the generator closer to the engine.
At the bottom, loosen the locking nut of the tension roller and turn the tension bolt to loosen the air conditioner belt. Remove both belts.
With the help of an assistant, unscrew the crankshaft pulley bolt. The sequence of actions is as follows: the assistant in the car turns on the fifth speed and presses the brakes; with a slight movement of your hand, you unscrew the bolt from the outside through the pipe.
Unscrew the four bolts of the timing belt protective cover. You will not remove the cover until you unscrew the power steering pump.
We unscrew the two bolts securing the power steering pump, having first removed the pulley.
Unscrew the three bolts of the lower timing belt protective cover.
Set the top dead center. Turn the crankshaft clockwise until the marks on the camshaft match.
And also the crankshaft.
Next, unscrew the timing belt tension pulley bolt and remove the belt along with it. Having locked the camshaft sprocket, unscrew the bolt and dismantle it. There are two small ten-point bolts hidden under it; we turn them out.
Replacing the belt of Lacetti auxiliary units
Let's consider a procedure such as replacing the belt of Lacetti auxiliary units. The whole job will take less than an hour.
The accessory drive belt drives the alternator, power steering pump, and air conditioning compressor.
The belt must be replaced if there are tears, abrasions or cracks on its plane. Also, if the indicator arrow drops below the leftmost mark, then the belt is extremely worn and must also be replaced.
The indicator arrow on the moving part of the tensioner should be between the two extreme marks on the stationary part of its body.
Replacing the timing belt on a Chevrolet Lanos 1.5 with your own hands
The condition of the timing belt in the car must be monitored. However, the vast majority of car owners do not pay too much attention to it, sincerely believing that there is simply nothing to break there. However, a broken belt entails a lot of troubles, the elimination of which will cost the driver a significant amount of money. We will talk about how to independently replace the timing belt on a Chevrolet Lanos 1.5 in this article.
How to properly check the rollers for serviceability?
If the Chevrolet Lanos engine begins to stall, has difficulty starting and runs louder while driving, this indicates some kind of malfunction, including breakdown of parts of the gas distribution mechanism. You can check the general condition of the idler and tension rollers by looking at the condition of the timing belt. It was mentioned above that these parts of the gas distribution mechanism have the same safety factor and, therefore, they wear out approximately at the same time (the pump, as mentioned earlier in the article, is twice as slow, and is replaced every second procedure).
Finding a timing belt in a Chevrolet Lanos is easy. It is necessary to inspect the engine compartment for a structure on the side of which there are several bearings, between which a wide and dense belt is stretched. This will be the gas distribution mechanism. If the belt looks worn, has damage or oil stains, both it and the rollers need to be replaced.
Before carrying out the procedure for replacing the belt, rollers and timing pump in a Chevrolet Lanos, you need to prepare. This also applies to studying safety precautions.
First, the car engine must cool down after the trip (if any). Changing parts of the gas distribution mechanism when the power unit is hot is a sure way to get serious burns.
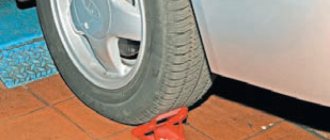
Second, the machine must be installed on a perfectly flat surface and securely locked in place. It is advisable not only to pull the parking brake, but also to install clamps under the wheels.
Third, new spare parts must be purchased only at large retail outlets from official dealers. Private sellers provide goods at a lower price, but they have a high probability of buying a low-quality fake.
How to install the rollers correctly in place?
Also, before moving on to the step-by-step instructions for replacing old timing rollers with new ones, you need to briefly describe how they are installed.
It was mentioned above that there are two types of these parts - bypass (guides) and tension. Some car owners believe that when installing the latter, they need to be tightened manually. This is not so; the spring on the tensioner “handles” the task of tensioning the belt on its own, and outside intervention can only lead to additional damage.
Basic instructions for installing the rollers in place:
- Disconnect the engine protection;
- Remove the timing belt;
- Unscrew the bearings, remembering or sketching their position;
- Install the bearings in accordance with the sketched diagram;
- Install the timing belt;
- Install engine protection.
This is a standard version of the procedure, without details that vary depending on the car model, body type, year of manufacture, and a number of other factors. The process of replacing the timing mechanism rollers on a Chevrolet Lanos is described in more detail later in the article.
Purpose of the timing belt
New timing belt for Chevrolet Lanos 1.5
The timing belt is a durable belt with a toothed profile. The teeth prevent it from slipping on the pulleys (which also have teeth). Its purpose is to transmit torque from the crankshaft to the camshaft (that is, to the timing shaft). In addition, the timing belt drives the water pump. Constant belt tension is ensured by a special tension roller, which must rotate smoothly, in no case jam, and there must be no dirt on its surface. In the Chevrolet Lanos 1.5, this belt is located to the left of the engine; it can be seen by simply opening the hood of the car.
Which belt and roller to choose for replacement
Original belt installed from the factory on a 16 valve Lanos engine 1.4 - 1.6 liters - GM 96183351 price from 1100 rubles
Original timing belt installed on 8 valve Lanos GM engine 96352407 price from 700 rub.
Original tension roller for timing belt 16 cl engine - GM 96350550 - cost from 1000 rubles
Original timing belt pulley for 8 cl engine - GM 90499401 - roller cost from 750 rubles
If for some reason you are unable to install a new original pulley and timing belt, you can choose inexpensive analogues.
Analogs of timing belt for 8 cl engine:
- Contitech CT874 (Germany) price from 900 rub.
- Gates 111RS17 (USA) price from 600 rub.
- LYNXauto 111EL17 (Japan) price from 600 rub.
Timing belt tensioner roller for 8 cl engine:
- HQ HQ96350550 (Korea) price from 600 rub.
- INA 531021330 (Germany)
- LYNXauto PB1074 (Japan) price from 900 rub.
Analogues of the timing belt installed on a 16 cl engine
- Contitech CT887 (Germany) price from 500 rub.
- Gates 5419XS (USA) price from 1000 rub.
- LYNXauto 127FL25 (Japan) price from 800 rub.
Analogs of timing roller for 16 cl engine:
- Coram C822 (Italy)
- LYNXauto PB1074 (Japan)
- INA 531021330 (Germany)
If you decide to replace the pump in addition to the roller and belt, the original number is 96352648. The cost of the GM pump 96352648 is from 2000 rubles.
Pump analogues:
- Fenox HB2801 (Belarus)
- Hepu P312 (Germany)
Once you have decided on the choice of timing belt, pulley and pump, you can begin replacing.
When to change a Chevrolet Lanos
The operating instructions for the Chevrolet Lanos 1.5 say that the timing belt should be replaced every 75 thousand km. But most car service employees are of the opinion that it needs to be changed earlier - every 60 thousand km. To know that the belt needs to be replaced, just do a simple visual inspection. Reasons for replacement are listed below:
- When the belt is bent, transverse cracks between the teeth are clearly visible.
- Very thin, barely noticeable cracks appeared directly at the base of the teeth.
- The thickness of the belt is uneven along its entire length, it has delaminated and traces of oil and dirt are clearly visible on it.
All this suggests that it is time to change the belt. If this is not done, it may break off right on the move. And when this happens, bent valves in the engine will be the least of the driver's problems.
About cars, repairs, tuning - accessible, free, honest
Site search
RSS subscription
Categories
Recent comments
Important points
- To successfully replace the belt, it is important to carefully monitor the position of all marks on the tension rollers and pulleys. If this is not done, the belt tension may be too strong and it will simply break. The location of important marks is shown below.
Location diagram of timing marks on Chevrolet Lanos 1.5
As can be seen from this article, when replacing the timing belt on a Chevrolet Lanos 1.5, there are a lot of nuances that the car owner will have to take into account. First of all, this is the position of the tension rollers and marks, of course. However, if you act consistently and use the above diagram, even a novice driver will be able to replace the timing belt.
Why are timing marks needed?
Timing timing marks location diagram.
The timing marks are marks along which the timing belt is adjusted, as well as the drive belt is replaced. This element is quite important because it directly affects the operation of the power unit.
What if you set it incorrectly?
What happens if, when replacing a belt, you set the marks incorrectly or don’t set them at all? In this case, you can knock down the gas distribution mechanism, which will lead to many problems. Namely:
- Since the gas distribution has been disrupted, the injection and release of exhaust gases will be carried out incorrectly. Subsequently, the engine may start to stall, stall, fail to start, or consumption may increase. In turn, this may lead to consequences, such as increased wear, burnout of the valve mechanism and piston group, and others.
- Everyone remembers what happens when the timing belt breaks - valve bending. This happens because the gas distribution process is disrupted and the pistons hit the valves, which are subsequently deformed. The exact same principle works in this case. A broken timing mechanism will cause the piston group to fight against the valves, which will simply deform them.
- Shifting the timing mark when replacing a belt or adjusting will result in fuel being injected too early or too late. The consequence of this may be flooding of the spark plugs or suction of exhaust gases into the combustion chamber.
In addition to the induced consequences, others may also arise, which can also lead to increased wear and tear of power unit parts or other problems.
How to set tags on a Chevrolet Lanos
Setting the timing marks is quite simple. Let's consider the sequence of actions:
- First you need to remove the timing belt protective cover. To do this, unscrew the mounting bolts. Of course, the easiest way is to do this with the engine removed, but if you only need to replace the belt and roller, then it is not advisable to dismantle the entire power unit.
The crankshaft driver and pulley must be turned clockwise.
This is how the timing marks are set easily and simply.
Replacing accessory drive belts
You will need: keys “13”, “18”, “19”, TORX T20, flat-blade screwdriver.
To drive auxiliary units, two belts are installed on the engine. The front belt drives the power steering pump. The rear belt rotates the A/C compressor, alternator, and water pump pulleys.
According to the manufacturer's recommendations, the power steering pump drive belt should be cut with a knife to remove it, after which it becomes unusable. This is explained by the fact that the belt, even after removal without damage, cannot be reused, since it is designed only for one-time stretching when put on pulleys (belt tension adjustment is not provided). In addition, belt replacement is regulated after a certain mileage or service life, so when replacing the rear drive belt (air conditioning compressor, alternator and water pump), the front drive belt (power steering pump) should be replaced at the same time.
However, the power steering pump drive belt can be removed without cutting it. The sequence of actions for this is described below.
To remove the front belt without cutting it, do the following:
1. Place the vehicle on a lift or inspection ditch.
2. Remove the right front wheel.
4. Rotate the crankshaft by the crankshaft pulley mounting bolt so that any of the holes in the power steering pump pulley is opposite the head of the lower pump mounting bolt.
5. Through the hole in the pump pulley, loosen the lower pump mounting bolt by one or two turns.
6. Turn the crankshaft pulley again so that any of the holes in the power steering pump pulley is opposite head A of the upper pump mounting bolt.
7. Place an 18-mm open-end wrench onto the edge of the pump housing.
8. Holding the pump housing with an open-end wrench from moving towards the block, unscrew the upper bolt securing the pump and remove it from the holes.
9. Release the retaining key and the pump will move towards the engine block. This will loosen the belt tension.
10. First remove the belt from the power steering pump pulley.
eleven. . and then from the water pump pulley. Remove the belt.
NOTE: To drive the power steering pump, a 4РК 643 belt is used.
12. Install the power steering pump drive belt in the reverse order of removal.
13. Rotate the crankshaft three full turns to ensure the belt is in the correct position on the pulleys.
To remove the rear belt
do the following:
1. Place the vehicle on a lift or inspection ditch.
2. Remove the right front wheel.
4. Remove the power steering pump drive belt (see above in this subsection).
5. Turn the tensioner lever with a wrench counterclockwise until the belt tension is released.
NOTE: Rotate the tensioner arm by installing a 12-point wrench on the special protrusion on the bottom of the arm.
6. Fix the tensioner in the depressed state by inserting a pin of a suitable diameter into the aligned holes of the roller lever and the tensioner body.
7. Remove the belt.
NOTE: A 6РК 1557 belt is used to drive the air conditioning compressor, generator and water pump.
8. Install the air conditioner, generator and water pump drive belts in the reverse order of removal, as shown in the figure.
9. Rotate the crankshaft three full turns to ensure the belt is in the correct position on the pulleys.
Self-replacement
To independently remove worn parts and install new parts, you will need a standard set of tools and basic handling skills.
Belt replacement
The procedure for replacing the alternator belt takes 30 minutes. Before work, it is preferable to place the car on a viewing hole, since the belt can only be pulled out from below.
Required Tool
To replace you will need:
- 10, 12, 14 mm socket heads;
- Phillips screwdriver.
Belt replacement instructions
The procedure is as follows:
- Place the car over the inspection hole. Lock the wheels with the parking brake.
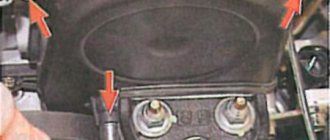
- Remove the right mudguard: use a Phillips screwdriver to unscrew the 2 plastic pistons. They are located next to the radiator. Unscrew the 2 bolts securing the shield to the side member with a 10mm head.
- Use a Phillips screwdriver to loosen the clamp securing the corrugated hose to the air filter housing.
- Using a 10mm head, unscrew the bolt securing the filter housing to the engine mudguard cup bracket.
- Unscrew the bolt securing the housing to the side member with a 12mm head.
- Remove the housing by lifting it out of the resonator pipe.
- Release the belt tension by turning the roller clockwise using the knob to 14.
- Remove the alternator belt.
- Install the new part onto the pulleys. There is no need to tighten it additionally - for this purpose, the design has an automatic tensioner.
- Install the parts in reverse order.