—>Auto parts and service stations —>
Let's talk. You will need a multimeter. We set the measurement limit to 20 V DC. (In our case, we are talking about the DT 832 multimeter model).
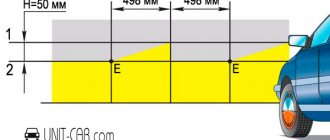
To make sure that the problem is in the threads, let’s check the voltage supply to them, for this we take the multimeter probes and do it as in the image (don’t be afraid to mix up the polarity on the multimeter, digital ones are no longer afraid of this). The device indicator will display a slightly underestimated voltage of the on-board network, approximately 12 V.
We place one probe at the right end of the heating filament. You can even fix it there somehow, but to quickly do so, hold the probe with your fingers.
We place the second probe in the very left part of the heating filament. We make sure that there is about 11V on the screen. This means that there is tension on the thread. Next we move the left probe to the right along the thread. If the thread is working, then the voltage will gradually drop down to zero as the probes approach. If the thread is damaged, then the voltage will be the same 11V up to the first left break, and immediately after it 0V. So, we have found the first gap. If there are several of them, then they can be detected using this method only after repairing the first one. I had two breaks on each thread, I knew exactly where they were, so I repaired them right away.
Next, an American Permatex restoration kit was purchased. The set includes a glass jar with a solution (the color is very similar to ours, only a little lighter), an applicator (a rectangle with a slot, it was immediately thrown away because the slot was almost a millimeter wide - too wide) and a brush (after the first use it crumbled and was replaced to an ordinary thin squirrel from a stationery store).
You can ask for a restoration kit at car dealerships.
But you can use conductive glue, available in stores, for example Kontaktol
Conductive glue can be freely purchased at any radio store or radio market.
I gave the shape of the thread with masking tape, very convenient. The main thing is to carefully glue two strips of tape above and below the thread.
The technology is as follows: 1. Dry the tear area with a hairdryer. 2. Cover with tape the top and bottom of the thread along the thread. 3. Degrease. 4. Using a brush, carefully apply a thin layer of reducing agent. 5. Wait 10 minutes. 6. Apply another layer. 7. We wait 10 minutes. 8. Apply the third layer. 9. We wait a day. 10. Very carefully remove the tape in the direction along the thread. Carefully, because the first time I removed the tape an hour after application and abruptly. I took it off with a restorer. 11. If necessary, clean with a stationery knife. 12. Turn it on (not earlier than a day after the repair), look at the result.
The repair site heats up much more, and the repaired thread itself heats up less than the whole thread. You can see it in the photo.
Here I first decided that I had put too thick a layer of reducing agent and needed to be cleaned off. But after thinking it over, I came to this conclusion. When a break occurs at the break point, the resistance of the thread increases to infinity. Our task is to reduce it. If I put too large a layer, then the resistance would be reduced too much, since according to the school formula [conductor resistance] = ([resistivity] * [conductor length]) / [cross section]. That is, by increasing the cross-section, we reduce the resistance, and therefore the heating in this place. And if the repair area heats up more than others, that means the resistance is too high. Therefore, the thickness of the repair layer needs to be increased.
With side mirrors, the diagnostic principle is the same, but the restoration process is complicated by the fact that the heating filaments of the mirror are covered with a plastic box. Here we won’t advise anyone how it works out.
Source
Repair of heated side mirrors
Additional settings
Curious
Regular community member
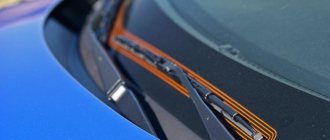
Probably, many of you have already encountered a malfunction of the heated side mirrors. In most cases, the problem is a break in the heating element, which can be solved by replacing the mirror element itself, which costs about $100.
At intervals of 2 weeks, the heating of the left mirror stopped working, and then the right one. The price of repairs has increased to almost 7 thousand rubles. To be honest, 200 bucks was a pity, plus I was also tormented by the realization that replacing the mirror elements would easily happen again very soon - they all burn out often.
Now I’ll tell you step by step how I repaired it.
1. Remove the mirror element (SE). They have told me how to do this more than once on the forum, I will repeat it. Take the ES by the edge farthest from the car. Pull it a little in the direction from the car (so that the fastener comes out of the lock), then we shift the force vector towards the rear of the car. 2. After the protective element is removed, use a tester to verify that 12 volts are supplied to the mirror when the heating is on. And again, we’ll use a tester to check the resistance in the protective element. If there is a break there... then everything is correct, this is the case that I am describing. 3. Place the SE in hot water. You just need to be careful so that the glass does not crack due to a sudden temperature change.
4. Using a knife with a thin blade, we try to cut the sealant that glues the mirror itself and its plastic body together. Carefully, without scratching or breaking the fragile mirror. 5. We heat it in water, if it doesn’t give in, but ultimately we try to disconnect the mirror from the body on one side. 6. Next, use a knife to cut it in circles like a tin can. 7. As a result, we get this picture. Important. Do not lose the heating connection contacts (red arrow). 8. We tear off the old heating. We remove the old glue from the mirror and body with a solvent. 9. Take a new, pre-purchased heating element. I personally took GEN-55. I bought it in St. Petersburg at the address indicated here: https://onyxmef.narod.ru/kontakt.htm 10. We need to solder our “native” connection contacts to the GEN contacts (which I indicated in point 7). Before soldering the contacts, I recommend irradiating them well with aspirin. 11. Glue the GEN onto our mirror. 12. We glue the mirror and the plastic case with sealant. 13. We measure the resistance with a tester. If everything went well, the result will look something like this. 14. Install the repaired mirror element in place.
How to repair heated mirrors (21 photos)
If your mirror heating is broken, do not rush to go to a car service center. Maybe you can fix it yourself using these instructions.
Removed mirror from the back side.
He warmed up the mirror surface with a hot air gun and inserted plastic cards to further dismantle the plastic frame of the mirror.
Periodically, warming it up with a hot air gun, I carefully inserted the cards further.
Periodically heating the mirror side with my hands, I carefully disconnected the mirror from the thermoelement and the casing.
Thermal film glued to the mirror. As you can see, there is nothing to be damaged there.
I warmed up the mirror and peeled off part of the thermal film from the mirror. (I didn’t do it very carefully due to weak heating). There is no need to peel off the film further, but I continued dismantling for the sake of curiosity and...
...And completely peeled the film off the mirror.
I measured the resistance between the contacts and got something similar to 30 Ohms. If the resistance could not be measured, then we would have to make a hole next to the other terminal and measure there. And so I was lucky and I immediately discovered a damaged connection (You can visually see which contact is not working, the conductor on the film becomes a little darker).
I made a hole in the film to detect a broken terminal.
This is the future guide. All he needs is a leg.
Photo report Quick repair of heated mirrors, repair report
When carrying out the repairs, _Freeman_'s research was used, for which I thank him very much. Previously I read “Repair of heated mirrors in Passat B5. Complete Guide."
The result was the following.
The mirror elements were extracted in a manner described more than once on this Forum.
Small windows were cut out in the plastic using a hot soldering iron. Under the plastic, the heating element is covered with a film and a layer of mastic. I carefully tore off the film and simply scraped off the mastic.
Next, a jumper from MGTF was soldered in.
We measure the resistance between the terminals - 8 Ohms.
Next, I varnished everything and covered it with sealant.
Everything works - temperature
50 degrees (maybe less, I didn’t measure it with a thermometer. Feelings may be subjective. I turned it on indoors from a source
13.8 Volts, my hand was noticeably hot). Time for everything - 30 minutes.
PS For orientation on the ground, see the location of the spring struts relative to the contacts. The photo shows the right mirror element. For the left, everything will be in a “mirror” reflection (pun intended).
PPS In the cold they are clearly not so hot, but to the touch they are very warm. And they are dry and clean, without frost or moisture.
Lanych
- Messages 224
- Reactions 8
- Points 0
Admin
Website Creator
Speed-master
Cheer lover
Lanych
Born Stupid? Try Again!
1.75 A at 14 V). Now, if you solder two jumpers crosswise to the terminals, the power will double and the heater may burn out.
PS It stands, it heats up (it’s cool), it doesn’t burst (it doesn’t burst).
_Freeman_
I live here
wolk66
Regular participant
Striker
Participant
None of my mirrors were heated either, although they are heated! 1. I took it apart, looked at it, tried to solder it - nothing came of it (apparently not everyone’s hands grow from there), put everything back together, used 2-sided tape. 2. I traveled around the markets, there are two heating options that I have come across: - just heating, which requires additional work on gluing the “holder” and the mirror itself to the surfaces - the one that I found in a single copy, 2-sided tape 3M.
3. I picked it up a second time, tore off the driver’s mirror that had previously been glued to double-sided tape with a hairdryer and a knife, thoroughly warmed up the remaining heating that had not yet been removed from the mirror and began to peel it off in a technical manner. Everything seemed to be going fine, but at a certain moment I got carried away and put the mirror on the flat surface of the table, continuing to tear off the heating strip itself and. SHAKE! the mirror breaks. Without hesitation, I go to the market and buy it for 390 rubles. non-original, Thai, tinted, heated driver's mirror, I install it - and here it is COMING! Until this moment, I had never driven with the heating working. ))) 4. Because I had previously purchased a fully symmetrical heating system, but I still had an unheated right mirror, I decided to “torment” the right side as well. This time I didn’t get too carried away and the heating was separated from the mirror without loss!
5. Treated the surface of the mirror with white spirit, removing any remaining glue! 6. I tried it on for a long time against the light, because this is the only way to view the heating thread on the purchased element, I cut it along the intended contour, and “tweaked around” a little in order to get the contacts out normally through the holder,
Because on the purchased element they turned out to be not the same size, the original “father” and “mother” are very small. 7. carefully tore off one surface,
glued it to the holder, then another and glued it to the mirror. and here it is the second Happiness of the day.
Source
Procedure
Now you can begin installing the heater. First, remove the holder with the mirror from the case. On most cars, it is enough to pry it with a screwdriver or something flat from below and pull it towards you.
Based on the characteristics of the holder, we choose the method of fastening the wire. If the inner surface of the holder is smooth (as in the photo), then stick double-sided tape on it.
Then we lay a piece of wire on this surface. This can be done arbitrarily, for example, in a zigzag or something else. The main thing is to place it so that the thread covers as much of the surface of the holder as possible. In this case, the wire should not intersect anywhere. Scotch tape will hold the nichrome thread well.
If the inner surface of the holder has any protrusions or fastening elements, then it will not be possible to stick the tape. In this case, a soldering iron will help to secure the wire. Everything is simple here - we apply a nichrome thread to the surface and press it with a heated soldering iron. The plastic will begin to melt and the wire will sink into it. Once cooled, the plastic will become hard and will hold the thread. But here it is important not to overdo it with heating the plastic, so as not to “push” it to the mirror. It is enough just to “drown” the wire in it a little and that’s it.
We recommend: Tinting of front windows is allowed - is it true?
In this way, we fasten the wire along the accessible surface of the holder without touching the fasteners.
When laying the wire, its ends should be placed towards the side of the holder that is closer to the door, and so that they do not touch each other. To these ends we solder terminals for connecting to the wiring or simply the ends of prepared wires. Then the resulting connections need to be insulated.
All that remains is to provide insulation. If the wire was secured with tape, then to insulate it you can simply stick several more layers of regular adhesive tape on top. This will provide thermal insulation and prevent the wire from peeling off and shorting.
As for the holder where the wire is secured with a soldering iron, you can simply fill the entire surface where the thread passes with sealant and wait until it dries. In this case, the fastening elements will not be affected, which will ensure ease of fastening, and the wire itself will be insulated.
Before installing the holder in place, we pull the wiring through the mirror body into the door, the wiring for powering the heaters. Only after this we assemble the mirror.
Do-it-yourself mirror heating repair
Excellent photo report on the repair of the heated rear view mirror.
Removed mirror from the back side. He warmed up the mirror surface with a hot air gun and inserted plastic cards to further dismantle the plastic frame of the mirror.
Periodically, warming it up with a hot air gun, I carefully inserted the cards further.
Periodically heating the mirror side with my hands, I carefully disconnected the mirror from the thermoelement and the casing.
Thermal film glued to the mirror. As you can see, there is nothing to be damaged there.
Heated rear view mirror does not work
Malfunctions in the heated rear view mirror affect vehicle safety. If a breakdown occurs, you can periodically clean the mirror surface yourself. But this is not always convenient and effective, especially in rain and snow.
Heating helps combat bad weather conditions while maintaining excellent visibility for the driver. And if a breakdown occurs and the heated rear view mirror does not work, you can independently determine the malfunction, its causes, and carry out simple repairs.
Why the heated side mirrors may not work and how to fix it
Heated exterior rear-view mirrors have become a mandatory element of a large number of cars, regardless of class, configuration and body type. This system is especially indispensable for machines operated in harsh climates.
The main task of heating is to ensure safety on the road. The driver always has clean mirrors at his disposal, in which what is happening behind is clearly visible.
There are cars, and mostly these are old models, where such systems are not provided standardly. But this does not prevent you from installing a defroster on the mirrors yourself.
The device may malfunction. Then the primary task will be to determine the cause of the malfunction and try to fix it on your own or by contacting a car service center.
Design and equipment
Mirrors equipped with heating can be divided into 3 categories:
- Regular ones. Installed from the factory and included with the vehicle. Increasingly, heating is already installed in the basic version of equipment.
- Model. Sold separately and suitable for specific make and model vehicles. Such mirrors can be installed instead of standard ones, where there is no heating.
- Universal. Similar designs of mirrors, which include heating, are designed for a wide range of cars of different brands and models. When selected correctly, they look no worse than standard or model ones.
Heated mirrors can be divided according to their shape, dimensions, and the type of heater used.
In short, heated rear mirrors include 3 main components:
- switch;
- heating element;
- fuse;
- wiring.
The unit is connected to the on-board electrical network, where a voltage of 12 V is normally provided. When the corresponding button is pressed, current is supplied to the heating element and heating begins.
Heating elements are usually heated by current to 50-70 degrees Celsius.
This is quite enough for the mirror itself to heat up and the adhering snow or ice that has formed to melt.
As for the heating elements themselves, they can be presented in the form:
- an ordinary incandescent light bulb;
- tungsten filaments;
- special boards;
- films with built-in elements to which current is supplied.
Each system has its own characteristics, advantages and disadvantages. But they can all fail at some point.
Types of heating
Wire-based heating
It is necessary to purchase tungsten filaments. They must be laid between two layers of insulating material. This creates a spiral. It is necessary to make two conclusions (for plus and minus). When choosing this heating option, you need to have a good understanding of mechanics. The spiral must be insulated; there should be no gaps between the two layers of insulating material.
On printed conductors
This is an easy option for installing heated mirrors since every car market has heated units. They consist of two layers of polymer material, between which conductors are located. Such parts are made for a specific model. They can be found according to the desired size; for this you need to know the parameters of the car.
To install the heating, you will need to disassemble the mirror housing. This is necessary in order to get to the other side. The inner part must be degreased and the board glued to it.
We recommend: What to do if the VAZ-2110 fuel pump does not work?
The heaters have two terminals on the sides (wires are connected to them), they must be soldered and insulated. The wires are connected to the wiring, and the heating regulator is displayed on the panel.
Important! Efficiency will be higher if the internal cavity of the housing is covered with foil or heat-insulating material.
Film heater
The most reliable elements today are film heaters. Installation is carried out by analogy with printed conductors. You need to stick a small amount of double-sided tape on the back of the mirrors. Film heaters are available with lead wires. To connect, they need to be connected to the car’s wiring and the button connected to the control panel. The main advantage of the film base is the uniform distribution of heat over the surface of the mirrors.
Causes of malfunctions
It happens that when the weather gets cold, the driver turns on the heated mirrors, but it refuses to work. It is difficult to say exactly when it stopped functioning, since during warm seasons the defroster is rarely turned on and tested. At this time, the side element is usually clean and no ice appears on it.
The only fact is that the rear view is now difficult due to the sticking snow and ice forming. Only the right heater, the left one separately, or both at once can fail. In some cases, there is heating, but it is poor, its temperature is not enough to cope with bad weather.
The driver's primary task is to determine why this happened and try to solve the problem.
You can prepare in advance:
- set of standard tools;
- multimeter;
- car light bulb;
- soldering iron;
- fuse;
- electrical tape, etc.
What you need depends on the type of fault.
Potentially, each of the main heating elements can fail. Namely:
- Power button. With its help, heating is started and turned off.
- Wiring. Transfers voltage from the on-board network to the heating elements.
- Fuse. Included in the power transmission circuit, it protects against overvoltage.
- Heating elements. Components responsible for heating the mirror itself.