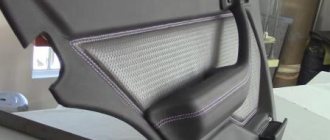
Today we are discussing such an issue as steering wheel reupholstery. Agree that the standard steering wheels on many cars can only be called squalid. Either they were normal, but time left marks on them in the form of scratches, cuts, torn seams, and so on.
Leather reupholstery is a fairly common service. In cities such as Moscow, St. Petersburg, Yekaterinburg, Krasnodar or Belarusian Minsk, for example, there are a number of studios where you can remake your steering wheel in just a couple of days, breathing new life into it.
Yes, of course, Volgograd, Nizhny Novgorod, Belgorod and any other, even small town in Russia and the CIS, will offer at least one master who can do such work for you.
But ordering a service is too easy. Yes, and you need to pay more. Therefore, I propose to talk about how the fitting is done with your own hands.
Wrapping procedure
Removing the steering wheel and old braid
Before starting work, you must remove the steering wheel using the vehicle repair and operation manual. Before dismantling, disconnect the battery! If there is an airbag in the housing, wait at least five minutes.
Remove the old braid. You can simply cut along the seam.
Creating a pattern and cutting out a new braid
Next you need to make a pattern. To do this, first the steering wheel is carefully, evenly, without differences in height, wrapped with film, and then tightly with masking tape. Using a marker, the future pattern is divided into four parts and a mark is made along the inside of the steering wheel for the inner seam.
Before cutting, you must number all the parts. Cut strictly along the lines!
Using the marked marks, you need to cut the masking tape and remove it from the steering wheel. It turns out four parts of the pattern. To level them, you can put a weight on top for several hours. Or make a denser template from cardboard, placing elements of masking tape on it.
Then, according to the sample of the resulting pattern, the elements of the future leather braid are cut out, and an allowance of 1.5-2 ml is made along the length. Each element must be marked. Do not forget that the final result depends on the accuracy of the work at the pattern making stage.
The pattern pieces are sewn together using a sewing machine or a needle and thread. It is necessary to retreat from the edge by 2-3 mm, otherwise the material will tear under tension. All parts are connected to form a ring. The finished ring is applied to the steering wheel. Everything must fit exactly to size. If the braid runs along the steering wheel, it is necessary to sew it along the seam. For additional fixation, the steering wheel can be lubricated with glue or epoxy resin.
Fastenings for manual sewing of braid
After this, you need to make fastenings that will hold the seam connecting the edges of the braid.
There are two types of fastening:
- holes;
- stitches along the edges of the product.
Holes along the edges of the braid can be made manually using an awl, or using a sewing machine with a needle without thread with a rounded tip.
The number of holes should be the same on both sides, the distance from the edge is approximately 4 mm, between the holes 4-5 mm. The work is quite labor-intensive, you should get about 600 holes.
The second method is much simpler - just use a sewing machine to make a stitch along the edge of the braid with a stitch in increments of 5-6 mm. The distance from the edge of the product is 4 mm.
All knots are made from the inside and secured with no more than two stitches.
Sewing the braid on the steering wheel
There are many options for braid lacing. The choice depends on the type of fastening and personal imagination. The simplest is to lace up like sneakers, threading a strong thread into the prepared fastenings. You should start from the bottom and move counterclockwise, carefully straightening the folds and stretching the material well.
Reference! If in some place it was not possible to straighten the skin perfectly, you can use a hairdryer. When heated, the skin becomes more elastic and small wrinkles are smoothed out.
After finishing the trim, you should hide all the threads under the leather, glue the knots with glue and run a hairdryer along the entire length of the steering wheel so that the leather fits better to the steering wheel. All seams can be coated with special leather glue. This will prevent them from unraveling.
The correct technology for re-tying the steering wheel
At this stage, it is very important to follow the order of work. To ensure that the covering material fits tightly to the steering wheel, the technician strictly follows the instructions:
- The required thickness of the leather at the edges is achieved by stitching along the lines of future seams. To do this, the master marks all the edges of the material, paying special attention to the folds, where the thickness will double when applying seams. Proper stitching will allow you to avoid defects in the form of leather seals on the covered steering wheel.
- Next, 4 leather parts of the future cover are laid out on a flat surface, numbering their location on the steering wheel from top to bottom.
- A nylon thread is threaded into the needle, and the elements are sequentially sewn together, so that the result is a hoop.
- The solid piece is carefully stretched onto the wheel so that the seams correspond to the cuts.
- The cover is fixed to the steering wheel using a special adhesive or epoxy resin.
- Next, the skin is stretched and smoothed so that it can be determined how many millimeters the edges need to be folded before suturing.
- At the final and most difficult stage, the leather is stitched, during which it is very important to maintain uniform tension of the material along the diameter of the wheel. Typically, such work is done with the participation of an assistant, when the master sews the edges, and a second person helps to tighten the leather cover.
Note!
In the signal cover areas, you can do without threads and attach the skin with glue.
Don't worry if there are small wrinkles on the rim - they will smooth out on their own in a few days. Only a professional can select leather with good elasticity properties, strong, high-quality thread for lining, a special durable needle and the correct type of seam. If you follow the technology for re-upholstering the steering wheel, the material will fit perfectly on the steering wheel and will last for many years. Once the covered steering wheel is ready, you should straighten the leather on the surface and you can attach the updated wheel to the car interior.
Video example of reupholstering a car interior.
To make driving comfortable, many drivers buy special covers for the steering wheel. This modification creates convenience and makes your hands less tired. Plus, the interior of the cabin is changing for the better. Today there are a lot of different offers on the market. However, you can tighten the steering wheel yourself. The most practical and convenient material for tuning a steering wheel is genuine leather. The use of artificial substitutes is not recommended. Since they do not have proper elasticity and wear out quickly.
Create a template
In order to achieve high-quality leather covering of the steering wheel with your own hands, you need to start working by making a pattern. The template can be created from tape and film. We remove the steering wheel (do not forget to remove the signal cover), then unscrew the fastening nut connecting the steering device to the shaft. When removing the steering wheel, you need to swing it in different directions. Next, we make a model of the steering wheel from masking tape and cling film, and then a template. This is done like this:
- The steering wheel is wrapped with film.
- Painting tape is placed on top.
- The places where the seams will be are marked with a pencil or marker.
- Carefully cut out the tape along the lines. As a result, you should have four elements in front of you: three cruciform and one rectangular.
- We unfold all the parts for the workpiece and number them.
- Next, we lay them out on thick paper (cardboard) and make patterns of the same shape that will be used for the pattern.
Tips for choosing a steering wheel
- Any driver can afford to buy a new car steering wheel. In stores selling goods from China you can find a new steering wheel for 3-5 thousand rubles. In a regular store, an average steering wheel will cost up to 10 thousand rubles. And this does not mean at all that they will slip you low-quality consumer goods. For this money, after spending a few minutes on a competent and thoughtful comparison of product characteristics, you can buy a good steering wheel.
- Braid material. When choosing a new “steering wheel”, you should first of all pay attention to the material from which the braid is made. It is better not to even consider synthetics; they are short-lived and harmful to the skin of the hands and respiratory organs. It is also better to cross out plastic steering wheels from the possible options. In summer, your palms tend to sweat more than usual, and, consequently, your hands will slip on the steering wheel. This is not only inconvenient, but also very dangerous. Experts recommend choosing leather, suede or Alcantura.
- Environmental friendliness of the material. If you decide to buy a new steering wheel, it is better to inquire about what material the braid is made of. Ideal option: check with the seller for the certificate for the braid. Otherwise, the store may give you a steering wheel made of artificial leather rather than genuine leather. Now technology is at such a level that visually this material is no different from genuine leather. But its durability remains the same. In just a couple of months you will have to change the braid or drive with a cracked steering wheel braid that has lost its presentation. The higher quality material was used for the braid, the more durable it will be and the more convenient it will be to drive the vehicle.
The D-shaped profile of the steering wheel demonstrates maximum sportiness
- Convenience. The steering wheel should be as comfortable as possible for the car owner, so you first need to hold it in your hands, twist it, try it on, and only then buy it. The material from which the braid is made must have moderate elasticity . An overly flexible steering wheel, as well as too hard a material, can impair the vehicle’s maneuverability and increase the driver’s reaction time.
Pay attention to the driver's horn button. It is not always located in the center of the steering wheel. Designer steering wheels often suffer from this problem. If the horn is located on the side, you need to check whether it is convenient to press it from all hand positions on the steering wheel.
- Steering wheel shape and steering wheel diameter. It is important to remember here that tuning, even the most creative, should not spoil the technical characteristics of the steering wheel. The standard shape of the driver's steering wheel is a circle with a diameter of 35-40 centimeters. Everything here has been verified and calculated over centuries of practical use. If the diameter is smaller, it will be more difficult to turn the steering wheel. If you happen upon a trendy designer steering wheel with a small diameter, think carefully about your decision before purchasing. If the car has a hydraulic booster or electric power steering, then it is quite possible to sacrifice a couple of centimeters in diameter, but if such a steering wheel is installed on a domestic Volga or Niva, which does not have a power steering, such tuning can increase the accident rate of the car.
- The shape of the steering wheel should be round. This is a well-known truth that is often forgotten by car accessory designers. Now the market is full of steering wheels of a wide variety of geometric shapes. Before purchasing such tuning, you must make sure that this accessory is easy to use. Touch it and get used to this steering wheel. Never buy a steering wheel based solely on the picture of the product.
- The size of the steering wheel is also important. Factory cars are equipped with steering wheels of standard sizes, but if there is not enough space in the cabin of your car, it is better to buy a shortened steering wheel in order to increase space in the cabin and improve the maneuverability of the vehicle.
Making a pattern
In order to correctly tighten the steering wheel, and for the result of your work to have an impressive appearance, you need to make a pattern. To do this, you need to make a preliminary layout (template).
It is made of adhesive tape and film, which must be used to cover the steering wheel. But before this you need to remove the steering wheel, as this will make the work easier.
The first step is to remove the cover from the signal and unscrew the fastening nut that holds the steering wheel to the shaft. After this, using loosening movements in different directions, remove the steering wheel from the splines. Now that the steering wheel is removed, you can do the preliminary layout. To create it, you need to wrap a film around the steering wheel and apply masking tape over it. Do not skimp on material, wrap it in several layers.
Once the entire rim is covered, you need to use a marker to make marks where the seam will go (where the parts join). This is done for the reason that it is very difficult to make a one-piece case, so it will be made of four parts. And those places where the parts will be connected to each other are marked with a marker. We also draw a marker along the inside of the steering wheel. It is advisable to draw all lines as evenly as possible. This will allow you to make smoother original parts when cutting. After all the lines have been drawn, the layout must be cut with a stationery knife along these lines.
We recommend: Replacing the front engine mount of a VAZ 2114
After cutting, you should have four separate elements. Now they need to be leveled and attached to the cardboard to create patterns for the pattern.
After the patterns are ready, they need to be applied to the base material in order to produce the final version of the covering. But, it is important to remember that you do not need to cut it exactly to size, but give some allowances for each edge of the part and then bend it. This is necessary in order to sew them together efficiently, and so that the thread does not tear the skin during tightening.
That is, the seam will be strong enough and the skin will not tear when stitched. In addition, the folds give the new steering wheel a more aesthetic appearance. Allowances can be given immediately while you are tracing the pattern. You can also first trace, and then use a ruler to add one centimeter to each edge. This way you will maintain an even retreat on each side.
After this, you can check how correctly the cutting of the elements was done. You need to place each of the patterns in the intended place and see how they are positioned: their edges should meet each other. If the stock left is too large, you can trim the edges. If everything is fine, nothing bothers you, you can begin the final process - sewing the parts together.
Constructing a pattern
Before you begin directly covering the steering wheel, you need to remove the pattern from it.
If the car owner wants to cover only the rim with leather, just measure the diameter and multiply the resulting number by 3.14. This is the cut length. The width corresponds to the girth and must be determined to the nearest millimeter. Even a small error will lead to the material being sewn overlapping or a gap to form between the edges.
The edges of the material are overlapped - such work can hardly be called high-quality
Since the width of the steering wheel may vary slightly, it is important to take measurements several times at different points and take this difference into account when cutting the leather.
When you need to sew not only the rim, but also the knitting needles, you should use the method described below to remove the pattern. If the car owner has never encountered cutting and sewing before, this option will suit him:
- First you need to wrap the steering wheel with cling film as tightly as possible. It must cover all parts that are to be covered.
- The second layer is wound with tape, leaving no gaps between the turns.
- The marker indicates the location of the grooves.
- Remove the winding by cutting it with a utility knife along the inside of the steering wheel (where the central seam will go).
- Using scissors, along the previously outlined lines, divide the finished pattern into separate parts.
- The patterns are straightened out on a flat surface and pressed on top with something heavy. After a day they can be used.
It’s okay if during pressing the patterns lose their original three-dimensional shape. It will be compensated by the tension of the skin, which will ensure a tighter fit of the braid to the steering wheel.
Steering wheel tuning by replacing the steering wheel
The method described below and characterized by replacing the most important element of vehicle control, due to its radical nature, requires a serious and balanced approach. For example, the presence of an airbag in a standard steering wheel is an important condition for ensuring the safety of the driver in an emergency. By replacing such a steering wheel, the car enthusiast artificially reduces his level of safety.
Another factor that requires due attention when tuning the steering wheel is the transformation of the ergonomic characteristics of the driver’s workplace. Due to changes in the geometric shape of the new steering wheel, the ease of reading the instrument readings located on the control panel may be impaired, or access to its most important elements may become more difficult.
A serious disadvantage of replacing the steering wheel is that the car will be removed from warranty.
Braid with stitching around the edges
This is the most common type of lace braid. Different seam designs can be created by weaving the thread differently between stitches. You can thread the thread under each stitch or skip 1-2 stitches. You can skip stitches alternately on one side or the other. We will look at several seams for such a braid below. Here are a few points to consider when re-tacking the braid.
- First, you need to clean the steering wheel of dirt.
- If the steering wheel is damaged, then minor irregularities can be repaired by wrapping the damage with adhesive tape, thereby leveling the surface and only then starting to install the braid.
- Pull the braid on all sides of the steering wheel.
- Lacing may take several hours. The duration of lacing depends on the type of stitch chosen. After each stitch, you need to pull the thread tightly so that the edges of the braid meet.
- Start lacing from the back side at the edge of the knitting needle. Pass the needle and thread through the hole in the existing stitch. This way, the knot of thread will remain under the braid.
- Only tighten the threads when the braid is in place, otherwise it will be difficult to unravel the thread back.
- The braid can be glued in the area of the knitting needles. Use upholstery glue. Modern glue is made on a water basis. It is non-toxic and washes off easily.
Zigzag stitch
A simple zigzag stitch to join the edges of the braid with stitched stitches.
This is the simplest stitch. A needle and thread are passed under each stitch of the stitches sewn along the edges of the braid (or, for small stitches, an equal number of stitches are skipped each time). The needle changes direction at each stage (stitches are threaded alternately from one or the other edge of the braid).
We recommend: How to replace valve stem seals without removing the cylinder head?
Hexagonal seam
Hexagonal seam. Used to connect the edges of the braid with stitched lines.
It is called so because of the similarity of individual seam segments to a hexagon. It is done as follows: a needle and thread are passed under parallel stitches located on different edges of the braid, two parallel stitches are passed, after which two parallel stitches are connected again (or more if the stitches are small), starting from the same edge as the previous ones. It turns out to be a hexagon with a stripe diagonally.
Pentagonal seam
The needle and thread are first passed through one stitch, then one opposite stitch is passed (or more if the stitches are small) and the thread is passed into the next stitch from the reverse side. That is, stitching is carried out through one stitch. The resulting weld segments are pentagonal in shape.
The process of stitching the braid together with a pentagonal seam, also known as a Euroseam, as many European auto manufacturers use it.
Diamond stitch
Diamond stitch. Used to connect the edges of the braid with stitched lines. Yellow threads are stitches sewn along the edges with a machine, blue thread is a hand-made joining stitch.
A needle and thread are threaded through each stitch of the lines sewn along the edges of the braid. Unlike the simplest stitch (shown first in this article), the needle and thread are always threaded in the same direction. That is, the thread goes through two opposite stitches, then goes through the next two opposite stitches, coming in from the same side as in the previous step. The resulting seam segments are in the form of a diamond with a transverse line.
Steering wheel tuning using a cover
The most common and least expensive way to tune a steering wheel (both in terms of material investments and the time required to carry it out) is to purchase and install a special cover.
However, even in this seemingly elementary operation, there are certain nuances, thanks to which it goes from the category of simply adding an additional decorative element to the category of tuning. This is, first of all, a harmonious combination of the cover with the interior design solution. In addition, it is necessary to take into account the material of manufacture of the case and the inserts located on it, as well as its dimensions. Car enthusiasts also have an ambiguous attitude towards the presence of foam rubber in the case, since it has not only strengths (volubility of the steering wheel), but also weaknesses (short service life).
The most famous manufacturers of covers, which are in high demand among domestic car enthusiasts, are “Racing”, “Isotta”, “Momo”, “Raid”.
If it is impossible to purchase a cover that meets your personal requirements, tuning studio specialists will come to the rescue.
Choosing material
Of course, leather for the steering wheel will be most preferable. This material is natural, strong and durable, plus it fits well in the hand. Alcantara can be an alternative.
But start with the skin. Its price is not so high, plus there are many design options. To choose the leather from which the steering braid will be made, follow several rules.
- Naturalness. Artificial leather will not work, it has the wrong properties. And in general, once you get to work, do everything efficiently.
- Thickness. We don't need thick skin. Otherwise, you will be tortured to pierce. Thin ones wear out quickly. The optimal size is considered to be 1.3 mm.
- Extensibility. Strictly average. The elasticity should ensure a tight fit to the wheel.
- Perforation. Its presence is not necessary, although working with perforated leather is more pleasant. At the same time, wear and tear is higher than that of ordinary leather. Decide for yourself. I chose smooth leather when wrapping the steering wheel.
In addition to leather for your car steering wheel, you will need a number of auxiliary materials and tools.
Tools and materials
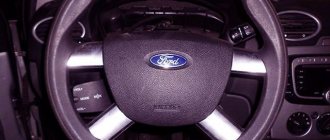
The steering wheel trim kit for Mazda, Nissan, BMW and any other cars, even a Ford Focus, will always be the same.
You need to put together:
- skin;
- a strong needle with which you will stitch the material;
- strong nylon thread;
- a pair of thimbles to protect your fingers;
- masking tape;
- cardboard of normal density;
- cling film;
- marker or pencil;
- sharp knife (buy at a building materials store).
All is ready. Now your car can be transformed. Start small - the steering wheel. Covering it with leather is not the easiest task for a beginner, but it can be done. I myself once decided to suddenly do something similar. The result exceeded my expectations, so you will definitely do no worse. I'm still a jack of all trades.
The whole process can be divided into two stages:
- pattern making;
- tight-fitting
If you do everything correctly at the first stage, reupholstering will be much easier.
Pattern
I will give sequential instructions to put everything on the shelves and convey to you the main idea.
- Remove the steering wheel. I don’t know what kind of car you have, so I can’t give specific instructions on how to remove the steering wheel. Look in the repair manual if you don't know, watch a video or simply act instinctively. No, I was joking though. We work only strictly according to the instructions;
- Get rid of the old braid. It is not difficult. You can simply cut the seams and remove the worn material;
- Wrap the steering wheel with cling film. Do not skimp on the material, but wrap it carefully so that there are no differences in height or unevenness;
- Painting tape is wound on top. Be sure to use a marker to mark the places where the seam will go;
- Cut the previously wound tape along the marked lines. Essentially, you will have several elements for the layout. Since they are curled up, straighten the tape and place something heavy on it. Leave it overnight. The next day the layout will be smooth and neat;
- The tape components can serve as a template for making a more durable cardboard base. That is, attach the tape to a sheet of cardboard, circle it strictly according to size and cut it out. Although this is not necessary;
- Now, using the sample of 4 elements of the layout (usually there are 4 pieces), the leather of the required size is cut out. Here, try to cut carefully, without violating the dimensions. Otherwise, you will have to trim, level, and so on. Why do you need extra trouble;
- Number the pattern elements so you know which piece of leather will go where.
In principle, the base is ready. Not as difficult as it seems at first glance. But then an equally important stage awaits you - sewing. If you have ever sewed, then you roughly understand what we are talking about. Those who have never even darned their own socks in their lives should not approach tight socks. I'm serious! Otherwise, the result may be very disappointing. Basic skills are a must.
Wrapping procedure
If you are careful and consistent in your actions, you will succeed and your car will have a truly beautiful handmade steering wheel.
- Take a strong thread, insert it into an equally strong needle;
- You need to retreat about 2-3 mm from the edge of the skin. If you sew too close to the edge, it will simply tear under tension;
- All the blanks need to be connected, resulting in a ring. This is why it is important to mark your patterns with a marker;
- The inner seam will be on the inside, so don’t worry about this;
- When the ring is ready, place it on the steering wheel, align all the edges so that everything matches;
- The leather will “walk” around the wheel if it is not secured. Here I solved the problem this way - I treated the steering wheel with epoxy resin. It held the skin firmly, but at the same time allowed the material to be slightly shifted until drying;
- Sew all edges neatly. If you are good with thread and needle, you can get a beautiful decorative seam;
- Stretch the skin evenly so that the tension is approximately the same everywhere.
The formation of small folds on a new case should not scare you. This is normal for the skin. In a few days everything will smooth out and look perfect. Be patient.
We recommend: How to properly flush a carburetor to restore its functionality: methods and means
What kind of leather should I take?
Considering the fact that the steering wheel is a part of the car, human contact with which is made throughout the entire route, therefore, it is necessary to choose only high-quality material for reupholstery and it is desirable that it should be genuine leather. Since any other fabric will deteriorate from constant rubbing of hands on the steering wheel after just a month of using the car. The intended skin should not be very thick, but it should not be thin either. If it is too thick, then you will not be able to pierce it with a needle, and if its thickness is small, then the new steering wheel cover can deteriorate very quickly. The optimal thickness of the material for covering the steering wheel is 1.3 millimeters. An ability such as extensibility should be of average value. This is a very important criterion to consider before purchasing. Its elasticity should allow the material to fit tightly on the steering wheel, otherwise there’s no point in thinking about quality.
You can consider the option of having perforation. This is a rather unusual and attractive look, and it is also pleasant to work with. But, having such positive qualities, I can also highlight its negative side - wear and tear. The only optimal solution for you is natural smooth leather.
Before purchasing, make sure that the material offered to you really has the necessary qualities, and that they are not slipping you a substitute. You also need to pay special attention to additional materials that will be used in this matter. The thread should be as strong as possible, because it will pull the edges together, so it should not break easily. Choose a strong needle, make sure it does not bend. My advice is to buy several of them.
Materials and tools
Since the steering wheel is constantly in contact with the driver’s hands, when choosing material for the covering, you should pay attention to quality, strength and durability. There are many options - you can choose fur, artificial or natural leather, silicone, foam rubber or wire.
The most popular and practical is the braid made of genuine leather. This braid retains its appearance for a long time, is pleasant to the touch, has good performance qualities, and looks expensive and solid. You can simply wipe it with a damp alcohol wipe to remove dust. It is better to give preference to perforated leather. It is softer and, thanks to its pores, breathes better.
Important! You should choose car leather, not furniture leather, otherwise in a short time the work will go down the drain.
Before you begin reupholstering the steering wheel, you should prepare all the necessary materials and tools. These include:
- leather;
- large needle for sewing (you can take a hardened one);
- durable nylon thread;
- thimble;
- stationery knife;
- masking tape;
- cling film (you can take packaging film);
- marker or pencil;
- medium density cardboard;
- glue or epoxy resin.
Which stitch to use for sewing braided handlebars?
During re-stringing, the color of the nylon thread may match the skin tone or differ. Models of dark colors with bright and contrasting threads look impressive.
Seams can be very diverse. You can sew it with an overlap or a cross stitch.
Note! Before sewing up the braid, you should practice sewing the seam you like on a regular piece of fabric.
Scheme of unusual seams for reupholstering the steering wheel
Now it’s clear how to properly sew a steering wheel cover. The task is not easy, but quite feasible. By setting a goal and being patient, the driver will be able to boast of a braid of his own production. Such exclusive items, made with your own hands, are valued higher than those purchased in a store or ordered through foreign websites.
Leather pattern for steering wheel cover
Now you need to decide what style you want to reupholster the steering wheel. To do this, you can get acquainted with various sketches. But it is unlikely that many solutions can be obtained from four elements. But you can always make each sector from several elements by combining different shades of material. Of course, it will take more time, and also effort. But the result will be a designer work of art. The best place to look for ideas is the Internet: there are a huge number of variations with a case. When we have figured out the design, we can lay out the leather on the work surface and begin the pattern.
You will come across a huge number of seams. But among motorists, the following styles are more popular: braid, macrame and sports. They form the strongest possible connection and also look great on the steering wheel
While doing this procedure, do not miss an important point: each sector of the template is transferred to the skin with a small margin. That is, you lay out the template and cut out 1-1.5 centimeters more from the edges. This reserve is needed for increased strength of the seams. If the skin is close to each other, then there is a high probability that the seams will come apart. Therefore, it is worth tightening the steering wheel well the first time, so as not to redo it later.
Once you have cut out the pieces you need, check that the dimensions are correct, taking into account the stock: simply apply the leather to the steering wheel. Don't be upset if you overdo it with the stock - you can always remove the excess with scissors.
After all procedures are completed, you can start sewing.
Choosing the right accessory
When choosing the accessory in question, you should be guided by the following criteria:
- Material of manufacture. Today, a wide selection of braids is offered, which are made from a variety of materials. The female sex prefers soft covers made of fabric, suede or velor, but in a particular case it all depends on the preferences of the car owner. Men, as a rule, choose cases in a classic design, namely leather and eco-leather. There are foam rubber braids available on the market, which are not worth purchasing because they lose their shape very quickly.
- Color and style. The braid should be selected in such a way that the accessory is combined with the overall design of the interior. If the interior is black, then the steering wheel cover should also have dark tones. For luxury cars, you should not take braids in the form of flowers or flashy shades. Such a decision can not only spoil the interior, but also create the wrong impression about the tastes of the car owner.
- Mounting type. Steering wheel braids are divided into two types: covers that are put on without covering, and elements that are fixed with a special thread. Each category has its pros and cons. The fixed braid can completely merge with the interior design, while it is almost impossible to understand that the cover was purchased separately. However, when installing such models, there may be some difficulties associated with a lack of skills for independent cladding. Covers that do not require trim are easier to install but less attractive.
How to find out the correct size
The size of the braids is selected according to the following criteria:
- steering wheel diameter;
- rim circumference width.
If the steering parameters are unknown, then they can be easily found out using a tape measure. One of the most common sizes is M, also called medium. If we talk about the parameter in numbers, then the diameter is 37–39 cm. Most sedans from Europe and Japan, crossovers and minivans have a steering wheel size M. Small cars are equipped with size S steering wheels, on American cars - size L. If the exact parameter is unknown steering wheel of your car, it is better to give preference to size M. This braid should also fit well on steering wheels of larger and smaller diameters. Now regarding the girth width. It’s easy to decide on this parameter. Most cars are characterized by a girth width of 82 mm. American cars are slightly thicker.
To select the braid size, you should know the diameter of the steering wheel and the width of the rim circumference
Selection by car brand
Let's look at the size of the covers depending on the make of the car:
- S, which is 35–37 cm in diameter, is suitable for brands such as Oka and Tavria. This size is also suitable for cars with a sports steering wheel. Installation on the KIA Picanto is possible, although the cover will be difficult to fit.
- Size M. Mainly installed on foreign passenger cars. Suitable for brands such as Kia, Nissan, Ford, Toyota, Chevrolet, as well as domestic cars of the VAZ 2108–2110, Priora, Grant and Kalina families.
- Size L corresponds to a diameter of 38–40 cm. Suitable for cars such as Volga, Moskvich and Niva. It will also fit on 2108, 2111, 2113.
- XL with a diameter of 42–43 cm is installed on GAZelle and UAZ.
- XXL is equal to the steering wheel diameter of 47 cm. Used for the steering wheel of foreign-made trucks.
- Size XXXL corresponds to a diameter of 49 cm and is installed on KAMAZ vehicles.
Large-sized braids are installed mainly on trucks of domestic and foreign production
Reviews
During the use of the Renault Logan car since 2008, about 105,000 km have been driven. With such a mileage, the wear on the original coating of the car's steering wheel became very noticeable. It became noticeable that on one side (mostly on top) the steering wheel was polished by hand to a shine))). And in order not to aggravate the situation, it was decided to buy a braid for the steering wheel. I didn’t really want a thick one that just pulls on, since it’s inconvenient to hold such a steering wheel, so I bought a lace-up one at a local USAVE store for 590 rubles. Autopilot brand. Size "M". The box contains the braid itself, it seems to be even leather, a needle and thread. At first the braid did not want to crawl onto the steering wheel, but we soon succeeded. And they immediately started lacing.
To make the braid on the steering wheel look beautiful, you may not be able to put it on the right way the first time, but don’t despairThe first attempt was unsuccessful, as the seams of the braid got into the intersections of the steering wheel. The edges did not want to be pressed and the overall picture did not look very presentable... Having moved the seams of the braiding, we began take No. 2... we lace... we tighten everything well in a circle several times... and voila... we got an excellent result! This braid required accidentally breaking an iron crochet hook ((, a lot of diligence, and probably an hour and a half of time. But the result is good. I really like it. The steering wheel turned out to be a little thicker, but not so much if they had just purchased an overlay braid. If you are diligent and diligent, I advise everyone, otherwise you will spit and just buy an invoice)
TaisiyaLisa
https://irecommend.ru/content/trudoemkaya-ustanovka-no-rezultat-otlichnyi-foto
But reviews can also be the opposite. Some owners are faced with outright deception when buying a product in online stores. The website describes that the material is genuine leather, but in fact the accessory is made of something unknown. The product emits such an unpleasant odor that it is impossible to drive more than 200 km. Such braiding simply has to be thrown away. From the described reviews, the conclusion suggests itself that the steering wheel cover must be chosen carefully.
What will you need?
To reupholster you will need the following materials and tools:
- Leather (it must meet all necessary criteria);
- Stitching needle (the needle must be strong). If possible, use Soviet-made needles, as they are really high quality;
- Strong thread (nylon is used);
- Two thimbles (it’s almost impossible to work without them). They will keep your fingers from getting punctured.
- Masking tape, sheets of Whatman paper (it is better to use thick cardboard);
- Pencil or felt-tip pen;
- Film;
- Knife (it is better to use a stationery knife).
After preparing all the material, you can proceed with the remaining processes: cutting and reupholstering.
Required Tools
To work with leather and assemble/disassemble the steering wheel you will need:
- surgical scalpel and its holder (sold at the pharmacy);
- gel pen with contrasting ink color;
- metal ruler and flexible measuring tape;
- scissors;
- cardboard;
- fine sandpaper;
- screwdriver;
- thermoactive glue;
- industrial dryer;
- a sewing machine that can sew single-layer leather;
- durable nylon threads;
- big needle.
Leather care
Leather braid care involves removing dirt only with mild hand soap and a soft sponge or towel. Avoid using strong all-purpose detergents as they may remove the special coating that is applied to the leather to make it last longer. For skin care, you can apply leather conditioner (UV protection) every 4-6 weeks. This will help protect the leather from drying out and cracking. It must first be sprayed onto the fabric or applicator, and then rubbed into the leather braid.
How to care for your accessory
In order for a braid made of genuine leather to last as long as possible, the material requires certain care. To maintain an attractive appearance, the material is regularly treated with special products that prevent drying and cracking, for example, Hi-Gear (leather cleaner), LIQUI MOLY Racing (leather care), Turtle WAX (cleaner and conditioner), 3ton (wet wipes) . The main thing when caring for leather is that the material does not lack moisture. Otherwise there is a risk of cracks appearing. Proper care will ensure the use of the cover for at least five years.
Cleaning and caring for leather braiding consists of the following steps:
- Prepare soft and clean cloths, cleaning products, and leather conditioner.
- Apply a cleaning agent to a rag and clean the steering wheel. In hard-to-reach places, you can use a toothbrush.
- When cleaning is complete, wipe the braid with a clean and dry cloth and apply conditioner. This product is designed to protect the leather product from drying out, which will extend the life of the accessory.
Today, purchasing the right car interior care product is not a problem: in almost every car store you can find everything you need.
For leatherette products, ordinary soapy water and clean rags can be used as a care product. The procedure is simple: use a clean rag soaked in a soapy solution to wipe the steering wheel, trying to remove all dirt. After this, wipe the steering wheel with a dry cloth. Suede braids or products made on a synthetic base are cleaned with a car vacuum cleaner or a dry, clean brush. It is better to avoid washing, since such a procedure can worsen the fit of the accessory to the control, which will also affect the quality of the external one.
How can you tell if the braid needs cleaning? This procedure must be resorted to when you feel that the steering wheel has visible dirt and has become sticky and slippery. If the cover material is leather, then over time it becomes dry. In this case, moisturizing and conditioning are required. This care procedure should be carried out at least once a year.
In order for the braid to last as long as possible, the product requires periodic maintenance using special products.