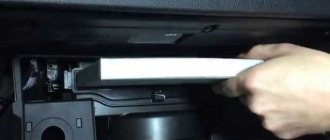
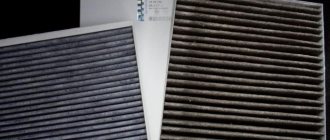
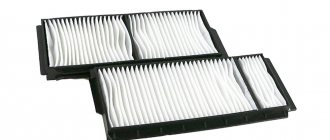
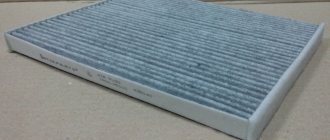
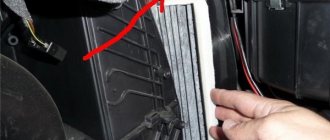
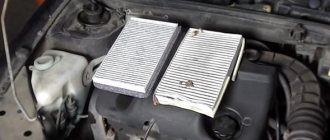
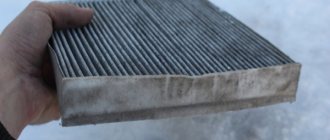
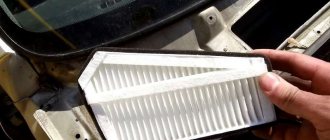
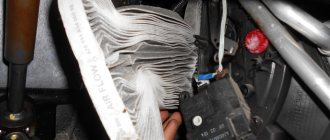
The filter element guards the cleanliness of the air entering the cabin. It is he who has to pass a huge amount of air through himself and cleanse the contaminants that fill the road air. Its structure contains a paper sheet that allows air to pass through itself, while dust particles remain on the sheet. Over time, the paper accumulates a lot of contaminants, which negatively affects the throughput and the operation of the interior ventilation system. The best way to check whether an element is dirty is to remove it and look at the amount of debris in its ribs. It can also be determined by indirect signs such as: poor ventilation of the stove and an unpleasant odor when the heater is turned on. The Chevrolet Niva (21214) is equipped with both conventional paper elements and those with activated carbon (for better air purification). Which one to choose is up to you.
Where is the filter located?
The cabin filter in a Chevrolet Niva car is located on the ventilation duct, which is an air intake. It can be found on the right side of the windshield under the plastic trim, which is located on the windshield wiper trapezoid, secured with a self-tapping screw.
ATTENTION! A completely simple way to reduce fuel consumption has been found! Don't believe me? An auto mechanic with 15 years of experience also didn’t believe it until he tried it. And now he saves 35,000 rubles a year on gasoline! Read more"
It should be noted again that the role of the cabin filter is great. And if it becomes clogged, it must be replaced as soon as possible. Most practicing car enthusiasts recommend purchasing a new filter to change, which is produced with article number NF-6004.
The cost of a cabin filter in a Chevrolet NIVA ranges from 160 to 310 rubles. In addition, you must definitely purchase fresh sealant, the price of which is approximately 120 rubles. However, when installing a cabin Nevsky filter, it often turns out that the dimensions do not match. The cabin filter of the named company has a larger seat than is expected in this car.
In this regard, many car owners prefer to purchase analog cabin filters, which are in no way inferior in quality to the original.
| Analogue | vendor code | Cost, in rubles |
| General Motors | SF4 | 165 |
| FORTECH | FS053 | 400 |
| LYNXauto | LAC1906 | 350 |
| Big Filter | 1118812201003 | 300 |
| Mann-Filter | CU26004 | 700 |
Such filters are slightly smaller in size and, in addition, have a soft frame and a foam rubber seal. This makes it easy to install the device and ensure high-quality cleaning of the air entering the cabin. The technical specifications recommend changing the cabin filter depending on the conditions in which the car is operated, but at least once every six months or a year.
However, experts recommend that car owners rely on personal feelings. If any health problems arise, the filter must be replaced. Since its purpose is to provide comfortable conditions for the driver and passengers. Most practitioners believe that the filter needs to be replaced in early spring and autumn. If the filter is not changed for a long time, this can lead to the appearance of mold in the filter and the spread of bacteria in the car. And, as a rule, it is almost impossible to remove mold.
Replacing air filters in Chevy Niva
Each Chevy Niva (Chevrolet) air filter is used for rough air purification, i.e. removing large particles of dirt and dust. In total, there are 2 of them installed in the Chevrolet Niva - the first is responsible for supplying air to the engine, the second is for interior ventilation. There are a huge number of filter options on the consumer market.
There are even those that purify the air from bacteria (with a so-called ionizer) or from excess moisture. With a filter through which air is supplied to the carburetor (fuel mixture connection area), everything is simpler - it is better to use models recommended by the manufacturer itself.
How are they replaced at home?
Replacing the cabin filter in a Chevrolet Niva
Replacing the cabin filter is easy. According to the manufacturer's recommendations, the procedure should be performed once a year, but in fact you will have to do this more often if the car is actively used.
The cabin filter is located under the trim on the left side under the hood and is hidden by a plug. To access it you will have to unscrew 1 screw. It should be noted here that you should not try to clean it of dirt under any circumstances.
It is not suitable for re-repair and is only replaced with a new one.
The cabin filter is replaced with a new one, a rag that can be used to cover the filter frame, and a special silicone-based sealant . Air filter replacement steps:
- removing the old dirty filter;
- cleaning the seat from dirt and dust;
- installing a new air filter;
- sealing the frame at the joints;
- application of rags.
Everything is extremely simple, even an inexperienced master can handle it. What is the benefit of replacing the cabin filter? Firstly, cleaner air in the cabin, and secondly, more efficient ventilation, which is important during the summer period of vehicle operation, when all possible methods are used to condition the interior volume of the cabin.
Why can't you restore an old filter?
Service station technicians repeatedly have to deal with cars in which an attempt has been made to restore the cabin filter. It should be noted that the foam part and the internal filler of this element are made in such a way that they will not allow dust to pass through, but can become clogged with moisture.
Naturally, every car owner who decides to restore the filter will first try to rinse or wash it. And this will lead to dust jams. In the future, when you try to turn on the air conditioning or heating, the accumulated dust will be thrown into the interior.
This is not only unpleasant, but also dangerous to health.
However, it should be noted that there are cabin filters that can be washed. But they consist only of a foam part and, accordingly, protect less well from dust. They should be replaced every 3-6 months. And, by the way, the manufacturer does not recommend using them.
Replacing the air filter
To ensure smooth operation of the Chevrolet Niva engine, you need to change the air filter in a timely manner. According to the manufacturer's recommendations, this procedure is carried out every 10-20 thousand km.
If you do not change the filter in a Chevrolet Niva for more than 50 thousand km, this will result in a drop in performance and debris entering the combustion chamber compartment. This increases the amount of soot, and in the future will require decoking of the engine.
Replacing the air filter is not difficult. First you need to unscrew the screw, remove the cover and pull out the old sponge. It is recommended to clean the inside of the case with a rag and gasoline. After 5 minutes you need to install a new part, tighten the lid and drive at least 5-8 km. It is recommended to replace the air element in a Chevy after changing the engine oil.
Installation of additional cabin filters in a Chevrolet Niva
There is also an additional Chevrolet Niva cabin filter, which is installed directly in the air conditioner (ventilating type). It is located immediately behind the primary body and is a sponge-shaped gasket.
It is sold in auto parts stores, but you can cut it yourself from a thick piece of foam rubber, which is used for cutting filters for vacuum cleaners. You can buy it at a building materials store.
The accessory used for final purification of the air entering the vehicle interior should be replaced approximately once every 2 years or less frequently if the vehicle is not operated under harsh conditions.
It is recommended to carefully inspect the ventilation grille. If dust appears there, it is urgent to change the cabin air filters.
The procedure does not require any skill or deep knowledge of Chevrolet Niva mechanics. Replacement takes 10 minutes along with cleaning the ventilation from remaining dust.
The procedure should not be ignored if the driver is concerned about his own health, especially if he has a tendency to allergies. And there is no reason to save here; the cost will be only 300 rubles.
Source: https://korchim.ru/biblioteka/salon/filtr-shevi-niva.html
When to change the filter
The filter is part of the forced air circulation system, which is performed by the on-board air conditioner. Of course, there are certain sanitary standards for changing the cleaner, but the degree of its contamination depends on the following factors:
- where exactly do you operate your car (dirt roads or asphalt);
- how often do you use your car?
- do you keep it clean?
We recommend: How to check the expansion tank plug
Auto mechanics at the official Chevrolet showroom advise changing this part every six months or after 10-15 thousand kilometers. Usually, according to the rules, it is recommended to replace them in early spring and then in the fall.
Remember, the air barrier has a warm, damp environment in which all kinds of fungi and hard-to-remove mold thrive.
Timing for replacing the cabin filter
The cabin filter in a car is an unremarkable detail that is hidden from prying eyes. It is located behind the glove compartment and does not attract attention until an unpleasant odor appears in the cabin. Also, when the SF is polluted, windows often fog up, and the stove and fan function poorly, even at maximum speed.
A malfunction of the cabin air filter can also be detected during an external inspection, but to do this it will be necessary to remove the glove compartment. For this reason, many drivers are in no hurry to change the SF, and in vain!
The cabin filter not only cleans the air in the cabin from dust and dirt. This element also holds plant pollen and pathogenic bacteria on the surface, which have a detrimental effect on human health.
Today SF is installed in every car. At the same time, the part is not durable and requires replacement after a certain mileage - 15-20 thousand km. In some cases, filtration is changed more often, depending on the operating conditions of the vehicle.
On a Chevrolet Niva, the cabin filter is replaced during scheduled maintenance. However, this work is not difficult, and any driver, even a novice, can handle it, provided that the instructions described below are followed.
Video “Replacing the cleaning element”
More visual information on replacing the Niva Chevrolet interior cleaner is presented in the video we offer.
Replacement periods are set based on the operating conditions of the vehicle. When driving primarily on unpaved roads, the filter becomes clogged much faster, so the need to replace the filter arises more often. If the car is rarely used or driven on a road with a good surface, replacement must be done every 15 thousand kilometers.
Also interesting: Installing a towbar Instructions for installing a towbar on a Chevrolet Niva. How to install a tow bar on a Chevrolet Niva. Installation of a towbar in photographs. Installation of a towbar for 2002—
The cabin filter consists of certain components that significantly increase the comfort of being in the car and help create a pleasant microclimate. It is especially important to protect the interior from harmful substances from other cars if there are often small children in the cabin, since in the future many types of dust and exhaust gases can lead to allergies.
Some cars have a standard warning system for filter element contamination, but in most cases, it is better to trust your own feelings, and if you suspect the filter is not working properly, it is better to replace it. Signs may include decreased air flow from the ducts or an unpleasant odor.
It is better to choose a new filter after first familiarizing yourself with its composition. Among the main indicators is the presence of activated carbon in the composition, which will help eliminate unpleasant odors and will absorb some harmful substances from the environment. Some Niva Chevrolet cabin filters have a bactericidal coating that prevents the appearance of microbes that cause an unpleasant odor and prevents the spread of dust mites.
Step-by-step replacement instructions
Replacing the cabin filter in a Niva Chevrolet is a simple process, but since it has to be done systematically, be sure to read the detailed instructions.
Where is?
Location of the barrier under the hood
The cabin filter element in the Niva Chevrolet is located under the trim, in front and slightly to the right. To gain access to it, you need to unscrew one screw and remove the cover.
What will you need?
The replacement process is simple and does not require many special tools:
- new cabin filter;
- sealing compound;
- rags;
- screwdriver.
Stages
Before replacing, you need to turn off the engine, turn on neutral speed and set the car to the handbrake.
- Unscrew the screw using a screwdriver and carefully pry off the cover.
Raise the lid
- We take out the filter filter.
We pry up and take out the filter element
- Using a rag, clean the body from dust.
- We clean the housing from the remaining sealant around the perimeter. It is better to do this with sandpaper.
- We print out a new filter and put it with foam on top.
We install a new one
- We treat the contour with new sealant.
- We put the cover in place and tighten the self-tapping screw.
- We turn on the engine, check the car, turn on the heater.
Filter location
Self-tapping screw that needs to be unscrewed
Old element
Retrieving the old element
New filter material installed
We install a new one
If everything works fine, then we can consider the work finished. If anything is still unclear, watch the video.
Where is the SF located on the Chevrolet Niva?
The filter should be changed regularly; untimely replacement can be fraught with serious consequences - polluted air, the proliferation of dangerous bacteria, the appearance of fungus and mold in the cabin. The SF is located in a dark place where the sun's rays do not penetrate, and these are excellent conditions for the proliferation of microorganisms, which then spread throughout the cabin.
The device itself is located on the air intake duct of the Chevrolet Niva ventilation system. It stands under the plastic lining of the trapezoid on the right side. It is very easy to find, it is located under the cover, which is secured with a self-tapping screw.
Filter selection
Typically, car enthusiasts choose a new Chevrolet Niva cabin filter produced by the Nevsky Filter company (product order number NF-6004). But the size of such a device is often larger than the seat. Therefore, many owners install filters from the manufacturer Kalina with catalog number 11180-8122010-82 - for a regular filter and 11180-8122010-83 - with carbon filler.
The dimensions of these filters are slightly smaller, but they have a soft frame and a foam seal around the perimeter. Due to this, the devices easily fit into place and provide good air purification. Other manufacturers of quality filter elements are Big Filter (part number GB-9831) and TSN (part number 9.7.26).
Cabin filter Chevrolet Niva, other manufacturers
Lynx carbon cabin filter
At the beginning of the article I lied a little, of course, alternatives exist. For a long time I supplied my clients and completed their orders with Filtron filters. But due to the appearance among the Poles of a purely Russian disease called “star”, I abandoned them. There is a cabin filter from the Taiwanese manufacturer LYNX. Very decent quality and in good packaging, but in terms of price it is inferior to “our” filter.
How to replace
You can replace the cabin filter yourself; there is nothing complicated about this procedure. The frequency of changes depends on the operating conditions of the vehicle. The dustier the area you move through, the more often you need to change it. There are two replacement methods: one with complete or partial dismantling of the frill; the other - through a special hatch made specifically for these purposes.
Method 1
- Open the hood lid and unscrew the screw that secures the hatch to the frill on the passenger side.
- Cut off the sealant from the lid and open the hatch.
- Remove the old filter (take it out carefully so that dust and dirt accumulated on it do not spill into the heater air duct).
- We remove the packaging from the new element and firmly install it in place of the old one (it must be facing the right way, for this there is an arrow in the direction of flow on the frame).
- We clean off the old sealing material from the lid and the frill itself, and apply a new one around the entire perimeter of the lid (sealing is needed to prevent water from entering the interior ventilation system).
- We install the lid in its place and remove the excess sealing material (for peace of mind, you can apply sealants around the entire perimeter of the lid and on top).
- We check the operation of the heater in all operating modes.
Method 2
To replace with partial removal of the trim under the windshield you need:
- Raise the hood and unscrew the frill fastenings (six screws, all on top).
- Lift the edge of the lining and remove the old filter element.
- After removing the dirt and dust accumulated there, install a new filter.
- Reassemble everything in reverse order.
These recommendations are suitable for anyone who is thinking about how to change the cabin filter. The second method is more suitable for those who do not have sealant or silicone on hand; you need to unscrew more screws, but the time will be the same.
Article rating:
Loading…
Share with friends: Add a comment
Replacing the filter
All Chevrolet Niva cars produced are equipped with a cabin filter. Over time, the filter may become clogged with dust and stop filtering the air. In this case, the equipment must be updated every 15,000 km.
If the car is used in difficult climatic conditions, when the air is heavily dusty, then the filter is changed every six months. Most often, the cabin filter needs to be changed if the following problems arise:
- Windows fog up in the cold season because the heating system fan is not able to provide sufficient air flow.
- Cars with air conditioning smell of dust and other contaminants.
If the equipment is not replaced in the listed cases, this may result in problems with the radiator of the air purification system, which is unlikely to be cleaned.
It is quite possible to replace the cabin filter in a Chevrolet NIVA not at a service station, but with your own hands. For self-installation, you must prepare the following equipment and tools:
- New filter.
- Silicone sealant to seal the lid.
- A screwdriver with a Phillips and a flat blade.
- It is advisable to watch a video on the Internet that will show how to quickly and efficiently install an unused filter.
The cabin filter is replaced according to the following algorithm:
- First of all, use a Phillips screwdriver to unscrew the screw that holds the cover in place.
- Using a flat blade screwdriver, install the lid and frill tightly together. Lift the roof up and then remove it.
- The old filter is then removed.
- The area where the filter was located is cleared of dust and other contaminants.
- After this, a new filter is installed.
- The filter must be installed in the direction of the flow in which the air moves. This direction is indicated by an arrow on the filter.
- The cover is lubricated with fresh sealant and installed in its original place.
The installation is completed by tightening one or more screws.
As a result, it should be said that you can replace the cabin filter in a Chevrolet NIVA yourself and it will not take much time. But it is precisely this action that will be able to protect the driver and passengers from serious health problems in the future.
Tired of paying fines? There is an exit!
Forget about fines from cameras! An absolutely legal new product - Traffic Police Camera Jammer, hides your license plates from the cameras that are installed in all cities. More details at the link.
- Absolutely legal (Article 12.2);
- Hides from photo and video recording;
- Suitable for all cars;
- Works through the cigarette lighter connector;
- Does not cause interference to radios and cell phones.
Find out details
Choosing a cabin filter
Today, all SFs are divided into two types:
- standard (anti-dust) devices;
- coal SF.
Standard filter devices are made of corrugated cardboard or synthetic fiber. The surface of the SF is multi-layered, due to which the atmospheric flow passes through several degrees of purification. The filter retains dirt, dust, leaves, pollen, and exhaust gases by 96%!
Coal SF, in turn, can also neutralize unpleasant odors in the cabin and additionally have antimicrobial properties.
When choosing a new filter device for the interior of a Chevrolet Niva car, you should follow the instructions from the manufacturer. It is important to purchase a model that is suitable in size.
Preparing for replacement
In order to replace the cabin filter in a Chevrolet Niva, you need to prepare the following tools:
- clean rags;
- new air filter;
- means for cleaning the seat;
- crosshead screwdriver;
- sealant.
The process of replacing the cabin filter
Step-by-step instructions for replacing the SF in a Chevrolet Niva:
- Open the hood, unscrew the cover bolts.
- Unclip the cassette latches.
- Carefully remove the old air filter.
- Wipe the seat with a clean rag.
- Insert a new SF into the cassette according to the “UP” and “DOWN” indicators.
- Treat the protective cover with sealant and tighten the screws.
This completes the installation procedure for the new SF.
Replacing the cabin filter on a Chevy Niva is performed in a similar sequence.
Changing the Chevrolet Niva cabin filter
In addition to protecting the health of passengers, the cabin filter helps to significantly extend the life of the ventilation system. By trapping large dust particles, the Chevrolet Niva cabin filter does not allow it to have a detrimental effect on the driving mechanisms of the air conditioning system, which because of this wear out faster and creak.
Currently, Chevrolet Niva can use single-layer and multi-layer cabin filters:
- Single-layer filter
- consists of dense fabric and is the simplest device for air purification. The advantage of using such structures is their low cost, but the disadvantages include low filtration quality. - Multilayer filters
- consist of several elements, between which activated carbon is placed. It is the use of microfiber in conjunction with a special carbon cloth that allows for maximum purification of the passing air. The disadvantages of such elements include their high dynamic resistance to the incoming flow, which increases the load on the ventilation system.
Replacing the cabin filter in a Chevrolet Niva is a procedure that anyone can do. It is replaced at least every 10-15 thousand kilometers.
Contamination and the need for replacement are determined visually, that is, by the actual condition. In order to save on car maintenance, you can replace the cabin filter in a Chevrolet Niva yourself; it takes 5-10 minutes.
An old, used Chevrolet Niva cabin filter cannot be washed, washed or processed for reuse. Only replacing with a new filter element will guarantee environmental safety and cleanliness in the Chevrolet Niva interior. When there is nothing to replace the old one with, you can simply shake it out and return it to its place.
If the filter has been clogged for a long time, the interior is warm and humid, then pathogenic bacteria, fungi, and mold spread quite quickly through the Chevrolet Niva ventilation and air conditioning system.
Moreover, in addition to replacing the cabin filter in a Chevrolet Niva, you will need to disinfect and disinfect the car’s air conditioner using special means (aerosol or foam).
Such an unpleasant smell is in any case associated with moisture in the cabin, so you should check whether the drainage hole is clogged?
To replace the Chevrolet Niva cabin filter you will need:
- Know the exact location of the filter installation.
- Know the position of the filter relative to the direction of air flow.
- The type of Chevrolet Niva cabin filter - a non-original filter in some cases may differ slightly from what is described in the technical documentation.
When replacing the cabin filter in a Chevrolet Niva, it is very important to set the correct position relative to the direction of air flow.
The required direction of air flow is indicated by an arrow on the cabin filter itself with the inscription “AIR FLOW”. The cabin filter is inserted into a special cassette.
Signs for replacing the Chevrolet Niva cabin filter:
- Dust when ventilation is turned on;
- Unpleasant smell in the cabin;
- The stove is blowing weakly;
- Humidity persists in the cabin during rain and damp weather, and the windows constantly fog up.
1. An unpleasant odor in the interior of a Chevrolet Niva is formed due to high humidity
, due to a clogged cabin filter. This creates a favorable environment for the proliferation of microbes - hence the smell.
2. If the Chevrolet Niva cabin filter is clogged with dirt and dust, it will have high resistance to the incoming air flow.
The result is weak air flow.
3. A clogged filter prevents the Chevrolet Niva from air conditioning.
This may be one of the reasons why the windshield fogs up in rain and wet weather.
When is it necessary to change the cabin filter material?
However, all of the above problems can be avoided if you simply change the filter at the appointed time. The manual that comes with the car indicates when to replace the filter. But in this matter it is better to proceed from personal feelings when examining the cabin filter element.
Certain models have special sensors that indicate the degree of contamination of the air barrier.
When choosing a new filter, be sure to take into account that those that contain activated carbon in their composition will last much longer when compared with conventional paper ones, including if they have a bactericidal coating.
