In this article we will talk about how to replace the fuel pump on various cars. In total, there are two injection systems on gasoline engines - injection and carburetor. The latter is rarely used and is no longer installed on new cars, since engines with such injection do not meet environmental standards. Today, carburetor engines can be found exclusively on motorcycles, gasoline generators, saws, and mowers. Injection systems are installed on all cars.
Fuel pump device
Modern cars use two types of fuel pumps - mechanical or electric.
The former are used in carburetor engines, the latter in injection engines. The mechanical pump is usually installed on the body of the gas tank, while the electric pump is installed inside the tank. Some automakers use both types of pumps at once.
Mechanical pump
The mechanical fuel pump is quite large. Its main elements are:
- fuel chamber;
- inlet valve;
- release valve;
- diaphragm;
- diaphragm return spring;
- drive lever;
- camshaft;
- fist.
When power is applied to the fuel pump, the lever begins a repetitive up and down motion. Due to these movements, the diaphragm moves, and gasoline flows first into the pump and then into the engine.
This is how fuel is supplied in carburetor-type engines. Since the distance between the carburetor and the fuel pump is usually small, such devices can supply fuel even at minimal pressure.
A mechanical fuel pump is usually installed on the body of the gas tank
Electric pump
Electric fuel pumps are small in size and have a simple design. Inside the pump housing are:
- chamber for gasoline;
- inlet valve;
- release valve;
- additional solenoid valve;
- diaphragm;
- diaphragm return spring;
- core;
- electrical contacts.
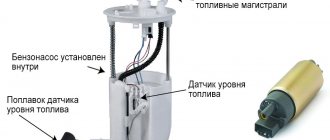
The main element of an electric pump is the core. Due to the additional valve, it performs reciprocating movements and opens the valves for fuel inlet and outlet. Such a pump only works when the fuel pressure in the system is high and gets very hot while the car is moving. For more efficient cooling, it is usually mounted in the gas tank.
The electric fuel pump is small in size and simple in design.
How does a fuel pump work?
The fuel pump is powered by the power unit. When the engine starts, the on-board computer signals the fuel system about the need to supply fuel. Electricity is supplied from the engine to the fuel pump, and a small motor inside the pump creates the necessary pressure in the system. In the first few seconds after starting the car, you can hear the fuel pump humming as it pumps gasoline.
A certain amount of fuel enters through the inlet valve into the pump chamber, then through the outlet valve into the fuel filter. There, the fuel is cleaned of dirt and impurities and sent to the engine. The fuel pump turns off automatically, along with the engine.
How does a fuel pump work?
Let's figure out how the pump works. It consists of a housing in which there is a membrane and two valves - inlet and outlet. The membrane is acted upon by a spring, which returns it to its original position. When replacing the fuel pump mesh, you will have to completely disassemble the housing. In some cases, you may have to install a repair kit. It includes gaskets, membrane and valves.
The pump is driven from the camshaft - it has an ellipse-shaped section. The convex part of the camshaft pushes the rod, which drives the fuel pump mechanism. At the same time, the spring is compressed, the membrane moves, the inlet valve opens, and the outlet valve, on the contrary, closes. Gasoline is injected into the pump chamber. When the membrane moves in the opposite direction, the intake valve closes, the exhaust valve opens, and gasoline flows through it to the carburetor.
Please note that a filter must be installed in front of the pump to clean gasoline from harmful impurities.
Where is the fuel pump located
When faced with the need for repair or replacement for the first time, many car enthusiasts ask where the fuel pump is located. The pump is located directly in the gas tank and is in direct contact with the fuel, that is, it is immersed in gasoline. On most civilian vehicles, the gas tank is located at the rear of the vehicle under the floor.
The fuel pump is installed so that it is located at the top of the gas tank. Thanks to this placement, the pump can be accessed directly from the cabin. To do this, you need to remove the rear sofa, since the fuel pump is located directly under the seat on the left or right side.
Causes of malfunction
If we talk specifically about the causes of fuel pump malfunction, they can be reduced to the 4 most common:
- It is a bad habit for a motorist to drive with an almost empty fuel tank. Make sure that there is at least half the volume of fuel in it.
- Significant contamination of the fuel filter, which must be cleaned or replaced in a timely manner. This is due to the poor quality of the fuel being supplied.
- Low quality fuel. As mentioned above, it leads to damage to the fuel filter, which, in turn, disrupts the operation of the fuel pump.
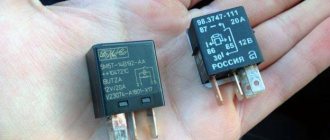
- There is a fault in the wiring that connects the fuel pump to the relay. Corroded and damaged wires severely restrict the flow of electrical current from the relay to the pump.
This is interesting: Causes of valve knocking on a cold engine and how to eliminate them.
These situations lead to the fact that the part exhausts its service life as it receives extreme loads. Consequently, its service life is significantly reduced.
Most often, a fuel pump that has exhausted its technological life cannot be repaired, but only requires a complete replacement.
When to change the pump?
When replacing a fuel pump, you need to perform simple manipulations, but what can lead to this work?
A list of reasons why the fuel pump malfunctions is given below:
- Rod wear can be solved by replacing it. In some cases, it is sufficient to remove one or more gaskets installed under the housing.
- Destruction of the membrane leads to gasoline leaking out of the housing. Air leakage begins, no pressure is created at the outlet.
- Valve malfunction - usually due to excessive heat. When cooled, valve operation returns to normal. As in the previous case, no outlet pressure is created.
And, naturally, physical damage to the pump housing leads to the fact that it stops working normally.
Signs of pump failure
Before replacing the fuel pump on a Nissan or any other car, you need to make sure that it is the one that is faulty. One of the main signs that the fuel filter is clogged is that when you turn on the ignition, the pump runs for too long and makes a loud noise. This suggests that he cannot quickly gain pressure. As a rule, this does not happen abruptly - it cannot be that everything worked perfectly yesterday, but today it pumps poorly. If this happens, then the reason is most likely not in the filter, but in the pump itself.
If the filter is clogged, it will contain a huge amount of rust, as well as other suspended particles. If they get into the fuel system, they can greatly damage the injectors - they have very small holes and can clog very quickly. And if you start cleaning the injectors too often, then think about whether you changed the gasoline filter too long ago (check the air filter too, it won’t hurt).
The second obvious sign of a malfunction is the complete absence of “signs of life” in the fuel pump. If you do not hear a hum when you turn on the ignition, then the relay may have failed. But it’s also worth checking the fuse and the fuel pressure sensor - how the pump functions depends on it. If nothing has changed, try directly applying voltage from the battery to the fuel pump. If it does not work, then it needs to be replaced or repaired. The first is preferable.
DIY fuel pump replacement
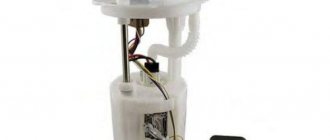
The gasoline pump in the power supply system of an injection gasoline engine is an electromechanical device that pumps fuel from the gas tank and creates the necessary fuel pressure in the fuel line necessary for the most efficient dosed injection of fuel injectors.
If a number of conditions are met during vehicle operation, the fuel pump will serve properly for quite a long time (on average, about 200-250 thousand km or more). It should be borne in mind that regular driving with an empty tank, refueling with low-quality fuel with a high content of impurities and debris, ignoring the need to periodically replace the fuel pump screen, flush the fuel system and the gas tank itself lead to the fact that the gas pump breaks down much faster. Another factor that affects the service life of a submersible electric fuel pump is unprofessional tuning and boosting of the engine. More efficient injectors are installed on the car, the pressure regulator in the fuel rail is changed, the ECU is reflashed (chipped), etc., but the fuel pump remains standard. As a result, the pump constantly works at the limit of its capabilities, heats up and quickly breaks down. For the reasons stated above, as well as as a result of natural wear and tear, drivers often need to replace the fuel pump. Next, we will look at how to change the fuel pump yourself.
Required Tools
Below is a list of required tools:
- Wrenches of the appropriate size (most often 8 and 10 mm)
- Pliers
- Two screwdrivers: flat and Phillips
- Hammer
- WD-40
- Screw clamps
- Set of heads
Preparation
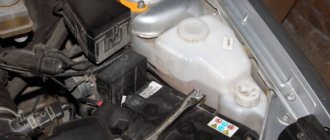
Before you begin removing the fuel pump, you need to carry out a number of preparatory measures. To understand how to get to such an important part as the fuel pump, you need to find the owner's manual for your vehicle and study it carefully. In most models, the gas tank is located inside the bottom of the car and can only be located by removing the rear passenger seat or getting to the bottom through the trunk, which is undoubtedly more difficult than the first option.
This is interesting: What to do and what the fine is if the license plate light does not light up
In other models, only when you fold back the carpet inside the luggage compartment, you can gain access to the fuel pump and begin the process of replacing it.
It is very important that a minimum amount of fuel remains in the tank itself, and to be more precise, no more than 10 liters. You need to make sure that the ignition is turned off and remove the ignition ground cable. It is better to vacuum the interior to avoid various debris and dirt getting into the gas tank.
Before carrying out the procedure for dismantling the fuel pump, it is very important to also relieve pressure from the power system. In order to do this, you will need to perform two steps: first disconnect the negative terminal on the battery, and then under the hood on the fuel rail, press a special valve through which gasoline will flow out.
You can also use another method by disconnecting the terminal from the battery, then turning off the power to the pump to remove all electrical current from it. At the same time, turning the engine off with the starter, the terminal is put back on the battery. After some time, the remaining fuel will leave the system.
When the voltage drops, first remove the electrical connector from the pump, then pay attention to the fuel lines and loosen all the clamps and clamps on them to disconnect all electrical wiring from the pump.
Locate the fastenings of the line to the pump terminals, unscrew the fittings and the return line, having first removed the clamp from it. Watch how the fastening looks when you previously removed the pump; it can be fastened in a makeshift manner.
Removing the O-ring
The next step is to remove the pump pressure ring, for which a tubular wrench is best suited.
It is worth noting that each pump has arrow indicators to facilitate the assembly of the entire structure. Memorize them or sketch them.
Before removing the pump from the gas tank, remove the o-ring, and then carefully pull out the unit, being careful not to damage the special fuel level sensors.
After you have pulled out the pump, remove the rubber seal on its seat.
Completion
Finish the entire process by seating the new mechanism and replacing all the rubber plugs and seals that come with it. Pay close attention to all the arrows that help you install the pump correctly and in the right place, sometimes they should converge in a line or point to the rear of the vehicle.
Be careful when handling all fuel level indicators as they are very fragile. Tighten all fasteners, but without fanatical force.
This unit can be replaced by using the services of qualified specialists, but if you have the time, energy and desire, you can do it yourself using all the necessary tools.
Fuel pump repair and replacement
The technology for diagnosing, repairing and replacing a fuel pump is usually not very difficult. If you have the desire, time and a minimum set of tools, all work can be easily done independently.
Removing the fuel pump
In order to remove the fuel pump, it is proposed to perform a series of sequential actions.
- Turn off the engine.
- Open the hood.
- On the engine, locate the device connected to the fuel supply system.
- Disconnect the connector with wires from the fuel pump.
- Disconnect the fuel supply hose.
- Disconnect the collet clamp and unscrew the four mounting bolts.
- Carefully pull the fuel pump out of its socket by hooking it onto the rubber gasket.
- Clean the device from oil, dust and dirt.
Video: replacing the fuel pump on an AUDI A6
Replacing the gasket
Often the cause of problems with the fuel pump is the sealing gasket. The degree of its wear determines the tightness of the connection between the pump and the engine and, as a consequence, the amount of fuel supplied to the pump.
The sealing gasket is selected individually for each fuel pump model
The gasket replacement process is quite simple.
To replace the rubber sealing gasket on the fuel pump, you need to remove the device and clean the seat itself of adhering dust and dirt.
- Remove the fuel pump.
- Clean the pump socket from oil and dirt.
- Lubricate the new gasket with a small amount of gasoline.
- Install the gasket into the socket.
- Carefully place the fuel pump on the gasket and secure it with bolts.
Replacing the mesh
To replace faulty elements, the fuel pump must be disassembled. The algorithm for disassembling the pump and replacing the filter mesh is not very difficult.
- Remove the housing by loosening the locking latches.
- Disconnect the power connectors.
- Remove the tubes from the fittings. This can be difficult since the connections use heat shrink materials and the tubing is tightly attached to the fittings. Score the surface of the heat shrink with a knife and remove the tubes.
- Unclip the clamps according to the diameter of the pump.
- Remove the mesh.
- Clean the mesh from dirt. If mechanical damage is present, replace the mesh with a new one.
- Follow all steps in reverse order.
It is necessary to clean the fuel pump screen from dirt and, if necessary, replace it with a new one.
Complete cleaning of the fuel pump is usually carried out at a car service center. The pump is removed from the machine, disassembled, washed with special means, dried with a compressor and assembled.
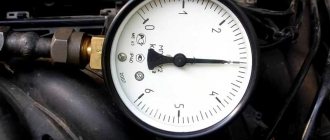
Bleeding the fuel pump
Gasoline in the fuel system is constantly under high pressure. However, sometimes due to incorrect operation of the pump, the pressure may drop. In these cases, high pressure in the fuel system is created artificially. This process is called pumping the fuel pump. It is performed in several stages.
- Disconnect the hose connecting the fuel pump and engine. To avoid fuel leakage, direct the hose to an empty container.
- Turn the starter without starting the engine. If the fuel pump manages to pump 0.5 liters of fuel in half a minute, then it is in working condition.
- To restore high pressure, connect a regular pump to the hose connecting the gas pump to the gas tank and inflate the system with compressed air.
Replacing the fuel pump on a Volvo FH 12
The fuel pump of the Volvo FH 12 is installed in the gas tank and is a rather complex device. Its replacement is carried out from inside the car as follows.
- Remove the carpet on the trunk floor.
- Fold down the rear seat back and you will see a small hatch underneath.
- Using a 10mm wrench, unscrew the five nuts securing the hatch cover and remove the cover.
- Disconnect the fuel pipe connectors.
- Disconnect the two hoses from the pump, having previously marked each one.
- Remove the pump from the tank.
- Install a new pump.
Replacing the gasket under the fuel pump
It is recommended to replace the rubber seals, including the pump gasket located under the fuel pump. This part is intended for one-time use, so it is not reinstalled after the device is removed.
Ring gasket
What to do if the pump fitting is broken? It requires urgent repair or replacement with a new one. It depends on the specifics of the breakdown, whether the fitting on the cover of the fuel pump module has broken, on the pump itself, or whether we are talking about the fuel supply and return fittings. If the problem is serious, it is recommended to purchase a new kit along with a cover, sold at a car service center.
This is interesting: Rating of autonomous and electric engine pre-heaters: which one is better to install
Replacing the pump
To replace the fuel pump, you need to arm yourself with a set of tools. After this, proceed to dismantling:
- You fold down the rear seat and underneath there is a niche with a pump installed.
- Disconnect the block with wires.
- Remove the tubes and hoses that go to the fuel pump.
- Unscrew all the nuts that will secure the housing to the gas tank.
- Carefully remove the pump along with the fuel level sensor.
- Disconnect the pump from the fuel level sensor.
If it is not possible to replace the pump, repair it. To do this, as a rule, it is enough to install new brushes.
But it also happens that one or more windings on the rotor or stator fail. In this case, of course, it will be easier to install a new electric pump. But if you have suitable wire or working spare parts from old pumps, you can try to repair it. As a rule, this is quite difficult to do - the damage is usually so severe that the pump elements cannot be restored. Therefore, the best way out is to install a new or used device.
After repair work, everything must be reassembled in the reverse order. And don’t forget to install a rubber gasket, otherwise gasoline will start leaking out. When replacing the fuel pump mesh, you will have to perform similar manipulations, but you do not need to install a new electric drive.
Problems after replacing the fuel pump
A common problem after replacing and installing a new fuel pump is the car not starting on time or showing no signs of starting at all. It should be noted that the new unit needs to build up pressure in the fuel system, and this takes time. To carry out this process, you need to turn on the ignition without turning the key in the “start” position and turn the engine using the starter for 30 seconds - 1 minute, and then repeat the steps.
If your attempts were unsuccessful, then most likely mistakes were made when installing the device or you installed a completely faulty mechanism. The reason could also be a planned blocking of car systems or a failure in the security system.
Determine whether the problem is mechanical or electrical, and then reinstall the fuel pump by connecting it directly to the battery. This method is universal in the absence of fuel pumping by the device.
Car won't start after replacement
Car won't start after replacing fuel pump? This phenomenon is not uncommon. In many cases, this is not a problem. The car cannot start immediately because the pump takes time to pump up the pressure that was previously reduced. To bring the pressure to the optimal level, you need to turn on the ignition for 5 seconds so that the instrument panel lights up. Next, turn the engine with the starter. If it doesn't work on the first try, you should wait about a minute and try again.
If cranking the starter does not help start the engine, then one of the following reasons may be occurring:
- errors were made when assembling or connecting the BN;
- the new fuel module is faulty;
- the car's security system has gone down or a blockage has occurred;
When installing and connecting a new pump, failures of various types are possible: from malfunction of the valves on the fuel pump to breakage of contacts, terminals or connectors.
It is important to identify the exact nature of the problem and determine its type - electrical or mechanical. The simplest breakdown relates to the power supply to the fuel pump; it either exists or it doesn’t. If we are talking about an immobilizer or alarm system, then the anti-theft system can turn off the power supply to the BN, preventing the car from starting. Don't forget about filter clogging either. If the valves are stuck, the device can operate and produce characteristic sounds, but at idle.
The listed malfunctions prevent fuel from entering the ramp, so the engine cannot start. To clearly determine the cause, it is important to make sure that there is no gasoline in the rail. Next, it is recommended to dismantle and connect the BN from the dimensions or batteries directly. This method is considered the fastest for checking the device.
Pump replacement
Most modern cars are equipped with fuel pumps, which are located inside the fuel tank itself. Because of this, getting to it is quite difficult and such placement raises a lot of questions.
In the case of the VAZ 2114, you can raise the rear seat, under which there is a rectangular hatch. By opening it, you will have access to the pump, a sensor with a float and a coarse filter - a mesh. That is, if necessary, you can easily replace a filter or other element.
There are two fuel wires going to the fuel pump:
- The server. With its help, passing through a fine filter, the ramp and injectors are fed;
- Back. Fuel is returned through the pressure regulator to provide continuous power to the engine.
Now let's talk directly about how to remove and replace a failed fuel pump.
- Be sure to disconnect the negative terminal from your car's battery.
- It is advisable to empty the fuel tank.
- When removing the fuel module, you will be able to get to the bottom of the fuel tank, and therefore have a chance to clean it of all kinds of sediment.
- Release the pressure inside the fuel line. This will prevent a whole jet of fuel from hitting your face or inside the car. To do this, use the measuring nipple on the fuel rail and a thin screwdriver.
- Remove the rear seat to gain access to the hatch that leads us to the fuel module.
- Unscrew the two fasteners holding the hatch cover.
- Disconnect the electrical connector from the module.
- Using a 17mm wrench, unscrew the fuel lines that are connected to the pump. Do this carefully so as not to lose the O-ring. Then move the pipes to the side so that they do not interfere with you.
- Using a 7 mm socket, you need to unscrew the 8 fastening nuts. They hold the pressure plate that holds the entire module in place.
- Remove it carefully through the hole in the fuel tank, but before doing this, do not forget to release the fuel level sensor float.
- If there is a new module, install it in the exact reverse order.
- If only one of the elements needs to be replaced, then you will have to disassemble the fuel module into elements.
- Even a beginner will not have any problems disassembling the module, since the assembly can be disassembled into elements quite easily.
- Perform the reassembly procedure, fill with fuel and check the system for operation.
Replacement process
Pay attention to the type of pump installed. On the new pumps, the mounting system is slightly different
Therefore, for work you will need a ratchet and a 10 mm socket. With their help, the ring is dismantled in a circle and the clamps provided on the fuel line are pressed out.
The procedure for replacing the fuel pump should not cause serious problems. But still be careful, careful and consistent. You work with fuel, and therefore must follow all safety precautions.
How to extend the life of a fuel pump?
If used correctly, the fuel pump works properly for quite a long time (about 300 thousand km or more). To prevent the fuel pump from exhausting itself prematurely, you must:
- avoid constantly driving with an empty tank,
- refuel only with high quality fuel,
- carry out scheduled replacement of fuel pump screens,
- Don't forget to flush the fuel system and gas tank.
It should be noted that unprofessional modernization of vehicle components and assemblies, as well as boosting the engine, significantly affect the performance of the fuel pump, reducing its service life. When replacing a fuel pump yourself, first find out the required model of the spare part, and when purchasing, purchase spare parts from well-known manufacturers.
Sources
- https://carnovato.ru/zamena-toplivnogo-nasosa/
- https://KrutiMotor.ru/kak-pomenyat-benzonasos/
- https://remontista.ru/uslugi/dvigatel/zamena-benzonasosa/info/
- https://www.syl.ru/article/406093/zamena-benzonasosa-svoimi-rukami-poshagovaya-instruktsiya-osobennosti-i-rekomendatsii
- https://autoparts-remix.ru/obsluzhivanie/kak-snyat-fishku-s-benzonasosa.html
- https://diagnozbibike.ru/zamena-benzonasosa/
[collapse]