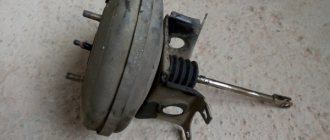
Why do you need a brake booster?
Location
Thanks to such a convenient amplifier, even a weak woman can easily drive a heavy-duty vehicle. This amplifier is used to minimize the overall efforts of the driver, who can now stop even a very heavy car, as easily and very quickly as possible. A large braking torque is created here with minimal effort when pressing the brake pedal; the main aspect of the operation of the VUT is the vacuum reinforcement of normal mechanical movement. Today, it is difficult to imagine even a single car without such a design; thanks to this amplifier, you can quickly and easily stop even multi-ton large vehicles. Today, repairing a vacuum brake booster is a fairly simple operation that can be done very quickly.
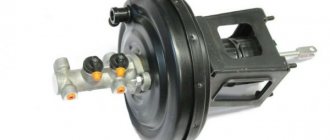
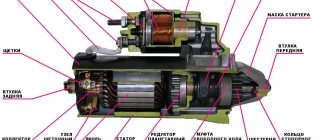
VUT device:
- General building.
- The diaphragm is working.
- Working special valve.
- Pedal pusher.
- Hydraulic cylinder rod.
- Return spring.
The device of the vacuum brake booster VAZ 2110
How to repair a vacuum brake booster yourself
The essence of the unit’s operation is the “airless” force of mechanical movement, thanks to which it is easy to stop a multi-ton vehicle. The design of this device is connected to the brake master cylinder and contains a spring, a diaphragm, a tracking valve, a pusher, a casing and a rod.
The main symptoms of node failure are listed below:
- “wooden” pedal;
- engine interruptions at idle;
- increase in free play up to 50%;
- “jamming” (the car slows down even without pressing the pedal).
Repair of the vacuum unit may be necessary due to a “leaky” diaphragm, loose connection, loss of tightness in the housing, wear of the spring or failure of the air valve. Diagnostics are carried out with the internal combustion engine running. If the unit is broken, replacement is necessary.
Changing the length of the vacuum booster rod is required to adjust the VUT and determines the correct travel of the brake pedal. The size of the gap is controlled by a bolt - the correct “switching on” of the valves depends on its position.
This setting is necessary every time after checking for leaks.
When the engine is turned off, the pedal should “walk” in the range of 0.5-1.4 cm. With a lower value, the working cylinder “sticks,” which leads to excessive fuel consumption and a decrease in the service life of the pads. During operation, the car drives as if it were on a handbrake. A gap exceeding the designated range will result in increased pedal travel. Most often it signals the depressurization of the unit.
Main VUT failures, amplifier diagnostics
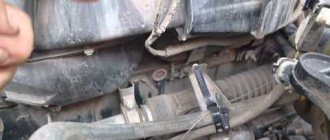
If the VUT breaks down, the car brake system does not fail and will continue to work. Due to such a breakdown, driving the car will be more difficult, that is, the driver must make much more effort to brake. Among the main common causes of VUT failures may be a rupture of the working hose that serves to connect the VUT to the engine itself. Such a hose rupture can easily be calculated by the characteristic hissing sound; to repair the product, you should also check the tightness of the clamp and the quality of the hose itself.
Cracks in the tube
There are often a number of breakdowns inside the device itself; the valve usually fails, and the rubber may also wear out or the elastic partition may rupture, which you can replace with your own hands quite quickly. Also, the breakdown is caused by a rupture of the common diaphragm of the brake booster; here the tightness of this system changes, which leads to air leakage in the device. Sometimes, when the fastening is loosened, the working diaphragm may move a little forward, which leads to the appearance of a gap, and a certain knock will be made when braking. To solve this problem, you should adjust the rod and extend it slightly.
To check the proper operation of a modern computer, a general diagnostic of its operation should be carried out. It is advisable, before checking the vacuum brake booster, to examine the operation of the car engine, which may trip during this breakdown. You can also check the amplifier like this: press the pedal all the way, now the engine starts, if then the pedal goes down, then everything is fine, but if its position does not change, then repair is required. You can also check the VUT in this way: the engine starts and the brake is immediately pressed, then the engine is turned off, and the pedal is pressed for another 30 seconds; if the pedal rises slightly, then the VUT is definitely faulty. Diagnostics and general adjustment of the VUT must be carried out clearly, constantly and functionally, as this is an important aspect of the safety of the entire vehicle.
More information about checking VUT:
Signs of a faulty vacuum brake booster - self-diagnosis
How should you check the VUT for serviceability without resorting to an inspection hole? This is done like this: when the engine is not running, you need to press the brake about 6 times. Then, holding this pedal, start the engine. The pedal should move forward a little, and if this does not happen, first of all you need to check the tightness of the hose connections and the operation of the check valve.
If your vacuum brake booster hisses, then you definitely need to check several places. The most common problem with VUT failure is the hose that connects it to the engine intake manifold. It is imperative to check whether there are any cracks or tears on it; you need to check whether the clamps are tightened. Also, the amplifier may fail due to internal parts, such as a valve. Over time, this valve becomes hard due to rubber wear, so the elastic septum may rupture.
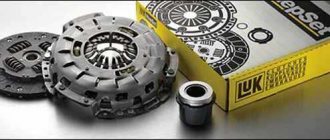
You can simply purchase a vacuum brake booster repair kit and change the boots, sometimes this saves you from hissing. But this is worth doing if you are confident in the serviceability of the amplifier itself.
Signs of a malfunctioning vacuum brake booster include the case when the engine starts to stall. The first thing many car enthusiasts do is buy spark plugs and adjust the valves, but the engine still runs poorly. In such cases, it is worth carrying out a small check: close the amplifier hose so that it does not allow air into the engine. If the engine starts to work properly, then the problem is in the brakes.
Expert opinion
Ruslan Konstantinov
Automotive expert. Graduated from Izhevsk State Technical University named after M.T. Kalashnikov, specializing in “Operation of transport and technological machines and complexes.” More than 10 years of professional car repair experience.
The vacuum brake booster itself is a simple unit, but there is no point in repairing it. To make sure that this particular part is faulty and not some other, it is enough to carry out simple tests. Even a complete beginner in car repair can do the check. There is no need to remove anything. 1. After starting the engine, you need to let it idle for some time, then turn off and press the brake pedal all the way, thereby creating a vacuum. After this, you need to release the pedal and immediately press it all the way. If the VUT is faulty, pressing it again will have a noticeably shorter stroke, since insufficient vacuum is created. If no differences are observed in the pedal stroke, we can conclude that the system is working properly. If in doubt, you can move on to another test. 2. The next check is carried out with the engine turned off. You need to press the brake intensively several times, then squeeze it all the way and start the engine. In a working system, a vacuum will begin to create, and the pedal will drop slightly lower, since the amplifier membrane puts pressure on the rod, and it, in turn, pulls the pusher and the pedal mechanism. If it does not drop lower after starting the engine, it means that a vacuum is not created and the amplifier is faulty. 3. This test will help determine if there is an air leak. After starting the engine, you need to press the brake pedal all the way and turn off the engine. In a working system, the pedal should not return. If, after stopping the engine, the pedal rises under the action of the return spring, it means that the VUT is faulty, since the pressure in the working chamber increases.
Assembly and processing of the product
Before processing and assembly, it is necessary to thoroughly clean all parts of the VUT, and if necessary, replace them. The working parts can also be washed in regular gasoline; this is done with all elements of the amplifier except the common sealing ring, and after that the parts can be dried with a stream of air. Next, the amplifier is adjusted and assembled; first, a ring and cuff are inserted into the base, and then their location is fixed. The housing is secured to the device, and then it is advisable to lubricate the diaphragm with talc and install it on the housing flange. Now the support ring is inserted into the diaphragm, and the product itself is inserted into the shell of the support disk. This operation will be common for both Moskvich and VAZ 2109, since the design of the amplifier is the same everywhere.
It is advisable to coat the central valve with molybdenum disulfide, and after that it is necessary to remove excess of this powder from the part. Now you can put the support washer on the valve, and then install the valve on the washer to fix it. Next, you should insert a diaphragm into the assembled assembly, install a spring and a plate, and then insert the rod itself through the holes. A technological special screw connects the rod and the body, and the overall surface of the body must be treated with lubricant. The cover with the valve is assembled, the spring is installed and the ring is put on, and then the cover and body are assembled.
Operating principle of a vacuum booster
The cover is connected to the housing base, the amplifier is removed and installed on a stand for adjustment. The thread of the general adjusting screw is lubricated to protect the product from self-unscrewing, and the screw must fit into the rod until the piston moves inside the amplifier. The adjusting bolt is lubricated to protect against self-unscrewing, and then screwed into the rod. The pusher is inserted into the body of the common piston and the sleeve is screwed in until it stops. Now the filter and cover are installed, the locknut and fork are screwed onto the thread of the pusher. Next, the amplifier still undergoes a series of tests on a special stand required to control operation.
Typical VUT failures and their symptoms
Usually the vacuum seal fails for the following reasons:
- rupture of the working membrane;
- the valve gasket has dried out;
- wear of the connection or vacuum hose of the pipeline;
- check valve failure;
- loss of tightness of the working chamber.
The main problem with VUT is rupture of the diaphragm due to natural wear of the rubber. A characteristic whistle under the hood and a sinking brake indicate that depressurization has occurred and air is being leaked into the hydraulic part of the brake system. This can be checked by the amount of brake fluid. If the level has dropped, it means it is leaking through a torn inner seal of the master cylinder.
Results, amplifier operation
Today it will be difficult to find at least one motorist who has managed to drive cars with ordinary simple brakes. It was on such old cars that you had to press hard on the brake pedals when you needed to quickly stop the car. You had to put all your might on the brake and put your entire body weight into it, and this operation required a lot of physical effort. Those days are long gone, and the stubborn hard pedal has been replaced by power brakes. For each machine, the principle of the general operation of VUT amplifiers will be identical, that is, the design of the product will be the same everywhere.
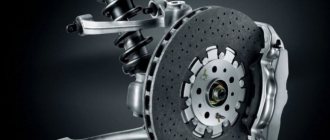
Features of the vacuum brake booster - how does it work?
A working brake booster is capable of several times increasing the force that the driver applies when pressing the brake pedal, thereby ensuring the correct operation of all components of the brake system and high-quality braking. Driving a car with a faulty or out of order “vacuum seal” is very difficult or impossible, since human effort alone when pressing the brake pedal is not enough to activate the calipers and quickly, especially during emergency braking, press the pads to the discs.
Therefore, if this unit malfunctions, it is not recommended to operate the vehicle until the defects that have arisen are completely eliminated. On most modern cars, the vacuum booster is connected to the engine intake manifold by a special pipeline that transmits vacuum from the chamber to the booster. Next, the necessary vacuum is created, the amplifier diaphragm is attracted and, with the help of a special rod, increases the pressure on the piston of the brake cylinder, which significantly simplifies the braking process for the driver.
More expensive types of amplifiers on various car models are additionally equipped with a special vacuum pump of a mechanical or electrical type, which helps the main mechanism. In the first case, the pump is connected to the camshaft by a special drive, in the second it is equipped with an additional electric motor.
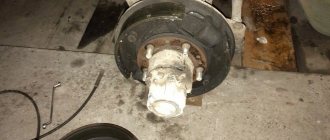
Carrying out repair work on VUT: how to remove the device?
Repairing a vacuum brake booster, first of all, involves removing this device.
How to properly remove the vacuum brake booster?
First, in the engine compartment, you need to remove the upholstery and windshield trim. To prevent air from entering the hydraulic system, the tubes that are connected to the master cylinder do not need to be removed. Then, using a 17 key, the brake cylinder is unscrewed from the booster. To prevent the brake pipes from bending too much, remove the brake cylinder carefully, slowly, tilting it slightly forward. Just remember to disconnect the hose from the fitting!
In order to remove the VUT together with the brake pedal, you need to unscrew 4 bolts of 13, pull out the amplifier, having first disconnected the brake light wire, then pull out the pin that connects the VUT and the pedal and unscrew the 2 nuts located in the mount to the bracket .
The part has been removed. All that remains is to carry out repair work, which, if you do not know the structure of this device perfectly, is best entrusted to professionals.
Video.