Europanel on VAZ 2110 instead of the old torpedo
A frequently asked question is where to buy and how to install a Euro panel or dashboard trim on a VAZ 2110 with your own hands. This is not surprising, I’m already tired of dozens of ancient panels and want to somehow update the interior. In this article I will show you what is needed in order to change the old VAZ 2110 torpedo to the euro and many important issues that you will encounter when replacing the old torpedo.
First, let's define what “installing a torpedo on a VAZ 2110” means. In fact, only the panel overlay is different, and the lower part of the panel remains the same. It turns out that the torpedo is collapsible and consists of 3 parts. We are talking about the very top trim, so installing it is not as difficult as replacing the entire dashboard of a car.
Dismantling
Removing the dashboard takes a lot of time, since there are a huge number of wires under it, through which electricity is distributed throughout the cabin. The fastenings on the dashboard of the VAZ-2110 car are fragile, so every action during dismantling must be careful. If the fastenings are damaged, it will be impossible to firmly install the panel in its original place, and squeaks and noise during movement will increase significantly. In most cases, to improve the design there is no need to completely remove the panel; it is enough to dismantle only the upper part, but there are non-standard situations, so the article offers a description of a complete analysis.
To change the torpedo trim, it is not necessary to remove it completely!
So let's get started, let's look at the panel overlays, which are divided into:
Euro-1, another name is “Caprice” and has an index of 21104. The features of this lining are that it does not have a passenger shelf.
Euro-2, index 2110L, cover but already comes with a passenger shelf.
Euro-3, a cover without a shelf, but under the instrument panel of Kalina, Priora, and has a climate control module with 3 knobs and an emergency stop button.
There are also exclusive panel overlays that make the interior of the VAZ 2110 similar to the Nissan Primera, where the instrument panel is in the center.
In addition to these Euro-overlays, there are overlays that are installed on top of them. For example, the overlay of the Chestnut panel.
It is not difficult to install the Kashtan overlay on the dashboard, so we will not dwell on this, but changing the old panel overlay to the Euro one is already more difficult.
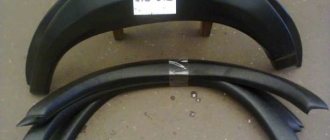
The euro overlay for the panel consists of:
- On the masonry itself
- Inserts for buttons (small insert 2110L-2120031, large 2110L-2120032)
- Air ducts (2114-81080623)
- Device panel trim (2110L-5325124)
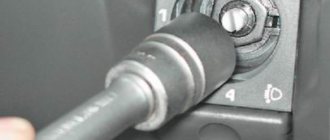
- Double button for turning on the headlights and low beam
- Key for turning on the rear fog lights (with fixation)
- Rear window heating switch (latching)
- Key pads - 2 pcs.
- Plugs instead of keys - 6 pcs.
- Wiring harness for connecting the dual side position switch and low beam headlights
- Block
- Device panel fastenings
- It may be necessary to purchase separately different keys for the VAZ-2114 and pads for them.
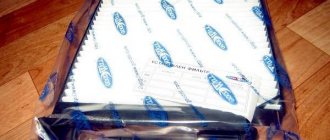
The cover gives the impression of a high quality product. It is softer than the old pad and, as the developers say, is more injury-proof. They also promise improved air flow to the side windows.
Now we are moving towards installation, and here we can distinguish 2 methods, each of which has its own advantages and disadvantages:
Installing the Euro trim without removing the dashboard
In this option, you need to have a drill and screws on hand.
Rely on the lining mounting diagram and start in order:
- Remove the dashboard.
- Open the glove compartment and unscrew the three screws from the inside (positions 1,2,3 in the diagram). Trying to unscrew the screw (pos. 9) from the inside near the windshield is difficult, but doable.
- Remove the 4 keys (next to the control module) and unscrew the screws from the inside (pos. 4.5)
- Unscrew or loosen the fastening by adjusting the backlight (pos.

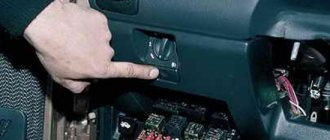
- Open the fuse module and unscrew 2 screws from the inside (pos. 6 and 7)
- Now the panel overlay is held in place only by screws, positions 10 and 11. They cannot be unscrewed, so we break them out or lift the overlay by the right edge and cut them off with a file. (Note: the Euro trim will cover the entire top of the panel up to the windshield, so you don’t have to worry about the appearance when you cut or break the screws)
- Remove the old dashboard trim.
Let's prepare a new dashboard trim for installation
To do this, we cut off the remaining material of the Euro lining. There is no need to cut out any space under the dashboard, otherwise there will be a gap between the control column and the trim. In this place you simply need to make 2 cuts on the sides so that this part of the lining can be slightly bent as needed. Also, there is no need to cut off 10 mm from the sides of the lining in the area of the side air ducts; these places must be adjusted to the location.
We measure the panel overlay and adjust it as necessary. At this step, it is recommended to use anti-creak (soundproofing the panel). This way, you will insure yourself against squeaks in the future.
To install the dashboard in the Euro trim, you can use one of the methods:
- Use fasteners from the Euro lining kit.
- Use fasteners from an old lining (from drilling).
- We connect connectors and Europanel keys according to the instructions:
When the overlay is ready, let's try to install it. Fastening the Europlate in positions 1-7 of the diagram. We fix 35mm screws on top, which are then hidden under a plastic cover.
The advantage of this method is time. If you dismantled the panel, then you will spend no more than 3 hours changing the lining. If this is the first time you are faced with a similar type of work, then about five hours.
Instructions for installing the Europanel on a VAZ 2110
Many people simply don’t like the old instrument panel, while others want a Europanel on a VAZ 2110 because the old one has already lost its appearance, so to speak, it’s worn out. In any case, having decided on a replacement, you need to solve a couple more questions: where to get a suitable panel and how will the installation take place: on your own, or will this task be entrusted to specialists?
Let’s be clear right away: there is nothing complicated about installing a Europanel yourself, so it’s quite possible to decide to do it. In addition, you yourself will control all the stages; you may want to carry out others at the same time as this work - to eliminate noise and squeaks while driving, windproofing, etc.
What types of overlays are there?
If you just need a Euro pad, then there are two options:
- Euro-1 rubber, another name for which is Caprice. It has the same instrument cluster as the VAZ 2110, the only thing is that there is no shelf on the passenger side; Panel trim VAZ 2110 Euro-1
- Euro-2 is practically no different except for the presence of the mentioned shelf. Panel trim VAZ 2110 Euro-2
There is also a Euro-3 overlay on sale. But it is for later and more advanced VAZ cars - Priora, Kalina. The fact is that this version provides more devices, for example, there is a unit for climate control, which is not observed in the top ten. Although, in principle, if desired, installing this option is also possible.
Any Euro pad mentioned above is a quality product, unless, of course, it is a cheap fake. It is softer and even, according to manufacturers, less traumatic, like the old one. In addition, after its installation, the supply of warm air to the side windows should improve.
Panel covers for VAZ 2110
Most often, they want to change the old dashboard because it has lost its appearance.
But there is a way out of the situation by not installing a new panel, but now a Euro panel trim is being sold for the VAZ 2110. Now there are several types of overlays on euro panels:
- Euro - 1, it is also called whim, that is, it is identical to the regular dashboard of the VAZ 2110, only there is no shelf on the passenger side.
- Euro - 2, and of course, you can find Euro - 3, but they are more suitable for modern VAZ cars.
But still, this version of the lining can be installed. If we talk about the quality of such linings, then they are high-quality and soft, unless, of course, you buy a fake.
When purchasing, you should pay attention to ensure that the pad has a complete package of components:
- The pad itself.
- Instrument buttons.
- Instrument panel.
- The design is different, so it is worth purchasing plugs.
- All buttons and pads.
- Air ducts.
- Fuse panel mounting.
Components
When purchasing, you will receive what is included in the kit, namely:
- Europlate;
- Inserts for switches (buttons) of devices;
- Trim on the instrument panel;
- Since your instrument combination may differ from those whose installation is structurally provided, there should also be six plugs; they can be inserted instead of buttons;
- The buttons themselves and two pads for them: • Double – for low beam and dimensions; • To turn on the fog lights; • Heated rear window.
- Air ducts;
- Block and wiring harness designed to connect a double button for side lights and low beam;
- Brackets securing the instrument panel.
Installation without completely disassembling the panel
The panel, as many people know, consists of three parts, but the Europanel of the VAZ 2110 is, in fact, only the upper part of the dashboard. And if the goal is only to replace it, without any modifications or other tuning, then you can safely do a partial disassembly without removing all the equipment.
The dismantling process goes like this:
- Remove the dashboard;
- Open the glove compartment and unscrew the three screws from the inside. It is quite difficult to unscrew the screw near the windshield, but still doable;
- Next to the ECU, pull out 4 buttons and unscrew the screws from the inside;
- We loosen the fastening of the backlight adjustment. You can unscrew it completely, as is more convenient;
- Having opened the instrument fuse box, we also unscrew 2 screws from the inside;
- There are still two self-tapping screws that hold the panel trim, but they cannot be unscrewed without complete disassembly. Therefore, either these screws are carefully broken out, or even cut out by lifting the overlay on the right, using a metal file. At the same time, the appearance of the future updated “face” of the interior will not be affected, since the Euro trim will cover these places;
- Now you can safely remove the cover.
Common faults and solutions
Tidy "tens" with installed LEDs
The control panel may stop working for several reasons.
As a rule, removing the instrument panel is carried out for the following malfunctions:
- The backlight on the “tens” control panel stopped working. In this case, it is necessary to diagnose the condition of the contacts, as well as the condition of the wiring responsible for the suspension. The shield could stop working simply due to the combustion of safety elements, or the lamps could fail due to wear, often the cause is a short circuit. In principle, as practice shows, there are more than enough reasons, so sometimes identifying and solving a problem without a tester can be very problematic.
- One of the most serious problems for which a disassembled device may have to be replaced is complete failure. If there is a system failure, and all sensors and indicators on the dashboard stop working without exception, the controller arrows fall down, and the light bulbs simply do not light up. To eliminate the problem, you must first diagnose safety component number 15, it is marked as F6 and this part is located in the fuse block. If this component is burned out, then this problem can be solved simply by replacing it with a new one. However, first you need to figure out exactly what the reason for its burnout is. First, you should find and eliminate the cause, only then install a new element. As a rule, the cause of a blown fuse is a short circuit in the on-board network.
- The arrows began to spontaneously move up and down. This problem occurs quite often in domestic dozens; as a rule, the main reason is the problem of poor ground contact. Firstly, the ground wire is connected to a partition designed to separate the passenger compartment and the engine compartment. If you need to get to it, you will need to dismantle the audio system from its installation location; the quality of its fixation must be checked. Secondly, quite often during installation the mass is removed to another place so that it is more conveniently accessible. So if you have an anti-theft system, but there is no wire under the car radio, try looking for it under the trim, in particular, next to the driver’s left foot. Thirdly, the ground wire could have been damaged during installation of a new car radio. When the negative wire is connected, the ground wire must be unscrewed. Next, it is reinstalled, however, as practice shows, it is often less reliable than it was originally. As a result of vibrations that occur during driving, driving on uneven roads, including potholes and bumps, the mount begins to weaken over time. Accordingly, this leads to the contact being lost, and this, in turn, leads to the inoperability of the control panel. So, first of all, you need to securely fix the wiring, as this can cause certain difficulties in the future.
- Malfunctions related to the operation of the device itself. If you need to qualitatively check whether everything is normal with this device, dismantle it as much as possible from the installation site, but to do this, do not disconnect the wires that power it. First, the white wire marked X2 is diagnosed, which is connected to the first contact. In addition, using a multimeter, you should also diagnose the presence of voltage on pins 9 and 10. If the system is working properly, you will notice when diagnosing that the system voltage is 12 volts. We also recommend checking the back of the dashboard - all conductive tracks on it should be intact.
- As practice shows, the problem of the control panel not working is often caused by the failure of the cigarette lighter itself. This is because many car enthusiasts practice connecting various electronic devices and gadgets to this socket for various functions. For example, it could be a charger for a mobile phone, a tablet; the charger can also power a video recorder, radar detector, GPS navigator and other devices. Since devices of this type consume a large amount of current, the devices are often damaged by the cigarette lighter itself, and the problem of burnout of the F19 fuse element can also often occur. Accordingly, the control panel either turns off completely or continues to function, only incorrectly. If the fuse is working, you can try to disconnect the plug socket. If these steps do not produce any results, then simply replace the safety device.
- Tuning the dashboard of a VAZ 2110 is often the reason for its performance. The new shield may not have been installed correctly and is no longer working. Or, during installation of the device, not all wires were connected, or they could simply be bent. If the problem is in the wires, then replacing them will solve the problem (video author - LedStyle70).
Installing a new cover
Installation of a new lining occurs after preliminary preparation:
- It is necessary to measure and trim off excess material;
- But it’s better not to cut off what seemed to be superfluous under the instrument panel, otherwise there will be a gap near the steering column, and you can make cuts to bend it a little if necessary;
- Near the side air ducts, trimming is also done during installation, measuring on site;
- We carry out fitting and adjust trimming;
- We apply anti-creak to avoid squeaking in future operation;
- We choose the method of installing the dashboard with a Euro trim: use new brackets included in the kit or drill them out from the old trim;
- All that remains is to install the instrument cluster you need and secure the Euro trim with self-tapping screws, which are then hidden under the plastic trim.
An article on self-soundproofing a panel overlay can be found here: https://vazweb.ru/desyatka/salon/nakladka-na-panel.html
With panel disassembly
The first stage is carried out according to the plan already described. Next, we proceed like this:
- We assemble the trim, installing our instrument cluster, air duct panels and those accessories included in the kit;
- At the base of the panel we carefully attach the wiring harness;
- We connect the wires from the Euro pad to this harness, tightening everything with mounting ties;
- We connect devices to the required buttons using connectors;
- We secure the cover with self-tapping screws.
This method, although it takes more time, provides high-quality sound insulation to eliminate all annoying squeaks.
This material will help you quickly and accurately disassemble the dashboard: https://vazweb.ru/desyatka/salon/kak-razobrat-panel.html
We also recommend replacing light bulbs with high-quality analogues or LEDs. So, the updated panel will look even more solid.
Installation of Europanel on VAZ 2110, 2111, 2112
On the Internet, many are tormented by the question of where to buy and how to install a Euro panel on a VAZ 2110 . This is not surprising, I’m already tired of the old panel and I want to somehow update the interior. In this article I will show you what is needed in order to replace the old VAZ 2110 panel with the euro and an equally important question - where to find it:
First, let's define what “
installing a Europanel on a VAZ 2110 ” is.
If you look closely, only the panel overlay is actually different, while the bottom of the panel remains the same. It turns out that the dashboard is collapsible and consists of three parts. We are talking about the very top trim, so installing it is not as difficult as replacing the entire car panel. For those who don't understand:
- Removing the europanel of a VAZ 2110 is the same as dismantling the old panel, there is no difference (see instructions below).
- To replace only the panel trim, it is no longer necessary to remove the panel!
So, let’s look at the panel overlays, which differ in:
- Euro-1, another name is “Caprice” and has an index of 21104. The distinctive features of this lining are that it has no shelf.
- Euro-2, index 2110L, the cover already has a shelf.
- Euro-3, an overlay without a shelf, but under the instrument panel of a new type (Kalina, Priora), has a climate control unit with 3 knobs and a large emergency stop button.
The euro overlay for the panel consists of:
- The pad itself
- Inserts for buttons (small button insert 2110L-2120031, large 2110L-2120032)
- Air ducts (2114-81080623)
- Instrument panel trim (2110L-5325124)
- Double button for turning on the headlights and low beam
- Button for turning on the rear fog lights (with locking)
- Button for turning on the heated rear window (with locking)
- Pads for buttons - 2 pcs.
- Plugs instead of buttons - 6 pcs.
- Wiring harness for connecting the dual headlight and low beam switches
- Block
- Instrument panel brackets
- You may need to purchase separately various buttons for the VAZ-2114 and pads for them.
The cover itself gives the impression of a quality product.
It is softer than the old-style pad and, according to manufacturers, is more injury-proof. They also promise improved air flow to the side windows. Now we move on to installation, and here we can distinguish two methods, each of which has its own advantages and disadvantages:
Installing the Euro trim without removing the panel
We try on the panel overlay and adjust it if necessary. At this stage, it is recommended to use anti-creak (panel soundproofing). This way, you will insure yourself against squeaks in the future.
To install the dashboard in the Euro trim , you can follow one of the following methods:
- Use the brackets from the Euro trim kit.
- Use brackets from the old trim (drill).
We connect the Europanel buttons according to the instructions:
The pinout of the European hazard warning button (379.3710-02M) is the same as the standard button (connectors: 6,7,1,2,5,9,10,4,11,12) are the same. Connection diagram for external lighting buttons (from VAZ 211415) Connection diagram for PTF button from VAZ 211415: Install the rear window heating button: Now that the trim is ready, we try to install it. Fastening the Europlate in positions 1-7 of the diagram. We secure it on top with 35mm self-tapping screws, which are then hidden under a plastic cover.
The advantage of this method is time. If you have already resorted to dismantling the panel, then you will spend about 3 hours replacing the lining. If this is your first time encountering this type of work, then about 6 hours.
Installing Euro trim with panel removal
If you decide to completely remove the dashboard, then follow these instructions.
It will be more convenient to work if the panel is at home. We remove the standard panel trim according to the instructions already described.
Similarly, we cut the euro-overlay around the perimeter, according to the instructions attached to it. We assemble the cover: install the air duct panels and accessories that came with it.
Carefully lay out the wiring harness and secure it to the base of the panel. We glue all joints in the same way with anti-squeak. We attach an additional harness of the Euro pad to the wiring harness and tighten all the wires in the bundles with additional mounting ties. We prepare and connect connectors to additional buttons.
We fix the Euro-overlay to the panel with dozens of self-tapping screws.
The advantage of this method is that you have the opportunity to make noise insulation behind the panel, where a lot of noise from the engine comes from, and also completely rid the panel of squeaks. There is only one drawback - the time it takes is at least 10 hours.
Replace the old panel with Euro-3
- Buy a Euro-3 torpedo assembled with under-torpedo wiring , find wiring diagrams for the old-style and new-style panels and do the docking yourself. Forum thread.
- Buy Euro-3 overlay.
Then you should replace the old-style automatic control system (2 twists) with a new one (3 twists) according to this instruction, or this one. Leave the old device, or replace the old-style dashboard with a new one (Kalina/Priora, 1118-3801010-12), again manually connect the connectors (they are different) according to the pinout diagrams.
Where to buy a europanel (euro-overlay) for a VAZ 2110?
Conclusion
I think you will agree that the VAZ 2110 with the Europanel will become a more respectable car.
The only drawback of the Euro trim is that to remove the dashboard you need to remove the trim, so at the assembly stage it would be advisable to replace the light bulbs with better ones (Osram, Philips, etc.) in order to forget about replacing them for a long time. By the way, if you still want to change the panel completely, then try installing a panel from the Priora in the top ten.
If I decided to replace the VAZ 2110 dashboard, then..
Installation and repair instructions
View after dismantling the panel
Replacing the panel, especially if you are installing it on an old VAZ 2112, is a certain difficulty. Older machines do not have some of the functions for which the panel has buttons. The wiring may need to be worked on.
Tools and materials
Standard tools will be required.
But a certain amount of additional materials is needed:
- you will need plugs for extra buttons that are not needed on an old car;
- air duct;
- various inserts, buttons (5 pieces) and pads;
- a new wiring harness suitable for the wiring diagram;
- brackets for mounting the instrument panel;
Algorithm of actions
The shield is fully installed.
First you need to remove the old panel. This is done in the same way as on other models of VAZ cars.
When installing, you need to replace the ignition switch with a decimal or Kalinovsky one, depending on how many terminals there are on the block to the lock. You can leave the old one and rearrange the wires, but the new one will work and look better.
The instrument panel wiring needs to be replaced. Also, connect the dimensions with additional two wires in Ш4/13 and Ш3/13 on the mounting block. This applies to older units with 11 relay spaces.
Depending on whether it is an injector or a carburetor, the connection has its own nuances. If you bought a solid factory panel, then instructions should be included with it. Briefly, it can be noted that the injector is not equipped with a speed sensor, please take this into account when installing.
The car's electrical circuit can be of great help. If it is not there, you can find it on the Internet. There are some differences between the VAZ 21124, 2111 and other car variants, so find yours.
If the instrument panel does not work after turning it on, check that the wiring is connected correctly - this is usually the error.
Removing and installing a torpedo on a VAZ 2110 with your own hands
The need to remove and replace the dashboard on a VAZ 2110 car may arise when repairing devices and parts located under its surface. In particular, it is with the removal of the dashboard that the car’s air intakes are inspected. Sometimes they can become clogged and prevent your heating or air conditioning systems from working properly. The process of removing and replacing the dashboard on a VAZ 2110 is not particularly simple. To carry it out, you will need to be patient and master the skills of masterly working with instruments.
In today's article we will tell you how to remove, replace, install, modify and improve the dashboard on a VAZ 2110 with your own hands. In addition to all this, we will give you a photo report of the work done and show you an interesting thematic video.
What should be considered when replacing a torpedo on a VAZ 2110
Replacing the torpedo on a VAZ 2110 will not only add some charm to the car, but can greatly improve the ride comfort not only for the passenger, but also for the driver. After all, you can replace the dashboard with a torpedo. When replacing it, the following points should be taken into account:
- What exactly does the car owner want to achieve with a replacement? This could be an increase in space in the cabin in front of the front seat.
- Just to give, so to speak, an expensive look to the car.
- Organize a place to install additional devices - radios, screens, and so on.
In any case, you can get the most beneficial effect from such an undertaking.
The first thing to consider when selecting a torpedo for a VAZ 2110 is its size and the shape of the car’s interior.
It is also worth considering the category of people, passengers, who will be in the car. This will sometimes improve the safety of the vehicle.
Once the type of torpedo is determined, it is worth thinking about what additional functions it should perform. This could be the installation of additional equipment, space for mobile phones, space for a car audio system - speakers, or a radio.
The next stage is choosing a coating. It is best to get it as universal as possible and try to install torpedoes with the following coatings:
- Plastic. The torpedo is made entirely of plastic without unnecessary inserts.
- Plastic with wooden or leather inserts.
These are the two most popular types of torpedoes for the VAZ 2110, which are the most practical to use and will best suit almost any type of interior.
Europanel for VAZ 2110-12: what you need to know before buying
Hot summer heat! The temperature outside the VAZ 2110 on the surface of the body reaches 80 ° C, burning off the paint and drying out rubber products by the falling rays of the sun. Direct incinerating effects of rays cause cracks in plastic and rubber parts. The heat reverses the process carried out when molding plastic parts, disrupting the chemical composition of the substance during the constant heating process, creating a haze on the windshield that reduces visibility.
Increased heating has a particularly negative effect on the dashboard, the main part of the vehicle's interior. Car enthusiasts pay attention to the condition of the panel every day. The budget car class is equipped with panels made of polyvinyl chloride - a thermoplastic plastic. The stylish interior design of models of this type will not let car lovers get bored because the decor is swollen from heating by the sun. Although the soft polyurethane dashboard of the VAZ 2111 is also worthy of careful treatment in regions with maximum solstice. You can avoid the appearance of cracks and fading of the material by constantly covering the panel with any object, which will protect the panel from direct rays, but not from heating in a closed cabin.
An economically viable way out of the situation with an unsightly dashboard is only to replace the product with a luxury version for the VAZ 2112. The idea of changing an element is to recreate the original features of the vehicle’s interior in an updated European class design, where each panel element has a functionally justified location. The configuration of the instrument panel with cutouts for ventilation holes, placement of buttons and warning sensors meets the wishes of most car enthusiasts.
Tuning a VAZ 2112 should end with updating the appearance of the interior, highlighting and personalizing the car, raising it to a European class, replacing the old instrument panel with unsightly cracks and a faded surface with a part made of modern composite materials. Attracting the glances of amazed passers-by to the car, after a luxury Europanel is installed for the interior of the VAZ 2110 and the VAZ 2112 model, the car enthusiast is able to fall in love with his vehicle again and is ready to spend hours in the cabin, feeling the aroma of novelty and the look of European style with maximum and ergonomic functionality of the arrangement of elements on the instrument panel.
How to remove the dashboard on a VAZ 2110 with your own hands - step-by-step instructions + photo report
In order to remove a torpedo on a VAZ 2110, you must perform the following procedure:
- Unscrew 2 screws on the right and 2 on the left on the central tunnel.
- Next, remove the covers on both sides.
- Remove the plug near the handbrake.
- Unscrew the screws on the left and right of the central tunnel.
- Unscrew the screws at the back of the central tunnel.
- Removing the plastic of the central tunnel.
- Disconnecting the cigarette lighter wires. Mark so as not to get confused when connecting to the assembly.
- Remove the gearshift knob cover.
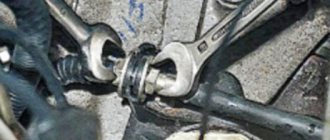
- Using a wrench, unscrew the interior heating air duct.
- Removing the air duct.
- Unscrew the fastenings of the central panel from the front.
- Unscrew the fastenings of the central panel at the back.
- We finally remove the panel.
- We unscrew the screws of the glove compartment.
- We remove the glove compartment.
- Disconnect the glove box light wires.
- We unscrew the screws inside the space in place of the glove compartment.
- Unscrew the remaining screws on the sides of the torpedo.
- Unscrew the torpedo bolts as follows as in the photo.
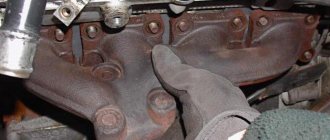
- Removing the air duct.
- Unscrew the nut on the dashboard under the air duct.
- We lower the torpedo from the pins.
- We disconnect the wires from the front panel and mark them so as not to get confused during assembly.
As you noticed, if you follow our instructions, the process becomes much easier. You can remove the VAZ 2110, 2111, 2112 torpedo with your own hands, but it is better to do it with an assistant.
How to remove the instrument panel?
In order to remove the instrument panel in a VAZ 2110, you must perform the following steps:
- You need to disconnect the negative terminal wire from the battery;
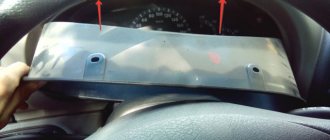
- unscrew the screws and remove the instrument cluster;
- unscrew the 2 fastening screws that secure the instrument panel to the trim and remove the instrument cluster from the socket;
- You need to disconnect the wiring harness from the dashboard.
Installing a torpedo on a VAZ 2110 - step-by-step instructions
In order to install the instrument panel of a VAZ 2110 (torpedo), you must perform the following steps:
- Install the instrument panel so that the guide pins fit into the holes on the instrument panel.
- At the same time, move the steering column adjustment knob into the hole on the instrument panel.
- Using a screwdriver, drive the threaded rods into the holes on both sides of the panel.
- Install the foot warmer air duct so that the air duct fits into the hole in the air distributor housing.
- Connect all terminals to wires in reverse order. Secure the panel and reinstall all components that were removed during disassembly. After completing the work, check the operation of all devices.
Tuning ideas
VAZ 2112 with Europanel
If you have a VAZ 2112, tuning is available for a panel that is not too wide. But you can install additional instrument lighting so that you can see all the readings at night in the dark. It just looks stylish, especially if you use a tuning blue color for the lighting.
This panel has a lot of space for buttons that are not needed on an older machine. But you can install heated side mirrors and turn it on via these buttons.
Improvement and tuning of the dashboard on the VAZ 2110
One of the most popular ways to improve the dashboard on a VAZ 2110 is its sound insulation. In order to do this, you must perform the following steps:
- We remove the tidy, I already told you how to do this earlier
- Next we foam, but under no circumstances should you pile up a huge pile of foam at once, it won’t dry out in a week.
- Don’t forget to try it on so that later it doesn’t turn out that your steering wheel touches it, or it’s just too high.
- In principle, all the work consists of two things, you cut, foam, cut again and so on many times.
- Next, we apply the cheapest putty we could find.
- Next we cover the dashboard with Shumka.
- We install the torpedo back.
You can modify the dashboard of a VAZ 2110 in different ways, someone covers it with leather, someone inserts an LCD monitor into it, in tuning a car it all depends on you and your fantasies and desires.
Installing the dashboard trim
The cover will be installed after complete disassembly - it’s easier and more convenient. The instructions say that the trim must be cut around the perimeter. Now you can assemble the case: we place in it the accessories and instrument connectors that came in the kit. Carefully lay out the wiring from the base of the cover. All joints of the new VAZ 2110 panel must be glued with anti-creak.
We attach additional harnesses to the standard wires and tighten them with zip ties. Please note that there are additional buttons on the cover - standard connectors must be connected to them. The cover is attached to the original panel using self-tapping screws. Now you can carry out the installation in reverse order.