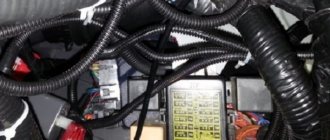
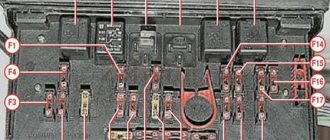
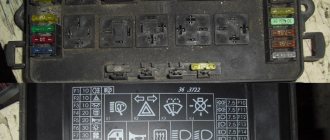
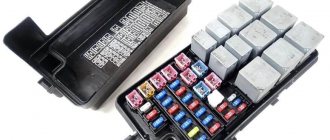
Fuse and relay boxes in the engine compartment
Main block with relays and fuses
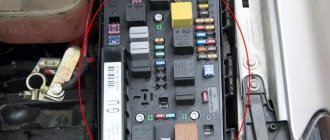
It is located under the hood on the left side of the engine compartment, next to the headlight and battery. Closed with a plastic protective cover. 3 fastenings on different sides.
The back of the cover contains current information describing the fuses. Changes in the presented diagrams are possible depending on the configuration and year of manufacture of your car.
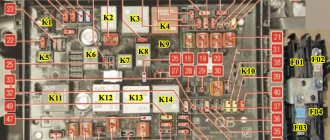
Photo block diagram
Description
| Number | Protected circuit |
| 1 | 15A Transmission control unit |
| 2 | 15A Engine control unit |
| 3 | Not used |
| 4 | 10A Canister air solenoid valve |
| 5 | 15A Ignition |
| 7 | Not used |
| 8 | 15A Fuel injection system |
| 9 | 15A Fuel injection system, ignition system |
| 10 | 15A Engine control unit |
| 11 | 10A oxygen concentration sensor |
| 13 | 7.5A Canister solenoid valve |
| 14 | Not used |
| 15 | 20A Rear window wiper |
| 16 | 7.5A Ignition, cabin air quality sensor (air conditioning system) |
| 17 | 5A Ignition, airbag |
| 18 | 10A Throttle Position Sensor |
| 19 | Not used |
| 20 | 20A Fuel Pump |
| 22, 23, 29 | Not used |
| 30 | 15A ABS |
| 31 | 20A Body control unit |
| 32 | 20A Same |
| 33 | 30A Heated front seats |
| 34 | 25A Roof hatch |
| 35 | 30A Audio system |
| 36 | Not used |
| 37 | 10A Fuse for right high and low beam headlights |
| 38 | 10A Left headlight high and low beam |
| 39,40 | Not used |
| 46 | 10A Cooling fan |
| 47 | 10A oxygen concentration sensor |
| 48 | 15A Fog lights |
| 49,50 | Not used |
| 51 | 15A Horn |
| 52 | 15A Instrument panel |
| 53 | 10A Electric mirror |
| 54 | 5A Light switch, light control |
| 55 | 7.5A Folding mirrors |
| 56 | 15A Windshield washer |
| 57 | 15A Steering column lock |
| 58 | Not used |
| 60 | 7.5A Mirror heater |
| 61 | 7.5A Mirror heater |
| 62 | 10A Air condition |
| 63 | 7.5A Rear window sensor |
| 64 | 5A Air quality sensor |
| 65 | 7.5A Rear fog lights |
| 66 | 15A Rear window washer |
| 67 | 20A Fuel supply control unit |
| 68 | Not used |
| 69 | 5A Battery Voltage Sensor |
| 70 | 5A Rain sensor |
| 71 | Not used |
| Fuse links | |
| 6 | 30A Windshield wiper |
| 12 | 30A Starter traction relay |
| 21 | 30A Rear electric windows |
| 22 | Not used |
| 24 | 30A Front electric windows cruze |
| 25 | 20A Electronically Controlled Vacuum Pump |
| 26 | 40A ABS |
| 27 | 30A Electronic key control system |
| 28 | 40A Heated rear window |
| 41 | Not used |
| 42 | 20/30/40A Engine cooling fan |
| 43,44 | Not used |
| 45 | 40A Engine cooling fan |
| 59 | 30A Diesel fuel heater |
| Relay | |
| R1 | Air conditioning compressor drive clutch |
| R2 | Starter traction relay |
| R3 | Engine cooling fan (K7) |
| R4 | Front wiper mode (speed) relay |
| R5 | Front wipers |
| R6 | Not used |
| R7 | Engine control system main relay |
| R8 | Fuel pump |
| R9 | Engine cooling fan (K2) |
| R10 | Engine cooling fan (short circuit) |
| R11 | Not used |
| R12 | Engine cooling fan (short circuit) |
| R13 | Engine cooling fan (K1) |
| R14 | Not used |
| R15 | Ignition |
| R16 | Pre-heating system (diesel) |
| R17 | Heated exterior mirrors |
High Power Fuse Box
It is located on the battery cover.
Scheme
Decoding
| 1 | 100A Fuse Box - Instrument Panel |
| 2 | 100A Fuse Box - Instrument Panel |
| 3 | 80A Electric Power Steering (EPS) (NJ1) |
| 4 | Not used |
| 5 | 250A Fuse Box - Additional Battery |
| 6 | 250/500A Starter Motor |
Additional block with relay
Depending on the configuration, there may be a separate unit with a relay under the hood.
- Cooling fan medium speed relay;
- Cooling fan speed control relay;
- Cooling fan medium speed relay.
Engine fuse box
It is located at the battery terminal.
Engine fuse box
| № | Description | A |
| 1 | Fuse Box - Instrument Panel | 100 |
| 2 | Fuse Box - Instrument Panel | 100 |
| 3 | Electric Power Steering (EPS) (NJ1) | 80 |
| 4 | Not used | – |
| 5 | Fuse Box - Auxiliary Battery | 250 |
| 6 | Starting motor | 250/500 |
| № | Description | A |
| 5 | Glow plug control module | 80 |
| 6 | Electric auxiliary heater | 100 |
| 7 | Not used | – |
| 8 | Not used | – |
Fuse box in the cabin
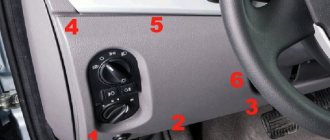
The block is located in the panel on the left side directly at the driver's left knee.
To gain access, open the small items storage compartment and pull it up. Then you should remove the bottom of the drawer from the panel stops and pull it out.
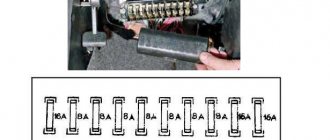
Photo of the block
Scheme
Table with designation
| 1 | 10A Mobile phone control module |
| 2 | Not used |
| 3 | 25A Body controller |
| 4 | 20A Radio receiver |
| 5 | 7.5A Parking assistance control module, sound emitter, steering column switch - center console, display |
| 6 | 20A Cigarette lighter - front |
| 7 | 20A Socket for additional electrical appliances - center console 1/2 |
| 8 | 30A Body Controller |
| 9 | 30A Body Controller |
| 10 | 30A Body Controller |
| 11 | 40A Door Control Module - Electric Fan |
| 12 | Not used |
| 13 | 25A Seat heating control system module |
| 14 | 7.5A Diagnostic block, oil supply fitting |
| 15 | 10A Airbag diagnostic and control module |
| 16 | 10A Rear compartment door release relay |
| 17 | 15A HVAC control unit / HVAC control panel assembly |
| 18 | Not used |
| 19 | Not used |
| 20 | Not used |
| 21 | 15A Instrument cluster |
| 22 | 2A Ignition switch/door lock receiver |
| 23 | 20A Body Controller |
| 24 | 20A Body Controller |
| 25 | 20A Steering column lock control module |
| 26 | Not used |
| Note: The relays listed below are service-free printed circuit board (PCB) relays and are located inside the unit. | |
| 1 | Releasing the rear compartment door |
| 2 | Logistics mode |
| 3 | Auxiliary Power Relay |
Please note: the cigarette lighter fuse in the Chevrolet Cruze is located in this block at number 6.
Relays and fuses for Chevrolet Cruze sedan, hatchback, station wagon (1.6 and 1.8): block diagrams
Fuses are designed to break because they prevent the entire system from being overloaded. They are the noble victims of the electrical world.
Locate your vehicle's fuse panel. You may need to take apart the owner's manual, but they can usually be found under the steering wheel. It also makes sense to look under the hood. You need to remove the Chevrolet Cruze fuse panel cover. Inside you'll see a series of colors and numbers that represent different amperages, while a diagram (usually on the back cover) will show you what each fuse does in your car. Find the fuse that is blowing. If the item is knocked out, the inside will usually be black or the metal thread may be broken. If it's dark, you may need a flashlight to make this faster. We take out the broken fuse if its exact pinout is known. You can use various tools to remove a blown fuse
Fuses can break easily, and a broken fuse is much more difficult to remove than a completely intact fuse. Insert a new, replacement fuse (or replacement fuses) of the correct amperage - refer to the fuse panel and owner's manual. Using a fuse of the wrong amperage can cause serious problems in the circuit. Keep several extra fuses of varying strengths
In a jam, you can always take the fuse out of the lesser used function with the same amperage and use it for something more pressing, but that's just a temporary solution. For example, if the fuse for your power windows blows and there is no rain in the forecast, take the working fuse allocated to the rear window and use it for the power windows. Just double check that the amperage for each is the same. Start the ignition to see if your work has paid off. If the same fuse fails soon after replacement or fails at all, it may be time for a trip to a mechanic for a diagnosis.
Where are the fuses located on a Chevrolet Cruze?
Even a novice car enthusiast can replace Chevrolet Cruze fuses on his own after studying the material we offer. The process itself is simple and, knowing what is located where, you can do it in just five to ten minutes.
The fuses in the car are located in fairly accessible places. In order to get to them, you do not need to remove bulky components or dismantle complex systems. The first is located in the engine compartment on the right side at the rear, near the battery.
Second, in the cabin on the left, behind the glove compartment
It is very important to learn how to change them, because their failure is a common occurrence. It would be stupid to immediately go to a service station if something in the electrical equipment has failed or the cigarette lighter has simply stopped working
You can first try to fix the problem yourself.
Chevrolet Cruze Fuse Box
Reviewed Chevrolet Cruze 1.6 1.8 cars from 2006, 2007, 2008, 2009, 2010, 2011, 2012, 2013
- Where is the fuse box located?
- Under the hood - number 12
- To gain access to the fuses in the engine compartment, you need to release the three latches of the block cover, then remove it.
- On the inside of the cover there is a diagram of the location of fuses, relays and fuse links.
- The mounting block contains tweezers for removing and replacing fuses
Before replacing a fuse in a Chevrolet Cruze, find out the cause of the blown; if you replace the fuse and it blows again, you need to contact an auto electrician.
Do not change fuses to a different rating or jumper, this may lead to a fire or failure of the electrical equipment protected by this fuse.
The purpose and amperage of the fuses are shown in the table below.
- In order to replace the fuse in the engine compartment block of a Chevrolet Cruze, use tweezers to grab the fuse and remove it from the connector.
- Then install a new fuse
- To replace the relay and fuse link, remove them by hand by shaking them to the side
- Mounting block of fuses, relays and fuse links in the engine compartment of a Chevrolet Cruze with an open cover
Chevrolet Cruze cigarette lighter repair
In some cases, you can restore your device using simple manipulations. Below is a table with repair recommendations.
| Breakdown option | Repair |
| Faulty contact points | Adjust the metal clips using a flat-head screwdriver. |
| Appearance of rust or oxide stains | Use a file or sandpaper to rub the rusty areas down to the metal base. |
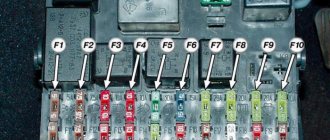
| Faulty protective element | Change the cigarette lighter fuse in the mounting block marked F6 with a rating of 20 amperes. |
| Broken cables | Check the integrity of the cables using a tester, solder or replace broken cords. |
| Burnt out nichrome thread inside the device | Replacing the Chevrolet Cruze cigarette lighter with a new one. |
Relay structure and its purpose in a car
The principle of operation of any standard relay in a car is the closure or switching of two contacts on a power electrical circuit using an electromagnetic field. Closing the contacts directly through the switch will require the use of thick wires and will lead to a voltage drop in the entire on-board network. A switch with an electromagnetic coil inside allows a low current to close the desired contact and apply voltage to a section of the circuit. Through it, headlights, heating and cooling fans, power windows, a starter and other components are powered in a Chevy Niva car.
A typical fuel pump relay 75.3777-10 has 4 contacts, a coil with an armature, and a spring for opening the contact. When voltage is applied to the control contacts, the rod is drawn into the winding and another pair of contacts is closed. It turns off automatically as soon as the low-current connectors are de-energized.
Advantages of using relays in Niva Chevrolet cars:
- spontaneous leakage current in the on-board system is eliminated;
- reliable control of all electric motors;
- quick and guaranteed start of electrical mechanisms;
- Network overload protection.
The fuel pump relay has appeared on cars of the Chevrolet Niva family since 2003, when an injection engine was installed. The engines of the VAZ 21213 family are equipped with a carburetor and do not have a relay in the fuel supply system.
Chevrolet Cruze fuses: diagram, block location
Modern cars are relatively reliable and safe. They are created taking into account the maximum period of trouble-free operation. However, there are times when sensitive electronics fail, breaking down at the most inopportune moment.
Chevrolet Cruze fuses do not fall into the category of problem parts. But due to various reasons, breakdowns still occur. This can happen either due to a short circuit or due to the inexperience or illiteracy of the owner.
Next, let's look at where the main fuses are located on the Chevrolet Cruze, as well as which one is responsible for what.
Removal and replacement process
There are cases when, after replacing a certain element, the breakdown is not resolved. Even after complete maintenance of the suspected location of dysfunction, the malfunction remains
In this case, the manufacturer recommends paying attention to the seat itself.
There are often times when the main part is fully operational, there are no short circuits in the wiring, but the car still behaves inappropriately. In this case, further diagnostics takes on drastic methods. We are talking about completely replacing the fuse box with a known good one, or, in other words, a new one. The reason is the burnout of the tracks.
To effectively dismantle the blocks, certain manipulations must be performed. To do this, you do not need to take the car to a mechanic at a service station. The whole procedure can be done at home using a primitive set of tools.
Replacing the engine compartment
To replace the engine compartment fuse box, you need to perform the following sequence of actions.
- Disconnect the positive terminal of the battery.
- Using a 10mm wrench, unscrew the three panel fixing bolts.
- Use a flathead screwdriver or similar tool to pry off the mounting terminals.
- Remove the block from its seat.
- Unscrew the bundle of wires from the end.
Replacing the interior unit
For the interior part, the sequence of actions is as follows:
- Turn off power to the battery.
- Remove the lower part of the dashboard.
- Disconnect the wire block from the element.
- Then you need to pull the unit up and towards you.
After replacement, assembly must be carried out in the reverse order.
Tinting of the future! TROKOT frame curtains provide privacy for your car with protection from the sun and fines. — TROKOT curtains are 10 times better than tinting! — More than 55,000 Russian motorists chose these curtains!
- Set up in 10 seconds, remove in 3 seconds!
