The headlight of a modern car is a high-tech, and therefore very expensive product. However, the stones and gravel flying from under the wheels don’t care how much it costs. And if there is durable metal on the body under a layer of paintwork, then the headlight glasses are practically defenseless against impacts.
It is advisable to protect them, thereby reducing the risk of upcoming replacement. Read on to learn how to do this correctly.
Approach this issue with caution
What are the disadvantages?
The anti-gravel film on the headlights dissipates the STG line, resulting in blinding oncoming cars. Scattering also results in loss of light beam, which causes inconvenience to the driver. Therefore, if the decision is made in favor of booking, then what kind of film should be used to cover the car headlights? It is best to do this with polyurethane. It is absolutely smooth, without its own shagreen. As a result of pasting, the light beam does not change. Vinyl is best used for additional protection of other parts of the car. On car enthusiast forums there are different opinions about whether it is possible to glue film to car headlights.
But at least most owners agree on one thing. Polishing the headlights and covering them with film, using protective elements such as covers, using film for the rear lights - all this preserves the appearance and makes the car respectable if sold.
Where is the best place to do it? In auto repair shops or in your own garage
After finding out all the pros, the question naturally arises: “How to properly glue the film to the headlights?” Where is the best place to do this? In car workshops offering this service or at home? Having ordered fog lamps with film from a car repair shop, the owner pays and picks up his car with protected optics. The auto repair shop takes care of all the visibility settings for the vehicle's optical system.
But you can watch a video on YouTube “how to armor headlights with film yourself” and perform this procedure in your garage.
It is necessary to prepare tools and carry out preliminary work. You will need:
- film material;
- rubber spatula or plastic card;
- construction hair dryer;
- blade or sharp knife;
- acetone or industrial alcohol.
Passing MOT and possible punishment
How to tint headlights with film
Car owners who want to do tuning often think about whether it is possible to tint headlights with film. It is impossible to answer this question unequivocally, the point is not spelled out in the Code of Administrative Offences, but still the owner of the car can be punished. Each case is considered separately.
Difficulties may arise when passing a technical inspection. On the one hand, the law does not punish tinting headlights, but on the other hand, lighting devices must meet a number of requirements specified in GOST. During maintenance, they are necessarily checked for light transmittance, mechanical damage, size compliance, presence of foreign elements and other parameters. If the light transmittance of the headlights is below 85% due to the film, you will not be able to pass the MOT.
If the headlights are tinted with film, the fine can vary within several thousand rubles. Punishment is imposed only in cases where the light transmission capacity is greatly reduced and the car can create an emergency situation on the road. Such cars are classified as faulty or those whose operation is prohibited. According to the Code of Administrative Violations, fines are imposed in the following amounts:
- 3000 rubles for individuals;
- up to 20,000 rubles for officials responsible for operating the vehicle;
- up to 500,000 rubles for legal entities.
For driving a car with tinting, the driver can be fined 500 rubles if the lighting devices do not transmit enough color. If the color red is used on the headlights, the driver may be disqualified from 6 to 12 months.
For tinting rear headlights with film, the fine does not exceed 500 rubles, but in practice it is usually not charged.
And although the law does not provide for punishment for tinting lighting fixtures, it is worth assessing all the risks before applying it. If you want to protect lighting devices from damage, you should choose transparent film. If the main goal is tuning, you should pay attention to the choice of material and refuse to purchase a dark-colored option, which significantly impairs the passage of light.
Features of operation after pasting
In order for the film applied to the headlights of your car to serve as long and effectively as possible, you should follow a few simple rules during the operation of the vehicle.
- If possible, use manual washing. Or at least ask the car wash employees not to spray the headlights with high water pressure. This will help prevent accidental peeling.
- Buy a small bottle of detergent that is designed specifically for use on vinyl or polyurethane flooring. They are relatively inexpensive, plus the consumption will be insignificant. Even with weekly washing.
- Avoid using products like polishing pastes that contain fine abrasive components. When properly cared for, the protective coating does not require polishing.
- Do not wash or treat the machine with hot steam. This service is available at some car washes and does not harm regular headlights that are not coated with armor material. But the film itself can peel off from hot steam.
- When using vinyl covering, do not forget about the low frost resistance of this material. Therefore, it is better to store the car in a garage. If you have to leave it on the riser, use an insulated awning. Since polyurethane armor is not afraid of frost, you can skip this point.
- In both cases, you should avoid severe overheating. For polyurethane it is less dangerous, but in direct sunlight at the height of summer, or when the car is in close proximity to a heater, the film may come off the surface.
Initially, high-quality armor material for headlights, which was applied in compliance with the technology, can last about 5-7 years, subject to proper care. But in case of active use of the vehicle off-road, the service life is reduced to 2-4 years.
Effectiveness of headlight armoring with vinyl film
Do-it-yourself car wrapping
The special vinyl film itself is not durable. It consists of ordinary vinyl, which is easy to cut or tear. However, the molecular structure of the vinyl film makes it possible to significantly reduce the impact energy of a stone hitting the headlight from the car in front. In other words, when a stone hits a headlight armored with vinyl film, such a film distributes the impact energy from the stone, and the headlight does not receive a point blow, but is distributed over a larger surface. Thus, the impact energy density is reduced, and the surface of the headlight is able to withstand a blow from a stone without breaking. However, if a too large stone does come across, the effectiveness of the vinyl film will not be enough, and the surface of the headlight will still crack; it will not scatter to the sides, since the film will hold all the fragments in place. In other words, vinyl film will allow you to drive with such a cracked headlight for some time before purchasing a new one.
Why was there a need for protection?
The need for anti-gravel film for headlights arose due to the fragility of the material from which car lights are made. High-strength glass has been replaced by transparent polymer materials or inexpensive types of glass. Plastic, capable of withstanding the impact of small stones and objects, remains defenseless when exposed to dust and dirt with admixed substances, from which it becomes cloudy and loses its light-transmitting qualities.
Before it comes to choosing the material for covering the headlights, you need to decide for yourself whether it is worth armoring the headlights with film. Along with the positive aspects of the budget film, car enthusiasts also noticed its disadvantages.
How to tint headlights with film yourself - detailed instructions
How to tint rear and front headlights with film and varnish
If you don’t know how to tint your headlights with film yourself, check out the step-by-step instructions below. First, prepare the materials and tools that you will need during the work process:
- film for tinting headlights;
- water;
- degreaser;
- napkins;
- stationery knife;
- squeegee.
Do-it-yourself headlight tinting with film is performed in the following sequence:
- Prepare the film. Cut the blank according to the dimensions of the lighting fixtures. Cut off the material with a margin and remove the excess at the end.
- Prepare the surface of the lighting fixtures. First, wash them from dirt with water, then degrease them with a special product and wipe dry with a napkin or soft cloth. For degreasing, you can also use wipes impregnated with a special composition.
- Wet the prepared surface with water. It is better to use a spray bottle for these purposes, but if you don’t have one, a clean rag will do.
- Remove the protective layer from the film and apply it to the surface of the lighting fixture.
- Straighten the material with a squeegee. Using a fairly strong pressing force, smooth the film from the center to the edges so that small air bubbles come out.
- Trim off any remaining material. Use a sharp utility knife for this.
The technology for tinting the front and rear headlights is no different.
How to do the pasting correctly
If the car has been in use for more than two years, before armoring the headlights with film yourself, polish the lenses. Small scratches are polished with a special paste, medium scratches are polished by hand, and deep scratches are polished using a special set of tools. If polishing headlights and armoring with film cannot be done at home, then it is better to turn to specialists.
Film blanks from different manufacturers can be ordered online for any make of car.
After polishing, the lenses are thoroughly washed and wiped with alcohol. Then the film blanks are cut to size, leaving a margin of 2-3 cm.
After heating with a hairdryer, the workpiece is applied to the plastic lens without removing the backing. The protective layer is removed after cooling, carefully smoothing it with a spatula, preventing the formation of bubbles.
You may need to remove the old film.
Advantages of booking car headlights
In addition, this coating has a number of other advantages. Thanks to its smooth surface, it is easy to clean from insects and dirt when washing your car. Absolutely neutral when washing cars with non-aggressive chemical detergents. And if you get scratches from small stones or branches, such films can be easily dismantled and replaced with new ones. The glass will remain perfectly clean and undamaged.
Protective effect of armor film
Why were vinyl materials chosen? As it turned out, this material does not change the luminous flux and its magnitude. According to the manufacturers of such accessories, the light transmission of such products reaches values from 97 to 99%. This procedure can be performed either in a tuning studio or independently. After all, in external tuning companies you will have to fork out a considerable amount of money. If you do the whole process yourself, you can only get by with the cost of the material. How to book headlights is described in the algorithm below.
Advantages and disadvantages
The obvious advantages include the following aspects:
- It is easy to apply the film yourself, so the cost savings are obvious.
- High-quality glass protection, scratches and chips will not appear.
- Damaged headlight glass may return to its original appearance after being covered with film.
- The light passes through evenly.
- The color of the film can be chosen to suit your taste. Then it will perform not only a protective function, but also please the eye.
- There are types of coatings that can be polished.
- Long-term use does not lead to wear or deterioration of color.
- The ability to create a perfectly smooth surface.
If we talk about shortcomings, there are only a few of them. Firstly, with the lights turned off, the car is practically invisible. Secondly, the cost of the source material makes you wonder whether this manipulation is necessary.
Headlight reservation procedure
To properly protect your car headlights from damage, you must strictly follow all the rules for applying the film. For this work you will need the following tools and materials:
- stationery knife;
- soapy water spray;
- cleaning and degreasing agent;
- construction or household hair dryer;
- film for booking of appropriate thickness;
- rubber or silicone spatula.
You need to start work by preparing the surface of the headlights. On modern cars, in most cases, these elements are made of special transparent plastic, so cleaning and other operations should be carried out extremely carefully and carefully so as not to cause scratches and abrasions.
The preparation of headlights includes their thorough washing using detergents and degreasing with alcohol or another product safe for glass and plastic.
When booking optics, it is important to properly prepare the room, since it is highly not recommended to do this work in the open air. On the street it will be very difficult to avoid dust and other debris that is blown by the wind from falling on the surface. It is best to reserve headlights in a well-cleaned and lit garage. At the same time, the room temperature should be normal - ideally, if this indicator is in the range from 25 to 35 degrees Celsius.
A few words should also be said about the fact that there is no need to remove optical instruments to apply armored film. Firstly, such material adheres quite firmly to the surface without additional gluing to the back of the headlight. Secondly, after completing the procedure, you will most likely have to go to a service center to adjust the position of the optical instruments.
After preparing the headlights and the work area, you need to do the following. The film is applied to the pre-wetted optics. When the material is fixed, you need to make markings along the edge of the element with a special or regular marker. At the same time, a margin of five millimeters is left along the edge of the film
During marking, special attention should be paid to ensure that the film does not move, since after an erroneous cutting, you can say goodbye to expensive material
After marking, the film for armoring the optics is cut out with scissors, and you should act extremely carefully and avoid damaging the edge of the material. Afterwards, the headlight is generously watered with soapy water, and the backing is removed from the film. During removal, it is advisable to spray the material itself with soapy water. The cut film is applied back to the headlight
In this case, special attention should be paid to whether it is applied with the correct side. After this, the film is placed on the surface of the optics and carefully smoothed with a spatula.
The main task of this procedure is to expel water and air out.
Next, the material is slightly heated with a construction or household hairdryer and smoothed over the surface in accordance with the shape of the optics. At the same time, you need to try hard and not overdo it. Overheated material may crumple and not fit at all. It is better to warm up gradually, periodically smoothing the film. Heating with a hairdryer allows the film to take on the shape of the optics. Finally, you need to trim the edges along the contour of the headlight.
After applying the material, it is advisable not to drive the car for at least 24 hours. For the next five days, you should avoid aggressive washing and cleaning the headlights from dirt.
When the film has dried and set sufficiently, the machine can be operated as usual. If, over time, scratches and abrasions appear on the surface of the headlights, they can be easily sanded.
Materials and tools
To reserve headlights yourself, you will need tools and accessories:
- material;
- drying. You can use a hairdryer; in extreme cases, a narrowly directed hot fan is used to heat the surface;
- roller for smoothing the coating or soft spatula;
- surface degreaser;
- scissors;
- rags for wiping.
In addition to film, protection for car headlights involves the use of special varnish as an alternative. Xenon headlights can be armored using one of the materials (varnish, film) or in combination. If halogen lamps are installed, only one of the options is selected.
What car seats need to be booked?
Car armoring with film does not imply complete wrapping of the car, but on the contrary, it is intended for local application to certain places - those that are most susceptible to impacts and mechanical damage. These include:
- the hood is its central part;
- windshield;
- radiator and bumper;
- headlights and mirrors;
- thresholds, door handle areas.
It is imperative to use PTF film armoring, as well as conventional headlights, since the functionality of the coating provides double protection. In addition to eliminating mechanical damage, the possibility of cracking after impact is completely eliminated.
Decorative eyelashes - decoration for a woman's car
DIY eyelashes made from film are an interesting car decoration for ladies. Even the most inexperienced car enthusiast in matters of tuning can add a decorative element made from film.
The lines of the hood, radiator grille and bumper should be combined as much as possible. And the main thing is to maintain the style of the car by precise cutting of the material, giving the headlights the desired expression.
The structure of the Oracal 970 film is suitable for this purpose in all respects. First, photographs are taken of the hood with headlights. Then sketches of the “eyelashes” are completed, followed by making patterns and transferring them to the selected film. Next, the work is carried out as with pasting. If this is difficult for anyone to do, then you can order ready-made decorative elements in the online store.
Advantages and disadvantages
Tinting rear or headlights with film has a number of advantages:
- Easy to do. You can do the procedure yourself without spending money on the services of a specialist.
- Cleans up easily. This is especially true in proceedings with traffic police officers.
- The film is available in different colors. It is not difficult to choose a material to match the color of the car.
- Does not wear off during use. Retains aesthetic characteristics for a long time.
- Performs a protective function. Prevents scratches and chips on lighting fixtures.
- Forms a smooth surface. Provides uniform light dispersion.
The disadvantages include the higher cost compared to applying tinted varnish. In addition, tuning is noticeable only when the lighting is on, that is, on a sunny day the car will not stand out much among other cars.
Tinting optics with varnish
Let’s say right away, forget about all the cheap varnishes that are sold in a wide range in our car stores. When dried, they will give the exact opposite effect of the desired one. Instead of a shiny gloss, the lanterns will be dirty matte, which, you understand, will nullify all conversations about aesthetics. For a given purpose, you need to choose expensive professional materials, slightly darkening them with a special varnish. This gives the shine the necessary depth, emphasizing its richness. The final result is magnificent. Over time, the varnish can be polished and minor scratches that may have occurred during use can be removed. Let us separately make a reservation that tinting with varnish at home is extremely difficult. For these purposes, it is better to resort to the services of professionals who will carry out the necessary work in a special spray booth.
Advantages:
Low cost.
Flaws:
- It is better to remove the optics before tinting;
- Less light transmission;
- Uneven application, difficult to apply varnish evenly;
- It is impossible to remove varnish from optics without consequences.
What is car headlight reservation?
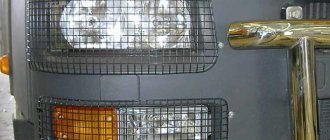
Armoring car headlights is a procedure similar to armouring car windows or covering the front body panels with armored anti-chip film. True, in the case of headlight reservations, a slightly different film is used. The purpose of car headlight armor is to protect the glass or transparent plastic surface of the headlight from impacts from stones and other heavy objects on the road. Everyone knows the cases when a large stone that hits a headlight from under the wheels of a car in front breaks the plastic or glass surface of the headlight. Previously, motorists protected their headlights with special steel grilles. However, such grilles worsened not only the appearance, but also the lighting of the car.
To armor car headlights, a special vinyl film with a thickness of 0.1 to 2 millimeters is used. The film adheres tightly to the glass or plastic surface of the headlight and strengthens it, preventing it from breaking when hit by a stone. In addition to vinyl films, polyurethane film is also used. However, polyurethane films are much more expensive and are most often used for expensive cars. Vinyl film is more efficient and can stretch when heated so that it can be tightly adhered to the entire surface of a complex headlight.
Vinyl film is more efficient and can stretch when heated so that it can be tightly adhered to the entire surface of a complex headlight.
What's better? Vinyl or polyurethane
Protecting headlights with film is done using two types of materials – vinyl and polyurethane. Vinyl films preserve the transparency of lenses and are good to work with in your garage. The structure of the material has a thickness of 0.6 to 2 mm. While attracting buyers with its color range and low cost, vinyl protection is still not resistant to high temperatures.
Polyurethane film for headlights differs significantly in its properties. It is more reliable protection, as it has a multi-layer structure. Thanks to this, the mechanical energy of the impact is distributed around the circle, turning a point impact into a diffuse one. But armor film for headlights made of polyurethane material is too expensive and is applied to simpler geometric shapes.
Do-it-yourself algorithm for booking car headlights
1. Buy the right material
When choosing, please note that when booking plastic glasses for lighting equipment, it is better to use a film with a thickness of only 100 microns. And for booking glass products, use a film from 1 to 2 mm thick
At the same time, do not forget about the shape of the headlight. After all, the thicker the film, the more difficult it will be to lay it on various curves and protrusions. And too thin will not provide sufficient protection.
2. The next step is to clean their surface from dirt, bitumen stains, and insect remains. To do this, use a clean rag. You can wash the headlights with detergent or water. But afterward, the entire surface must be degreased - wiped with a clean rag soaked generously in alcohol. After this, make sure that no dust gets on the surface. Therefore, it is best to perform this procedure in the garage.
3. Next, using scissors (knife), cut the film blank into the required shape. At the same time, do not forget to leave an allowance of 2 cm at the edges. Then heat the workpiece with a hairdryer (do not remove the backing from the film). The best way to warm up is to apply the film to the surface of the headlight. This will immediately give the film a convex shape corresponding to the curvature of the surface.
4. After the film acquires elasticity, carefully remove the protective layer (backing) from one side to a distance of no more than 3-4 cm. Then immediately smooth the released upper adhesive surface to the surface of the headlight. For these purposes, actively use a spatula. Make sure there are no air bubbles under the surface. If there are any, you should remove them with a spatula. Next, again heating a strip of film 3-4 cm wide, we repeat the procedure. We continue this way until the entire workpiece is glued to the surface.
5. After the surface is carefully pasted over, cut off the excess on the sides. If you need to make bends and folds in the film, you can cut a little at the corners.
6. After all excess has been removed, take the hairdryer again and heat the film again. At the same time, again rubbing it onto the surface using a spatula. This completes the procedure for booking headlights with your own hands.
What to do if protection needs to be removed
Even the best quality armor coating will someday need to be replaced. There are some nuances when removing anti-gravel film.
when a large amount of damage occurs on the film, it will need to be removed
First of all, you need to heat the film. To avoid temperature fluctuations, ensure that the entire vehicle warms up slowly and evenly. To do this, it is enough to place it in a garage, the air in which is not lower than 20 °C. If you are performing surgery in winter, install heaters in the room. Within 2–3 hours the film will reach room temperature.
Now you will need a hair dryer. You can use a regular household one if it can heat up to 60–80 °C. Otherwise, it is better to use an industrial one. To properly remove the film, please read the following instructions carefully.
- Direct a stream of air onto the film.
- Carefully pry up the shortest edge so as not to damage the surface of the headlight.
- Begin to carefully peel it away from the surface. In this case, the angle between the film and the headlight should be approximately 30°.
- After the final removal of the film, clean the surface of the headlight from any remaining adhesive.
- Rinse it with clean water.
Now you can install a new anti-gravel coating or leave the headlight in its original condition.
Video: how to remove protective material from headlights
Buying and installing an anti-gravel film will cost you much less than replacing a headlight. And if you carry out this process at home, you will save even more. At the same time, gluing armor is not a complicated process at all, if you know certain nuances and follow all the rules. In addition, the surface to be treated does not have a particularly large area, which greatly simplifies the work. In other words, don't be afraid to try making things yourself. You can do this quite well.
(1 vote, average: 5 out of 5)
This is interesting: How to tighten or replace the alternator belt
How to choose a film
In order for the car to receive maximum protection, you need to know certain criteria for choosing this material.
Criterias of choice
Armored film for a car should be selected according to its following indicators:
- what service life will this material have during operation;
- what is the degree of tear resistance of the material;
- thickness – must meet the requirements;
- elasticity during application - for ideal adhesion to machine surfaces;
- the material must transmit UV so that the paintwork of the car burns out evenly with the non-armored parts of the car;
Manufacturers and price
Armored film for cars is produced by several companies, the most famous brands among them are the following:
- LLumar is a material from the American manufacturer Eastman Chemical (since 1977 on the international market). A high-quality coating protects windows from harmful UV and blinding light entering the interior, overheating in the interior, and prying eyes. The durable coating reliably protects against scratches and other destructive influences. LLumar guarantees an invisible shield with a high level of gloss for all car paintwork. The film is 30% thicker than others offered in this market segment, the company guarantees up to 5 years. Car armoring with LLumar film will help your car look great for many years. Price from 6,000 rub. per lin./m.
- Anti-gravel armor film Newshield – translated means “new armor”. The name speaks for itself. The armor has excellent technical characteristics and provides reliable protection against mechanical damage, bad weather, and chemical influences. Car armoring with Newshield film provides a guarantee for many years. Prices from 2,500 rub. per lin./m.
- 3M Venture Shield - protection from an American manufacturer, designed primarily for places that are more susceptible to harmful effects: fenders, bumpers, sills, handles. Crystal clear, anti-gravel armored film for cars made of polyurethane has a good protective function and perfectly preserves the graphic curves of the car, thanks to its uniqueness. Price from 2,000 rub. per lin./m.
- Hexis Bodyfence material from French manufacturers has the unique properties of innovative technologies - it has a self-healing effect (resistant to pinpoint impacts) and hydrophobic properties. Universal armor film for cars, suitable for glass and body. Long warranty period up to 7 years. Price from 2,000 rubles per linear meter.
The cost of carrying out work on armoring a car with film directly depends on the quantity and complexity of the work, as well as on the selected materials. The average price for wrapping a crossover is 30,000 rubles, polyurethane protection is up to 55,000 rubles. Costs can be significantly reduced by selectively applying protection, for example, armoring the car body with film or armoring thresholds and bumpers.
Prices for glass wrapping:
- windshield wrapping from RUB 3,000;
- all car windows 6,000 – 8,000 rubles;
- for a headlight or threshold for 1,500 rubles.
Kinds
Athermal, red, chameleon films are almost never used to protect car optics. These options are common when tinting car windshields and side windows.
When applying the coating to the windshield, the light transmission parameter is checked. The material must provide at least 75% light transmission.
For head optics, yellow film for headlights and transparent polyurethane are most often used.
Advantages of polyurethane coating:
- Resistant to temperature changes. Unlike vinyl, which can crack in frost from -15 °C.
- Service life from 7 years.
- Possibility to stick on ribbed and flat surfaces.
Diamond effect film can only be installed on rear lights. It is prohibited to armor the head optics with colored film (the exception is the yellow color of the coating, which does not reduce the range of the light beam).
What is armor film for cars?
Manufacturers offer a different color palette, but colorless and transparent ones are usually in demand, which can be safely glued to glass. Armored film can easily protect against negative influences:
- high humidity and mechanical damage;
- ultraviolet radiation and temperature changes;
- chemical substances.
The range of coatings varies in thickness; the thicker it is, the more reliable the protection of the machine, but application will be correspondingly more difficult.
Car armor film is what this innovative miracle is called for its ultra-high protective properties.
Advantages of film armor:
- Manufacturers promise that if damaged, the glass will not shatter, but will remain on the armored protection (under strong impacts).
- In case of minor mechanical damage, the film will be damaged; it is enough to remove it and replace it, and the protected areas of the vehicle or glass, headlights, are guaranteed to be intact and without damage, chips or abrasions.
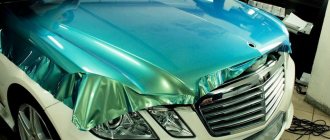
- If small dents appear due to damage, the paintwork will be intact after removing the coating. This will make the restoration process easier. Thanks to modern technologies, slight deformation of the metal will be removed without painting.
After a minor accident, the paint and varnish coating under the armor film remains intact
Armor film was first developed in the USA for the US military. But, of course, it will not save you from bullets, and in civilian life there is no need for this. Reserving a car with film will also not save much from serious damage during an accident.
Means for protecting car lenses from negative factors
Of course, car headlights provide illumination for the roads. The task of every driver is to try to protect them from negative influences. Dust, dirt, mechanical damage such as chips, scratches and damage.
Film for headlights is the most appropriate means of protecting the plastic or glass optical system of a car. The protective film evenly distributes the impact force of a flying stone or other object, protecting the headlight from damage. In addition, it prevents scratches during washing. And its chemical composition retains its translucent properties to the fullest.
Instructions for armoring and polishing a car body with film
Before starting work, it is necessary to prepare the vehicle according to the instructions:
- A mandatory point is to maintain a constant temperature of up to 22 degrees, and a complete absence of drafts.
- The car must be clean, free of dirt and dust.
- After pasting the armor film on a car made of polyurethane, it must dry for 12 hours. And only after that you can make adjustments to small details.
- The paintwork must be undamaged.
- For the coating, water or, better yet, a soap solution (any dishwashing detergent) is used; it does not allow the coating to stick before it is leveled.
You can book a car with film yourself if you strictly follow the instructions:
- Degrease all parts of the machine that will be coated with abrasive clay or white alcohol.
- The surface body is wetted with a soap solution, then protection is applied. The covering elements must be cut out in advance in accordance with the dimensions of the surface to be pasted.
- The surface is leveled using rubber spatulas, expelling water and air from under the film. Remaining material is carefully removed.
- The final stage is processing the edges and heating the material with a hairdryer. After this manipulation, the surface of the car will reliably adhere to the protective film.
When asked whether it’s worth booking a car with film, you can safely answer, of course, it’s worth it. This innovative technology will help preserve the appearance of the car for years, and most importantly, protect and extend the life of the car.
Protection with varnish
You can protect your headlights from stones and ice fragments using varnish. Manufacturers use protective varnish for headlights, which supports the optics housing for up to 18 months. Then intense wear begins, the body begins to turn yellow and darken.
The varnishing process can be carried out in a workshop or independently. Varnish is always applied after polishing:
- dismantling optics from a car;
- rough grinding, highly abrasive sandpaper is used;
- primary polishing;
- priming the headlight surface;
- primary (main) varnishing;
- re-varnishing;
- drying;
- fine polishing.
The use of varnish as an alternative protection improves the quality of road lighting and extends the service life of the part by an average of 3-4 years.
Each motorist chooses how to protect the optics individually. Varnish and film have their advantages and disadvantages; a large range of products allows you to choose the best option for any car.
Is tuning legal for headlights?
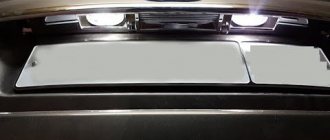
This is what a tinted taillight looks like (left)
Traffic regulations are the main regulatory document on the road. They should be followed and used as an argument in communication with the inspector, because appealing to “common sense” is usually useless. Section 3 of the rules contains a list of conditions prohibiting the operation of vehicles. In our case, point number 3.6, which regulates the use of lighting devices, is of interest. It states that it is prohibited to install devices and devices whose glow (reflection) color differs from the following:
- Front, for 1.1. Lighting devices - white, yellow, orange.1.2. Retroreflective devices (reflectors) - white.
- Rear, for 2.1. Reversing lights – white.2.2. Illumination of the state registration plate - white.2.3. Other lighting devices - orange, red, yellow.2.4. Retroreflective devices - red.
As usual, the driver will think that “everything that is not prohibited is permitted,” but the guy, on the contrary, will think that what is not permitted is prohibited. But the above excerpt is all that is said in the traffic rules on this issue: neither subtract nor subtract. It’s up to you to solve the “Hamlet’s dilemma”: to tint the headlights or not to tint.
Classification of protective films
There are two types of protective coating:
- Decorative and protective.
- Protective.
Decorative ones are characterized by the presence of patterns, sparkles, crumbs and other additional elements:
- Smooth.
- Textured. They are characterized by high density.
- Textured without color.
- Colored. May have additional effects and texture.
- Chameleons.
The last option is interesting because it has several shades that change depending on the viewing angle. Other types have different shades. Transparent, gray and black are used more often. On headlights, chameleon film and any colored coating look impressive, but do not affect the quality of light.
Disadvantages of using protective material on headlights
Polyurethane film is relatively expensive, and the price together with the work of the master will be even higher. Vinyl literally turns to stone when exposed to low temperatures, and also turns yellow over time. The same effect can occur with polyurethane material. However, you can avoid this phenomenon if you polish your armored headlights every 6-12 months.
Anti-gravel film is not able to protect against major damage. Perhaps these are all the disadvantages of this procedure. As you can see, it has more advantages than disadvantages.
Manufacturers
Among the popular film manufacturers are the following brands:
- Scotchprint;
- Arlon;
- Hexis;
- Oracal.
Films labeled 3M Scotchprint 1080 have a long service life (more than 5 years) and have several degrees of transparency. The minimum thickness does not distort the luminous flux and does not reduce the brightness of the high beam.
Model CM002 (made in China) is included in the budget segment, the cost of covering the head optics is no more than $5 (including delivery). The coating protects well from fine gravel and has a wide range of shades. Transparent kits and chameleon headlights cost the same.
Protection kits from the American brand Arlon are an armored coating for the headlight, glass, and body. Cast material with a thickness of 100 microns will last at least 10 years. The film is easy to apply and can be easily removed without leaving any traces.
The English manufacturer KPMF produces a vinyl version of protection, which is always removed with glue residue, so it is not very popular. Although the service life is at least 7 years, there are all color shades (more than 7,000).
With an anti-gravel coating like Hexis Ecotac film, the optics are reliably protected from debris and gravel that fly out from under the wheels at high speed. Average service life up to 3 years. Vinyl does not crack or stain. The disadvantage is that it is very difficult to remove material from any surface; a lot of glue will remain on the headlight.
It is definitely necessary to use film if the plastic has lost its gloss over time and there are bright lamps in the unit. This will not only give the car a beautiful look, but also improve the lighting on the road.