Tuning options
In any car, not only the appearance of the body is important, but also the interior.
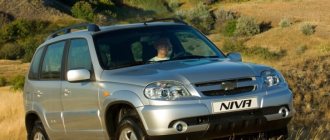
Chevrolet Niva is no exception here. For some reason, the appearance of the dashboard of this car does not please the owners for long, and some often want to change something almost immediately after purchase and add style, so to speak. The most serious change inside the cabin is the tuning of the Chevrolet Niva dashboard. Before starting work, it is important to decide what exactly you want to do and think about the consequences.
The choice of options for tuning is not particularly large:
- Install a device from another car. In this case, you will need the services of a qualified electrician, since the connectors will have to be redone. You can also install a digital version of the tidy - it will be more than original.
- As a tuning option, you can install LED bulbs instead of regular ones. Many car owners choose this option because it is less expensive and the easiest to implement.
- Another tuning method is to install original instrument scales on the speedometer, tachometer and other sensors. Moreover, you can buy such scales either ready-made or make them yourself in accordance with your preferences.
For those who want to bring something new to the interior of the cabin, there are special offers in the form of electronic panels such as Gamma GF 825, GF 826, GF 610 SL, FLASH-I, etc. They look great and are installed without problems.
If you decide to carry out such tuning of the instrument panel, the Chevrolet Niva will immediately be transformed for the better. You just have to pay from 9 to 20 thousand rubles for this. But for this money you will additionally receive:
- multifunctional trip computer;
- digital and analogue vehicle speed indicators;
- LED warning lamps with two-level alarm;
- on-board network voltage indication;
- "Autolight" system;
- integrated diagnostic tester for electronic engine management system;
- ability to select and adjust the backlight (color, brightness).
Well, if you don’t have the opportunity to spend that kind of money, you can modernize the panel using special tuning kits. They include overlays for instruments and indicators (of different colors) and lighting elements. Such sets cost 500-800 rubles.
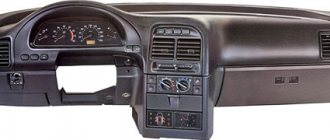
Description and location of indicators and instruments on the panel
The instrument cluster includes many elements.
In accordance with the diagram above, the shield structure is as follows:
- The coolant temperature control sensor, the arrow on it rises as the engine warms up. The controller needle should not be allowed to move into the red zone, as this will indicate overheating of the power unit.
- A tachometer is a device that measures the number of revolutions of the engine crankshaft.
- The left turn signal activation symbol, made in the form of a green arrow, appears when the corresponding indicator on the steering column switch is turned on. If the light blinks faster than usual, this may indicate a burnt out bulb.
- Right turn signal.
- Speedometer, this device allows the driver to know how fast the vehicle is moving. The speedometer is connected to the transfer case via an electric drive.
- Gasoline fuel level controller; the Chevy Niva uses an electromagnetic device that functions only when the ignition is activated. When the ignition is turned off, the controller needle moves down the scale.
- The fuel reserve indicator in the gas tank appears on the dashboard when the fuel level in the system is about 4-6.5 liters.
- The side light activation lamp appears on the dashboard when the corresponding optics are turned on.
- The brake system emergency symbol appears if the brake fluid level in the expansion tank has dropped to a critical level.
- High beam indicator.
- A key that allows you to reset the daily mileage readings. You can also use this button to switch to the clock or outside temperature sensor.
- A screen that displays the total and daily mileage of the vehicle.
- The Check Engine indicator indicates the need for engine diagnostics. It should always appear when the ignition is turned on, and disappear after starting the engine. If this light remains on while driving, the engine management system needs to be checked.
- Light alarm activation lamp.
- Symbol of time and temperature; you can switch from one mode to another using button 11.
- Battery low indicator, this light should always appear when the ignition is turned on and disappear after the engine is started. If the indicator is always on, this indicates that there is no charging current in the on-board network. This may be due to a failure of the voltage regulator or generator unit, or the lamp may light up if the tension of the generator strap is insufficient or breaks.
- Handbrake activation symbol. If your Niva Chevy is on the handbrake, the indicator will light up when you turn on the ignition and start the engine.
- Indicator of emergency low pressure of engine fluid. It should always appear when the ignition is activated. If it lights up after turning on the engine, this indicates low pressure in the system or a lack of engine fluid.
- Reserve indicator (video author – Artem S).
And also interesting: How to prepare a Niva and Shevik for off-road use - a brief educational program on work and prices
The shield of the Niva-Chevrolet has a classic arrangement. It is shifted to the left and is located on top of the steering column. This position gives the driver the opportunity to observe the sensor readings without turning his head to the side while driving.
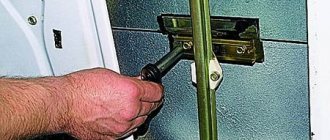
Disassembling the dashboard
If the shield malfunctions, it will have to be disassembled in any case to determine the cause of the breakdown. How to remove the instrument panel? “Niva-Chevrolet” will not cause problems in this sense.
This is done as follows:
- Use a slotted screwdriver to pry up and remove two plugs. The first is located to the right of the hazard warning button, and the second is in the far right corner of the panel trim.
- We turn out the screws located under the plugs.
- We pull out the right side of the dashboard trim and remove the connectors from the control buttons. Remember (take a photo) which connectors go to which buttons!
- We disengage the left side of the trim, remove the block from the buttons for turning on the headlights and dimensions. We remove and remove the lining.
- Unscrew the two screws securing the dashboard. Disconnect the connectors.
- We remove the panel.
First, disconnect the battery; this must be done, since the dashboard contains a lot of wiring that can be shortened during careless removal. To de-energize, remove the terminal from the minus and this will be enough. After which you can remove the console.
Tuning the trunk of a Chevrolet Niva
The easiest way to do tuning of a Chevrolet Niva trunk with your own hands is to install LED elements on the lid. They can also be attached around the perimeter of the rear door arch.
For those who love music, the trunk of the Niva Chevrolet opens up enormous opportunities for experimentation. You can install powerful speaker systems with a subwoofer there, although you will have to sacrifice capacity.
A completely exotic solution would be to install a small billiard table that will extend and unfold automatically. The Niva Chevrolet trunk volume of 320 liters opens up wide opportunities for modernization.
Below you can watch a video on how to make an organizer for the trunk of a Chevrolet Niva with your own hands.
Design Features
What can the instrument panel tell us? The Chevrolet Niva is designed in such a way that its panel unites all the control devices of the car. It includes:
- speedometer;
- odometer (counter of kilometers traveled);
- tachometer (crankshaft revolution counter);
- coolant and ambient temperature indicators;
- fuel level indicator;
- 12 control (signal) lamps.
In order for the driver to monitor instrument readings at night, the panel is illuminated when the side lights are turned on. How bright is the instrument panel backlight? "Chevrolet Niva" has the function of adjusting the level of illumination of the dashboard. It is provided by six special light bulbs.
Important: the shield has an electronic design and cannot be repaired if it fails! Spare parts in the form of individual panel units are not available for sale. The only exceptions are signal and lighting lamps. In other words, if at least one indicator fails, you will have to buy an assembled panel.
Expedition trunk
If the car owner often travels or transports large items, it is recommended to tune the roof rack.
Tuning elements:
- The loading basket is an expeditionary trunk with sides, which ensures a comfortable arrangement of things inside the basket. It has a reinforced design, which increases its load capacity to 200 kilograms.
- Two crossbars. Installed transversely to the car parallel to each other. You can also install cross members along the car. Intended for transporting things that are of considerable length (fishing gear, skis, etc.).
- Autobox. The trunk is made in the form of a closed element, which is characterized by the presence of internal compartments. Thanks to the tightness of the car box, things that are not resistant to ultraviolet radiation and precipitation can be transported in it. It is recommended to purchase a trunk with a lock that will limit unauthorized access inside.
The simplest light tuning
- After you have removed the dashboard, remove the dark-edged protective glass.
- Remove the arrows and turn the panel over, unscrew the screws that hold the entire structure using a Phillips screwdriver.
- The next step is to remove the scales, but since they are glued to the plexiglass, be careful not to break it.
- Peel off the light filter (located on the scales) and wipe off any remaining glue with nail polish remover or solvent.
- Then we put everything back in its place and check it.
Important! It is better to control the entire process through a fluorescent lamp, so all the shortcomings are visible.
The scale values on the dashboard will be highlighted much brighter than before the upgrade. This option is quite simple and quick. Moreover, there is less chance of breaking something.
Dashboard plug addresses
| White 13-pin header (X-1) | |
| 1 | "Mass" (body) |
| 2 | Tachometer (low voltage input) |
| 3 | Tachometer (high voltage input) |
| 4 | battery (via fuse F-3) |
| 5 | Coolant temperature sensor |
| 6 | Fuse F-10 |
| 7 | Empty (reserve) |
| 8, 9 | Electronic engine control unit |
| 10 | Terminal “15” of the ignition switch (via fuse F-10) |
| 11 | Handbrake switch |
| 12 | Generator output "D" |
| 13 | Oil pressure sensor |
| Red block for 13 pins (X-2) | |
| 1 | Ambient temperature sensor |
| 2 | Terminal “15” of the ignition switch (via fuse F-16) |
| 3 | "Mass" (body) |
| 4 | Panel light control |
| 5 | Turn switch (starboard repeaters) |
| 6 | Turn switch (left side repeaters) |
| 7 | Brake fluid level sensor |
| 8 | On-board computer |
| 9 | Speed sensor |
| 10 | Fuel level sensor |
| 11 | F-14 fuse |
| 12 | Emergency light switch |
| 13 | Terminal "50" of the ignition switch |
A few words about warning lamps
Why are indicator lights needed on the instrument panel? With their help, Chevrolet Niva gives the driver signals that a failure has occurred in one of the systems. It looks like this:
- a lamp in the form of an oil can indicates that there is insufficient pressure in the engine lubrication system (may be due to damage to the crankcase, a malfunction of the oil pump or the sensor itself);
- the light with the image of the battery turns on when the battery stops receiving charging from the battery (the voltage regulator may fail or there may be an open circuit in the generator circuit);
- a lamp in the form of a circle with an exclamation mark inside lights up when the level of brake fluid in the expansion tank drops below normal (it is better not to continue driving until you find out the cause of the fluid leak);
- a light bulb in the form of a schematic engine - “CHECK” may indicate the failure of any sensor, malfunctions in the operation of systems and mechanisms (accurate diagnosis is carried out after reading and decoding the error code);
- a signal indicator in the form of a thermometer located on top of the scale of the coolant temperature meter lights up if it heats up above normal (failure of the radiator fan, temperature sensor, thermostat).
According to the previous scheme, we disassemble the Niva’s dashboard and unscrew all the light bulbs, there are 18 of them in total, and they are all the same, and replace them with LEDs.
You can also replace the light bulbs in the stove, there are only 2 of them. To do this, remove all the knobs and remove the panel, change the light bulbs. Put everything back together and check for functionality. This another simple tuning will cost you about 400 rubles. and 40 minutes of work.
Also interesting: Chevrolet Niva rear door does not open
If you don’t like the way the basic instrument panel on a Chevrolet Niva looks, you can tune it by replacing the standard background. For these purposes, you will need to buy a special overlay in the store with the dial values already printed on it. They are usually presented in a wide range of car dealerships. All that remains is to choose a ready-made one to suit your taste and replace the standard one with it; this can be done while replacing the incandescent paws with LEDs.
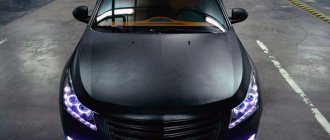
External transformation
Visual tuning of the Chevy Niva is the most successful way to quickly achieve the effect. The radical approach is to change the color, but it will take a lot of time, and the cost of the issue will bite many. An alternative option is to use film. Professional wrapping allows you to extend the service life of the body by protecting it from chips and scratches. It goes without saying that this will be a real transformation.
We also recommend reading a very interesting article in which our specialist talks about tuning the Daewoo Nexia.
You may also be interested in our expert’s article on the features and nuances of tuning the Hyundai Solaris.
We advise you to further study the algorithm and rules for tuning Renault Logan, presented in the material of our specialist.
Additionally, we recommend reading our specialist’s article on how to tune a VAZ-2113.
Film selection
When choosing a film, give preference to options with microchannels, thanks to which you can process curved surfaces. Avoid Chinese manufacturers, since the quality of such products is enough for interior decor at most.
It is worth paying attention to the following manufacturers.
- 3M is a Japanese brand that offers films with the effects of unpolished steel, brushed metal or carbon fiber.
- Hexis is a French product, among whose range the film with pearl effect deserves the most attention. Imitation of metal, plastic or leather is also available.
- Orafol is a German manufacturer whose activities are focused on the production of premium films. A wide range of colors and textures are available.
Work order
If you bought film for the first time and don’t know whether you can stick it, practice on a small, flat area without bends. The level of dust in the room should be minimal. Don’t skimp on consumables and be sure to purchase a primer. We are talking about a special adhesive composition, which makes it much easier to deal with sharp corners when gluing.
The stages of work are as follows.
- Clean the selected element and complete the pattern in a mirror image.
- Selecting the area between the middle and the edge of the part as the starting zone is worth taking into account the configuration.
- Take your time when fixing the vinyl, taking care to get rid of any bubbles using a soft spatula.
- Use a primer to further secure the film along the edge.
- Remember that using a heat gun makes the material more elastic and it will take the shape of the required surface. It is very easy to overheat the film on a surface with an uneven structure, be careful.
- Excessive tension on the material can cost you spectacular definition.
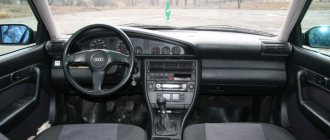
"Niva-Chevrolet": instrument panel, designations
Now let's look at the “screen” itself. What indicators does the instrument panel combine? Chevrolet Niva is not original in this regard. The largest indicators are the tachometer and speedometer. Their round scales are located in the center of the shield. The hands of these devices are driven by small, separate stepper motors.
Below the tachometer there is a liquid crystal screen, which displays information about the ambient temperature, as well as the time. At the bottom of the speedometer scale is the same display informing the driver about the total and daily mileage.
To the left of the tachometer is the coolant temperature gauge scale, to the right of the speedometer is the fuel level indicator in the tank. Both devices have a magnetic-electric design.
In the lower left corner there are warning lamps for the battery discharge indicator, parking brake engagement, emergency engine oil pressure, as well as another backup lamp. The lower right corner is occupied by indicators for turning on the headlights, high beam headlights and a low brake fluid level indicator.
At the top, between the tachometer and speedometer scales, there are arrows for activating the turn signals (right and left). At the bottom center of the dashboard there is an indicator for turning on the hazard warning lights, and below it is a “CHECK” indicator lamp.
Do-it-yourself modification of the Niva Chevrolet stove
The Chevrolet Niva is equipped with a liquid-type heating system combined with an engine cooling radiator.
This design, the main function of which is to heat the interior, allows, if necessary, to increase the intensity of engine cooling. In addition, the LC and GLC trim levels include air conditioning. Despite the rather complex design of the heating system of the Chevrolet Niva, most of the problems can be solved independently. With proper diagnosis, this will not be difficult.
Considering the design flaws in the Chevrolet Niva heating system, many car owners are upgrading the stove with their own hands. The most common purpose of such tuning is to improve the air supply to the driver's and front passenger's footwells. To do this, additional air ducts are installed and the shape of the damper drive strip is adjusted. For this modification you will need:
- two plastic tubes (plumbing or cable ducts);
- two plastic couplings corresponding to the inner diameter of the outer diameter of the tubes;
- thin sheet plastic (cut plastic card);
- Super glue;
- file;
- drill and set of saw bits;
- screwdrivers;
- stationery knife.
It is necessary to work with the plastic of the heater housing very carefully, as it is quite fragile. The actions are performed in the following order:
- Select tubes suitable for the role of additional air ducts.
Plumbing pipes can be used as additional air ducts - Remove the side trims on the center console on both sides.
- Remove the damper drive strip located on the left side of the heater.
- Ream the top curved opening of the plank by approximately 2 millimeters.
- The lower curved opening must be reduced by 2 millimeters by gluing plastic plates.
You can extend the bottom guide slot by gluing together scraps of plastic card - Using a drill and saw bits matching the outer diameter of the coupling, drill two holes in the heater body, the bottom edges of which should be 10 millimeters above the factory air ducts.
Holes in the stove body should be drilled very carefully - Insert and secure the couplings into the drilled openings. In this case, you can use sanitary sealant.
The plastic coupling will ensure reliable fixation of the new air duct tube - Insert the new air duct tubes into the couplings and secure them.
- Install an upgraded damper control bar. Before fixing it, it is important to correctly align the dampers themselves.
- Check the efficiency of foot airflow at different operating modes of the stove.
As a result of the actions performed, the intensity of the supply of warm air to the lower part of the cabin should increase noticeably.
Thus, repair and replacement of most elements of the Chevrolet Niva heating system can be carried out independently. You can also modify the stove and eliminate its design flaws with your own hands. This will require a minimum set of tools and careful adherence to the recommendations of specialists.
Before the heater is improved, it is necessary to understand the principle of operation of the dampers. Then you should completely dismantle the decorative panels located on the left side of the Chevrolet Niva stove. The next step is to remove the regulator responsible for the position of the dampers. When optimizing your car, you need to understand the design of the heating device, which will allow you to dismantle the “unnecessary” equipment without unnecessary delays. The motorist must remove the lower part of the regulator, through which the front flap is activated.
When dismantling all the plastic elements, you should not try to abruptly remove the parts, since almost all the components of the device being disassembled are made of fragile plastic, which breaks even under more or less significant impact. If, however, due to haste or carelessness of the owner of the movable property, the lower part of the device being removed gets a crack, it can be hidden with a soldering iron.
Modifying the Chevrolet Niva stove with your own hands involves the need to secure the lower damper so that it is tightly closed in the upper position. Of course, such a modernization completely eliminates the ability of the motorist to take advantage of the “front” position, however, it provides many other more significant advantages.
To tightly fix the front flap, you will have to make a small-sized bracket with your own hands (it is best to resort to using a simple tin), which will be held on by a self-tapping screw.
Once the “front” of the stove is in the closed position, you will need to think through the trajectory of the element that regulates the simultaneous supply of heat to the glass and legs. It is worth noting that skilled craftsmen, when upgrading their Chevrolet Niva, use all available means, in particular, an ordinary discount card will be useful for optimizing the stove. By means of which a cut line is drawn, then the element is glued with cyanoacrylate and filed to size with a file.
The modification of the Chevrolet Niva heater should be completed after the hand-cut part is glued with superglue.
The Chevrolet Niva inherited a fairly efficient heater from its previous VAZs. Even in 20-degree frost, the temperature in the cabin can be quite comfortable after just five minutes of warming up. But like all VAZ models, the “Dzhiem” SUV suffers from the build quality and the quality of the components supplied to the assembly line. This is also reflected in the operation of the heater - if the stove does not blow into your feet, then the reasons can be looked for in several places at once. Let's look.
The heater radiator is leaking
And this may depend on a lot of factors - the quality of the pump, the tightness of the system and the heater radiator, including the correct operation of the thermostat, and the quality of the coolant. If the temperature with a fully warmed-up engine is within 80-90 degrees, we look for the reasons for the lack of air in the legs in the design of the heater.
Turn on maximum heat.
A feature of the stove on a Chevrolet Niva is the absence of a heater radiator tap, that is, antifreeze circulates in a full circle in winter and summer and passes through the heater radiator. Taking this fact into account, the factory somewhat complicated the design of the air ducts and air dampers - there are two of them in the Chevrolet Niva.
Upper deflector flap.
One works for frontal airflow, the second is responsible for supplying air to the feet of the front and rear passengers and the driver. It is with this damper that problems arise that we will try to solve.
One of the ways to solve the problem of poor foot airflow.
Also interesting: Refinement of the Chevrolet Niva stove - Auto magazine Acord-Auto
In some cases, the correct switching method does not work and then you have to modify the heater to achieve full functionality.
We will improve the cracks and eliminate leaks in the stove.
Warm air simply spreads throughout the cabin, escaping through leaks in the dampers and air ducts. Naturally, each specific car has its own gaps in the heating system, so there cannot be a single treatment recipe.
However, with little effort, without removing the front panel and the entire heater, you can modify the guides for the dampers so that the main flow of warm air is supplied to the feet. To do this, you need to remove the casing from the console on the driver's side and, if desired, the steering column casing.
In front of us on the stove side is a die, which is responsible for the direction of movement of both dampers, and therefore the direction of air supply. All that remains is to unscrew the die with the slots, change the shape in the uppermost slot from curved to straight, maintaining the starting and ending points.
A radical solution to the problem of poor foot airflow is to close one damper AT ALL with foam rubber.
Having changed the geometry of the movement of the upper damper, it remains to firmly fix the lower one, which is responsible for blowing the legs. It is enough to fix the lever of the lower damper with a self-tapping screw in the position of blowing the legs. Now there will be constantly warm air in the legs, and its quantity and proportions between the windshield and the legs are smoothly selected by a conventional air direction regulator. This way you can come to an agreement with the Niva Chevrolet stove and make it evenly warm up the interior.
Details Category: Interior and trunk Updated 06/06/2016 16:33
The aluminum radiator heats up quickly, is inexpensive, has good rigidity and is light in weight.
Usually the cable braid is damaged, which leads to the need to replace the entire part. You can purchase suitable cables at an auto parts store. When choosing a new heater cable, you should pay attention to its length. To replace the cables, you only need flat-blade and Phillips-blade screwdrivers.
The replacement process is as follows: Remove the side panel of the lower part of the center console. It is located under the steering wheel to the right of the pedal assembly and the modification of the stove on a Chevrolet Niva using self-tapping screws. In the resulting niche you will find two cables. Unscrew all accessible screws securing them. In the niche under the console there are lower fastenings for the damper cables. Remove the switch handles of the heater control unit.
Installation
Attach the purchased trim to the dashboard and trace all the components and symbols so that when you cut off the excess, the trim will lie flat. Then remove the old one and glue a new one in its place. This is probably the most difficult thing in the whole procedure.
Also, many people like to change the color of the instrument hands, most often to white, as it advantageously reflects the LED backlight of the dial. This is done using women's nail polish. The old paint is cleaned off with a utility knife and the hands are degreased with nail polish remover or acetone. Then they are coated with white varnish.
After the varnish has dried, they can be put in place. Glue the overlay onto the panel, place the arrows and assemble everything in reverse order. Enjoy the updated version of the instrument panel.
Possible faults
The instrument panel, like any other electronic component, is susceptible to harmful factors such as a short circuit, broken wires in the power or information circuit, or a malfunction of one of the main components of the device. If you have encountered a similar problem, first of all, determine what signs of failure the shield is showing:
- the panel does not function at all, but the engine starts and runs normally;
- The Niva-Chevrolet instrument panel does not light up, but all indicators work (no backlight);
- The speedometer and tachometer do not work;
- Temperature and fuel level sensors are not functioning.
In the first case, contact on the device connectors is most likely lost. It is enough to disconnect the pads, clean the contacts, and everything will work again. A similar malfunction can overtake you in the fall or winter, when the level of moisture in the air is high.
If on a Niva-Chevrolet car the instrument panel lamps do not light up, but all its elements are operating normally, the reason must be sought in the power wires of the lighting bulbs, or in the lamps themselves.
Failure of the tachometer or speedometer also indicates a break in the power circuit. The same can be said if there are problems with the fuel level and temperature sensors.
If you understand the symbols of the light bulbs in the Niva Chevrolet instrument panel, let's look at the next point - possible malfunctions of the device:
- The instrument cluster does not work, but the engine starts normally. Most likely, the problem is caused by either a failure of the shield itself or a lack of power.
- The lights on the instrument cluster do not light up. If all the indicators stop working at once, this may indicate a break or fraying of the wire responsible for the lighting. If only some of the lamps do not work, then most likely they are simply burnt out.
- Devices do not work - speedometer or tachometer. Most likely this is an electrical type problem; you need to disassemble the panel and look for the fault.
- Sensors do not work - fuel level, antifreeze temperature. As practice shows, this usually indicates poor contact in the electrical circuit. Usually this problem is solved by disconnecting and cleaning the plug contacts (the author of the video is the Ig K channel).
And also interesting: There is an opinion: test Lada 4×4 Urban 5 doors.
Niva upholstery reupholstery
The standard materials used for upholstering the interior of the car in question are of low quality, which determines a short service life, as well as an unattractive appearance. If desired, you can reupholster the interior, which will make the car look more attractive and comfortable to use. All work on reupholstering the interior can be divided into several stages, which we will discuss in more detail later.
To begin with, it is recommended to decide on the most suitable color. Of course, the choice largely depends on the taste preferences of the car owner, but when making a choice you can follow some recommendations:
- It is recommended to select the upholstery color to match the body color. They should be in harmony, but not look alike.
- To select the right color combination, special schemes are often used. They make the choice much easier.
- In most cases, two basic colors are used to decorate the interior in a ratio of 45% to 55%. Due to this it becomes more interesting.
- In many cases, the ceiling surface is left virtually unchanged. Then it is recommended to adjust other colors exactly according to it.
- If you plan to use materials with pronounced stitching, then you need to pay attention to its shade. In some cases, it stands out against the general background, which allows you to emphasize the style of the salon.
An extremely unfortunate option is to use black material and light-colored stitching. This is due to the fact that in such a case almost all the shortcomings will immediately be evident.
The next step is to directly select the most suitable material. On sale you can find simply a huge number of different materials, each with its own specific advantages and disadvantages. In most cases, price is the deciding factor.
The following materials are often used for interior trim:
- Leather.
- Velours.
- Faux suede.
- Substitute for genuine leather.
- Velveteen.
It is not recommended to purchase material via the Internet. This is due to the fact that you need to check its quality directly upon purchase.
When choosing a material, you must also take into account the fact that there should be a supply of it. Approximately 20% of the total amount of material is taken as reserve. The threads for covering must be of increased strength and elastic, otherwise after some time the surfaces will begin to sag.
Torpedo tuning Chevrolet Niva
To tune the torpedo, you must first remove it. Don't forget to turn off the power beforehand. After which you can either cover the torpedo with leatherette, or paint it with a spray can or spray gun in any color you like. If you decide to cover the dashboard with fabric or leatherette, to do this you need to take measurements from the dashboard and make patterns from them so that it is convenient to cut the material and not confuse anything with the dimensions.
Then you need to sew the components together and start reupholstering. To do this, use hot glue and a regular hairdryer. The glue needs to be applied to the dashboard and, after waiting a little, apply the material, smoothing it and heating it with a hairdryer. This is done to prevent air bubbles from forming underneath.
When the work is completed, the torpedo can be installed in place, but keep in mind that some parts will become thicker and you may have to file down the plastic or trim the fabric here and there.
Of course, the easiest option for tuning a dashboard or dashboard is to buy a new one, but it is much more interesting to make the upgrade yourself and catch the admiring glances of passengers.
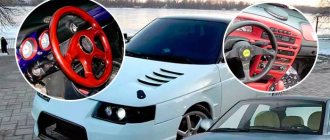
Dashboard and steering wheel
The work is being carried out according to the established scheme:
- We take measurements from the removed dashboard and steering wheel.
- We make patterns.
- We cut out the material.
- Sew it together.
- Glue it to the dashboard, apply glue first to the smoothest part - the top, smooth it out, heating it with a hairdryer.
- We glue the steering wheel.
Ready! Internal tuning of a Chevrolet Niva with your own hands can be considered half finished. All that remains is to add LEDs to the instrument panel and change the radio and your car will sparkle with new colors.
Thanks to the detailed instructions for modifying the interior presented in the article, you can handle the reupholstery yourself without the help of specialists.
Replacing the instrument cluster on a Chevrolet Niva
What can you tell by looking at the described instrument panel? Chevrolet Niva, despite the participation of foreign designers in the development of the car, remained close to its relatives. This is a typical VAZ shield, not much different from those installed on the new Samaras. And, to be honest, reviews about it do not evoke positive emotions.
Display – TFT LCD with RGB backlight. 3.2″ (240x320) Displays up to 5 parameters simultaneously. Updated design. Reset ECU errors. Working with parking sensors. Software Update.
Display - LCD graphic 128×64 Installation - in a standard place. Black background white symbols. Autolight. Working with the partner. Reset ECU errors.
For VAZ 2110, Lada Samara, Chevy Niva. Display - graphic with RGB (128x64) Installation - in place of the standard EPC. Reset ECU errors. Autolight. Tropic.
Display – LCD graphic 128×64 Black background white characters. Autolight. Installation is a regular place. Software Update. Working with parking sensors. Reset ECU errors.
Display - LCD graphic 128×64 Installation - in a standard place. Black background white numbers. Software Update. Working with the partner. Reset ECU errors.
For Lada Samara, VAZ 2110, Chevy Niva. Display - PLED graphic (128x64). Installation - in the standard location of the EPC. Reset ECU errors.
Display: TFT with RGB backlight. Installation - in place of the standard EPC. Autolight. Tropic. Watch. Encoder. Reset ECU errors.
For Lada Samara, VAZ 2110, Chevy Niva. Display - PLED graphic (128x64). Installation - in the standard location of the EPC. Reset ECU errors. Autolight.
Display - LCD graphic 128×64 Installation - in a standard place. Black background white symbols. Working with EPG. Working with the partner. Reset ECU errors.
Display - LCD graphic 128×64 Installation - in a standard place. Black background white numbers. Working with the partner. Reset ECU errors.
If you are planning to change the instrument cluster on a Chevrolet Niva, you have a choice - whether to buy a new factory combination, produced since 2021, the old model panel until 2021. or "tuning". It hardly makes sense to install an old panel with a “ten” design on a car - it’s too outdated, and it’s not easy to find it on sale.
What is a torpedo
In any car, comfort is created not only by comfortable seats and the presence of heating devices. A very important element of comfort in cars is the dashboard – the dashboard. Its appearance affects the mood of not only the driver, but also the passengers. On a Chevrolet Niva SUV, the standard dashboard can be improved with the help of new decorative elements and components. The main detail in changing or tuning a car's dashboard is the desire of the car owner.
All cars have a dashboard (board), which is located in front of the passenger compartment. In a Niva Chevrolet car, it is a plastic covering on which almost all vehicle control elements are located. Although the panel is not a necessary part for driving a car, without it driving turns into complete dissatisfaction.
Read news about the new Niva
- Ignition relay Niva Chevrolet where is it located
- Review of the standard alarm system Niva Chevrolet
- Niva Chevrolet installation of air conditioning - Auto magazine MyDucato
- Niva Chevrolet alarm connection points
- Installation and repair of Niva Chevrolet cooling system fans
- Chevrolet Niva pinouts. Wire diagrams || Niva Chevrolet power window button diagram
- How to change the light bulbs on the instrument panel of a Niva Chevrolet: video
- Relays and fuses Lada 4×4 (VAZ 21214, 21314) » Lada.Online || Niva 21213 low beam power button
Repair of heating system components
The recirculation damper mechanism is dismantled and the cable is removed. Each end must be twisted into a ring and securely fixed.
Using a cable, the position of the air supply flap is changed. Assembly is carried out in the reverse order. Replacing the interior heating control unit A faulty control unit can also cause incorrect operation of the interior heating system. Its dismantling, necessary for repair or replacement, requires the following procedure. The negative terminal is disconnected from the battery. All handles are removed from the heater control mechanism.
To do this, you need to carefully pull them towards you. All handles are removed from the heater control mechanism. Use a flat screwdriver to remove the air circulation lever.
Use a flat screwdriver to remove the air circulation lever. Use a screwdriver to pry up and then remove the block lining. Use a screwdriver to pry up and then remove the block lining. Under the lining, use a Phillips screwdriver to unscrew two self-tapping screws.
Under the cladding, two self-tapping screws are unscrewed. The control unit is removed. Remove the connector with the wires going to the speed switch. The block of wires that provide illumination of the unit is disconnected. The connector with wires is removed from the control unit. If there is an air conditioner, all hoses coming from the vacuum switch are disconnected.
Also interesting: Chevrolet Niva gearbox diagram video
Use a screwdriver to remove the bracket holding the damper cable braid and other similar elements. All rods are disconnected from the control unit. A new or repaired device is installed in the reverse order.
After dismantling, the control unit is repaired or replaced with a new one. Replacing the stove pipes If a coolant leak is detected, the pipes along with the clamps should be replaced. The work is performed in the following sequence: The coolant is drained from the system.
The screws securing the glove compartment are unscrewed and it is removed. Use a Phillips screwdriver to unscrew the clamp of the lower pipe. The hose is removed carefully - the antifreeze should not get on exposed skin. If difficulties arise, the pipe should be rotated around its axis. Correctly turning on the foot airflow It turns out that even after several years of owning a Chevrolet Niva, not everyone knows how to properly turn on the warm air airflow to the feet.
By using fan speed controls and damper position controls, and using sound logic, we can end up with a situation where the entire flow of hot air is directed onto the windshield and into the face of the driver and front passenger. Of course, the car is warm, even hot, but your feet are cold.
Practice has shown that Shniva has a special algorithm for supplying hot air to the legs. On most copies this is done like this: Warm up the engine until the flow of warm air is clearly felt by your hand.
The fan speed switch is set to the fourth position, 4th speed. Turn the airflow direction knob to exactly 12 o'clock. Immediately return it to the position around the clock. Correct position of the stove blower control. The air damper will make a characteristic click and the air flow will flow to your feet.
Exceptions are the heater valve built into the partition of the engine compartment, and the pipes connecting the heater to the engine cooling radiator. If necessary, this unit can be replaced entirely.
The radiator and heater dampers are combined into a single unit: The air forced by the heater fan enters the heating system through the air intake located under the windshield.
Depending on the position of the damper, the air flow goes either through the heater radiator or directly into the air ducts. The distribution damper is responsible for distributing the flow between the air ducts. The selection of the stove operating mode, temperature and air flow direction is made using the stove control unit located on the center console.
Heating system with air conditioning The principle of operation of a car heater with air conditioning is similar to that described above. However, its design is significantly different. Instead of an intermediate heater housing, an air conditioner evaporator is installed, hidden by a plastic casing. When the air conditioner is turned on, air is supplied to the cabin through the evaporator using a damper.
The design of a car heater with air conditioning is somewhat different: To carry out high-quality repairs, you first need to understand the reasons and identify the faulty element of the system. The stove does not heat the footwell. There may be several reasons why the stove does not direct air to the feet.
First you need to find out whether this mode is turned on correctly. Due to the design features of the damper system, the direction of air to the legs is carried out as follows: Set the fourth rotation speed of the stove fan. Set the heater mode switch to the upper vertical position. Switch the mode controller one position to the left.
After this, air should begin to flow into the legs. If this does not happen, the procedure should be repeated several more times. If the mode still does not turn on, you should check the following components: Coolant leak If antifreeze leaks from the cooling system without visible streaks on the radiator and pipes, you need to pay attention to the condition of the heating system. The main signs of a coolant leak through the heater are: Typically, the leak occurs through the heater radiator.
To verify this, you need to remove the lower part of the center console. If traces of moisture are detected in the area of the stove body, it is recommended to replace the radiator.
If a coolant leak is detected through the heater radiator, it should be replaced. Before replacing the heater radiator, you should check the tightness of the heater pipes and their connections. The stove does not warm up the air well. Often the stove does not warm up the interior effectively enough. Instead of hot air, slightly warm or even cool air comes from the deflectors. This usually happens for the following reasons: Thus, when diagnosing a malfunction, first check the coolant level in the cooling system.
If it is insufficient, they begin to look for leaks. If the stove cannot melt the ice on the windshield, it is faulty. If the amount of antifreeze is OK, and the stove does not respond to changes in the position of the temperature regulator, the damper is faulty.
With proper diagnosis, this will not be difficult. Replacing damper control cables Damper control cables fail quite often. Usually the cable braid is damaged, which leads to the need to replace the entire part.
You can purchase suitable cables at almost any auto parts store. When choosing a new heater cable, you should pay attention to its length. To replace the cables, you only need flat-blade and Phillips-blade screwdrivers.
Read news about the new Niva
- The modernized Lada Niva Legend (4x4) 2021 was shown on the Internet
- Lada 4×4 Bronto - sales stopped, new details » Lada.Online - all the most interesting and useful about LADA cars
- Description of the instrument panel Lada 4×4 (VAZ 2121, 2131) » Lada.Online - all the most interesting and useful about LADA cars
- Chevrolet Niva gasoline consumption per 100 km
- Buy LADA (VAZ) 2131 (4×4) 2021 in Rostov-on-Don, low price for Lada 2131 (4×4) 2021 on the Avto.ru website
- Fuses Niva 21214 injector «
- The new large Lada 4×4 Niva “Bigster” 2021-2022 based on the Dacia Bigster was shown for the first time. The SUV has changed beyond recognition
- New Niva Chevrolet Lux 2021 - review of GLC equipment