Fuse box in the passenger compartment
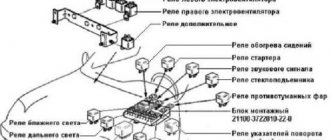
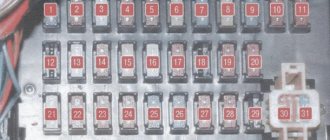
Compared to the engine module, the interior inserts are located in a compact panel on the right, lower part of the tidy. The photo above shows the cover of the mounting block on a car from 2006 to 2008.
Fuses for the machine's auxiliary systems, which are not directly related to engine operation, are installed here.
Most of the elements do not affect the behavior and driving characteristics of the vehicle at all.
Kia Spectra fuses
The Kia Spectra is a compact car produced by Kia Motors between 2000 and 2009.
In this vehicle, the electrical system ties everything together, including the engine controller, power windows, interior/exterior lighting, audio-visual system and alarm.
The many electronics in a car carry a lot of potential for error. If a certain mechanism does not work in a vehicle, it is not necessarily due to a technical defect. It is possible that only one fuse is faulty. This article will tell you how to recognize faulty elements and, if necessary, replace them.
How it works
Fuse boxes are essentially concentrators that distribute electricity. A fuse performs a very important function in an electrical circuit as it protects the system from damage, overload or short circuit. In a circuit, the weakest component is often destroyed first. After that it turns off. This weak component should usually be a fuse.
If we consider the operation of fuses using brake lights as an example, the following sequence of actions should be highlighted. Under normal conditions, fuses pass electricity from the battery to the switch, which, when pressed, sends that voltage to the light bulbs.
Color is important
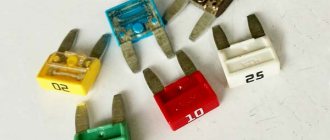
An important parameter of a car fuse is the maximum current it can withstand before it blows. To quickly determine the maximum intensity for each of them, the corresponding colors shown in the table are suggested:
| — gray — 2A; — purple — 3A; — beige or light brown — 5 A; — dark brown — 7.5 A; — red — 10A; — blue — 15A; — yellow — 20A; — white or transparent — 25A; — green — 30A; - orange - 40A. | - green 30A; — orange 40A; — red — 50A; — blue — 60A; — brown — 70A; — white or transparent — 80A; - purple - 100A. |
Most fuses, despite being color coded, have a transparent body. This helps diagnose parts and identify faulty circuits faster and easier.
Where is the fuse box
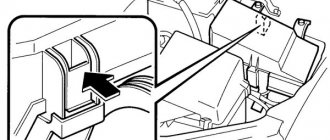
In the Kia Spectra, the safety block is sometimes indicated by a pictogram. The location of the fuse box may vary depending on the year and model of the machine. Basically, they have two fuse panels.
The engine compartment contains fuses for items such as the cooling fans, anti-lock brake pump, and engine control module.
The other is in the cabin in the dashboard, containing fuses for devices and switches located in the cabin.
But before you start desperately searching for where the blocks are, it's worth taking a look at the magic book called the Operating Instructions. Loosen the cover and you can immediately see the fuses for each electrical system in the Kia Spectra.
What to do if your car fuse has blown again
If the fuse blows again after replacing and reconnecting the car battery, the problem may be with the wiring harness or terminal. In this case, you should contact professionals at the service station.
Under no circumstances should additional fuses be installed at this stage without a more detailed error analysis. First of all, a problem with the electronic system should be investigated by a specialist. If all fuses are good, there may be an error in the terminal.
Spare fuses can be purchased for about 2,500 rubles at some gas stations, car dealerships and well-stocked specialty stores. It is recommended to purchase the entire kit directly because sometimes it is not known in advance which fuse needs to be replaced.
To summarize all of the above, it should be noted that for stable operation of the entire car, you should constantly maintain and monitor its main components. At the first hint of failure, even as it may seem at first glance, such an insignificant part as a fuse, replace it in a timely manner.
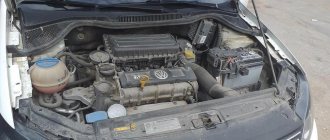
Block under the hood
This part is much more complicated.
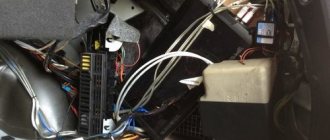
The photo above shows how the inserts and relays responsible for the main equipment of the car are mounted. Most of the elements, if they fail, completely block the operation of the machine and disrupt the normal functioning of important systems. Further diagrams with descriptions in Russian are given using the example of a 2007 car in the maximum configuration.
Kia Spectra fuse diagram
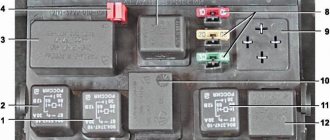
Above is the installer installed under the hood of the car. There are a number of elements present here.
| Number | Purpose |
| 1 | Consumers of the first group. |
| 2 | ABS control system |
| 3 | Interior fuses No. 34, 35. |
| 4 | Second group of consumers |
| 5 | Supply voltage to starter |
| 6 | Power supply for elements 15 and 20 |
| 7 | Radiator Fan Relay |
| 8 | Heating system and air conditioning |
| 9 | Starter control relay |
| 10 | Stove fan |
| 11 | Air conditioning compressor electromagnetic clutch |
| 12 | Headlight corrector for headlights |
| 13 | Emergency crew |
| 14 | Standard central locking |
| 15 | ABS control module |
| 16 | Roof hatch servo drives. |
| 17 | Power windows on the starboard side. |
| 18 | Likewise for the left side of the car. |
| 19 | Rear window washer |
| 20 | Interior lighting |
| 21 | Power supply for headlights |
| 22 | Ignition coils |
| 23/24 | Headlights in low and high beam mode respectively |
| 25 | Oxygen concentration sensor before the catalyst |
| 26 | Likewise, after the catalyst |
| 27 | Fuel pump |
| 28 | Power supply for injector electronics |
| 29 | Air conditioner control |
| 30 | Heated exterior mirrors |
| 31 | Automation of size switches |
| 32 | Rear fog lights |
| 33 | Front PTF |
| 34/35 | Dimensions on the left and right sides, respectively. |
| 36/37 | Low and high beam headlights |
| 38 | Klaxon |
| 39 | Heated rear window |
| 41/45 | Reserve |
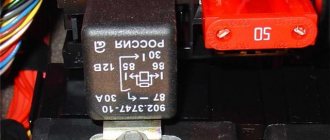
You should also clarify the situation with the relay.
| Number | Decoding |
| 50/51 | Right and left headlights respectively |
| 52 | Fuel pump |
| 53/54 | Cabin air conditioning system |
| 55 | Klaxon |
| 56 | Supply voltage to fuses 34 and 35 |
| 60 | Turning on the power windows |
| 61 | Stove fan |
| 62 | Starter |
| 63 | Radiator fan drive |
| 64 | Air conditioning fan |
| 65 | Heated rear window |
Next, you should consider the small fuse panel inside the car.
| Number | Decoding |
| 1 | Turn signals |
| 2 | Instrument warning lamps |
| 3 | Reserve for automatic transmission |
| 4 | ABS |
| 5 | Driver airbag |
| 6 | Windshield wiper and washer |
| 7 | Head unit |
| 8 | Serves to power the cigarette lighter |
| 9 | Heated seats |
| 10 | Supply voltage to the ECU |
| 11 | Brake lights - lamp line. |
| 12 | Automatic switching off of dimensions. |
Below the main unit there is also a small relay module.
| Number | Purpose |
| 1 | Turns and hazard lights |
| 2 | Central door locking module |
| 3 | Fog lights. |
Spectra turn signal fuse and relay: where is it located?
Installed in the cabin under numbers 1. When replacing parts, there is no need to look for the correct part number. The machine uses standard plug inserts and a five-pin relay; the price on the market fluctuates around 50 rubles.
Cigarette lighter relay and fuse
In the standard wiring, insert No. 8 of the interior module is responsible for powering the outlet. Some drivers prefer to install an additional unit in the rear seats or inside the luggage compartment. It is unreasonable to connect two devices to one line. A separate wire is pulled from the battery and the device is attached to it. Here you will have to ask the owner to show where exactly the protective element is hidden.
Gasoline pump
The fuel pump power supply is controlled through inserts 27 installed under the hood. For 2009 inclusive, the corresponding relay was mounted at position 52.
Heater relay and fuse
On a 2009 car it is installed under the hood at position 10, the required relay is mounted next to it - at number 61.
Window lifters
The right and left sides of the main are powered by fuses 17/18. There is one relay - No. 60.
Low and high beam
Powerful inserts are used to allow both sides of the headlights to be pulled simultaneously. Here it is No. 36/37 for the near and far operating modes of the optics.
Instrument lighting
Connected to fuse 2 installed in the car interior.
Washer
The windshield wiper insert is the same element. The increased power of the element is enough to cover the rating of two highways at the same time.
The insert is mounted at position 6 in the car interior. An auxiliary relay for the motor in the tank and the gear motor is installed near the instruments.
Kia Spectra wiper fuse and relay: where is it located?
The information is listed above.
Where is the starter relay located?
The power unit is installed in the engine compartment at position 62. This allows you to quickly replace a damaged device. Otherwise, the design of the module differs little from common analogues. The retractor is mounted in the housing and replacing it will require complete disassembly of the entire assembly.
Generator regulator relay
Located inside the generator. The layout of the device on other cars of the manufacturer is similar.
Charging relay
The regulator is installed by the manufacturer close to the battery. The device is simple but effective. You can recognize it by its appearance - a small black box installed between the generator and the battery.
Reverse
The lamp is protected by a remote element. To gain access, you will need to remove the plastic lining of the gearshift lever panel. This is where the insert will be mounted.
Heated rear window
The tenna fuse is installed at position 39. The power line switch is mounted in the engine compartment at number 65.
Kia Spectra brake light: where is it located?
They are switched on through insert 11 of the interior panel.
Horn fuse and relay
Compatible with the horn device and located at number 38 in the engine compartment. The corresponding relay No. 55 is also installed nearby. In the standard wiring, when the alarm is turned on, the emergency lights also light up.
Interior lighting
There is only one light in the car. The lamp is low-power and does not require a relay. The design contains fuse No. 20.
Radio tape recorder
For the standard audio system, there is one insert No. 7 installed in the cabin. When installing more efficient acoustics, users often transfer the element to a separately routed line.
central locking
The power element is installed at number 14 in the main block. The button relay is mounted inside the cabin at position 2. It is not clear what the engineers were guided by with such an arrangement.
Speedometer
Protection systems are installed under the dashboard. To gain access to the parts, you will need to remove the shield and reach under it. The necessary equipment will be installed there.
Air conditioner
The manufacturer does not provide clear instructions on where the elements responsible for a specific area of the device are located. The design has 3 fuses - 8, 11 and 29. There are also two relays: 54, 64.
Watch
Power is supplied through an element installed under the tidy. To access the device, remove the dial along with the shield and find the insertion in the power wire.
Reverse speed
The signaling device is connected to the scenes via a special sensor. To gain access to the device, it is necessary to remove the lining of the box. The element will be installed under it.
Ignition
The coil fuse is installed in the engine compartment at position 22.
Dashboard
Controllers and lighting are organized through insert 2 installed under the dashboard.
Kia Spectra: cooling fan relay
The main airflow is protected by fuse 7, and the power lines are turned on by relay 63. Both inserts are installed under the hood of the car.
Fog light fuse
The rear PTFs are powered from No. 32. The front module is connected through fuse element 33. Relay 3 is responsible for turning on the power lines of both units.
Dimensions
The machine is equipped with automatic switches. Inserts 31 and 12 are responsible for turning the lighting on/off. Both elements are separated into separate blocks. The operation of the dimensions on the right and left sides is controlled by inserts 34 and 35.
Kia Spectra: ABS fuse
Insert 2 under the hood is responsible for the operation of the sensors. The control unit is protected by element 15, and the low-voltage sections of the electronics are routed from element 4, mounted in the cabin.
Replacing KIA Spectra fuses yourself
All on the topic Replacing KIA Spectra fuses
- Ribbon
- Tell me where the turn signal relay is located on a Volkswagen VZ
- Akzhan
- thank you brother
- Podrugin Rock
Thank you! At these fucking stations...they say; The sensor died, they replaced it, and I checked it using your method... the sensor is working! I'll check the wiring tomorrow! Like and subscribe.
Avila
Marvelous. This is amazing!
Adham Sinyukov-Uvarov
thank you for all the videos you do. very short and to the point!
- Alter Kolchigin
- Well, you have patience Ivan! I wonder how many kilometers later this bucket will return to you again
- Sholpan
- Thank you, I almost broke everything)))
- Owl
- Can the starter be connected using this diagram?
- Pius
- *_install a Priora steering wheel_*
- Saodat
- Instead of getting Nicolas Cage into the film in 60 seconds, they should have cast Dim - he’s a great special and a charismatic character :)
- Kita Zhanybekova
- I don't have an auto fold feature.
- Cola
- so you have it off written ac off)))))))))))))))))
- Lad
The most important thing is that it shows Europe!!!))))
Isra
Good afternoon. In my opinion, the valve on the return line of the fuel filter should be open when the engine and fuel are cold. But as the fuel warms up, this valve will shut off the return flow to the filter and the fuel will go into the tank - accordingly, there will be no overheating! And in this case there is no heating in winter!
- Immortal
- thank you, now we’ll look for how to unscrew it, but there are no screws or bolts, I was once looking for how to remove the radio and it’s only in German, but the trailer can be understood Senkyu
- Gnutikov Anime
- Hi Nikolay, take off the valve cover and there will be two bolts inside, open it up, there will be a fine filter and wash it in gasoline and put it back and it will all work out
- Bol Kiss
- If you found the video useful, please LIKE and SUBSCRIBE!
- Karamaev Christian
Toyota corolla 1.4 D4d they filled my air conditioner with oil as needed. It cools for about two minutes and stops, I turn it off and after 30 seconds turn it on. And it works again for a couple of minutes
Holt
Thank you from the bottom of my heart! I saved money and became a little smarter.
Minos
Oh dear, if only you knew how you helped me with your video. Thank you sincerely!
Carlo
Thank you, it’s interesting to see. It’s a pity that you don’t have HDI (I would listen with pleasure) I’ll add on my own - the turning radius is too big, I sit low, the brakes are ordinary, with electronics tx,.tx, but I agree with all the positive reviews!
Temirbek
Hello! I also won't start. Gasoline sprays, there is a spark but it does not start.
Wener
You kind of made it look more complicated that it actually is.. In fact, it doesn't matter in which position the key is, all you need is power to the window.
Also, it doesn't matter how you are moving the window while pulling the fuse : automatic, manual, up or down, all will work.
You NEED NOT to wait 30 seconds, don't wait at all, just turn off the ignition, put the fuse back on, lower the window in automatic - mine works lowered in automatic so not sure what year is your car and why it doesn't 't work on your car, have you tried it? Again, just lower in automatic then it's good to go. Hope this helps, because often times these procedures are reproduced from other users with extra steps that are not actually needed. Let's keep it simple (or shall I say the simplest)
Write a comment
How to remove the fuse box on a Kia Spectra
To quickly dismantle the module you will need to complete the procedure.
- Disconnect battery power. This is necessary to avoid causing a short circuit.
- Remove the mounting block cover.
- Next you will need to disconnect all terminals visible on the surface.
- Next, the plastic panel latches are snapped off and all the screws are unscrewed.
- After this, you need to carefully pull the module towards you and disconnect the wire connectors connected to the back of the panel.
- After this, the part is removed from the machine entirely.
