Some motorists, for various reasons, prefer to repair their car themselves. In these cases, it is important to know the procedure for disassembling and assembling the engine. To begin with, it is worth understanding that it will not be possible to do without costs. Even if you do not plan to replace parts, you will have to install new gaskets during assembly (except in cases where the gaskets are not damaged or pressed through).
You may also need engine sealant that can be used instead of gaskets, a torque wrench (needed during assembly), and a set of wrenches of different sizes. Moreover, you will need not only open-end and ring wrenches, but also socket wrenches (preferably with interchangeable heads, long and short wrenches). In addition, you will need a lot of free time, since disassembly takes from several hours to two to three days, depending on the make and condition of the car. Let's look at the procedure for disassembling and assembling the motor in more detail.
Required Tools
Let's look at the engine assembly process using the example of a VAZ 2106 car. To assemble the engine, you will need the following tools:
- First of all, you will need a set of keys in the following sizes: 12-14, 17, 19, 21, 22, 36.
- If you don't have a set of keys, use a gas key.
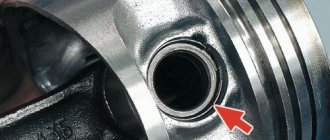
- Device for pressing piston pins.
- A regular torque wrench and size 12 and 13 sockets. If you don't have them, you can use a cylinder head bolt wrench.
- Hammer.
- Screwdriver.
- Mounting blade.
This is exactly the minimum set of tools required to work with the engine of a VAZ 2106 car. Now let’s look at the process of assembling the engine for this car.
This is interesting: We prevent the purchase of a drowned car on our own
How to disassemble and reassemble a car engine yourself
If you do not yet have experience in disassembling and assembling a motor, but have a desire to try it, then this article will help you. We will tell you the procedure and note the main nuances that should be taken into account when performing this work.
First, let's prepare everything you need: new gaskets or sealant for the internal combustion engine, a torque wrench, a set of wrenches of different sizes, and you will need open-end, ring and socket wrenches with interchangeable heads, long and short wrenches. Take into account the fact that you will have to spend a lot or a lot of time on the work (depending on the model and condition of the motor, disassembly takes from several hours to several days).
Preparation
Before installing the crankshaft, it is advisable to check it for runout. And it doesn’t matter whether the crankshaft is new or used, you need to check it otherwise, with today’s “quality” of spare parts, you can repair the engine and then suffer with it for a long time and tediously. We place the crankshaft on the prisms and check the runout, the norm is no more than 0.03 mm. If you don't have an indicator, take the crankshaft to a good turner
What is a major overhaul and why is it needed?
Overhauling a VAZ engine is quite a labor-intensive job that requires knowledge of the structure and operating principle of the unit.
This process will take a lot of time. You will have to remove the engine from the car and completely disassemble it. All removed spare parts are checked for suitability for further use and, if necessary, replaced with new ones. Particular attention is paid to the crankshaft: it is restored and brought into perfect condition. The existing systems are also checked: cooling, lubrication, fuel supply, and the crank mechanism is repaired.
During repair work, internal combustion engine parts and components are brought to perfect condition. After assembling the unit, its condition and performance should be identical to a new engine just released from the assembly line. Capital is needed if the engine has fully or partially exhausted its service life, and corresponding signs have appeared indicating this. It is impossible not to pay attention to them. With further use of the car, the engine may completely fail and cannot be restored. There is only one option left - purchasing a new part. Naturally, purchasing spare parts is more expensive than repairing them.
The service life of the engine before overhaul can be extended if you follow simple rules when operating the machine.
- Monitor the oil level and change it regularly.
- Monitor the coolant level to prevent the machine from overheating.
- Fill with high-quality fuel recommended by the manufacturer.
- Operate the machine wisely and avoid overloading.
- Limit the vehicle's idling time to a minimum.
- Avoid extreme driving that requires high speeds. Do not allow the tachometer needle to enter the red zone.
Removing and disassembling the engine
Car service in St. Petersburg car repair and maintenance in St. Petersburg PERSONA car service.
Removing and installing the engine. The engine is usually removed from the car when it is necessary to replace or repair parts of the crank mechanism - the cylinder block, its liners, parts of the piston group (piston rings, pistons, piston pins), when repairing or replacing the crankshaft and its main liners and connecting rod bearings, except for the cylinder head, head cover, oil pan and their gaskets. The need to remove the engine from the vehicle for repair is determined by the results of checking its technical condition.
Due to the fact that the engines of the cars under study are structurally combined with a gearbox and clutch into a single power unit, which is attached to the car body on shock-absorbing supports, if it is necessary to repair the engine, it is usually more convenient to remove the entire power unit from the car (except for the AZLK-2141 car with VAZ-2106 engine, from which the gearbox assembly with clutch housing is first removed, and then the engine itself is removed).
To remove the power unit, the car is placed on an inspection ditch or a lift and, after disconnecting the engine from the body, the power unit is removed from the engine compartment upwards using a hoist or any other lifting device with a load capacity of at least 200 kgf.
On front-wheel drive vehicles, it is possible to remove the engine from the engine compartment downwards. In this case, one lift is used without a lifting device, and the engine, after disconnecting it from the body, is installed on a special trolley placed under the car standing on the lift.
Depending on the layout and design features of the power units on the vehicles under study, the sequence and technology for performing individual work on their removal and installation may vary slightly, however, the general procedure for performing these works is approximately the same for all the vehicles under consideration and is given below:
1. Remove the hood (the hood does not need to be removed if the power unit is removed downwards).
2. Drain the oil from the engine (see subsection “Lubrication system”).
4. Disconnect the engine cooling system hoses going to the radiator and heater.
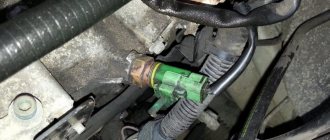
5. Disconnect the electrical wires from the battery, generator, starter, ignition coil, EHP carburetor, sensors and switches.
6. Disconnect the hose from the vacuum brake booster.
7. Disconnect the fuel supply hoses to the fuel pump and the fuel bypass hose from the carburetor.
8. Disconnect the carburetor air and throttle valve actuators.
9. Disconnect the cable drive or clutch slave cylinder.
10. Disconnect the exhaust pipes of the muffler.
11. Disconnect the front wheel drive (on front-wheel drive vehicles) or the cardan transmission (on vehicles with a classic layout), close the hole in the universal joint fork in the gearbox with a plug.
12. Secure the engine to the lifting device.
13. Unscrew the engine mounts to the body.
14. Remove the engine assembly with clutch and gearbox. Installing the engine on the car is done in the reverse order of removing it.
Engine disassembly. Disassembly of the engine is carried out after its external cleaning and washing on a special stand, which allows you to rotate the engine to ensure ease of disassembly and assembly work. In order to ensure high quality of subsequent engine assembly and not to disturb the balance of its parts, it is necessary to install suitable parts in their original, worn-in places. To do this, during disassembly, parts are marked without damage by punching, paint, tags or inscriptions. These parts include liners, pistons, piston rings, pins and connecting rods with caps, crankshaft and flywheel, flywheel and clutch, cylinder block and main bearing caps, and flywheel housing.
Engine disassembly has approximately the same sequence for all engines studied and is performed in the following order. If the power unit has been removed from the car, then before disassembling the engine you need to remove the starter, gearbox with clutch housing and clutch.
Remove the ignition system devices (distributor or ignition distributor, its drive, high voltage wires, spark plugs) and the generator.
Disconnect the hoses of the engine power and cooling systems, remove the fuel pump, carburetor, fan, liquid pump, thermostat.
Remove the oil level indicator and the tube into which it is inserted, and remove the oil filter.
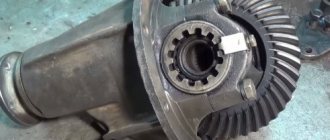
Remove the generator drive pulley from the crankshaft toe by blocking the flywheel with the locking pin and unscrewing the pulley mounting bolt.
Unscrew the front cover and, having disconnected the tension mechanisms, remove the timing belt or timing chain.
Remove the intake and exhaust gas lines, head cover and cylinder head with gaskets.
Turn the engine upside down and remove the oil sump with gasket, oil pump and oil receiver.
Remove the connecting rod caps by unscrewing the nuts of the connecting rod bolts, and carefully, so as not to damage the mirrors (working surface) of the cylinders, remove the connecting rods with pistons through the cylinders and mark the connecting rod caps with connecting rods for their subsequent correct assembly.
For engines with removable liners (UZAM-331, -412), pistons with connecting rods are pushed out of the block along with the liners, and then removed from the liners through the lower part of the liner, which makes it possible not to pull the connecting rod through the liner and avoid possible scratches on its surface. If it is not possible to remove the piston with connecting rod together with the liner, then first remove the piston with connecting rod through the liner, and then remove the liner using a puller. If it is not necessary to remove the liners, then they are fixed in the block using clamp bushings, and the pistons with connecting rods are removed, as usual, through the cylinders. If the liners are not secured, then when removing (installing) the pistons they may move out of place and their seal in the block will inevitably be broken.
Reasons for premature overhaul
Even with the most careful driving and careful routine maintenance, the vehicle's mileage will sooner or later lead to wear and tear on the power unit. It's only a matter of time.
But there are factors that speed up this process:
- Poor quality fuel.
It is known that such fuel leads to carbon formation, wear of rubber and plastic parts, and even jamming of the ShPG.
- Poor quality oil.
The pressure in the system decreases, the temperature decreases, or the engine, on the contrary, overheats.
- Untimely oil change.
In what cases is the power unit repaired?
Let's consider in what cases it will be necessary to repair the engine:
- Wear and wear of parts exceeds 80% of the resource.
- The appearance of mechanical damage to the main components of the power unit.
- Failure due to improper setup or maintenance.
- Other reasons that could cause malfunctions.
How to classify the repair of gasoline engines:
- On-line repair. This is the repair of worn parts, which during operation have a service life lower than the main power unit.
- Technical repair of engines. It is carried out during routine maintenance for the planned replacement of worn out elements.
- Unscheduled repairs of car engines. This is an unexpected breakdown of the power unit, which is caused by poor-quality maintenance, spare parts or other reasons that led to restoration operations on the motor.
- Planned repairs. It is also called a major overhaul. It is usually carried out according to the mileage of the car, when the resource of the power unit is exhausted.
This is interesting: How to start a car in cold weather on your own
Where to begin
Many motorists wonder where to start repairing gasoline engines? The answer is quite simple - it is necessary to determine the signs: is repair of the unit generally necessary, or is the problem hidden in something else? To do this, you will have to carry out a number of diagnostic procedures. They are divided into 2 types: electronic and mechanical.
Electronic diagnostics can show whether car repairs are necessary in terms of electronics and whether there are any problems at all. To do this, the electronic engine control unit is checked, as well as the condition of all sensors and connections. If no problem has been identified, then there is no point in going any further, as you may create a problem that will have to be solved.
Mechanical diagnostics will require a lot of time, effort and knowledge. To carry out this operation, there are instructions on the Internet, but in this article we will try to explain everything in much more detail and clarity. If problems are discovered during diagnostic operations, gasoline engines will have to be disassembled and repaired.
By the way, there is an engine repair manual for this, which is issued by the manufacturer, both in paper and electronic form. So, let's look at the process of repairing a car, or rather its power unit, in more detail.
Dismantling and disassembly
The first process is to remove the power unit from the car and disassemble it. In each specific case, engines are removed differently. This is influenced by the following indicators: drive, engine location, number of cylinders, body design features, gearbox type and others.
For example, dismantling the power unit from a Lada or a domestically produced truck is much easier than from other cars. They contain fewer electronic devices, so dismantling is quite easy and simple.
For example, diesel engines YaMZ-236 and YaMZ-238 can be removed from a vehicle in 10-12 hours, while their foreign counterparts can be removed in more than 36 hours. The same situation applies to the disassembly process, which can take Zhiguli cars from 3 hours and foreign-made cars from 10 hours.
The disassembly process should be treated carefully, since it is at this moment that the first diagnostic operations are carried out. A car enthusiast, if he is repairing an engine with his own hands, must visually inspect the presence of damage, cracks and other defects on the power unit and its components.
How to disassemble and reassemble a car engine
Some motorists, for various reasons, prefer to repair their car themselves.
In these cases, it is important to know the procedure for disassembling and assembling the engine. To begin with, it is worth understanding that it will not be possible to do without costs. Even if you do not plan to replace parts, you will have to install new gaskets during assembly (except in cases where the gaskets are not damaged or pressed through). You may also need engine sealant that can be used instead of gaskets, a torque wrench (needed during assembly), and a set of wrenches of different sizes. Moreover, you will need not only open-end and ring wrenches, but also socket wrenches (preferably with interchangeable heads, long and short wrenches). In addition, you will need a lot of free time, since disassembly takes from several hours to two to three days, depending on the make and condition of the car. Let's look at the procedure for disassembling and assembling the motor in more detail.
Troubleshooting elements
The next stage will be troubleshooting, which will determine the signs of a malfunction and also show what condition the mechanics are in. What is this procedure:
- Measurement of the crankshaft for size, hardness, deflection and alignment.
- Diagnostics of the condition of the plane and body of the cylinder block.
- Condition of the piston group.
- Worn elements and cylinder head housing.
- Other indicators.
- Feasibility of engine repair.
How to remove the engine
To remove the engine from the engine compartment, you will need the following:
- Disconnect all plugs from the sensor connectors installed on the vehicle. You don't have to label them, since each connector has its own shape.
- Remove the radiator pipes, unscrew the fuel hose, and then loosen the engine mounts.
- Loosen the bolts securing the gearbox to the engine. If the engine is installed longitudinally, then it is advisable to loosen the gearbox mount in order to move the unit back.
- Unscrew the bolts securing the exhaust manifold to the exhaust pipe.
- When nothing is blocking the engine, use a chain with a tap or other device to remove it from the engine compartment.
Taking this opportunity, you need to wash everything under the hood, as well as process the connectors and wires.
Spare parts
When diagnostics have been carried out and all the parts that need to be replaced have been identified, it is worth ordering the necessary spare parts, since preparation is required before installing them on the engine. Often, when gasoline engines are repaired, the following spare parts are changed:
- Main and connecting rod bearings.
- Piston group.
- Connecting rod pins.
- Connecting rod bushings.
- Oil filter and pump.
- Pump or its repair kit.
- Inlet and exhaust valves.
- Oil scraper rings.
- Gasket set.
- Valve guides and seats.
- Other details.
Grinding the block and crankshaft
The next stage of repair and restoration work is grinding the crankshaft, as well as the planes of the block and head. Using surface grinding and milling machines, the plane of the GBU and the block is brought into a mirror surface. As a rule, the following can be removed: 0.05mm, 0.1mm, 0.25mm, 0.5mm, 1mm or more of the thickness of the product.
As for grinding the crankshaft, there are types of repairs for this unit:
| Type of repair | Thickness, mm | Efficiency compared to new |
| Repair No. 1 | 0,25 | 80-90% |
| Repair No. 2 | 0,50 | 70-75% |
| Repair No. 3 | 0,75 | 65-70% |
| Repair No. 4 | 1,00 | 50-55% |
| Repair No. 5 | 1,25 | 40-45% |
| Repair No. 6 | 1,50 | Less than 30% |
| Repair No. 7 | 2,00 | Not applicable since 1995 |
Block head repair
Repairing the cylinder head is one of the simplest operations in the process of engine overhaul. It is recommended, of course, to carry it out at a car service center, but many motorists, after repair operations on Zhiguli cars, repair the cylinder head of foreign cars themselves. So, what is included in the process of overhauling the cylinder head:
- Replacement of the camshaft (or several, if there are 2 or more of them on the car).
- Replacement of valves, both exhaust and intake.
- Replacement of guide bushings.
- Changing seats and valve stem seals.
- Argon welding, in the presence of cracks or leaks.
- Other work related to the repair of cylinder head of one type or another.
Procedure for disassembling a car engine
The procedure for disassembling a car engine - instructions and a step-by-step plan on how to properly disassemble the engine, a step-by-step list of actions when disassembling the engine. We disassemble the engine as follows:
Procedure for disassembling a car engine - instructions:
1. Remove it from the car.
2. Disconnect the clutch.
3. Remove the camshaft drive belt, tension roller and spacer washer located under the tension roller.
4. Disconnect and remove the pulley from the camshaft.
5. Remove the cover. To do this, unscrew the three fastening bolts of the water pump and one bolt with a nut attaching the rear cover of the camshaft drive belt.
6. Disconnect the water pump. We first pry it off with a screwdriver, which we insert between the cylinder block and the pump housing flange, and move it a little.
Engine disassembly, troubleshooting
Before you begin repairing a car engine, it must be freed from attachments.
We remove the generator, starter, intake and exhaust manifolds and other parts of attachments, and simultaneously assess the condition of the components.
The injectors can be washed and adjusted, the intake manifold and throttle body can be washed.
After dismantling the attachments, we begin to gradually disassemble the engine.
We remove the front engine cover, this is especially true if the timing chain drive is chain driven - you can check the condition of the chain.
After removing the front cover, we evaluate the condition of the chain, guide and tensioner.
Remove the valve cover to get to the cylinder head bolts. Optimally, if you have an assistant and a wrench with a long wrench, then you will be able to tear off the cylinder head bolts without effort.
After the cylinder head bolts are torn off, unscrew them, carefully prying them from all sides with a screwdriver.
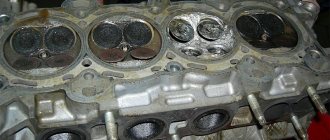
Let's pay attention to the cylinder head. It is best to have the cylinder head tested. This process means checking the head for cracks and the condition of the components. As a rule, it is necessary to replace several guides with valves, and then the valves must be ground in to the seats.
New valve seals are installed. By the way, when doing engine repairs with your own hands, it is important to check the condition of the camshaft cams - if they are severely beating and worn, replacement will be required. At the service station, the head plane is ground to a perfectly flat state, and the plane can also be milled a few millimeters.
When the head is ready, we move on to the cylinder block. Initially, evaluate the gap between the piston and cylinder. If the cylinder has a blue tint, it means it has overheated.
The cylinder block also needs to be taken for measurement, where, by using a professional tool, the results of wear on the cylinder surface will be known. Usually it is necessary to hone the surface of the cylinders or bore them to the repair size of the piston.
At this time, check the crankshaft for runout. If the runout is within tolerances, which allows the journals to be ground to the repair size, then the crankshaft is bored.
After purchasing new pistons and rings, you can give them to the craftsmen, who will hang the connecting rods and pistons separately and together, adjusting them by weight and installing them in the cylinder block with the required torque.
It is important to assess the condition of the oil pump. If their sprockets are not ground off, you can get by with regular pump washing and cleaning the oil receiver mesh. In general, the DIY engine repair is complete, all that remains is to assemble it.
Engine disassembly.
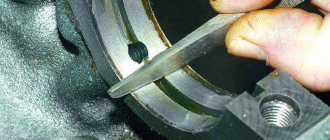
Engine disassembly is carried out in the sequence established by the manufacturer. A description of the engine disassembly sequence for a specific model can be found in the service literature. Disassembly of engines of traditional design usually begins with the removal of attachments, intake and exhaust manifolds, crankshaft and camshaft pulleys and the flywheel. Then remove the valve cover, the front and rear crankshaft covers, the bearing housing with the camshaft (with the upper position of the valve) and the cylinder head. Turn the engine upside down with the crankcase cover (oil pan), unscrew it, remove the oil inlet pipe of the oil pump and the oil pump assembly, disconnect the connecting rod mounting caps from the CV and push the pistons assembled with connecting rods out of the cylinders. If there is a wear ledge in the upper part of the cylinder, which may interfere with the removal of pistons with connecting rods from the cylinder, the ledge is cut off with a scraper (special tool). After removing the pistons and connecting rods, unscrew the bolts securing the main bearing caps and remove the engine crankshaft. If the engine block is lined, press out the liners. Depending on the engine design, a different disassembly procedure is possible. Depending on the type of repair, a different scope of disassembly work is possible (for example, it makes no sense to remove the intake and exhaust manifolds if repair work is not being carried out on the cylinder head itself, or if they do not interfere with this repair, etc.). Before starting disassembly, it is advisable to combine the valve timing marks and other installation marks on the shafts and body parts of the engine to identify them (there may be several marks on the pulleys, which can become confusing during subsequent engine assembly). If it is impossible to determine the location of these marks, the piston of the first cylinder of the engine should be placed at top dead center on the compression stroke and try again. If the marks are not found (a rare case), mark the pulleys in any available way (for example, apply marks with a center punch or paint) and use them when reassembling the engine. When disassembling the engine, carefully inspect the parts. Damaged parts are rejected. Parts that do not have visible damage are washed and set aside for subsequent instrumental inspection. Parts that are not damaged and have no extreme wear can subsequently be reinstalled into the engine. Parts that are planned to be reinstalled into the engine must be marked at their installation location. When assembling the engine, these parts must be installed in their original places in the same orientation in space (i.e., liners are installed in their sockets, pistons are installed in their sleeves, pins and rings in their pistons, valves in their guides, etc. ) In this case, the balance of the engine and the running-in of parts to each other are not disturbed. Non-wear parts of the engine include connecting rods. If the connecting rods are not damaged, they are reinstalled into the engine. The connecting rod is not a friction pair for the mating part since the CV journals and piston pin slide along the surface of the liners installed in the connecting rod heads, while the heads themselves are not subject to wear. The connecting rod and main bearing caps are not interchangeable (they must not be mixed up). When removing covers, check that there are marks on them and that these marks correspond to the places where the covers are installed. If there are no marks on the covers, the covers are marked. After removing the piston and connecting rod assembly from the engine, install the removed cover in place and secure it with nuts. In this case, the caps will be difficult to confuse with the connecting rod caps of other cylinders and connecting rod caps from other engines. When performing disassembly operations, use serviceable tools and devices (however, this is a general rule that is relevant for all types of work performed).
How to disassemble an electric motor: 7 rules
In order to check or repair the electric motor, it must be disassembled. This is a simple task that can be done by people without special training.
How to disassemble an electric motor? 7 basic rules for disassembly
When disassembling you need to follow several rules:
Assembly of the unit
The assembly of the unit is carried out using a stand that allows you to rotate the engine 360 degrees. So, let's look at the sequence of the operation:
- Installation of liners and “laying” of the crankshaft.
- Installation of connecting rods and piston group.
- Installing the yokes in the correct position, as well as their final tightening.
- Installation of gaskets and covers covering the motor.
- Installation of the oil pump and pump.
- Installation of the crankshaft pulley.
- Installing the cylinder head(s).
- Pallet installation.
- Assembly of small units.
- Installation of fuel equipment.
- Other assembly work.
This process is quite labor-intensive and difficult, so it is recommended to entrust it to professionals.
3.2.2.1.1. The procedure for disassembling and assembling the engine
3.2.2.1.1. The procedure for disassembling and assembling the engine
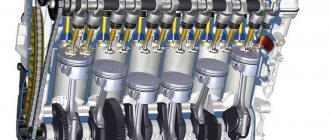
Cylinder block, crankshaft and connecting rod-piston group
1. Oil seal holder 2. Cylinder block 3. Coolant pump 4. Generator bracket 5. Timing chain cover 6. O-ring 7. Oil receiver with pre-filter 8. Flywheel (torque converter drive disk) 9. Mounting plate 10. Main bearings 11. Thrust half rings 12. Crankshaft 13. Main bearing caps
The easiest way is to disassemble the engine and perform all types of work on a portable stand specifically designed for engine repair. Such stands can often be rented. Before mounting the engine on the stand, it is necessary to remove the flywheel with the clutch mechanism in order to screw the stand bolts into the cylinder block (crankshaft housing).
If there is no stand, then you can disassemble the engine by mounting it on a sturdy workbench or on the floor. When disassembling without using a stand, be very careful when manipulating the engine.
If you purchase a ready-made remanufactured engine, you must first remove all the attachments in order to install them later in exactly the same order as during an independent overhaul. Such units include:
— generator, and brackets for the power steering pump and (or) air conditioning compressor (depending on the vehicle configuration); — ignition distributor, spark plugs and high-voltage wires; — coolant pump and thermostat and radiator hoses; — parts of the carburetor or fuel injection system; — all sensors and solenoid valves along with wiring; — suction and exhaust manifolds; — oil filter; — fuel pump — for carburetor engines; — engine mounting parts; — flywheel/torque converter drive disk. Warning
When removing attachments from the engine, pay special attention to those little things that can make engine assembly easier. Place marks on gaskets, seals, spacers, pins, bolts, washers, nuts, etc. to ensure they are in the same position during reassembly.
If an incomplete cylinder block is installed (i.e. a cylinder block with a crank mechanism and piston group fitted and installed), then the cylinder head, oil pan, oil pump and camshaft drive chains should also be removed.
If you plan to carry out a major overhaul with complete disassembly, then the engine must be completely disassembled and parts of the internal engine structure must be removed in the following order (unless otherwise stated, see subsection 3.1.1 and subsection 3.1.2.2.1).
When is it necessary to overhaul an engine?
Car engine wear occurs gradually.
There are a number of signs indicating a malfunction of the internal combustion engine.
Precursors of “disease” may appear in the following sequence:
- Increased fuel and oil consumption. When parts wear out, gaps appear between them, which fill with fuel during operation. An increase in oil consumption occurs due to clogging of the piston rings or loss of elasticity of the valve stem seals.
- The vehicle's power decreases.
- Noticeable dark blue smoke from the exhaust pipe. This indicates that oil has entered the fuel mixture.
- The oil pressure light starts blinking or is constantly on.
- The engine makes an unusual knocking noise when running. It is possible that the bearings of the crank mechanism were worn out.
- When measuring compression, the instruments show a significant deviation from the norm (decrease). Low compression indicates damaged gaskets and worn piston rings.
- When you unscrew the spark plugs, carbon deposits, oil, and dirt are always found on them.
- Frequent overheating for no apparent reason.
Stages of engine repair
Rebuilding the engine involves performing the following actions:
- Removing the motor.
- Complete disassembly and removal of accumulated dirt by washing and cleaning.
- Identification of defective spare parts of the block that need to be replaced: inspection of the engine block for cracks, measurement of possible gaps formed, assessment of the condition of the crankshaft, identification of worn parts.
- Overhaul of the cylinder head.
- Restoration of the cylinder block.
- Assembly of the unit and installation on the car.
Disassembly and dismantling of the engine
The process of removing the unit from the car may vary depending on the car model. Dismantling a carburetor engine is much simpler than an injection engine. There are fewer electronics that have to be removed first. Also, the disassembly process will be different for brands with front and rear wheel drive.
The preparatory stage preceding dismantling will be the removal of interfering mechanisms and unscrewing the retaining bolts. The removal of a heavy unit from the car body occurs using a special lift or winch. If there is no such device, then to reduce weight, all possible parts and spare parts of the engine are removed, and it is pulled out manually. This will require the help of several people.
Disassembly follows. The work should be done sequentially, carefully inspecting the parts for wear and placing them in order.
It is worth knowing that a VAZ engine can be disassembled in about 3 hours; disassembling a foreign-made engine takes more time: about 10 hours.
Washing engine parts
Washing is an important step that many people skip.
It is not right. Each detail has a specific meaning. If the spare parts are not washed and deposits are not removed, then the degree of wear can be incorrectly determined, which can cause rapid failure of the entire motor. You should also wash the block and cylinder head with special care to examine for possible cracks.
Diagnosis of damage and defects
Defects are identified visually and using measuring instruments. All spare parts are checked for wear, scratches, cracks and chips. Particular attention should be paid to the following details.
- The cylinder block and head are checked for integrity, special attention is paid to cracks and chips.
- The crankshaft is inspected and measured to check whether wear has appeared, and is also checked for alignment and bends.
- Parts of the connecting rod and crank mechanism: the general condition and the presence of play are determined.
- Gas distribution mechanism.
Cylinder head repair
Repairing this spare part is not too complicated, but many car owners turn to the service for help. If you decide to do the repairs yourself, then you will need to replace or repair the following parts.
- Camshafts.
- valves.
- Guide bushings.
- Valve stem seals.
If cracks are found on the block head, it will need to be replaced or polished. It is possible that there will be a specialist who can weld the damage with argon.
Cylinder block repair
After cleaning and washing the block, it is necessary to restore it, bringing it to a quality close to the factory one. It is necessary to polish the head seat to a mirror shine, eliminating any existing holes and chips. For this, a surface grinder or milling machine is used. Depending on the degree of damage, the cut thickness can vary from 0.05 mm to 1 mm. If there are too deep cavities, grinding may consist of several stages.
Crankshaft repair and restoration
A car's crankshaft can be repaired and bored a certain number of times, depending on the model. For example, the crankshaft on a VAZ needs to be repaired 4 times and is bored to fit different sizes of liners with their subsequent enlargement. Having dismantled the spare part, the first thing you need to check is whether it can be restored. If yes, then you can buy larger earbuds and get started.
The second thing you need to pay attention to is the crankshaft journals. If, upon inspection, wavy grooves and risks are found on them, then you need to get rid of them. This is done by grinding on a special machine. Remember the main thing! Replacing liners without grinding is unacceptable. Repairing a car engine with your own hands will be in vain, the result will be zero.
Assembly and installation of internal combustion engines
Having prepared the head, cylinder block and crankshaft, we proceed to assembling the engine. For engine capitalization, you may need to purchase the following spare parts from a car store:
- Valves, guide bushings and seats for them;
- Connecting rod and main bearings;
- Connecting rod pins and bushings for them;
- Piston rings;
- Repair kit for pump;
- Oil filter;
- Gasket set.
Engine assembly occurs in the following order:
- Installation of liners and crankshaft shrinkage.
- Installation of pistons and connecting rods.
- Fixing the crankshaft with yokes.
- Installing the gasket.
- Installation of the motor cover.
- Mounting the pump and oil pump.
- Installing the crankshaft pulley.
- Installing the head.
- Fastening the pan and crankcase.
When installing the liners and piston group, lubricate the parts and cylinder walls with a special lubricant. Its further performance and service life depend on the high-quality assembly of the internal combustion engine. It is advisable that it be carried out by a person who knows the principles of operation and the design of the motor.
We install the unit in its original place using a lifting device. After successful installation, it is fastened, then the removed equipment and electrics are installed in reverse order. Before starting the engine, it is additionally recommended to center the clutch and test the engine.
Running in the engine
Having capitalized the engine, you definitely need to break it in properly.
Otherwise, the motor will quickly fail without using up even half its service life. During the break-in period, parts are ground in, and excessive load will harm them. According to existing standards, a car needs to be run in for about 2-3 thousand km. In this case, the speed should not exceed 60 km/h.
Clutch housing
To ensure exact alignment of the gearbox axis with the crankshaft axis, the hole in the clutch housing is finalized as an assembly with the cylinder block, so it should not be removed from the block unless necessary.
To remove the clutch housing, you need to do the following:
- remove the cylinder block with the clutch housing from the stand using a lifting device, freeing it from the clamping brackets of the stand;
- install the block on stands or a workbench;
- Use a spanner to unscrew the bolts securing the clutch housing to the cylinder block and remove the clutch housing as an assembly with the clutch drive parts.
Some motorists, for various reasons, prefer to repair their car themselves. In these cases, it is important to know the procedure for disassembling and assembling the engine. To begin with, it is worth understanding that it will not be possible to do without costs. Even if you do not plan to replace parts, you will have to install new gaskets during assembly (except in cases where the gaskets are not damaged or pressed through).
You may also need engine sealant that can be used instead of gaskets, a torque wrench (needed during assembly), and a set of wrenches of different sizes. Moreover, you will need not only open-end and ring wrenches, but also socket wrenches (preferably with interchangeable heads, long and short wrenches). In addition, you will need a lot of free time, since disassembly takes from several hours to two to three days, depending on the make and condition of the car. Let's look at the procedure for disassembling and assembling the motor in more detail.
Read in this article
Engine assembly steps
To assemble the motor, the following new parts are needed:
- a complete set of engine gaskets and seals;
- new cylinder head bolts;
- a new set of chains or timing belt;
- new oil and filter, spark plugs, service belts;
- new pump, thermostat.
To assemble the engine, you need to assemble the bottom of the cylinder block, and then proceed to the following:
- install the cylinder head, tighten the cylinder head bolts without tightening them;
- armed with a torque wrench, as well as the correct data on the tightening torque of the cylinder head bolts, we tighten the bolts in the correct order and with the required torque;
- now the sprockets and timing chain, or the timing belt with rollers are installed, and we set everything according to the marks on the first cylinder; you can check the marks by the mark on the flywheel;
- rotate the crankshaft by the pulley to identify possible snagging;
- Reassemble all attachments in reverse order.
Now we proceed to install the engine in the engine compartment, everything in the reverse order.
Most likely, the engine will not start the first time until the fuel system builds up pressure and all sensors are not synchronized. Then we check the pressure in the cylinders with a compression meter, where the compression should be at least 13 kPa.
Assembling a car engine: what to consider
Reassembling the engine is carried out in the reverse order. When installing connecting rods, please note that each of them has factory marks on the body, which must coincide with such marks on the cylinder block body.
Relatively speaking, you need to respect the left and right sides when installing. In addition, as mentioned above, the connecting rod and connecting rod cap are individually matched to each other at the factory. More precisely, the parts are made from one single piece. They cannot be replaced.
The connecting rod and main bearings are installed so that the locks on them and the seats match. Before installation, they need to be lubricated with machine oil and wiped with a clean cloth to avoid dust particles. The main and connecting rod caps are tightened with a torque wrench. The tightening force varies for different cars. It is written in the passport, as well as in special reference literature.
Finally, we note that if you disassemble and reassemble the engine yourself, then it is better to have with you special reference literature for a specific car model.
Do-it-yourself removal of the engine cylinder head in a garage: preparation and removal of the cylinder head. How to remove the head if it is stuck. Useful tips.
Main and connecting rod bearings: purpose, design and operating features of plain bearings. How to tighten liners correctly, tightening torque.
Why and when does the cylinder head need to be ground? How to check the mating plane of the block head with your own hands. Milling and grinding of cylinder head.
When might partial engine disassembly be necessary?
The car engine is partially disassembled if the diagnostics did not reveal damage to the cylinder block or crankshaft. The partial disassembly process itself involves removing the oil pan, cylinder head, pulleys, pistons with connecting rods, as well as the front cover of the engine block.
It is worth noting that partial disassembly of a car engine is practically no different from complete removal of the propulsion system. However, this type of work still has its own characteristics. Often, it is much more convenient to repair a car on an engine that has been completely removed, however, it is obvious that in special cases there is no point in completely disassembling it.
Also be aware that most 4x4 engines do not allow the pan to be removed without removing the transfer case or the entire engine.
During the process of partial disassembly of the car's propulsion system, it should also be taken into account that it is very important to constantly monitor cleanliness during the work. This is necessary not only during the repair process, but also when you are engaged in reassembly. In order to minimize the possibility of unnecessary dirt entering the engine, be sure to pre-wash the engine with pressurized water and special compounds. Before you remove the cylinder head, you need to align the crankshaft, high-pressure pump (for engines running on diesel fuel), and the camshaft according to the marks that are on the parts.
In order to remove the oil pan from a car engine with a classic layout, it is necessary to lift the engine itself using a specialized lifting device. This will allow the pan to move downwards, which will make it possible to remove it from under the oil receiver.
Please note that the free passage of the pallet is usually limited by the front suspension cross member. There are cars where it is not possible to raise the engine to a sufficient height, since the gearbox will rest against the bottom of the body. In some engine models, the cylinder head prevents its lifting because it rests against the wall of the engine compartment. Then it will simply not be possible to remove the pan - at most, remove the oil receiver from the system, and only then pull out the pan.
Disassembly and assembly of the power unit
To completely disassemble the engine you will have to remove it. You can do this immediately, or you can do it after the cylinder head has been removed. To remove it, you will need a hand winch and a strong support (for example, a beam) on which to hang it. Filming the motor also takes several hours.
First you need to drain the oil and coolant, and also remove all attachments: fuel pump, carburetor, water pump (pump), generator, oil pressure sensors, oil filter, oil dipstick, breather, etc. It is strongly recommended that during further work the nuts and bolts from each bridle be folded separately. For example, in signed boxes.
In what order does the engine disassemble: main stages
Disassembling and reassembling an engine in general terms is almost always the same. There may be some differences in details depending on the brand and model. The following is a suggested procedure for the removed power unit.
- The gearbox is disconnected. There is nothing particularly complicated about this, since it is attached with bolts. It is most convenient to remove it after dismantling the engine, but you can separate the assembly earlier. In this case, difficulties may arise when installing the motor in its place.
- The clutch disengages. To do this, unscrew the bolts securing the clutch housing, after which the entire assembly is removed.
- Now you need to remove the crankshaft drive pulley. To do this, you will need a strong flathead screwdriver and a suitable size wrench (it is better to also have a gas wrench). First you need to fix the crankshaft. To do this, use a screwdriver to lock the flywheel. To do this, you need to screw a bolt into the clutch mounting hole, insert a screwdriver between the flywheel teeth and press it against the bolt.
- Use a gas wrench (or an open-end wrench of the corresponding number) to unscrew the nut (on some cars it is a ratchet). After this, use something suitable (it can be a wheel wrench) to function as a lever, pry up the pulley and remove it from its place. Now the bolts securing the flywheel are unscrewed, after which this part is removed. There is a plate underneath that is held in place by bolts. It also needs to be removed.
- The timing belt or chain is removed from the camshaft if the cylinder head has not been removed first. In some cars, to get to the timing belt or chain, you must first remove the valve cover (also known as the cylinder head cover). It is secured with nuts on studs or bolts. There is a gasket under the cover that can be saved and, if suitable, reused.
In addition, many engines also have a front engine cover that covers the camshaft chain or belt. Of course, there is also a gasket under this cover. But sometimes it is replaced with a special sealant. The cover is usually attached to studs using nuts.
To remove the belt (chain), you must first loosen the chain itself by removing the tensioner. Next, you have to remove the camshaft gear. This part is secured with a bolt. But in addition to a key of suitable size, you will need (at least on domestic engines) a powerful flat-head screwdriver or chisel, as well as a hammer. Using these tools, the locking plate is bent, which prevents the bolt from unwinding spontaneously.
Once the gear is removed, the chain is removed and you can begin removing the crankshaft gear. Here it is better to have a special puller, since without it you may have to tinker. This part is fixed on the shaft with a key, which can fit quite tightly in the groove. If, during the process of removing the key, its edges were somewhat deformed, then they can be corrected with a file. The last procedure at this stage is to remove the chain tensioner shoe. There shouldn't be any problems with this.
6. Dismantling the camshaft. To do this, you need to unscrew the nuts (they are on studs) that secure the camshaft housing and remove the shaft itself.
7. Remove the cylinder head. It is fixed either with bolts or nuts on studs. Now you can turn the engine over and unscrew its pan. There will be a gasket under the pan. It will most likely have to be replaced, but you can get by with sealant.
We also recommend reading the article on how to tighten cylinder head bolts. From this article you will learn about the procedure for tightening the cylinder head, as well as with what force (torque) it is necessary to tighten the cylinder head bolts.
8. Remove the oil pump. Unscrew the rear oil seal cover (from the engine end). The oil pump shaft and its drive gear on the rear of the engine are removed. To do this, you need to unscrew the bolts and remove the locking bracket, after which the shaft and then the gear are removed using a screwdriver. You need to handle it carefully, as it plays an important role in the operation of the engine.
9. The next important step is dismantling the crankshaft. Complete disassembly and reassembly of the engine cannot be done without this process. This requires attention and accuracy, since the parts are not interchangeable, but individual.
10. Removing connecting rods. First you need to turn the crankshaft so that the two connecting rods are in the upper position. Next, unscrew the nuts from the connecting rod cover and remove the cover itself (yoke). The yoke will fit tightly, so gentle tapping on the sides with a hammer will be required. Now you can remove the connecting rod. It is pushed out together with the piston by hand or the handle of a hammer.
Attention! Each connecting rod and each yoke are numbered. The numbers must match, so after removing the connecting rod, it is better to put the cover back in place.
On the inside, the connecting rods and covers have metal liners. If their replacement is not envisaged, then it is worth scratching the corresponding number on the non-working side. The same procedure is carried out with the other two connecting rods.
11. Removing the main covers. They are also fixed with nuts and are strictly in their places. On their inner side there are also liners - main liners.
12. The crankshaft is removed, the old liners from under it and the retaining half rings are removed.
The engine disassembly process can be considered complete.