How to replace a burnt-out H7 low beam bulb in a Renault Duster
After Russia introduced a law on compulsory daytime driving with low-beam headlights or GOST-compliant DRLs, low-beam lamps on cars began to burn out more often. In addition, the load on the generator has increased, which also affects fuel consumption. In this article we will take a detailed look at the process of replacing a low beam lamp on a Renault Duster.
What to choose?
So that after replacing the light bulb on a Renault Duster, it will last for a long time and you will not have to make another replacement soon, you need to choose a light bulb model that is made with the highest quality and is based on only high-quality materials.
Mainly, owners evaluate original consumables for Renault
Duster, believing that using the original is the most reasonable and rational solution to the problem.
However, in the manufacturing sector there are many other popular manufacturers who offer low beam lamps that have greater durability and light beam power. With all this, the price of such a product will be very lower, and a quality guarantee directly from the manufacturer will allow for a free replacement once the element is ready to fail within about 30 years.
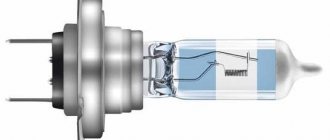
The specification for replacing the low beam lamp on a Renault Duster is type H7 and power 55 watts. This means that any consumable that meets these parameters will fit the Renault Duster
will not cause any complaints.
As a result, low beam bulbs from the Osram and Philips brands are popular among Renault Duster
, however, there are many more manufacturers that also meet fairly high quality requirements.
Replacing low beam lamp Opel Corsa d
Which lamps should I choose to replace a burnt out one?
If you were satisfied with the light that was before, we can safely buy the above lamps and install them. If it was not enough, then you should take a closer look at brighter lamps - with increased brightness. For example, the following lamps are suitable for Renault Duster:
- Osram H7 +110%
- Philips H7 +130%
- Bosch H7 +90%
By installing these lamps you will feel a significant difference in light compared to standard lamps. However, like all lamps, lamps with increased light output have disadvantages :
- Service life is shorter than that of a conventional lamp
- The price is much higher
- They are often sold in sets, so if 1 lamp burns out, you need to purchase a set
The advantages of such lamps
- Brighter light without installing additional equipment
- The lamps have the same power as regular ones, i.e. 55W
- The lamps are certified and approved for use on public roads
Which lamps to choose depends primarily on your preferences.
Improved lighting in the trunk, glove box and interior
The Renault Duster car enjoys deserved popularity among Russian drivers. However, some elements in the standard package cause complaints from users. This also applies to lighting in the trunk, interior and glove box, which can be easily improved on your own; in extreme cases, you can contact service centers.
Improved trunk lighting
Many drivers complain about poor lighting in the trunk of a Renault Duster car since there is only one light source installed there. There are different ways to solve this problem. The easiest way is to install a different type of light bulb. The trunk, interior, front dimensions and license plate lighting use the same lamps - W5W 12V. To improve the illumination of the trunk, install a lamp with a W5W lamp base . No complications are expected with such a replacement, since both types of light bulbs have the same base. LED analogs of W5W 12V lamps: Mayak 12T10-W\5SMD 5 SMD chips, Mayak 12T10-W/6SMD 6 SMD chips, Mayak 12T10-ULTRA-SW 6 SMD chips + 1 lens. Once replaced, the light will become bright and white. If you need even more light, install an LED strip on the sides of the trunk, connecting it through the trunk lamp.
LED lighting will improve visibility in the trunk even when completely full, and will save your time and nerves when searching for the things you need. In addition, you will also save money, since LEDs are more durable.
Improving interior lighting
You can also enhance the lighting in the car interior by installing an LED bulb. However , a greater effect can be achieved by installing an LED strip . The operation of installing an LED strip is absolutely not burdensome in terms of money or time. You just need a little ingenuity and a little skill. Buy double-sided tape, an LED strip of the desired parameters, some wire and a soldering iron with all its accessories . The power supply for the LED backlight must be connected to the wiring of the interior lamp. After you have chosen the locations for the lighting, cut the LED strips to the required length. Solder the wires and mount with double-sided tape . All that remains is to hide the wiring in the cabin. To place the lighting in prominent places in the cabin, it can be packaged in a heat-shrink tube (this is also inexpensive).
Replacing a low beam lamp on a Renault Duster
So, open the hood and start replacing the lamps. The low beam headlights must be turned off.
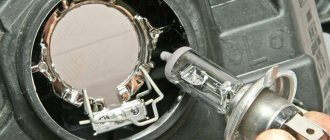
Remove the rubber boot from the inside of the headlight and see the lamp itself
It is not necessary to remove the lamp socket. Carefully grab the lamp base and pull it out towards you.
Remove the socket from the old lamp and put it on the new one
Now we take the lamp as shown in the figure with the protrusion facing up and insert the lamp into the base until it clicks.
We check the functionality of the lamp and put on the rubber plug.
Do-it-yourself dismantling and replacement of headlights
The procedure for replacing a headlight is simple, so it can be done by novice drivers with their own hands. The process consists of two main stages: removing and installing a new device.
Low beam lamps
Replacing the low beam bulb on a Renault Duster is not difficult (video author - trebor1159).
The procedure consists of the following steps:
- The negative terminal from the battery is disconnected.
- The corrector drive cable is disconnected.
- Then remove the rubber plug from the back of the headlight.
- To remove the light bulb, you need to take it by the base and press down until it clicks. The element is removed by the block.
- Next, the old light bulb is removed from the socket, and a new one is installed in its place.
- Further actions are performed in reverse order.
Fog lights
The right and left fog lights change in the same way, so it is enough to consider the process of replacing the right element:
- The right wheel and protective shield are removed.
- Next, the fastenings of the front part of the fender liner are unscrewed. After this, the freed part should be bent and placed behind the brake disc.
- Then, by pressing the latch, you need to disconnect the connector with wires from the light bulb.
- Turn the light bulb counterclockwise until it stops and remove it from the housing.
- We install the new lighting element in the reverse order.
Photo gallery “Replacing the PTF lamp”
To install, you need to prepare a set of tools and purchase a special set of DRLs. The kit includes all the necessary parts and installation instructions.
DRLs must be placed strictly in certain places.
Installation of DRLs on Duster consists of the following steps:
- Places for installation are prepared: holes of the appropriate size are cut out in the radiator grille.
- You need to pull the wires through the cut holes so that they do not touch the radiator.
- We rewind the fastened wires with electrical tape.
- We insert lighting blocks into the prepared holes.
- We attach the control unit behind the battery to the shield.
- Next, connect the wires according to the diagram. After installation, we check the operation of the DRLs.
Replacing the Duster high beam lamp
Remove the rubber boot and put it aside
Gently press the spring clamp of the lamp and move it to the side
We take out the lamp and remove the block from it. We take a new block, put it on the lamp and reassemble it in the reverse order
Types of lamps
First, let's decide which bulbs are suitable for Duster. A properly selected consumable will help avoid many problems. Poor or unsuitable replacement will cause overheating of the connector or melting of the wiring.
French manufacturers install H7 type consumables with a power of 55 W on headlights. This means that any lamp with these characteristics will do.
What to choose
Since the modern market provides a huge range of products for Duster, you should think carefully about your choice. Experts say that original Renault light bulbs are the right and optimal solution for a car. But finding the original is a difficult task that requires considerable effort.
If you couldn’t find the original, don’t worry. The main thing is the manufacturer. It is recommended to buy products from well-known companies, because high-quality materials are needed. Car owners recommend German ones: they are in no way inferior to Japanese ones, but are much cheaper.
The greatest demand among Renault Duster owners is for optical lamps produced by Osram, Philips and PIA. Consumables meet all requirements and are made of high quality materials.
The cheapest lamps produced are: approximately 300 rubles. Durable, reliable, yellowish light, no frills. This is a cheap and practical option for Renault Duster.
Philips consumables are already more fashionable. They cost three times more, the light is white with yellowish tint, but brighter. Service life is about six months.
Remove the lamp from the headlight housing.
Disconnect the wire block from the lamp. We attach the wire block to the new H7 lamp and, having inserted the lamp into the headlight housing, press the wire block until the spring clips snap into place.
To replace the side light lamp, remove the protective rubber cover of the low beam and side beam lamps.
Replacing the turn signal lamp
The lamp socket is located at the top of the headlight, so you won't have any problems with replacement.
Turn it counterclockwise and remove it from the headlight socket.
Press the lamp and turn it counterclockwise. We take out the lamp from the socket
We take a new PY21W lamp and install it in the socket. We reassemble in reverse order.
Precautions when working with halogen lamps
Headlight covers for Renault Duster
Duster halogen lamps, like conventional incandescent lamps, use tungsten as a light source. However, the heating temperature of tungsten in halogen lamps reaches 2700 - 2900 C, which is much higher than that of conventional lamps . Due to the high temperature, their high light output is achieved.
But, at this temperature, any contaminants that fall on the surface of the flask immediately burn out, forming dark spots.
The appearance of spots leads to a decrease in the light output of the lamp, as well as to uneven heating of the surface of the glass of the bulb and its cracking . Therefore, when replacing, it is necessary to take the halogen lamp not with your hands, but with a napkin or gloves. Gloves should not leave traces of the material from which they are made on the lamp. If it so happens that traces of dirt appear on the glass, it must be thoroughly wiped with alcohol. It is necessary to avoid sharp physical impacts on halogen lamps, they are sensitive to this . Following these recommendations will significantly extend the life of the Renault Duster light bulb.
Features of low beam on Renault Duster
The Duster is equipped with block headlights that use an H7 , which has a luminous power of 55 W. It is advisable to use only high-quality products from reputable manufacturers in order to avoid further problems associated with overheating of the connector, as well as melting of the wiring.
For productive operation of headlights, an intense luminous flux is required. You should pay close attention to him too. The brighter the glow, the fewer problems there are when maneuvering on the road. All work should be done with the battery turned off to avoid any safety problems.
What lamps can be used?
As noted earlier, a wide variety of low beam lamps can be used. The most important thing is that they are produced by a reputable manufacturer. Many people use European brands. According to reviews from car owners, many recommend German manufacturers and, as it turns out, the cost of German products is much lower than the same quality products from Japanese manufacturers. This is a little strange, but the fact remains. The most popular companies among buyers are PIA and Osram. Both options will suit you perfectly.
And here is the rating of lamps according to independent auto experts:
1st place – OSRAM Night Breaker
2nd place – Halogen MegaLight Plus
3rd place – Philips X-treme Vision +130 .
The best H7 lamps took the first 3 places
A more detailed review of H7 lamps can be seen in this video:
How to replace a low beam lamp
So, the Renault Duster low beam lamp has been purchased, and all you have to do is replace the one that has failed. We provide instructions that will tell you in detail how such a procedure is performed. Everything is done extremely simply. Replacing a lamp involves several steps:
- The low beam bulb is carefully removed from the packaging, never with a bare hand, only with a glove, because touching it with your hands is prohibited. If they come into contact with the skin of your hands, halogen lamps may subsequently fail, resulting in you having to run to the store again. However, some auto electricians do this without gloves, but if you do not have such experience, it is better not to risk it.
- At the next stage, you need to remove the rubber plug from the side of the engine compartment, which provides protection from various types of external influences. First of all, we should talk about moisture that gets into the device.
Remove the rubber cover from the back of the headlight
- The main thing is not to overdo it when you remove the lamp. It is pulled out along with the cartridge. First, press down on the socket, and then remove the lamp. In this matter, accuracy is important, which will protect against mechanical damage to both the cartridge itself and the wiring.
Carefully remove the lamp
- You remove the lamp, and then install a new one in its place. Before installation, coordinate the light bulb correctly, see where it is “top” and where it is “bottom”.
Maintain correct lamp orientation
When installing, first insert the lower edge of the lamp; when it is in place, press the upper edge until it clicks.
Installing a new lamp
- After installation, check the functionality and correct orientation of the lamp inside the headlight.
We visually check the result of replacing the lamp
So, the procedure is completed, and, as practice shows, it is no different from a similar procedure with other cars of various brands. The driver always needs to remember that it is not necessary to independently replace the low beam lamp on a Renault Duster, because you can always contact a specialized company, that is, a dealer car center or other organization. There are a huge number of specialized centers on the market that offer to do this at the best price. Of course, only replacing it yourself brings pleasure and saves money.
Do not forget that the luminous flux of the lamp is constantly decreasing. This happens due to aging. The scattering of light becomes worse, and the driver begins to see the road poorly. This is especially true at night, when visibility on the road is poor. You should not delay the procedure for replacing the low beam lamp on a Renault Duster if it begins to malfunction or dim. Dim light leads to accidents on the roads. So be sure to monitor the condition of your vehicle so that you can always replace the lamp on time. We told you how to do this, so there should be no problems with replacement. It is best to always have a new light bulb in stock, which allows you to troubleshoot problems associated with poor lighting in a timely manner. Don't forget about this so you don't get into trouble on the road. Transport must always be in good working order and work one hundred percent.
What to choose
So that after replacing the lamps on your Renault Duster car, you will not have to do another replacement soon, you have to choose a model that is made to the maximum quality, and is based on exclusively high-quality materials.
First, you should take a closer look at the original consumables for your model; many experts say that if an original low beam lamp is installed, this will be the most correct and optimal solution to the problem.
Now on sale there are a large number of popular manufacturers among consumers who offer high-beam light bulbs for sale, and, of course, low-beam light bulbs, which have a serious power of the light beam itself, and accordingly greater durability. Also, the cost of the product will be noticeably lower, and a quality guarantee directly from the manufacturer itself will officially allow you, in the event of an unexpected consumable failure ahead of time, to make a free replacement in the salon.
Characteristics from the official passport for replacing a lamp on a Renault Duster car - power 55W and type H7. This means that any element that meets these characteristics will be ideal for your car, and there will be no questions asked. Among the most popular among Duster owners is the low beam lamp manufactured by Osram and Philips, but there are a large number of manufacturers that meet high quality and performance requirements.
When choosing an element, the most important thing is its appearance. When buying it, you need to carefully look at the soldering, check whether there are cracks or any other mechanical damage (chips, scratches) on the glass. If you see that the conductive thread under the glass is torn, or there is play in the base, or rather uneven joints, then it is better to refuse the purchase. If there are no similar unpleasant defects, then feel free to buy, install and check the evenness of the light.
How to replace the low beam bulb on a Renault Duster?
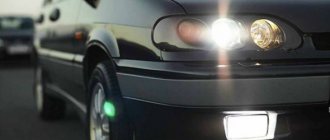
Low beam is the basis of the Renault Duster mnemonics. This type of lighting signals to other cars that your car is on the road. Also, it illuminates the roadway by 30-50 (m) in conditions of poor visibility or at night. Renault Duster headlights are distinguished by a solid level of reliability, but there are still a number of situations when the Duster low beam lamp requires replacement.
In what cases may light bulbs need to be replaced?
- The light source simply burned out
- The vehicle owner does not like the type of light (Renault Duster uses halogen)
- The driver does not like the intensity of the light (Renault Duster's signature low beam bulbs are Philips H7 +30%)
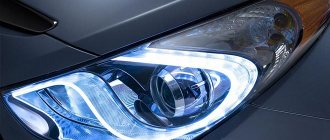
Many drivers of the French compact crossover prefer to use a more intense light source as the low beam. Most often, the original Renault Duster low beam lamps are replaced with their closest analogue in the form of Philips H7 +130% (pictured). This lighting is brighter and more expressive. The more intense light illuminates both dry and snowy roads perfectly.
You should immediately pay attention to this point that branded lamps are most often sold as a set, that is, there are 2 lamps in a box. Experts recommend changing the light bulb, if it is burned out, on both headlights at once. This way you will provide the most even and high-quality lighting for your Renault Duster. A low beam lamp, a socket and a rubber plug are all that stand in your way of the necessary lighting.
What will be required for repairs?
- Light bulb set (H7 12 V, 55 W)
- Medical gloves
- Special alcohol wipe for wiping glass surfaces
Changing lamps is considered a technological operation of a minimum level of complexity. By following proper instructions, anyone, even those far from car repairs, can handle this work. For everything about everything you need 15-20 minutes of time. Many motorists carry with them a ready-to-install set of spare light bulbs, since they can be changed very quickly on their own, even in the field. So, how to change the low beam bulb on a Renault Duster?
Possible difficulties
Some car owners have problems installing new parts on the left side. To increase the working area, it is necessary to disconnect the cable from the positive terminal of the battery, which is then removed from the machine. The maintenance procedure is shown in a video filmed by crossover owners in the process of self-repair. When performing work, it is prohibited to use excessive force that could destroy the bulb bulb. You can remove glass shards from the headlight only after removing the device from the car.
If after replacement the headlights do not work, then you need to check the fuse (the part fails due to a short circuit or a sharp jump in current in the circuit). The Renault Duster design includes 2 protective elements rated for a current of 10 A, which serve the headlights on the left and right sides of the car. The parts are located in a mounting box mounted on the side of the instrument panel (driver's side). The fuses are removed with tweezers (installed on the cover), and after replacement the headlights are turned on.
When installing “Hydronic” type heating units on vehicles, access to the right headlight is blocked by the housing of additional equipment. Owners change lamps using medical clips. But if the plastic power plug is damaged, you will need to remove the headlight from the car. To carry out the work, it is necessary to dismantle the bumper and then unscrew the bolts securing the lighting device. If work is carried out in winter, frozen plastic becomes brittle. It is recommended to park the car in a heated garage during servicing.
Process of changing near mnemonics
- Turning off the car
- Open the hood
- Removing the terminals from the battery
Please note that some experts also recommend unscrewing the battery mounting bracket and removing the battery. This moment will allow you to get to the headlight unit better and more conveniently. But many motorists skip this moment and, even with a battery on board, change the lighting quickly and easily.
- Remove the rubber plug on the low beam
- Some drivers remove the socket along with the light bulb. But if the low beam bulb on a Renault Duster is being replaced, that is, only the light source is changing, then this technological operation need not be carried out
- We pull the block with the wires and the lamp comes out perfectly (it is held on by a spring clip)
- We take the lamp out of the block (just take it out)
- We replace the old light source with a new one
Please note that the Duster low beam lamp is halogen. This means that the glass is very sensitive to dirt from dirty or greasy fingers. It is best to handle a new light bulb while wearing medical gloves. If traces of talc (from gloves) remain on the glass, it is better to remove them with a special alcohol wipe (it does not leave lint or streak marks).
- We assemble the headlamp in the reverse order
- Checking how the new lighting works
- We carry out all the above operations with the headlight unit on the opposite side
How to change
In addition to the article, it is advisable to watch a video with step-by-step instructions, where the wizard shows how to correctly replace the low beam lamp on a Renault Duster.
Since you will be working with electric current, be sure to follow safety precautions:
- Before replacing, disconnect the battery: remove the terminal block on the positive side with a tenth wrench.
- You need to wear gloves to remove the new device from the packaging, as the lamps will fail if you handle them with bare hands. Experienced mechanics can do it without gloves, but it’s better not to take risks.
- Moisture ingress is unacceptable.
- If the replacement will be carried out near the battery, it is better to remove it. To do this you will need the thirteenth wrench. Unscrew the second terminal and carefully remove the battery.
How to replace a burnt-out H7 low beam bulb in a Renault Duster
After Russia introduced a law on compulsory daytime driving with low-beam headlights or GOST-compliant DRLs, low-beam lamps on cars began to burn out more often. In addition, the load on the generator has increased, which also affects fuel consumption. In this article we will take a detailed look at the process of replacing a low beam lamp on a Renault Duster.
Main conclusions
The Renault Duster car uses block headlights, so a separate H7 lamp of 12 V and 55 W is installed for the low beam. In addition to the standard lamp, analogues from other manufacturers are used:
- Osram.
- Phillips.
- PIA.
- Bosch.
- Halogen et al.
Of these, the brightest and most affordable is Philips X-treme Vision, and the most durable is Philips LongLife EcoVision. LED modifications are superior to them, but they are quite expensive and not everyone can afford them. When replacing the lamp, do not touch it with bare hands, but use clean cotton gloves for this.
Which lamps should I choose to replace a burnt out one?
If you were satisfied with the light that was before, we can safely buy the above lamps and install them. If it was not enough, then you should take a closer look at brighter lamps - with increased brightness. For example, the following lamps are suitable for Renault Duster:
- Osram H7 +110%
- Philips H7 +130%
- Bosch H7 +90%
By installing these lamps you will feel a significant difference in light compared to standard lamps. However, like all lamps, lamps with increased light output have disadvantages :
- Service life is shorter than that of a conventional lamp
- The price is much higher
- They are often sold in sets, so if 1 lamp burns out, you need to purchase a set
The advantages of such lamps
- Brighter light without installing additional equipment
- The lamps have the same power as regular ones, i.e. 55W
- The lamps are certified and approved for use on public roads
Which lamps to choose depends primarily on your preferences.
Super bright reversing lamps
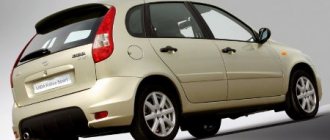
Among the light sources, Renault Duster drivers complain about the reversing lights. But if in the trunk the lack of lighting is just wasted time, then with poor light from the rear lights it is traffic safety. Of all the possible ways to solve the problem, the greatest advantage is installing LED lamps instead of standard ones. This method impresses with its simplicity; it is only important to choose an LED lamp. For Renault Duster, we recommend a car LED reversing lamp P21W 12V 1.9W Philips 12839REDX2 .
Manufacturer: Philips/Germany. Installed in the usual way.
Replacing a low beam lamp on a Renault Duster
So, open the hood and start replacing the lamps. The low beam headlights must be turned off.
Remove the rubber boot from the inside of the headlight and see the lamp itself
It is not necessary to remove the lamp socket. Carefully grab the lamp base and pull it out towards you.
Remove the socket from the old lamp and put it on the new one
Now we take the lamp as shown in the figure with the protrusion facing up and insert the lamp into the base until it clicks.
We check the functionality of the lamp and put on the rubber plug.
Changing the light source in the trunk and additional brake light
Replacing a light bulb in the trunk of a Renault Duster is performed in the following sequence:
- Using a thin flat-tipped screwdriver, pry the lampshade behind the side ear.
- Remove from the slots in the trunk.
- Disconnect the light and the block.
- Use a special spatula to pry up the diffuser holder.
- Release the diffuser from the lantern.
- Remove the baseless bulb from the socket.
- Insert the working part into the slot.
- Reinstall the lamp.
Procedure for replacing the lamp in the Duster additional brake light.
- Press the side clamps on the flashlight body.
- Remove the body.
- Release the latch and rotate the socket 30 degrees to the right.
- Remove the socket from the reflector.
- Remove the baseless light bulb from the socket.
- Install the new one in the opposite order.
Replacing the Duster high beam lamp
Remove the rubber boot and put it aside
Gently press the spring clamp of the lamp and move it to the side
We take out the lamp and remove the block from it. We take a new block, put it on the lamp and reassemble it in the reverse order
Step-by-step replacement process
- Remove the rubber plug from the back of the headlight unit.
It is enough to pull the special protrusion and the plug will come out of its place of fixation.
- Remove the old light bulb and socket.
The lamp should only be grasped by its metal base.
- Attach a new light bulb after removing the old one.
- Place the cartridge in place and close the rubber plug.
When the lamp is installed, all that remains is to check its functionality and close the plug
Useful tips!
- For the most convenient replacement of the right light bulb, you can first remove the battery.
- When working with light bulbs, you should wear gloves to avoid leaving marks on the base.
Replacing the turn signal lamp
The lamp socket is located at the top of the headlight, so you won't have any problems with replacement.
Turn it counterclockwise and remove it from the headlight socket.
Press the lamp and turn it counterclockwise. We take out the lamp from the socket
We take a new PY21W lamp and install it in the socket. We reassemble in reverse order.
Workflow Description
So, if you have already purchased a replacement element, then you can start working, they are simple, and the instructions below will convince you of this.
Removal
This type of work includes the following actions:
Replacing a low beam lamp in a Duster begins with disconnecting the battery, after which it is removed so as not to interfere with the work process; there is no need to remove anything from the right. Next, the housing is wiped to remove dust and dirt; cleanliness is very important to maintain excellent performance of the headlights over a long period of time. The drive cable of the corrector also needs to be disconnected, if the element is to be removed, this is done simply, so there is no point in focusing on this action.
There is a special tab on the plug - pull it towards you and carefully remove the cover
The last thing you need to do is remove the light bulb; to do this, you don’t need to turn or unscrew it; carefully grab the base and press down until you hear a click, this means the element has come out of its seat and can be carefully removed by grasping the block. Without pressing, you can grab the block and gently pull it out of the mounting hole in a downward direction, so the assembly will also come out without any problems.
The photo clearly shows where the light bulb is located; removing it will not be difficult, since it is attached with latches
Last of all, the old Renault Duster low beam bulb is removed from the block; when the structure is removed from the headlight, you can easily figure out how to do this, so this stage can be considered one of the simplest.
Assembly
It is important to assemble the structure correctly, especially if this is your first time doing such work with your own hands; in fact, there is nothing complicated, and this process is carried out similarly to the one described above, only in reverse order:
First of all, a new lamp is installed in the base, and it should not be installed haphazardly, but so that the protrusion that is present on the rim looks up, the correct position is shown in the photo below, everything is simple, but this nuance should not be missed, so as not to cause problems.
The protrusion must point upward
- The assembly assembled in this way is carefully inserted into place and, with a little effort, is pushed forward until a characteristic click is heard, which will notify you that the light bulb is in the correct position. After this, move the structure slightly to make sure that it and all elements are securely fixed.
- Next, carefully put on the plug, making sure that it fits well around the entire circumference and provides reliable protection. If there are distortions or loose areas, you need to remove the cover and put it on again.
- It is worth noting that under the low beam lamp there is a size that can also be changed; the operation is similar to that described above, with the only difference being that the small socket, which is located slightly lower, is removed.
- After assembly, you need to check the functionality of the element and, if everything is fine, the work can be considered successfully completed.
The low beam in Renault Duster is of good quality if reliable bulbs are used