About Matiz
01/26/201507/12/2016 Roman
Poor road conditions force the driver to constantly brake sharply and then pick up speed again. In addition to increased fuel consumption, this can lead to too rapid failure of some components, in particular brake pads, on both the front and rear wheels. Therefore, it is necessary to regularly check this element for wear, so that in the future you can replace the pads in time before they completely fail.
- 4 Important notes
- 5 Video about replacing brake pads on DAEWOO Matiz
Replacement of rear brake pads of Daewoo Matiz
Daewoo Matiz has long gained fame as an economical and unpretentious car for the city on domestic roads. The components for it are also quite accessible and inexpensive. As for the rear brake pads, there is nothing complicated in the process of replacing them; even a non-professional can handle it. Possible reasons for replacement include wear, peeling, breaks and oiling of the friction linings of the pads. It is also worth noting that replacement should be done as a set.
The process of replacing the rear brake pads of Daewoo Matiz
Finally, we proceed directly to the replacement process:
First, deal with the handbrake. Once seated in the back seat, use a Phillips screwdriver to unscrew the screw holding the cover that hides the handbrake cables. Using an open-end wrench set to 14, loosen the front locknut and then tighten the adjusting nut fully. Repeat on the second cable, so both cables are released.
Loosen the wheel nuts, jack up one side of the car, and install safety stops.
Using a screwdriver, pry up the rear hub cap and pull out the cotter pin using pliers. Using a “13” wrench, unscrew the rear hub nut and carefully remove the small bearing.
Tap the brake drum with a hammer. Using a spudger, slowly pull the drum away from the brake pads.
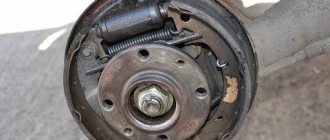
Remember the location of the springs, unfold the cups and remove them (all except the bottom one - it will not interfere). Move the handbrake cable spring and remove its shank from the block lever.
Clean the support disk and apply lubricant. Lubricate the threads on the adjustable bar to ensure free movement of the nut. Screw the nut until it stops.
We proceed directly to installing new pads. Connect the handbrake cable to the block and secure it with clamping springs. Install the adjustable bar (first the upper and lower tension springs, and then the flag spring).
Next is the brake drum. It would also be a good idea to replace it if the diameter exceeds 182 mm. Check exactly how it fits onto the pads. If it is loose, this is fraught with problems with the braking system (the handbrake will have weak grip, and the brakes may be ineffective). Tighten the adjusting bar nut until the drum is put on with force. Install the outer bearing and tighten the hub nut until the washer stops turning, then loosen it a little. This is the optimal position. Install the cotter pin and cap.
Repeat for the second side. Press the brake pedal several times, the pads will move to their working position. For the last stage you will have to “hang” both rear wheels. To adjust the handbrake, tighten the adjusting nuts on the cables evenly. The goal is to achieve complete locking of the wheels when raising the handbrake lever 5–7 clicks. Tighten the locknut.
That's basically it, the replacement has been successfully completed. You can hit the road!
Source
Daewoo Matiz (Daewoo Matiz) replacement of rear brake pads, drums. Video and photo
We will show you how to replace the rear brake pads and drums in a Daewoo Matiz car with your own hands in a garage. First of all, we need to lower the parking brake lever completely, then remove the rear wheel, pry it up with a screwdriver and remove the protective cap of the wheel bearings. We straighten the cotter pin, remove it from the groove of the castle nut and the axle hole, this can be done using pliers or pliers:
When reassembling, it is necessary to replace the cotter pin with a new one. Using a 30mm socket, unscrew the castle nut. Remove the inner wheel of the outer bearing complete with cage and rollers. Remove the brake drum. If the thickness of the lining of one of the four brake pads is less than 1 mm, all four pads will need to be replaced. If you ignore this rule and change only the problematic pad, this can lead to uneven braking of the rear wheels and the car pulling to the side. After you have removed the brake drum, under no circumstances should you press the brake pedal, as this may lead to failure of the pistons and cylinders of the brake system.
Possible problems during operation
For Matiz vehicles, the main problem is caused by the rear elements of the braking system. They are the main components provided for quickly stopping the car.
When driving in urban conditions, you have to constantly slow down and stop, so the rear brake pads are subject to severe wear. To ensure safety, it is recommended to replace obsolete parts.
The life of the driver, his passengers and other road users depends on the condition of the braking system. Therefore, if you feel a problem that the car cannot be stopped, then you need to urgently carry out diagnostics.
Experienced technicians will assess the condition of the brake fluid, remove the rear brake drums, and perform a thorough inspection. If there are even slight doubts about the reliability of the system, it is recommended to carry out urgent maintenance.
Replacing Rear Brake Pads of Daewoo Matiz Video
replacing rear pads and drum lift from Daewoo Matiz
(
Daewoo Matiz )
The main features that indicate replacement of the rear brake pads will be their squeaking, ineffective braking, cold drums after heavy braking. Brake pads for Volkswagen Golf 5-6. Replacing rear brake pads with viburnum. All this confirms your assumption that you need to have your rear brake pads audited and most likely replaced. Replacing rear brake pads on a car. Check and replace viburnum brake pads. Replacing viburnum with brake pads at the rear and. In this article we will just talk about how to replace rear brake pads on Daewoo. Matiz
(
Daewoo Matiz
)
Features of replacing the Deu Matiz gasket (Daewoo Matiz)
Features you'll encounter include the machine's rear axle design, which also combines the wheel bearing seat in the disc drum. Replacement of rear brake discs and pads, Golf iv. As a result, when removing the drum, you also have to disassemble rear bearing, which may indicate a readiness to change it also if it is broken and out of order, since it is not recommended to reinstall a broken bearing after replacing the pad.
Replacement process for Deu Pad Matiz (Daewoo Matiz)
Straighten the pin, holding the nut from rotating, and pull it out.
30 Unscrew the nut holding the bearing
Remove the washer in front of the bearing.
Matiz rear pads: replacement step by step.
Matiz rear pads
The need for
replacement
is, however, relatively rare; the drums are removed and performed regularly.
replacement of rear brake pads included Daewoo Matiz 0.8 l-1.0 l manually and automatically
Remove the inner bearing that is mounted on the hub, leaving the outer bearing race in the drum.
Now remove the drum along with the outer ring from the machine.
After removing the drum, we check its shape as well as its internal diameter, which should not exceed 182 mm. Replacement of Volkswagen Golf brake discs and pads. Otherwise the drum must be replaced. If the drum is removed, the brake pedal cannot be depressed because the pistons may fall out of the brake cylinder and the hydraulic brake circuit is reduced. Next, bend and remove the spring located under the brake cylinder
We also remove the strut tension adjustment spring
Remove the pin from the lever
Remove the lower extension spring.
Remove the gasket. VAZ 2101-2107 Repair and replacement of VAZ balls, replacement of VAZ rear brake pads. If necessary, adjust its length and reduce the size of the building.
We turn the pin holders
And remove them with springs
Brake pads can now be removed
During disassembly, the parking brake cable is also removed from one of the pads
Everything is going in the opposite direction. Adjust the length of the spacer panel to the position of the pads in the drum so that the pads reset with minimal play, thereby providing the most effective braking when the brake pedal is depressed. When tightening the bearing nut, apply 25 Nm of torque to the nearest groove where the locking pin can be installed. Replacing rear brake pads on a Volkswagen Golf. Replacing front and rear brake pads with vases. (Golf 5-6) Rear brake pad replacement 2008 Golf 1.6 Rear brake pad replacement. Replacing the front brake pads to replace the brakes with viburnum. Before tightening the nut, check the brake pedal and handbrake. If necessary, disassemble and adjust the spacer bar again. Replace dirty cover.
Prices for repairing a Daewoo car
SarSTO car service offers a wide range of services for the repair and maintenance of Daewoo cars (Daewoo) on favorable terms for you.
Attention! The price list shows prices for the most popular services. These prices are valid for Nexia cars (Nexia) with 8 and 16 valves, as well as Espero, Matiz, Tico and Leganza
Work Price Price Price Price
| Name of work/Car model | Nexia 8 grade | Nexia 16th grade, Espero | Matiz/Tiko | Leganza |
| Repair of engine, fuel system, intake and exhaust systems. Overhaul of Daewoo engine | ||||
| Engine overhaul | 20000 | 23000 | 18000 | 23000 |
| Remove/install engine | 6000 | 8000 | 5500 | 8500 |
| Hydraulic compensators - replacement | 4200 | 5500 | 5500 | |
| Oil seals - replacement | 7500 | 9500 | 5500 | 9500 |
| Oil pump - replacement | 2400 | 3000 | 2400 | 3000 |
| Fuel pump - replacement | 700 | 700 | 700 | 700 |
| Engine mount - replacement | 600 | 600 | 600 | 600 |
| Intake manifold gasket - replacement | 1000 | 1000 | 1000 | 1000 |
| Exhaust manifold gasket - replacement | 1200 | 1500 | 1200 | 1800 |
| Cylinder head gasket - replacement | 5000 | 6500 | 4500 | 6000 |
| Valve cover gasket - replacement | 450 | 600 | 450 | 600 |
| Timing belt kit - replacement | 2500 | 3000 | 2400 | 3500 |
| Rear crankshaft oil seal replacement / with automatic transmission | 3800 | 3800 | 3500 | 4200 |
| Camshaft oil seal - replacement | 3200 | 3600 | 3100 | 4200 |
| Air filter | 200 | 200 | 200 | 200 |
| Muffler - replacement | 450 | 450 | 450 | 450 |
| Reception pipe - replacement | 700 | 700 | 700 | 700 |
| Fuel tank - replacement | 2000 | 2000 | 1800 | 2200 |
| Fuel filter - replacement | 400 | 400 | 380 | 450 |
| Engine oil - replacement | 400 | 400 | 400 | 400 |
| Computer engine diagnostics | 850 | 850 | 850 | 850 |
| Liquid injector flushing | 1200 | 1200 | 1200 | 1200 |
| Ultrasonic injector washing | 2100 | 2100 | 2100 | 2100 |
| Fuel hose - replacement | 200 | 200 | 200 | 200 |
| Throttle valve - cleaning | 600 | 600 | 600 | 600 |
| Repair of the Daewoo cooling system | Nexia 8 grade | Nexia 16 grade | Matiz/Tiko | Leganza |
| Water pump - replacement | 2700 | 3400 | 2700 | 3900 |
| Cooling radiator - replacement | 1000 | 1000 | 900 | 1000 |
| Air conditioner radiator - replacement | 1000 | 1000 | 900 | 1000 |
| Coolant - replacement | 800 | 800 | 800 | 800 |
| Fan - replacement | 600 | 600 | 600 | 600 |
| Repair of suspension and steering of Daewoo (Daewoo) | Nexia | Matiz/Tiko | Espero/Leganza/Nubira | |
| Front shock absorber - replacement | 850 | 800 | 850 | |
| Rear shock absorber - replacement | 500 | 450 | 500 | |
| Stabilizer bushing - replacement of 2 sides | 600 | 600 | 600 | |
| Ball joint - replacement | 450 | 450 | 550 | |
| Front spring - replacement | 850 | 850 | 850 | |
| Rear spring - replacement | 650 | 650 | 600 | |
| Wheel bearing - front - replacement | 1000 | 1000 | 1000 | |
| Rear hub bearing - replacement | 800 | 800 | 800 | |
| Suspension arm - replacement | 1100 | 1100 | 1100 | |
| Rear beam silent blocks - replacement | 1500 | 1500 | 1800 | |
| Internal CV joint - replacement | 850 | 850 | 850 | |
| Outer CV joint - replacement | 700 | 700 | 700 | |
| Steering rack - replacement | 2200 | 2200 | 2200 | |
| Steering rack with power steering - replacement | 2500 | 2500 | 2500 | |
| Steering ends - replacement 2 sides | 500 | 500 | 500 | |
| Steering rod - replacement | 450 | 450 | 450 | |
| Power steering belt - replacement | 250 | 250 | 250 | |
| Power steering pump - replacement | 1200 | 1200 | 1200 | |
| Repair of the brake system of Daewoo (Daewoo) | Nexia | Matiz/Tiko | Leganza/Nubira | |
| Vacuum brake booster | 850 | 850 | 850 | |
| Front brake disc - 2 sides | 1100 | 1000 | 1200 | |
| Rear brake disc | 1200 | 1000 | 1400 | |
| Front brake pads | 450 | 450 | 450 | |
| Rear brake pads | 500 | 500 | 500 | |
| Handbrake lever | 1200 | 1200 | 1200 | |
| Front brake caliper | 550 | 550 | 600 | |
| Rear brake cylinder - replacement | 500 | 500 | — | |
| Brake fluid - replacement | 600 | 600 | 700 | |
| Handbrake cable - replacement | 1000 | 1000 | 1000 | |
| Brake hose replacement | 350 | 350 | 350 | |
| Repair of gearbox and clutch of Daewoo (Daewoo) | Nexia, Espero | Matiz/Tiko | Leganza/Nubira | |
| Clutch - replacement | 3800 | 3500 | 4200 | |
| Clutch lever mechanism - replacement | 500 | 500 | 500 | |
| Gear shift mechanism - replacement | 1000 | 1000 | 1200 | |
| Manual transmission oil - replacement | 400 | 400 | 400 | |
| Manual transmission cushion | 600 | 600 | 600 | |
| Manual transmission/automatic transmission removal and installation | 2600/2800 | 2600/2800 | 2600/2800 | |
| Flywheel - replacement | 4000 | 3900 | 4400 | |
| Clutch cable - replacement | 450 | 450 | 450 | |
| Speedometer cable - replacement | 500 | 500 | 500 | |
| Electrical repair of Daewoo (Daewoo) | Nexia 8 grade | Matiz/Tiko | Nexia 16th grade, Espero, Leganza, Nubira | |
| Generator - replacement | 900 | 900 | 1100 | |
| Ignition switch contact group - replacement | 500 | 500 | 500 | |
| Inductor - replacement | 250 | 250 | 250 | |
| Distributor cover - replacement | 300 | 300 | 300 | |
| Windshield wiper motor - replacement | 850 | 850 | 850 | |
| High-voltage wires - replacement | 300 | 300 | 300 | |
| Solenoid relay - replacement when removed | 400 | 400 | 400 | |
| Distributor - replacement | 450 | 450 | 450 | |
| Sound signal - replacement | 450 | 450 | 450 | |
| Spark plugs - replacement | 200 | 200 | 250 | |
| Starter - replacement | 850 | 850 | 2000 |
We change the rear and front brake pads on Daewoo Matiz ourselves
Poor road conditions force the driver to constantly brake sharply and then pick up speed again. In addition to increased fuel consumption, this can lead to too rapid failure of some components, in particular brake pads, on both the front and rear wheels. Therefore, it is necessary to regularly check this element for wear, so that in the future you can replace the pads in time before they completely fail.
Choosing a replacement option: yourself or from professionals
Any car enthusiast will be able to independently carry out work related to servicing the Matiz brake system. The rear elements are quite easy to change; no special tools are required. However, the work requires certain knowledge and skills.
Experts recommend checking brakes at professional car repair shops with special equipment. Experienced craftsmen have already performed similar work many times, so they have the necessary knowledge and experience.
They will perform high-quality replacement of worn parts, adjust and pump the system. You will receive a car designed for safe travel.
You can make an appointment for a specific time and agree on the purchase of spare parts. Many auto repair shops have contracts with material suppliers, so you can save money.
To always be confident in the operation of your Matiz’s brakes, it is recommended to carry out diagnostics and repairs of the brake system in specialized car dealerships.
In order for the brakes to function safely, it is necessary to regularly service the system and promptly replace discs, pads and hoses.
Maintenance of the brake system should be carried out in special services. In this case, it makes sense to trust the professionals.
Replacing front brake pads
It must be remembered that the replacement of pads on a Matiz is carried out when the thickness of one pad together with the lining has reached 8 mm. Here it is necessary to take into account the fact that one pad is no longer suitable; all the pads in the set will need to be replaced. If even one of the four pads is not replaced, this will lead to uneven braking force, which can skid the car while driving. This most often applies to emergency braking situations.
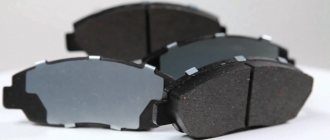
Difference between new and old pads
So, replacing the front brake pads on a Daewoo Matiz starts with the right wheel, although in the case of the left wheel the situation will be similar. Thus, you need to dismantle the wheel by first lifting the car on a lift or installing it on strong supports that will not allow it to move during servicing. It is also important to check the brake fluid level. If it is near the maximum mark, then it will be necessary to take a little of this liquid from there using a syringe or a rubber bulb. This is important, because at the moment the piston is sunk into the cylinder, the level of brake fluid in the reservoir will rise, and it may simply leak out from under the cap.
Getting to the brake system
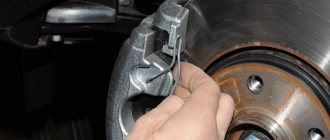
Next, we pick up a size fourteen spanner, which will help us unscrew the fastening bolt on the bottom of the caliper to the guide pin. Thanks to this, we will be able to slightly raise the caliper by turning it along the radius of the upper guide pin.
Now you can remove the outer and inner parts of the block from the corresponding guides. To do this, we pull special spring-type pad holders away from the grooves of the guide. In addition, it is a good idea to clean the brake system parts from dirt, rust and other foreign substances before starting the process of installing new pads. Particular attention should be paid to the places where contact occurs between the brake pads in the caliper and the guide elements of the pads themselves. For cleaning, it is best to use clean cloths or neutral chemicals. However, it is prohibited to use diesel fuel or gasoline for these purposes. New pads are installed in the reverse order of the steps already taken. Now our Daewoo Matiz front brake pads which we installed are ready for use.
Pad selection
If you have the original catalog number, you can always choose analogues that are suitable for the money. Any part that is an analogue of the original is usually cheaper than it. Exceptions are tuned spare parts, which are usually twice as expensive. The choice of brake pads should be taken very seriously, since the safety of movement and braking will depend on this. 96288629 — original catalog number of brake pads for Daewoo Matiz. The average cost is 1500 rubles.
Front brake pads.
Analogs
In addition to original parts, it is worth paying attention to analogues that are presented on the automotive market. So, many of them are not inferior in quality:
| Manufacturer's name | vendor code | Cost in rubles |
| Meyle | 025 232 4117 | 900 |
| Hola | BD820 | 900 |
| Bremsi | BP2804 | 1000 |
| Zekkert | BS-1285 | 1000 |
| Blue Print | ADG04268 | 1000 |
| N.K. | 225004 | 1000 |
| TRW | GDB3195 | 1000 |
| Japko | 50W04 | 1000 |
| Denckermann | B110141 | 1000 |
| Delphi | LP1390 | 1000 |
| Bosch | 0 986 495 224 | 1000 |
| Textar | 2324102 | 1000 |
| Ferodo | FDB1337 | 1200 |
| Goodwill | 1033 F | 1200 |
| Bosch | 0 986 424 512 | 1500 |
Reasons for replacing pads:
Important Notes
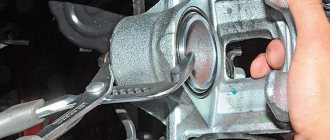
Since new pads, as a rule, have a slightly greater thickness than old ones, before installing them, you need to use sliding pliers to recess the piston a little deeper into the cylinder. If you don’t have such a tool at hand, then you can resort to an alternative method. We are talking about installing the inner pad in its place (it will even be better if you install the old pad in this place) and securing the caliper with a bolt on the guide pin. After this, you will need to insert a screwdriver with a fairly wide flat tip into the space between the brake disc and the caliper itself. Thus, it will be possible to move the caliper, which will lead to the piston recessing in the cylinder. In addition, it is important to remember that when installing the caliper into the starting position, the rectangular shaped protrusion on it is aligned with one of the pair of flats that are located on the edge of the guide pin. This must be done so that the guide pin cannot move around its axis while tightening the bolt that secures it to the caliper.
Once the brake pads are replaced, you will need to press the pedal a couple of times to ensure the pads are fully seated on the rotors. Next, you will need to check the amount of brake fluid again. And, if necessary, then add this liquid to the specified level.
An important note is that the process of operating a car involves the formation of irregularities on the brake disc. Therefore, before new brake pads wear in, the contact area must be slightly smaller, which increases the braking distance. Thus, the first 100 kilometers of driving after repair work should be accompanied by a smooth ride without sudden braking and loads. After this, the vehicle can be operated as usual.
Replacing rear brake pads
If the rear brake pads already need to be replaced, then similar preparatory work will need to be done. This applies to installing the car on strong supports or lifting it on a lift. By the way, it is necessary to change the rear brake pads when the thickness of their linings reaches a critical level of 1 millimeter. As we have already said, even if only one of the pads reaches the 1 millimeter mark, it is necessary to completely replace all four pads. If you ignore this, the braking process can make the car unstable on the road. Also, do not forget about the amount of brake fluid, which, as we have already said, should be slightly less than the maximum. For both wheels, the work process will be similar. So, it is not worth describing how to replace the rear brake pads of a Daewoo Matiz for each wheel.
Remove the rear wheel and get to the brake drum
The first thing to do is remove the brake drum. Check its condition, and if the diameter of the inner surface, which is the working surface, has reached 182 millimeters, then this means it needs to be replaced. As soon as the brake drum is removed, it is forbidden to press the pedal in order to prevent the piston and cylinder from disconnecting.
Now you can start cleaning all accessible elements of the system. As we have already said, it is forbidden to use gasoline or diesel fuel for this, so as not to worsen the performance characteristics.
Using pliers or a straight screwdriver, slightly pry up the upper tension spring of the brake pads, which will allow you to completely remove it. Also, take the same screwdriver and disconnect the upper part of the spring from its attachment point to the slack adjuster lever. After that we remove it. In addition, you will need to remove the earring, as well as the above-mentioned slack adjuster lever. To disconnect the lower part of the tension type spring from the rear block, you will need to use a screwdriver and pry it off the corresponding part of the spring. Thanks to this, it will be possible to remove this spring.
To slightly reduce the length of the spacer bar, you need to screw the ratchet onto the rod along the threads until it stops and move the brake pads away from the wheel cylinder. This way the entire spacer bar can be removed.
Using pliers or pliers, twist the support cup until it aligns with the corresponding groove in the cup with the shank of the support post. Here it is necessary to remember that the stand must be securely held from the rear of the brake shield. After this, it will be possible to remove the cup with the spring, and also pull out the support post from the corresponding hole on the brake shield.
Next, you can remove the front brake pad. Using a similar principle, we dismantle the cup, support post, and spring. Also, it will be possible to disconnect the handbrake cable in the form of its tip from the release lever, which will allow us to remove the rear brake pad complete with the lever.
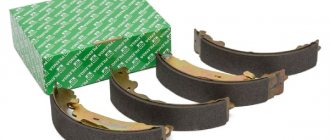
Before replacing the pads, you will need to reduce the spacer bar again by simply turning the ratchet to its limit. Installation of the pads is carried out in the reverse order and is not accompanied by additional difficulties. The brake drum is put in place, after which its accompanying elements are assembled in the same order as indicated during disassembly. Thus, the replacement of the rear brake pads on the Matiz was completed successfully.
Sequence of self-bleeding brakes
p, blockquote 37,0,0,0,0 —>
Proper pumping involves performing actions in a strictly defined order: from left to right, first the front wheels, then the rear. To control the volume of brake fluid filled, it is recommended to record the remaining amount in the expansion tank. The tank lid can now be opened.
p, blockquote 38,0,0,0,0 —>
Video - how to bleed the brakes and replace brake fluid on an Audi A6:
p, blockquote 39,0,0,0,0 —>
p, blockquote 40,0,0,0,0 —>
The next step is to check the threaded connection of the fitting for rust. If there is one, then you need to lubricate it with WD-40 liquid. If after lubrication it is difficult to turn the fitting, you should contact the technical service so as not to damage the thread. If there are no problems with the thread, then turn the bleeder fitting.
p, blockquote 41,0,0,1,0 —>
For convenience, you can park the car on an overpass or unscrew the wheel. Connect a transparent hose to the fitting. Place the other end into an empty bottle or other container for liquid.
p, blockquote 42,0,0,0,0 —> adsp-pro-2 —>
Then the partner must press the brake pedal repeatedly until the pressure becomes tight. The pedal is pressed all the way and fixed. Then you need to unscrew the fitting. This can be done with a key. When the pedal is pressed to the floor, screw the fitting back and release the pedal.
p, blockquote 43,0,0,0,0 —>
Video - bleeding brakes on a Volkswagen Sharan:
Important Notes
Similar to installing the front pads, after completing the work, you need to press the brake pedal a couple of times, which will set the cylinder pistons to their correct position for operation. During this action, small clicks may be heard in the brake mechanism, which suggests the operation of a mechanism that automatically adjusts the gaps between the drum and the pads. You need to press the pedal consistently until the clicks are no longer heard. This means that the adjustment process is completed and the car is ready for use.
Upon completion of the work, you also need to check that with the parking brake fully lowered, the rotation of the brake drum is carried out without unnecessary jerks, as well as with minimal physical effort. It will also be necessary to again visually check the amount of brake fluid, then top it up to the required level, and also adjust the parking brake, if such a need arises. That's all, the rear brake pads on the Daewoo Matiz have been replaced!
Possible problems during operation
For Matiz vehicles, the main problem is caused by the rear elements of the braking system. They are the main components provided for quickly stopping the car.
When driving in urban conditions, you have to constantly slow down and stop, so the rear brake pads are subject to severe wear. To ensure safety, it is recommended to replace obsolete parts.
The life of the driver, his passengers and other road users depends on the condition of the braking system. Therefore, if you feel a problem that the car cannot be stopped, then you need to urgently carry out diagnostics.
Experienced technicians will assess the condition of the brake fluid, remove the rear brake drums, and perform a thorough inspection. If there are even slight doubts about the reliability of the system, it is recommended to carry out urgent maintenance.
If you have the slightest suspicion of brake failure, you should contact a car repair shop.
