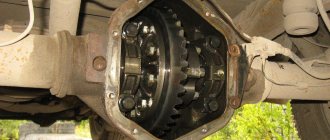
In the differential box 20 there are two semi-axial gears 10 and two satellites 18, which are in constant mesh. Support washers 8 and 19 are installed between the differential box, the ends of the gears and satellites. The satellites rotate around axis 17, fixed in the differential box with a stopper. Tapered roller bearings 7 are pressed onto the axles of the differential box. The beam housing has mounting sockets for installing the differential and threaded adjusting nuts 5 for the differential bearings. The differential assembly with the driven gear and bearings is attached to the beam housing with two covers using bolts. At the factory, the housings in the crankcase and the 6 bearing caps are machined together, so the 6 caps are not interchangeable. Adjusting nuts 5 ensure the required lateral clearance between the main gear gears and the preload of the differential box bearings. The adjusting nuts are secured against movement by locking plates 12, which are secured to the covers with bolts.
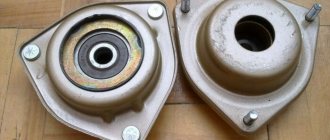
The axle shaft with its splined part is installed in the axle gear. The outer part of the axle shaft, through ball bearing 2, rests on the bearing seat located in the flange of the axle shaft housing. To add lubricant to the bearing, a grease nipple 3 is provided, mounted on the axle shaft flange. The bearing seat has a drainage slot for transmission oil drainage, which prevents leaked oil from entering the brake parts. A spring ring 31 is installed between the outer ring of the bearing and the end of the bearing seat. The bearing is secured against axial movement by a locking sleeve 30, which is pressed onto the axle shaft in a heated state. Inside the axle shaft casing there is a socket into which the rubber oil seal 29 is pressed. Between the axle shaft flange and the bearing there is a housing 1 of the outer oil seal with packing. The parts of the outer oil seal housing are assembled into a package and secured with two screws. A sealing paper gasket is installed between the outer oil seal housing and the axle shaft flange.
The outer axle shaft seal housing is attached to the casing flange with four bolts and secures the axle shaft from axial movement. The axle flange has five threaded holes for the wheel bolts.
Table 3.6. Nominal and maximum permissible dimensions, fit of mating parts of the rear axle
Repair of VAZ 2106 gearbox
Having installed the gearbox on the workbench, use a 10mm wrench to unscrew the two bolts securing the locking plates of the differential bearing nuts and remove the plates.
We use a core to make marks on the bed and the corresponding bearing cover so that during assembly we can install the covers in their places.
Using a 14mm wrench, unscrew the bolts securing the bearing caps.
Remove the outer bearing rings and adjusting nuts from the differential housing.
If we do not change the bearings, then we mark the outer rings so as not to mix them up during installation, because The bearings are individually worn in and it is not advisable to disassemble them.
We check the absence of radial play in the axle gears.
Use a puller to compress the inner rings of the tapered bearings.
Using a 17mm wrench, unscrew the eight bolts securing the driven gear to the differential housing and remove it.
We use a beard to knock out the satellite axis.
We turn the axle gears and remove the satellite gears.
We take out the axle gears with adjusting washers, marking their position.
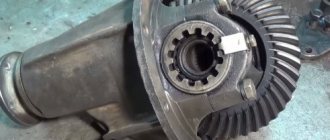
We remove the drive gear and the deformed spacer from the crankcase. When assembling the gearbox, we replace it with a new one.
Using a soft metal drift, knock the inner ring of the tapered bearing off the drive gear shaft.
An adjusting ring is installed under the bearing to ensure the correct relative position of the main gear gears.
Use a suitable tool to knock out the outer rings of the tapered bearings from the crankcase.
We thoroughly wash the gearbox parts in kerosene and carefully inspect them. If at least one tooth is damaged (chipping, waves, scratches, scuffs on the working surfaces), we replace the gears with new ones. The edges between the tops and working surfaces of the driven gear teeth must be sharp. If the slightest nicks or roundings are visible, replace the main pair with a new one. Minor damage to the satellite axle, axle pinion journals and their mounting holes can be eliminated with fine sandpaper followed by polishing. When assembling, replace the cuff, flange nut and spacer with new ones. If the gearbox is assembled in the same crankcase, then the change in the thickness of the drive gear adjusting ring can be calculated as the difference in deviations in the manufacturing dimensions of the old and new gears. The deviation in size with a “+” or “–” sign in hundredths of a millimeter is engraved on the drive gear shaft. For example, the old gear is engraved with –12, and the new gear is 4. The difference between the two corrections will be 4–(–12)=16. This means that the new adjusting ring should be 0.16 mm thinner than the old one. With the opposite ratio of corrections (4 on the old one, and 12 on the new one), the ring should be 0.16 mm thicker than the old one. To more accurately determine the thickness of the adjusting ring, we make a device from the old drive gear.
We weld a plate 80 mm long and trim it to a size of 50–0.02 mm relative to the plane for the bearing. The serial number and size deviation are engraved on the conical part of the shaft.
We grind the seats under the bearings (can be treated with fine sandpaper) until they fit smoothly. We press the outer rings of the front and rear bearings into the crankcase. We install the inner ring of the rear bearing on the manufactured device and insert the device into the crankcase. We install the inner ring of the front bearing, the flange of the drive gear and tighten the nut with a torque of 0.8–1.0 kgf.m.
We set the crankcase to a horizontal position and level.
We place a round, even rod (an extension from a set of socket heads) in the bearing bed and use a flat feeler gauge to determine the size of the gap between it and the device plate.
The thickness of the adjusting ring is determined as the difference between the gap size and the deviation in the size of the new gear (taking into account the sign). For example, the gap value is 2.8 mm, and the gear size deviation is 15. This means that it is necessary to install an adjusting ring with a thickness of 2.8–(–0.15)=2.95 mm.
We install an adjusting ring of the required thickness on the shaft and, using a piece of pipe of a suitable size, press on the inner ring of the bearing.
We insert the shaft into the crankcase. We install a new spacer, front bearing inner race, collar and drive gear flange.
Gradually tighten the nut with a torque wrench to a torque of 12 kgf.m.
We determine the moment of rotation of the drive gear shaft.
To do this, tightly wrap a strong thread around the neck of the flange in several turns and attach a dynamometer to it. The force at which the flange begins to rotate evenly should be 7.6–9.5 kgf (which corresponds to a torque of 16–20 kgf.cm) (for new bearings). If the force is not enough, tighten the flange nut. In this case, the tightening torque should not exceed 26 kgf.m. If, when tightening the nut, the turning torque exceeds 20 kgf.cm (9.5 kgf), disassemble the gearbox and replace the spacer sleeve.
We install the differential housing together with the bearings into the crankcase and tighten the bolts of the bearing caps.
If axial play is detected in the axle gears, then during assembly we install new, thicker support adjusting rings. The side gears should fit tightly into the differential housing, but can be turned by hand.
We make a wrench from a steel sheet 2.5–3 mm thick for tightening the adjusting nuts.
We adjust the gap in the main pair and preload the differential bearings simultaneously, in several stages: tighten the nut on the side of the driven gear until the gap in the mesh is completely eliminated;
Using a caliper we measure the distance between the covers;
screw the second nut until it stops and tighten it by 1-2 teeth of the nut. The distance between the covers should increase by approximately 0.1 mm; By rotating the first nut, we set the required gap in engagement of 0.08–0.13 mm. This is minimally noticeable play in the engagement, accompanied by a slight knock of tooth against tooth; We control the constancy of the gap in the engagement with our hands and gradually tighten both nuts until the distance between the covers increases by 0.2 mm. This will ensure the necessary bearing tension.
Slowly turn the driven gear three turns and at the same time feel the play in the meshing of each pair of teeth.
If it is uniform in all gear positions, then install locking plates. A decrease (increase) in play in any sector indicates deformation of the differential housing and the need to replace it or trim it on a lathe. There are two types of locking plates: single-claw or double-claw. Depending on the position of the nut slot, we install one of them.
Video about “Gearbox repair” for VAZ 2106
VAZ (2 parts). Repair of the rear axle gearbox - Part 1 repair of the gearbox in garage conditions Adjustment of the rear axle gearbox. Tutorial. Part 1
Where is the gearbox located?
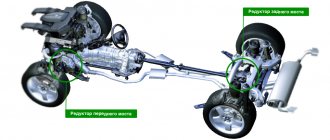
On the "sevens", as on all representatives of the rear-wheel drive family, the gearbox is located at the rear, under the bottom of the car. It connects the cardan to the VAZ 2107 axle and causes the wheels of the car to rotate. Rotation occurs thanks to axle shafts engaged in the gearbox, which, due to the technical features of the rear axle of the VAZ 2107, will have to be removed later. If the car is lifted, or when viewed from a garage pit, the gearbox is simply impossible not to notice.
Signs and malfunctions of the classic rear axle gearbox
Replacing a gearbox with your own hands is a labor-intensive process, which includes not only the purchase of a new unit (quite expensive), but also time costs. Therefore, before you start, you need to make sure that the gearbox is faulty. You can define the signs like this:
- gradually accelerating the car, listen carefully and remember at what moment the noise appears;
- while driving, start engine braking (remove your foot from the gas pedal at speed), at this time listen to the gearbox and note the moment the noise appears;
- accelerate the "seven" to hundreds, switch to neutral and turn off the engine - listen to how the gearbox behaves while coasting.
“If the bridge is noisy both in neutral and at speeds, the gearbox has nothing to do with it. If the hum occurs only at speed (regardless of the number), repairs, or, as a last resort, replacement of the gearbox are inevitable.”
When the signs are identified, it is necessary to carry out another check:
- park the car, secure the front wheels with shoes;
- jack up the rear so that the bridge hangs over (it is necessary that the wheels come off the surface);
- start the engine and accelerate the “seven” to the point at which noise occurs, while the wheels should spin without load.
If the noise has not changed, then the gearbox is clearly in good working order and it is not the cause of the trouble. Here other drive units are checked. Well, if there is no noise when driving without a load, then we are talking about worn gears of the gearbox, which make noise only when driving with a load.
The “seven” gearbox itself is a fairly reliable unit that can withstand a period of 100 to 300 thousand mileage, and there is no need to even look into it. Gears, gear spacer, differential adjustment - all these problems arise during improper operation:
- the use of oil with a low viscosity level, as well as failure to comply with the terms of its replacement;
- operating the “seven” with an amount of oil insufficient for this;
- During movement, the bridge is subject to extreme loads (frequent and unsuccessful slips).
Gearbox removal process
In order to repair or replace the rear axle gearbox of a VAZ 2107, you first need to remove it from the car:
- Drain the oil. This, by the way, may be a reason to replace it.
- Separate the flanges of the cardan and gearbox. To do this, you need to unscrew four bolts and nuts. At this time, it is necessary to fix and immobilize the cardan with a screwdriver or by holding the brake pedal. After unscrewing the nuts, you need to tie the cardan to the muffler. You can simply hang it, but this can also lead to negative consequences for the cardan.
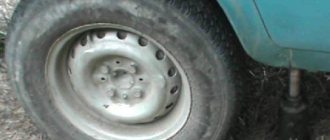
- Remove the axle shafts, because without this the gearbox cannot be removed. At the same time, you can inspect the seals, and if they are worn out, replace them. This will save time and prevent possible malfunctions.
- Separate the beam and gearbox by unscrewing all eight bolts that secure it. When unscrewing the latter, it is necessary to hold the gearbox so that it does not fall. The bolts are unscrewed - carefully remove the gearbox.
Repair and adjustment of the VAZ 2107 gearbox
Before you start repairing the gearbox and its subsequent adjustment, you need to have certain skills, backed up by skills, observe all the nuances and subtleties of this process, and also strictly follow the technological nuances of the process. Therefore, if a person starts work for the first time, then it is better to abandon this idea. In addition, you must have all the necessary tools:
- pullers;
- stands;
- a set of keys, screwdrivers and other accessories.
If something is missing, it’s better not to take risks and trust the professionals. In fact, disassembling the “seven” bridge will not be difficult, but it is one of the few components that requires professional maintenance. The gearbox is disassembled step by step:
- First you need to unscrew the shank nut;
- then the flange itself is removed, the drive gear is pulled out, and the rings responsible for the adjustment are dismantled;
- the oil seal is removed, the oil deflector is dismantled, and using a puller, the inner ring of the bearing is removed;
- the drive gear is disassembled, and the differential is dismantled, and the spacer sleeve, regardless of its condition, is subsequently changed.
To facilitate subsequent assembly, marks are applied to the bearing caps - you can use a pencil, but it is much more reliable to use a core for this. Marks are applied not only to the covers, but also to the body, this will allow them to be assembled correctly later. As for the right and left covers, they also need to be marked, because they cannot be confused; numbers and letters are applied to the covers and body in the appropriate places. The only inconvenience is that you need to carefully clean the covers so that the marks remain in place - that is why, for convenience, it is better to mark the marks.
In order to remove the cage with inner rings, you must use a hammer and drift. By lightly tapping over the entire surface, the process of knocking out the rings occurs. If you only knock on one point, it is unlikely that you will be able to remove the rings.
As a rule, all gearbox repairs consist of replacing the main pair - it takes the main “blow”. The main pair is responsible for determining the gear ratio, and it is produced in various variations. The increase in traction of the “seven” occurs due to the larger gear ratio, and the lower it is, the higher the maximum speed the car gets. Which pair to choose is up to the car owner himself, but there are some tips on this matter.
The bridge with the “deuce” was equipped with a pair with the highest gear ratio (about 4.4), but now it has become almost impossible to find a similar one, since this pair has been discontinued. The most optimal option for the VAZ 2107 is the “three-speed”, it has an indicator of 4.1 - this paired with a 5-speed works great without loss of speed and traction.
The gearbox is assembled in the reverse order (see description above), the only thing that needs to be done is to visually inspect all components for damage, clean and wash in kerosene. The gaps between the gears are subject to adjustment. It is produced by acting on the adjusting rings, the thickness of which is selected depending on the specific situation. Selection is made using probes with different thicknesses and calipers. A torque of about 18 kgf/m is the most accurate when tightening the flange nut.
It is necessary to understand that gearbox repair does not always meet the car owner’s expectations. In order for the unit to serve longer, it is easier to replace it completely than to restore it.
About sealing elements and their replacement
Note that on the first Six models, the connection between the bridge and flanges was sealed with a special gasket. A few years later, an oil-resistant sealing agent began to be tried on the assembly line instead. Therefore, in any case, it is necessary to update this seal during reassembly.
What needs to be done next? At the next stage, you need to thoroughly clean the surface of the gearbox connectors from the sealing substance, and then use a rag pre-moistened in gasoline to degrease this surface. If you use white spirit, take extra precautions to protect your respiratory tract. The threads of the mounting bolts and the holes for them located in the can must also be degreased.
All these surfaces are then treated with a new oil-resistant sealant. The threads of the fixing bolts are lubricated with a special fixing compound.
Then the axle gearbox is mounted into the beam and tightened evenly (crosswise) with bolts. Installation of the remaining elements is carried out in reverse order. Finally, you need to pour new oil into the rear axle.
How to fill the oil?
Before revealing the specifics of the replacement, we note that this instruction can be used not only for cars of model 2106. A similar algorithm for changing the oil can be observed in VAZ cars of models 2101, 2102, 2104, 2105, as well as model 2107.
So what do we need to do to change the oil? First you need to unscrew the drain plug with a hex key. Next, put some container and unscrew the filler element. After the oil has drained well, we screw the plug back in and use a special oil pump (or a large syringe) to pump transmission oil into it. Pour to the level of the bottom edge of the hole. Next, tighten the plug, and now you can safely start operating the car.
Sometimes the substance in the gearbox can be heavily contaminated. In this case, before adding new fluid, thoroughly rinse the gearbox or gearbox housing with a mixture of diesel fuel and oil (not necessarily transmission oil). The proportion is about 300 milliliters of diesel fuel per liter of oil.
How to adjust the VAZ 2106 gearbox yourself?
This operation is performed after each disassembly and repair of this part. But not always. You can determine whether the gearbox needs adjustment by the presence of axial play in the drive gears. This is done using an indicator with a division value of 0.01 millimeters. Checking for play is carried out with the propeller shaft disconnected by moving the flange in the axial direction.
The indicator leg is installed in the end part of the flange. By adjusting the tension, the axial play in the bearings is removed. A similar adjustment can be made by selecting the thickness of the adjusting rings. How do you then change the rear axle (gearbox) on a VAZ 2106?
Before final assembly of the gearbox, the meshing of the gears should also be checked. In order to do this, you need to paint the teeth of the device with some bright paint. It is not recommended to use something that is too liquid for this work, since its properties are not suitable (it will simply spread over the teeth). But you shouldn’t give preference to a thick one either - it won’t be squeezed out of the spaces between the elements (that is, there will be no result from it). After applying the paint, you need to rotate the drive gear in different directions. In this case, it is necessary to stop the revolutions when it hits the driven one. This must be done until there is a clear contact mark on the teeth. This is how we determine the correctness of the adjustment.
If during the work you need to move the driven gear, you can do this by changing the thickness of the shim set. The latter are installed between the end of the gear and the inner ring of the rear bearing.
So, we found out how to replace the rear axle (gearbox) on a VAZ 2106 car and how to adjust it correctly. By the way, services charge from 2 to 3 thousand rubles for such work - almost the full cost of the part being replaced.
AUTOFIZIK.RU / auto repair
Rear axle assembly and final drive adjustment
We assemble the main gear in the reverse order of disassembly, lubricating the bearings and gears with transmission oil. Having installed the drive gear in the gearbox housing...
... use a torque wrench to tighten the flange nut to a torque of 16–20 kgf.m, while the gear must be rotated for proper installation of the rollers in the bearings.
We install an indicator with a division value of no more than 0.01 mm on a tripod, resting its leg against the end of the flange...
...and moving the shaft by the flange, we measure the axial play of the drive gear.
To eliminate play, remove the spacer ring installed on the gear shaft (see Dismantling the rear axle) and measure its thickness with a micrometer. We select and install a new spacer ring. It should be thinner than the amount of play removed and additionally thinner by 0.05 mm - if the drive gear bearings are new or by 0.01 mm - if the bearings are left the same. If there is no axial play of the drive gear, use a special torque wrench with a scale of up to 0.5 kgf.m to check the moment of resistance to shaft rotation. With proper adjustment, the resistance moment should be 15–20 kgf.cm for new bearings or 7–10 kgf.cm if the bearings are left the same. With sufficient accuracy, the moment of resistance can be measured using a household steelyard...
...hooking its hook onto the hole in the flange.
In this case, the required values will be less - 3.8–5 kgf and 1.8–2.5 kgf, respectively. If the moment of resistance is greater, we change the spacer ring to another one, 0.01–0.02 mm thicker; if it is less, we select a ring of smaller thickness accordingly. Before assembly, the bolts for fastening the parts of the differential box and the bolts for fastening the driven gear, as well as their threaded holes, are degreased and coated with anaerobic sealant. We pay special attention to the cleanliness of the end mounting surfaces of the gears and the gearbox; the slightest contamination or nicks are unacceptable.
Rear axle gearbox VAZ 2106
The VAZ gearbox can be of various types depending on the components. The main gears have an unusual shape, and the teeth are at a variety of angles. This is explained by the fact that a hypoid type transmission is used. Its main advantage is low noise level, jerk-free operation and reduced load on each tooth. Thus, the entire mechanism can be operated for a long time and, as experience shows, quite reliably. The same gearbox is installed on many other models of domestic cars.
After all the preparatory steps have been completed, you can proceed directly to removing the gearbox. To do this, disconnect the cardan from the shank by unscrewing the 4 fastening nuts:
And lightly hit the cardan with a hammer. The result is the following picture:
After that, using a spanner wrench, we tear off the bolts securing the gearbox to the rear axle housing of the VAZ 2106, and then you can use a socket and ratchet to unscrew all the bolts completely (there are 8 of them in total):
When the last bolt remains to be unscrewed, you need to hold the gearbox so that it does not fall:
And having unscrewed it, carefully remove the gearbox from the bridge housing, as shown in the photo below:
If necessary, the gearbox is repaired or completely replaced, after which everything is put back in place in the reverse order. It is worth noting that it is better to install a new gasket at the joint, since it is not intended for reuse.
Replacing the hand brake follow the link.
How to adjust
This operation is performed after each disassembly and repair of this part. But not always. You can determine whether the gearbox needs adjustment by the presence of axial play in the drive gears. This is done using an indicator with a division value of 0.01 millimeters. Checking for play is carried out with the propeller shaft disconnected by moving the flange in the axial direction.
The indicator leg is installed in the end part of the flange. By adjusting the tension, the axial play in the bearings is removed. A similar adjustment can be made by selecting the thickness of the adjusting rings. How can the rear axle (gearbox) be changed on a VAZ 2106?
Before final assembly of the gearbox, the meshing of the gears should also be checked. In order to do this, you need to paint the teeth of the device with some bright paint. It is not recommended to use something that is too liquid for this work, since its properties are not suitable (it will simply spread over the teeth). But you shouldn’t give preference to a thick one either - it won’t be squeezed out of the spaces between the elements (that is, there will be no result from it). After applying the paint, you need to rotate the drive gear in different directions. In this case, it is necessary to stop the revolutions when it hits the driven one. This must be done until there is a clear contact mark on the teeth. This is how we determine the correctness of the adjustment.
If during the work you need to move the driven gear, you can do this by changing the thickness of the shim set. The latter are installed between the end of the gear and the inner ring of the rear bearing.
Replacing the rear axle gearbox of VAZ 2106, 2107
The main disease of REM is increased noise (hum), and the gearbox can hum for various reasons:
- there is insufficient oil in the bridge, or it is completely missing;
- the gap between the gears of the main pair is not adjusted;
- the gears are worn out, they have chips and other damage;
- the main pair has a manufacturing defect, the gears are not ground in from the factory;
- the shank nut has become unscrewed or loosened;
- bearings are worn out.
The main malfunction of the center differential is the wear of the gears of the axle shafts and satellites, when the surfaces of the parts are heavily worn, play forms between the differential gears, but the rear axle usually does not make noise due to wear of the differential gears.
ZM gearboxes on VAZ classics can be repaired, but only if there is no wear on the gears. If the mechanism can no longer be repaired, it needs to be replaced. We replace the rear axle gearbox of a VAZ 2106 on a “seven” as follows:
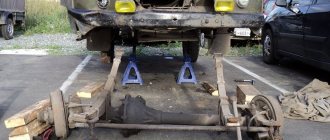
- we install the car on a pit or a car lift; changing the gearbox on the ground is extremely inconvenient;
- if the car is installed on a pit, it is necessary to jack up both sides; in any case, the rear wheels must be removed. If the work is not done on a lift, you should install stops under each side of the car (in the rear);
- unscrew the drain plug in the REM, drain the transmission oil, having previously prepared a container for it;
- remove the rear brake drums (two guide bolts on each side), after first removing the car from the handbrake. The drums can be difficult to remove; they are dismantled by tapping them from behind with a hammer through a wooden block. You cannot hit the drum with a metal hammer; the drum may break;
- remove the brake pads;
- unscrew the fastenings of the rear axle axle shafts on each side, each axle shaft is secured with four nuts;
- we press out the axle shafts, for this you will need a special puller, you can also make a homemade device;
- remove the driveshaft by unscrewing the four bolts and nuts. If the same REM is installed, the cardan with the shank must be marked; this is done in order to put the shaft back in the same position. If you install the cardan incorrectly according to the marks, the shaft may begin to vibrate;
- unscrew the eight bolts securing the rear gearbox (key 13), remove the assembly.
At this point, the removal of the gearbox can be considered complete; now all that remains is to either repair the mechanism or install a new one instead.
How much does it cost to repair and replace the rear axle gearbox of a VAZ 2106
In 90% of cases when contacting a car service center with problems with the rear axle and, in particular, the gearbox of classic Zhiguli cars, the owners are refused. The maximum that most experts can offer is to buy a new VAZ gearbox. There is only one reason for this - basic technical ignorance, because only a few will be able to correctly diagnose and adjust the rear gearbox of a classic. A new gearbox can be bought for 6-7 thousand, it will be a branded factory mechanism, after disassembly the price of the unit will be about 3 thousand, and on hand or on the market a gearbox with traces of long-term use will cost about 2000 rubles.
Only a few can correctly diagnose and adjust the rear gearbox of a VAZ 2106
It’s easier to sell a new one than to adjust or restore an old one, especially since this requires certain knowledge, and it costs the same as a qualified adjustment. Therefore, we decided to theoretically educate the owners of classic Zhiguli cars, so that if something happens, you can confidently remove, adjust, repair and install a full-fledged working unit with your own hands. But first, a few words about the design of the gearbox.
Rear axle gearbox VAZ 2106. Design
The rear axle gearbox in all classic VAZ models is installed in the rear axle housing and consists of two main components:
- bevel main gear of hypoid type;
- cross-axle differential.
The differential has the same design on all rear-wheel drive vehicles, with the exception of the all-wheel drive Niva. A self-locking differential is sometimes installed there. But he’s of no use at six, so let’s leave him alone for now.
Video tips for replacing the rear axle gearbox on VAZ cars
The main gear is of the hypoid type, made in the form of two helical gears - driving and driven. The drive gear is rigidly connected to the driveshaft of the car, mounted on the shaft on bearings pressed into the crankcase. The drive gear shaft is connected to the cardan mounting flange by a splined joint and is locked with a nut, which regulates the bearing play, but more on that a little later. The driven gear is mounted on the differential housing and rotates with it on bearings. They are secured with adjusting nuts, which adjust the gap between the teeth in the main gear engagement. Rotation on the axle shaft is transmitted through bevel gears, which mesh with the differential pinion gears. It's a little confusing, but if you look at the diagram, everything will become clearer.
↑ Disassembling the rear axle gearbox
Having installed the gearbox on the workbench, use a 10mm wrench to unscrew the two bolts securing the locking plates of the differential bearing nuts and remove the plates.
We use a core to make marks on the bed and the corresponding bearing cover so that during assembly we can install the covers in their places.
Using a 14mm wrench, unscrew the bolts securing the bearing caps.
Remove the outer bearing rings and adjusting nuts from the differential housing.
If we do not change the bearings, then we mark the outer rings so as not to mix them up during installation, because The bearings are individually worn in and it is not advisable to disassemble them.
We check the absence of radial play in the axle gears.
Use a puller to compress the inner rings of the tapered bearings.
Using a 17mm wrench, unscrew the eight bolts securing the driven gear to the differential housing and remove it.
We use a beard to knock out the satellite axis.
We turn the axle gears and remove the satellite gears.
We take out the axle gears with adjusting washers, marking their position.
We remove the drive gear and the deformed spacer from the crankcase. When assembling the gearbox, we replace it with a new one.
Using a soft metal drift, knock the inner ring of the tapered bearing off the drive gear shaft.
An adjusting ring is installed under the bearing to ensure the correct relative position of the main gear gears.
Use a suitable tool to knock out the outer rings of the tapered bearings from the crankcase.
Hypoid transmission and the magic of VAZ gearbox numbers
Technologically, it is easiest to transfer rotation from one bevel gear to another when they are on the same axis. But in the gearboxes of rear-wheel drive cars, a gear with axles shifted by 31.8 mm is used. This complication of the design is caused by the fact that, along with the transverse slipping of the teeth, the hypoid gear causes the teeth to slip longitudinally.
The photo shows the rear axle gearbox of a VAZ 2106, the cost of which is 6-7 thousand rubles
And this, in turn, gave the following advantages:
- long gear life;
- quiet operation;
- quick grinding of teeth;
- increased ground clearance.
If both main gears are severely worn or damaged, replace them only in pairs. The fact is that in preparation for sending ready-made sets of spare parts, pairs are selected using special precision equipment, taking into account the tolerance, the correction of which is applied to the drive gear shaft. On the driven gear you can read all the necessary information about the gearbox model - gear ratio (on the VAZ 2106 it is 11/43), model 2106, serial number and production date.
In principle, one of four sets of final drive gears can be installed in the gearbox of any Zhiguli model. They differ only in the number of teeth, and this dictates the gear ratio. There is no need to say what importance this parameter has when choosing a gearbox. It affects both the maximum speed of the car and the implementation of engine torque. As garage tuners say, “it either pulls better or goes faster.” In some ways they are right.
However, as we have already mentioned, there are only four options for final drive pairs:
- VAZ 2101 - 43/10 with a gear ratio of 4.3;
- VAZ 2102 - 40/9, the most high-torque gearbox with a gear ratio of 4.44;
- VAZ 2103 - 41/10, this is the most popular medium balanced version of the gear ratio - 4.1;
- VAZ 2106 - 43/11, is the fastest gearbox, especially when paired with a five-speed gearbox, and its number is 3.9.
Malfunctions and repairs of the VAZ 2106 gearbox
If the gearbox is properly adjusted, it will serve for a very long time.
A gearbox made according to technology and properly adjusted can serve for decades without reminding itself of anything at all. No noise, no hum, no ringing. This was the case until recently, but two popular products appeared on the market - fake gear oil, and a few years later, fake VAZ rear gearboxes. In most cases, everything that is sold in car dealerships and looks like a gearbox is actually just a pile of metal, unsuitable for use. The fact is that for high-quality adjustment of the gearbox, which is necessary, serious skills and sophisticated measuring equipment are needed. There can be no talk of any adjustment by eye here. And most service stations do just that, without realizing that they are simply killing a healthy gearbox. After replacement, you can check the performance of such a unit only on the go. Therefore, they are washed, painted with beautiful paint and placed on store shelves next to counterfeit lubricants. We will talk about lubrication separately, but now a little about the main malfunctions of the VAZ 2106 gearbox.
As with all units that have a closed lubricated volume, the shank oil seal can leak in the gearbox. This is noticeable right away, because after parking, drops of the transmission under the rear axle will speak volumes about it. It may also be that the oil leak is not caused by the oil seal, but by loose bolts securing the gearbox to the rear axle housing. But the most common symptom of gearbox failure is noise. The unit can make noise in different ways and in different modes, so no specialist can give any specific recommendations without listening to it personally. Nevertheless, there are the most common noise manifestations, which we will briefly discuss.
The main source of noise is a worn main pair. This sound cannot be confused with anything else, but it appears under load. As soon as you let off the gas, the noise disappears, and the active phase begins again after pressing the gas pedal. This malfunction can only be cured by replacing the main pair. Those who like to experiment can add magical additives to the lubricant, but, as a rule, these dubious means do not restore the main pair, cannot adjust the gaps, and do not change the bearings.
Gearbox bearing noise is quite easy to identify. They hum under any load, and in the most advanced cases they can even crunch at low speeds.
There are no options other than replacement to fix the problem. Except in cases where the noise was caused by improper tightening of the shank nut after replacing the oil seal. Incorrect adjustment of the gearbox can also cause a hum, but it is almost impossible to describe this noise, because it manifests itself differently in each gearbox. Gear adjustment is carried out only if you have measuring instruments, torque wrenches, the necessary probes and, most importantly, experience in this matter. An incorrect adjustment can ruin a good gearbox literally a thousand kilometers away.
A common sign of a gearbox malfunction is unit noise.
Another source of noise from the gearbox is the loosening of the shank tightening nut. It appears due to the fact that the spacer sleeve sags, the play in the bearing increases, and the nut becomes loose. The reason is insufficient tightening torque of the nut when replacing the oil seal or the disgusting quality of the metal of the spacer sleeve. In order for the gearbox to serve for a long time and happily, only certified transmission lubricants must be poured into it, preferably those specified by AvtoVAZ, observing a replacement frequency of 10-15 thousand kilometers.
Adjusting and replacing the rear axle gearbox
Features of the gearbox design. Replacement and repair using the example of the VAZ 2106
The rear axle gearbox of cars does not last forever and requires periodic repairs. Most often, its bronze bearings fail. This, in turn, causes the stockings to break and the shafts to bend. As a result, the main gear becomes warped and chips and breaks appear on it. If you do not repair the rear axle gearbox of the VAZ 2106 in time, it may jam. The worst thing is when, due to a malfunction, the shaft flies out of place, because it can damage the body of the structure or even break it.
It happens that the rear axle gearbox has to be repaired due to untimely filling of oil. This is why it is so important to monitor the transmission oil and change it every 35,000 kilometers.
Factors influencing the price of the service - repair of the VAZ rear axle gearbox in Moscow
The service is available for the following VAZ models:
1111 Oka210121022103210421052106210721082109210992110211121122113211421152120 Nadezhda2121 (4×4)212321292131 (4×4)23282329EL LadaGrantaKalina LargusPrioraRevolutionVestaXRAY
It is common knowledge that the cost of car repairs depends on several aspects. Among them are the following:
- cost of spare parts (original, China, alternative manufacturers);
- personnel qualifications;
- level of equipment of the service station (availability of painting booths, lifts, special tools and equipment, etc.).
For example, the price of the service - repair of the rear axle gearbox of a VAZ in Moscow will also depend on factors such as the age, make and model of the car. We are confident that car services will compete for your order and offer the best conditions. The centers have a system of discounts for regular customers.
Product replacement
Replacing a VAZ 2106 gearbox on your own is not that difficult. When starting this task, drain the oil from the structure body. While it is draining, carefully disconnect the driveshaft. The next step is to remove the rear wheels, brake drums and axle shaft. Having completed all this, you should unscrew the bolts through which the gearbox is connected to the bridge. After this, all that remains is to install the new part, not forgetting to use a cardboard gasket and sealant. After installing the gearbox, make sure that its flange is tightly secured.
Adjusting and repairing the rear axle gearbox involves a thorough inspection of its satellites, bearings, flanges and seals. If necessary, all these parts must be replaced. For VAZ cars this operation will not cost much.
Inspection of parts for defects should be carried out after washing them in kerosene. This way you can see for sure whether there are any chips or cracks on them. If you find small nicks on the gears, you can carefully polish them using sandpaper.
Paint to check
After assembling and adjusting the rear axle gearbox, be sure to check the gear engagement. This can be done by painting the teeth with medium-thick paint. Do not use a substance that is too thin, as it will stain the teeth and spread. Excessively thick paint will also not work, as it will not be squeezed out of the “gaps” between the teeth.
So, armed with suitable paint, rotate the drive gear clockwise and counterclockwise, while slowing down the driven one. Do this until the contact patch becomes visible. By the way, if you need to move the drive gear during adjustment, do so by changing the thickness of the shim set installed between the pinion end and the drive gear bearing inner race.
Assembly of the VAZ-2107 rear axle gearbox
We discussed disassembling the rear axle gearbox in the article - How to disassemble the rear axle gearbox of a VAZ-2107
Before assembly, we wash the gearbox parts in kerosene and inspect them. We check the condition of the main gear gear teeth.
Damage to at least one tooth (chipping, scuffing of the working surface) is unacceptable.
Using fine-grained sandpaper, we eliminate minor damage to the pinion axle, axle gear journals and their mounting holes in the differential box.
In case of serious damage to parts, we replace them with new ones.
If even minor damage to the surfaces of the support washers of the axle gears is detected, the washers must be replaced (with the selection of the thickness of the washers).
The bearings of the drive gear and differential box must be wear-free, with smooth working surfaces.
Poor bearing condition causes noise and gear teeth sticking.
We press the inner rings of the differential box bearings with cages and rollers onto the box using a suitable piece of pipe.
We fix the driven gear on the differential box.
When assembling the differential, lubricate the axle gears with support washers and satellites with transmission oil and install them in the differential box.
We rotate the satellites and axle gears so as to align the axis of rotation of the satellites with the axis of the holes in the differential box, and insert the axis of the satellites.
The axial clearance of each axle gear should not exceed 0.1 mm.
If the gap is increased, we replace the axle gear support washers with new ones of greater thickness.
The moment of resistance to rotation of the differential gears should not exceed 14.7 Nm (1.5 kgf.m) - the gears are turned by hand.
Checking the ease of rotation of the differential gears
Using a tool head (a piece of pipe) of suitable diameter, we press the outer ring of the front bearing into the crankcase socket.
Similarly, press in the outer ring of the rear bearing.
The correct position of the drive gear relative to the driven gear is ensured by selecting the thickness of the adjusting ring installed between the end of the drive gear and the inner ring of the rear bearing.
When replacing the main gearbox pair or drive gear bearings, select an adjusting ring.
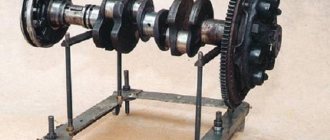
To do this, we make a device from an old drive gear: we weld a plate 80 mm long to the gear and grind the plate to a size of 50-0.02 mm relative to the end of the gear (the plane of contact of the adjusting ring).
We grind (or use fine sandpaper) the place where the rear bearing is installed on the drive gear so that the inner race of the bearing is installed in a sliding fit.
We install the inner ring of the rear bearing with a separator and rollers on the manufactured device and insert the device into the crankcase.
Then we install the front bearing inner ring with the cage and rollers and the drive gear flange.
Turning the gear by the flange to correctly install the bearing rollers, tighten the flange mounting nut to a torque of 7.9–9.8 Nm (0.8–1.0 kgf.m).
We fix the crankcase on the workbench so that its mating plane is horizontal.
We install the pattern ruler in the bearing bed with its edge so that the contact of the bed ruler occurs along the line.
Using a set of flat feeler gauges, we determine the size of the gap between the ruler and the device plate.
The thickness of the adjusting ring is determined by the difference between the gap and the deviation from the nominal position of the new gear (taking into account the sign of the deviation).
Marking of deviation from the nominal position (in hundredths of a millimeter with plus or minus signs) is applied to the conical part of the gear shank
For example, the measured gap is 2.90 mm, and the deviation from the nominal position is marked on the gear -15.
We convert the deviation into millimeters: -15x0.01 = -0.15.
The required thickness of the adjusting ring will be: 2.90—(—0.15) = 3.05 mm.
We install the adjusting ring of the required thickness on the new drive gear.
We remove the device from the gearbox housing and remove the inner rings of the front and rear bearings with cages and rollers.
Using a suitable piece of pipe, press the inner ring of the rear bearing with the cage and rollers onto the new drive gear.
We insert the drive gear into the gearbox housing.
We install a new spacer sleeve, the inner ring of the front bearing with a separator and rollers, and an oil deflector.
Having lubricated the working edge of the new oil seal with Litol-24 grease, we press it into the crankcase socket.
Install the drive gear flange.
Having locked the flange, we gradually tighten the nut securing it with a torque wrench to a torque of 118 Nm (12 kgcm).
We control the preload of the drive gear bearings with a dynamometer, periodically checking the moment of resistance of the bearings to the rotation of the drive gear.
To do this, tightly wrap a strong thread around the neck of the flange in several turns and attach a dynamometer to it.
If the moment of resistance to rotation is less than 157 Nm (16 kgf.m) - for new bearings, and for bearings after 30 km - less than 39.2 Nm (4 kgf.m), then tighten the flange mounting nut without exceeding the tightening torque .
After this, we again check the moment of resistance to rotation of the drive gear.
If the moment of resistance turns out to be more than 197 Nm (20 kgf m) for new bearings, and for run-in bearings - more than 59.0 Nm (6 kgf m), then the preload of the bearings has been exceeded.
In this case, it is necessary to replace the excessively deformed spacer with a new one and reassemble and adjust.
We install the differential assembly with bearings and adjusting nuts in the gearbox so that they come into contact with the outer rings of the bearings. Tighten the bearing cap bolts to the required torque.
We make a special wrench from a steel plate 49.5 mm wide and 3-4 mm thick for tightening the adjusting nuts.
We adjust the lateral clearance in the meshing of the main gears and preload the differential box bearings simultaneously, in several stages.
We tighten the left adjusting nut (from the side of the driven gear) until the gap in the meshing of the main gear gears is completely eliminated.
Using a caliper we measure the distance between the bearing caps
We tighten the left adjusting nut (from the side of the driven gear) until the gap in the meshing of the main gear gears is completely eliminated.
Screw the right nut all the way and tighten it by 1-2 teeth of the nut
By tightening the left nut, we set the required lateral clearance of 0.08-0.13 mm in the meshing of the main gears.
With this gap, when rocking the driven gear, with our fingers we feel minimal play in the meshing of the gears, accompanied by a slight knock of tooth on tooth.
When the nuts are tightened, the differential case bearing caps move apart and the distance between them increases.
To set the preload of the differential box bearings, tighten both bearing adjusting nuts sequentially and evenly until the distance between the covers is 0.15-0.20 mm.
Having established the preload of the bearings, we finally check the lateral clearance in the meshing of the main gears, which should not change.
To do this, slowly turning the driven gear three turns, using your fingers to control the play in the meshing of each pair of teeth.
If the gap in the mesh is larger than required (0.08-0.13 mm), then by rotating the adjusting nuts we bring the driven gear closer to the drive gear or move it away if the gap is smaller.
In order to maintain the set preload of the bearings, we move the driven gear by tightening one of the adjusting nuts and loosening the other by the same angle.
After adjustment, install the locking plates of the adjusting nuts and secure them with bolts